


Hey new to the van scene wanting to get my van in the weeds anyone do a front axle flip any pointers pulling leafs isn't low enough and the 2 inch drop axle still isn't low enough lol and I don't want to go Baggs want to stay old school.
+4
AzDon
Russell
Vantasia
Flatface
8 posters
Looking to do a front axle flip on a 64 g10
Flatface- Number of posts : 32
Location : Washington state
Registration date : 2016-03-08

Vantasia- Number of posts : 1412
Location : New Jersey
Age : 70
Registration date : 2013-08-18
Search the threads here and at VCVC, I know I saw several discussions on this with pics and what you have to do and other options for lowering. Here is a photo album that shows it done:
https://www.flickr.com/photos/dgoodman/sets/72157645223755810/
And the thread at VCVC:
http://www.vcvc.org/showthread.php/25162-Lowering-by-axle-flip-has-begun?highlight=axle+flip
Notice how the frame was notched, I think many took issue with the strength of that and how to do it better...
you need to apply to join, takes a few days to get approved if not already a member, send a pic of you van...
Here's another thread with pics and few links to other examples, several mention a company that makes custom drop axles that fit these vans too...
http://www.vcvc.org/showthread.php/24128-Lowering-a-69-Shorty?highlight=axle+flip
Last edited by Vantasia on Wed Mar 09, 2016 11:10 am; edited 1 time in total
Flatface- Number of posts : 32
Location : Washington state
Registration date : 2016-03-08
Great thank you for the info. Hopefully going to try and do it this weekend.
Vantasia- Number of posts : 1412
Location : New Jersey
Age : 70
Registration date : 2013-08-18
Ya welcome, there's also a pic in there of a modification to the drag link and tie rod to clear the spring. Someone else recommended reading the pros and cons and things needed at this site where they make custom drop axles:
http://www.droppedaxles.com/
He even has a 64-69 chevy dropped front axle with a 4.5" drop listed for sale...
http://www.droppedaxles.com/
He even has a 64-69 chevy dropped front axle with a 4.5" drop listed for sale...
Last edited by Vantasia on Wed Mar 09, 2016 11:23 am; edited 1 time in total
Flatface- Number of posts : 32
Location : Washington state
Registration date : 2016-03-08
Yea I seen that I'm sure I'll have to do that so it doesn't sit below the wheel scrub zone. Lol lota work but looks good when it's done.
Flatface- Number of posts : 32
Location : Washington state
Registration date : 2016-03-08
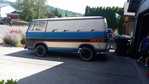
I called sids drop axle he told me only a 2 inch drop for the old vans. I'm trying to upload pics but I'm computer illiterate lol its a lot of work whole thing in primer didn't run I got it running and driving wanting to do a 70s custom van scheme with it. Flake paint and shaggy carpet
Vantasia- Number of posts : 1412
Location : New Jersey
Age : 70
Registration date : 2013-08-18
Read the tech articles and scrub zone calculator at the site...Flatface wrote:Yea I seen that I'm sure I'll have to do that so it doesn't sit below the wheel scrub zone. Lol lota work but looks good when it's done.
Vantasia- Number of posts : 1412
Location : New Jersey
Age : 70
Registration date : 2013-08-18
Vantasia wrote:Read the tech articles and scrub zone calculator at the site...Oh, I see you called him, good info....drive it a while as is, the height is nice and plenty safeFlatface wrote:Yea I seen that I'm sure I'll have to do that so it doesn't sit below the wheel scrub zone. Lol lota work but looks good when it's done.
Vantasia- Number of posts : 1412
Location : New Jersey
Age : 70
Registration date : 2013-08-18
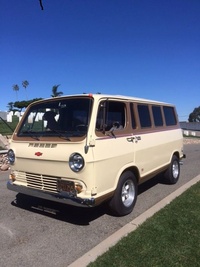
Tangerine/copper flake looks great or any candy red or blue on these vans....I bought mine already painted snowwhite, its a late 60's hot rod hippie theme! LOLFlatface wrote:I called sids drop axle he told me only a 2 inch drop for the old vans. I'm trying to upload pics but I'm computer illiterate lol its a lot of work whole thing in primer didn't run I got it running and driving wanting to do a 70s custom van scheme with it. Flake paint and shaggy carpet
Flatface- Number of posts : 32
Location : Washington state
Registration date : 2016-03-08
Flatface- Number of posts : 32
Location : Washington state
Registration date : 2016-03-08
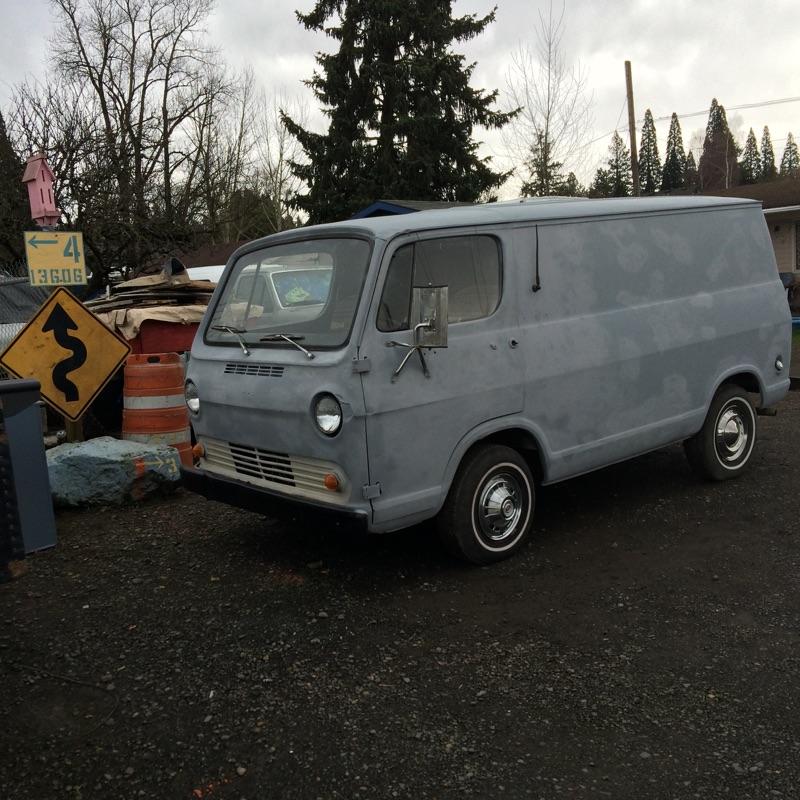
Wow I think I figured out how to upload pictures lol
Russell- Number of posts : 698
Location : Chula Vista, Ca.
Age : 64
Registration date : 2015-12-08
Flatface wrote:https://servimg.com/view/19436195/4
Flatface- Number of posts : 32
Location : Washington state
Registration date : 2016-03-08
Got my spring perches made today for the flip!! Gona hopefully get the front done tonight and back tomorrow night

AzDon- Number of posts : 746
Location : Lake Havasu Az
Age : 68
Registration date : 2014-01-20
I just finished doing the initial mock-up of a front axle flip on my g108.......The physical height change of the equipment is 4.75 inches and should be the same when I get all the weight back on since I have about the same leaf springs as before....... When I get everything back apart and painted, I'll take some pics..... Unlike the flip pictured for that first-gen, I had new u-bolts made and I made saddles for the axle that require no welding... Tie-rod passes over the leafs with room to spare, even with 6 degree caster wedges in place.....Nothing interferes!....It's as if it were made for this modification!

samsvan- Number of posts : 672
Location : Sarasota, Fl.
Age : 61
Registration date : 2014-09-04
I don't know guys. I didn't do the axle flip but I raised my leaf spring perches to get my front end down. It's not really that low but it did create some problems for me. First, the tie rod is directly under the engine crossmember so make sure you check clearance with the suspension loaded. Also, I had to remove the bottom out bumpers from my leaf springs in order to get even a little bit of travel. Now, when I cross an intersection or hit a decent bump, it bottoms out metal on metal. I've been being careful but I think I'm going to have to C notch the frame so I don't ruin my kingpins or worse. Lastly, the bump steer since I lowered my van is a handful to deal with. I haven't tried adding a stabilizer yet but something needs to happen.
AzDon- Number of posts : 746
Location : Lake Havasu Az
Age : 68
Registration date : 2014-01-20
I'm not sure what you mean by "bump steer", so I'll mention some things that are changed when you lower the front of a vehicle....
First and foremost..... CASTER ANGLE!......When you lift the rear or lower the front, you inadvertently "roll" the axle forward in a negative caster direction......When you have an appropriate number of degrees of POSITIVE caster, you have directional stability.... your vehicle chooses to go straight when you take your hands off the wheel.... it returns to center naturally after a turn..... Negative caster, on the other hand make the vehicle prefer anything other than straight ahead......Caster is the angle, front to rear, of the kingpin, measured in degrees of axle rotation from straight up....Positive caster is created by rolling the top of the kingpin rearward..... It is corrected by the use of wedge shims placed between the axle pad(s) and the leaf spring(s)......
Second, the toe-in may have been altered by rolling the axle.... Toe- in is adjusted at the tie-rod using a glorified tape measure to compare the distance between the tread on the front of the tire(s) with the same distance at the rear of the tires. For best accuracy it should be measured at axle level both front and rear. using a homemade caliper bar.......Camber is the inward or outward tilt of the tires, but it's unlikely that you did anything that would change the camber on your beam axle.....
My best guess is that you've rolled the caster negative and created "wander" (rather than bump steer) which can be corrected with wedge shims placed under the leafs with the thick end rearward........The shims are available in various degrees...... The caster shims will also roll the tie rod further from the crossmember (a happy thing, right?)..... IMO, modifying that crossmember would be far easier and safer than messing with the tie rod, but if I was going to try to drop a tie-rod, I'd concentrate on dropping the (replaceable) ends and keeping the bar itself straight.....
samsvan- Number of posts : 672
Location : Sarasota, Fl.
Age : 61
Registration date : 2014-09-04
Man! I never thought about checking the caster. There are shims in there but they are small. What I'm getting is when the springs compress, the van wants to take off to the left and when they unload, it wants to go to the right. I guess it won't hurt anything to try a bigger shim.
Thanks Don!
Thanks Don!
AzDon- Number of posts : 746
Location : Lake Havasu Az
Age : 68
Registration date : 2014-01-20
The flat mounting pad on top of the axle is 90 degrees to the kingpin angle, so you can use a magnetic dial protractor set next to the u-bolts resting on that pad to get the degrees forward or back from straight up.....You should probably have at least 4 degrees positive (rearward tilt) but more is better (to a point)
Another thing to consider for guys that have removed leafs.....SPRING WRAP!!
Thought of mostly in rear axle scenarios when power is applied/ withdrawn and changes u-joint angles or causes weird hop.... It's a problem on the front axle because when you step on the brakes, spring wrap can result in caster changing negatively and making the vehicle want to pull....One of the reasons I chose the flip to removing leaves is that I don't want the front axle dancing around.... One of the members here said his van has just a single leaf and air bags and I wonder how his van handles (especially braking)...... I'm not saying I wouldn't try this method, but I'd probably add a couple of strut bars to eliminate axle roll....
samsvan- Number of posts : 672
Location : Sarasota, Fl.
Age : 61
Registration date : 2014-09-04
I ordered 4 degree shims so I hope to get them on this weekend. I have the original number of leafs in my spring pack so I don't think I'm getting any wrap. We used the original main spring with the loops at each end and had Tampa Spring build the rest of the pack to original specs. I really hope the shims solve my issues.
Digz- Number of posts : 3794
Location : United States Six Lakes MI
Registration date : 2008-05-17
When the springs load and unload it slightly changes the distance from the steering knuckle to the arm on the box. In effect altering the length of the drag link compared to the steering wheels center. Any time you change the vertical location of the axle compared to the steering box you get movement in the steering wheel. You may need to make an adjustable drag link to get it set to your new normal.
samsvan- Number of posts : 672
Location : Sarasota, Fl.
Age : 61
Registration date : 2014-09-04
That's where I was headed until AzDon made me re think my shims.
Hey Flatface. You're the one who started all this. How did your drop work out?
Hey Flatface. You're the one who started all this. How did your drop work out?
AzDon- Number of posts : 746
Location : Lake Havasu Az
Age : 68
Registration date : 2014-01-20
Digz wrote:When the springs load and unload it slightly changes the distance from the steering knuckle to the arm on the box. In effect altering the length of the drag link compared to the steering wheels center. Any time you change the vertical location of the axle compared to the steering box you get movement in the steering wheel. You may need to make an adjustable drag link to get it set to your new normal.
This could definitely be a problem if spring wrap is a possibility..... I'll have to be mindful of this on my flip because I've moved the spindles a substantial distance vertically away from the leaf springs..... I've never understood why there is no adjustment sleeve on the drag link so that steering arm (and steering wheel) center could be re-set after a caster change..... Otherwise, you just remove and re-set the steering wheel center on re-install....

jrinaman- Number of posts : 890
Location : zelienople,pa.
Age : 60
Registration date : 2011-03-10
piece of threaded tube and 2 ball joints is all you need to make an adjustable drag link. that will correct the steering wheel but wont stop the changes in steering as the suspension compresses. not sure being lower would make a noticeable difference but softer springs sure would. 
samsvan- Number of posts : 672
Location : Sarasota, Fl.
Age : 61
Registration date : 2014-09-04
AzDon, I owe you a beer! The shims really made a difference. While I was under the van, I adjusted the lash on the steering box and packed it full of new grease too. The only thing I'm still going to do is take it to my buddies tire store for him to check the toe in. I can't get in there 'till next week though.
AzDon- Number of posts : 746
Location : Lake Havasu Az
Age : 68
Registration date : 2014-01-20
Okay, let me save you some bucks of the toe adjustment......First the toe-in caliper......
A 6 ft piece of rigid (non flimsy) angle, two large (at least 2 ft) framing squares and four c-clamps (or vice grips....... You will mark the treads of the front tires with white spray paint and scribe a line on each by holding an awl against while spinning, so that you have a single scribed line all the way around the tire(s) as reference trak-width markers......The distance between the scribed lines is your reference trak-width and should be a quarter of an inch narrower on the front side of the tires than on the rear side..... After scribing the line around each tire, set them back on the ground....
You will basically place the squares clamped into the angle at 90 degrees with the "L" sticking up.....
If you are doing this alone and need the bar to stand up on it's own, you will need to put a couple of flatbar legs on the underside. you will first set the squares to the width between the scribed lines on the backside of the tires.......compare with the distance between the lines on the front side of the tires......The distance should be a quarter of an inch narrower on the front side (quarter inch toe-in) to compensate for a little play in the tie-rod as the wheels naturally attempt to toe-out as the truck goes down the road......After setting the toe, you may want to pull the steering wheel off and re-install it straight as the finishing touch....


|
|
|