VintAGE-Vans

Would you like to react to this message? Create an account in a few clicks or log in to continue.

BRINGING IT ALL TOGETHER.... A's, G's & E's


+15
jrdunn96
paradiddle
WYO George
cole63
Das Boot
vanny
Udo
Big W
jimthefred
stanyon
BoneMan
FIZGIG
SDEconoTruck
Barnabas
Seth G
19 posters

    My 250 Swap

    Seth G
    Seth G
    Vintage-Vans Listings Manager
    Vintage-Vans Listings Manager


    Number of posts : 2086
    Location : Anacortes, WA
    Age : 51
    Registration date : 2013-04-24

    My 250 Swap - Page 6 Empty Re: My 250 Swap

    Post by Seth G Mon May 30, 2016 9:40 pm

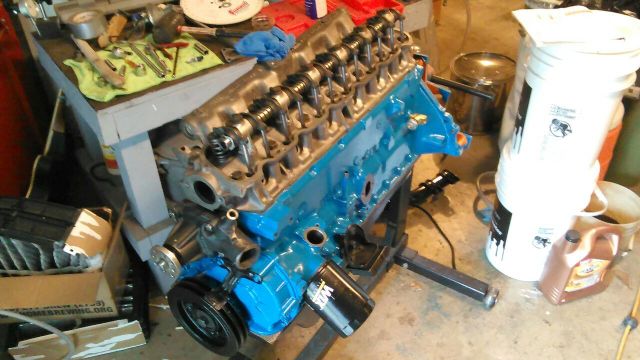
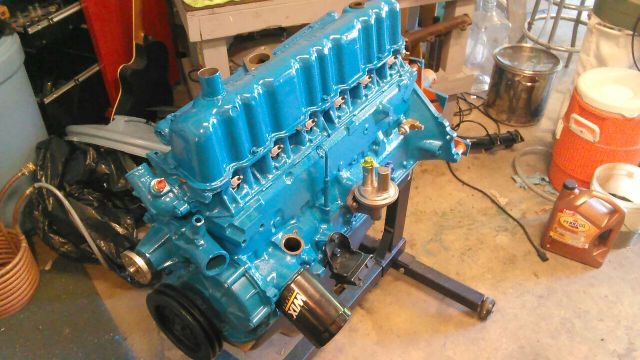
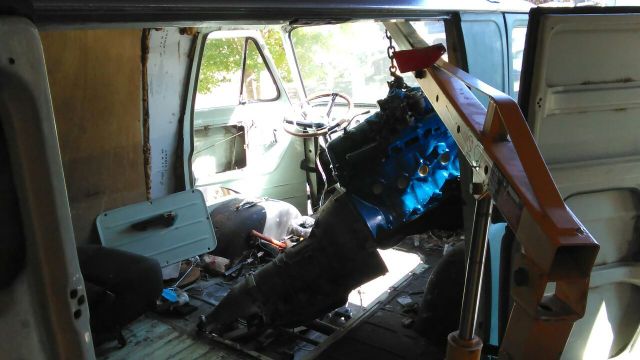
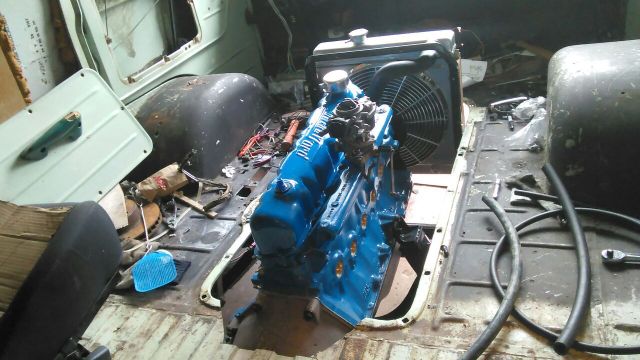
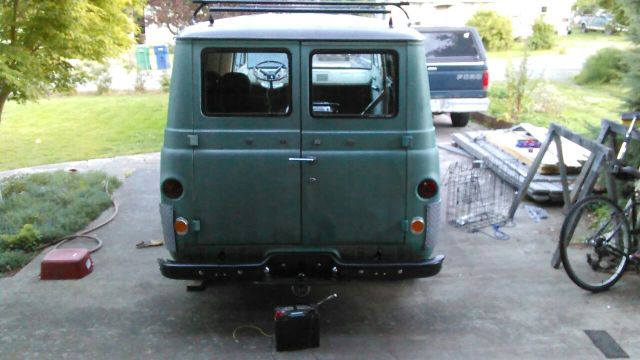
    Seth G wrote:Thanks George, my advise, do it Smile It all looks right at home in the van. The possibilities are endless. Light sucks but here's a pic,

    My 250 Swap - Page 6 9sma3E

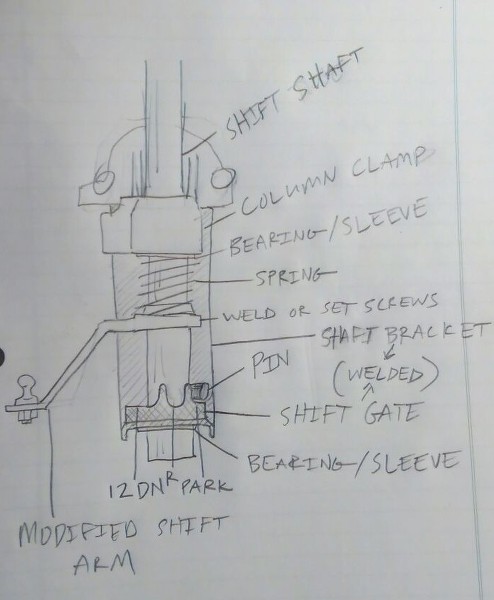
    This is what I've come up with to convert the 3 speed shifter into an automatic. I haven't been able to examine an oem auto column. I've seen Vic post a cable setup. Looks like it should work well. I'll either make an indicator or buy a generic one like the ididit Shift Indicator. I can get control cables wholesale at work so I'm going to go with a 30 series. I think it will work fine for the job. If it seems too weak I'll get a 40 series.

    My 250 Swap - Page 6 X8xVEL

    I'll use the base of this shift arm, utilizing the notches already there, to make the gate that get's welded to the support bracket. Already has a grease zerk, so I'll forego installing the bearing/sleeve in it. At least until it seems necessary.

    My 250 Swap - Page 6 KXM4Rp

    I plan on using the same spring that's used to keep the guide in the bearing under the steering wheel. I'll put the arm in the oem position on the oem pin if possible and use set screws for the arm and a cotter pin to capture the pin. I don't want to capture anything permanently if I can help it. Maybe use an allen headed machine screw and some locktite for the bottom pin...

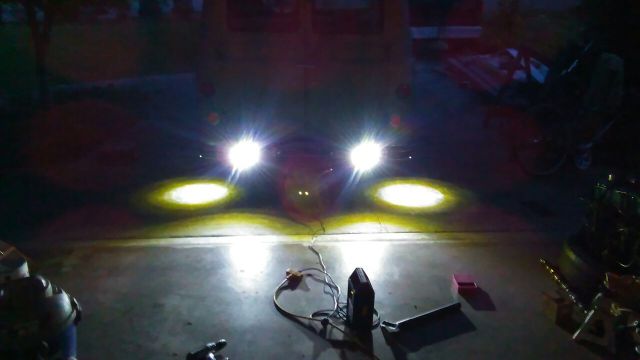
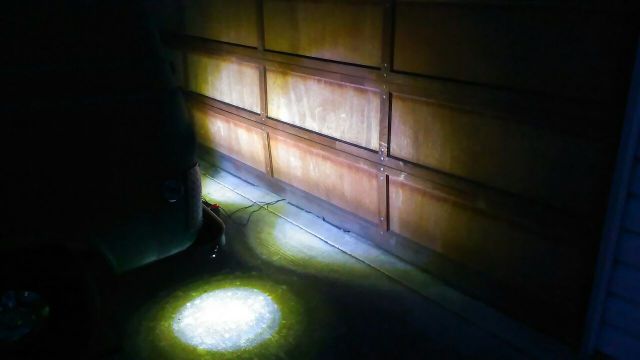
    I got the back up led's in last weekend, tested them today w/ a battery to check them out

    My 250 Swap - Page 6 UxsblD

    My 250 Swap - Page 6 OCcU3C

    Some at dusk

    My 250 Swap - Page 6 Ty0oqG

    My 250 Swap - Page 6 AscCR8

    My 250 Swap - Page 6 KGWs4X
    Seth G
    Seth G
    Vintage-Vans Listings Manager
    Vintage-Vans Listings Manager


    Number of posts : 2086
    Location : Anacortes, WA
    Age : 51
    Registration date : 2013-04-24

    My 250 Swap - Page 6 Empty Re: My 250 Swap

    Post by Seth G Thu Jun 09, 2016 9:19 pm

    Cam should be here this week.
    Seth G
    Seth G
    Vintage-Vans Listings Manager
    Vintage-Vans Listings Manager


    Number of posts : 2086
    Location : Anacortes, WA
    Age : 51
    Registration date : 2013-04-24

    My 250 Swap - Page 6 Empty Re: My 250 Swap

    Post by Seth G Fri Jun 17, 2016 6:42 pm

    Got the cam, got it installed and degree'd, everything is on the numbers. Going to finish assembly this weekend and prep for install.

    My 250 Swap - Page 6 OpspkP

    My 250 Swap - Page 6 GWvhd3
    Seth G
    Seth G
    Vintage-Vans Listings Manager
    Vintage-Vans Listings Manager


    Number of posts : 2086
    Location : Anacortes, WA
    Age : 51
    Registration date : 2013-04-24

    My 250 Swap - Page 6 Empty Re: My 250 Swap

    Post by Seth G Sat Jun 18, 2016 7:43 pm

    Getting closer

    My 250 Swap - Page 6 IstAUf
    vanny
    vanny
    Moderator


    Number of posts : 14778
    Location : Ashburnham, MA
    Age : 65
    Registration date : 2012-09-22

    My 250 Swap - Page 6 Empty Re: My 250 Swap

    Post by vanny Sun Jun 19, 2016 5:56 pm

    Coming along nicely, Seth! Twisted Evil


    _________________
    “The future will soon be a thing of the past."

    http://public.fotki.com/Vintage-Vans/vintage-vans-es/ruff-diamond-1/?cmd=fs_slideshow
    Seth G
    Seth G
    Vintage-Vans Listings Manager
    Vintage-Vans Listings Manager


    Number of posts : 2086
    Location : Anacortes, WA
    Age : 51
    Registration date : 2013-04-24

    My 250 Swap - Page 6 Empty Re: My 250 Swap

    Post by Seth G Sun Jun 19, 2016 6:03 pm

    Thanks Vanny! I got the top end painted today. Now I need to pick it off the stand and install the plugs on the aft end, the flexplate, block plate and transmission.

    My 250 Swap - Page 6 LA26WH

    My 250 Swap - Page 6 X5fQN3

    My 250 Swap - Page 6 NSJMck
    Seth G
    Seth G
    Vintage-Vans Listings Manager
    Vintage-Vans Listings Manager


    Number of posts : 2086
    Location : Anacortes, WA
    Age : 51
    Registration date : 2013-04-24

    My 250 Swap - Page 6 Empty Re: My 250 Swap

    Post by Seth G Sun Jun 19, 2016 8:01 pm

    I used some lauan and nylon spacers to mount the radiator. It was laying around. Motorcraft radiator cap

    My 250 Swap - Page 6 JTcGXr


    Seth G
    Seth G
    Vintage-Vans Listings Manager
    Vintage-Vans Listings Manager


    Number of posts : 2086
    Location : Anacortes, WA
    Age : 51
    Registration date : 2013-04-24

    My 250 Swap - Page 6 Empty Re: My 250 Swap

    Post by Seth G Mon Jun 20, 2016 6:28 pm

    Today at work I made a phenolic spacer from a piece we have laying around. I mimic'd the throttle mount from the aluminum spacer on the 170 that has the coolant lines run through it. It should make the throttle adapting easy and isolate the carb from all the head's heat. It's a little more than 5/8" thick, about the same as the other one.

    My 250 Swap - Page 6 IKPg3F

    My 250 Swap - Page 6 Rdr5lg

    My 250 Swap - Page 6 9dL53T
    Seth G
    Seth G
    Vintage-Vans Listings Manager
    Vintage-Vans Listings Manager


    Number of posts : 2086
    Location : Anacortes, WA
    Age : 51
    Registration date : 2013-04-24

    My 250 Swap - Page 6 Empty Re: My 250 Swap

    Post by Seth G Tue Jun 28, 2016 9:15 pm

    Seth G
    Seth G
    Vintage-Vans Listings Manager
    Vintage-Vans Listings Manager


    Number of posts : 2086
    Location : Anacortes, WA
    Age : 51
    Registration date : 2013-04-24

    My 250 Swap - Page 6 Empty Re: My 250 Swap

    Post by Seth G Fri Jul 01, 2016 6:26 pm

    I got new channels and fuzzies I'm going to try and install tomorrow. I hoped to get the engine in, it's ready. But it ran a week or 2 far out and my daughter is coming home for a couple of weeks Sunday. But it's just as well, things come in their time Smile
    It's getting close drunken
    paradiddle
    paradiddle


    Number of posts : 11
    Location : Mission Viejo, CA
    Registration date : 2016-03-27

    My 250 Swap - Page 6 Empty Re: My 250 Swap

    Post by paradiddle Mon Jul 04, 2016 11:09 am

    Seth - let me know how you are fitting the radiator and Taurus fan in - I'm having serious clearance issues in my sons van - he has a 200. After removing the stock fan it looks like I would have to mount the radiator about 3" from the front of the doghouse - I'm concerned about airflow being that far up.

    Jeff
    Seth G
    Seth G
    Vintage-Vans Listings Manager
    Vintage-Vans Listings Manager


    Number of posts : 2086
    Location : Anacortes, WA
    Age : 51
    Registration date : 2013-04-24

    My 250 Swap - Page 6 Empty Re: My 250 Swap

    Post by Seth G Mon Jul 04, 2016 11:55 pm

    I'm not using that fan, not yet at least. I'm using that cheesy 2600 cfm aftermarket fan that came with my radiator on that aluminum shroud above. The radiator is a 2 core, 1 1/8" cores. I'm going to set the engine so it clears the radiator w/ the factory fan and the electric, but not both. Seems like you could cut the shroud back on the edges to get that taurus fan right next to the radiator. The 240 radiator is set back a couple inches as it is w/ it's brackets.

    Got the channel fuzzies in on the drivers side, what a pain in the ass. They're in though. No more rattle Smile And fwiw it's all not ALL the heat. It'll help for sure.
    Seth G
    Seth G
    Vintage-Vans Listings Manager
    Vintage-Vans Listings Manager


    Number of posts : 2086
    Location : Anacortes, WA
    Age : 51
    Registration date : 2013-04-24

    My 250 Swap - Page 6 Empty Re: My 250 Swap

    Post by Seth G Sun Jul 31, 2016 12:18 am

    Well, while Thijs and Robin were up in Canada I managed to get the transmission mated to the engine and the engine mounted in the van. Although I eyeballed it and thought I was OK, turns out the air cleaner won't fit in the doghouse. Also I must have had a dyslexic moment when I ordered my starter, I got a MT one instead of an AT one, so I need to get another starter. I got the 64 dog house modified, need to make a hump. I got the radiator in. I had to remake my wood spacers and move it forward from stock 1/2" to get descent clearance from the water pump pulley, even with the motor hung as far aft as possible. The motor had to be dropped 1 1/2" to fit well in the 64 doghouse. It would fit in the 65 doghouse, but I ruled out using it b/c there were a number of differences between the later doghouses and the early ones. To much of a pain. I mounted the 170's carb linkage to my adapter and it mated right to the RBS carb Smile

    Now I need to mount the trans crossmember and set the trans angle. Clean, paint and insulate/dampen the dog house. Wire the engine and get new starter. Get adapter to use another air cleaner I have. Get a set of mechanical guages for temp, oil and volts. Break in the engine. Finish the trans linkage. Get a driveshaft made. And fab the new seat mounts. Almost there.

    My 250 Swap - Page 6 QVBIKI

    My 250 Swap - Page 6 W4cGZS

    My 250 Swap - Page 6 VSZnar

    My 250 Swap - Page 6 Vr2Jx8

    My 250 Swap - Page 6 EmYrLO

    My 250 Swap - Page 6 Qu3qu0
    vanny
    vanny
    Moderator


    Number of posts : 14778
    Location : Ashburnham, MA
    Age : 65
    Registration date : 2012-09-22

    My 250 Swap - Page 6 Empty Re: My 250 Swap

    Post by vanny Sun Jul 31, 2016 1:02 pm

    Looks Great in there Seth! It won't be long before you're cruising down the road again!!! And a BIG At-A-Boy for helping out Robin and Thijs! cheers


    _________________
    “The future will soon be a thing of the past."

    http://public.fotki.com/Vintage-Vans/vintage-vans-es/ruff-diamond-1/?cmd=fs_slideshow
    Seth G
    Seth G
    Vintage-Vans Listings Manager
    Vintage-Vans Listings Manager


    Number of posts : 2086
    Location : Anacortes, WA
    Age : 51
    Registration date : 2013-04-24

    My 250 Swap - Page 6 Empty Re: My 250 Swap

    Post by Seth G Fri Aug 05, 2016 9:00 pm

    I found I needed to clean the doghouse. I got it clean with a wide putty knife, oven cleaner, super clean and then used a die grinder with a green 36 grit 2" roloc disc and took the rust off it.

    I lined it with 80 mil sound deadener, butyl stuff, Noico brand. Then put a 3/4 mylar/foam liner on it. I used butyl mastic tape to seal it up. I hope it helps and holds up. We'll see.

    I hope to get the wiring and lines done this weekend. The correct starter arrived yesterday. And get the trans angle set and crossmember in.

    I'm a little worried about reflecting all the heat back at the engine....

    My 250 Swap - Page 6 BTDYOB

    My 250 Swap - Page 6 4RnF8S
    Seth G
    Seth G
    Vintage-Vans Listings Manager
    Vintage-Vans Listings Manager


    Number of posts : 2086
    Location : Anacortes, WA
    Age : 51
    Registration date : 2013-04-24

    My 250 Swap - Page 6 Empty Re: My 250 Swap

    Post by Seth G Sun Aug 07, 2016 6:41 pm

    I got the doghouse painted and installed. Fuel lines connected. Starter installed. The battery box back in and all the wiring roughly done except the charging and fan circuits. I had to cut the 3rd boss for the 250 alternator bracket off the block(that was fun) and mounted the 170's brackets so I was able to mount the 3g alternator. Got that done and the alternator mounted. Found I needed a special stator plug, got that coming. I had to shorten and add threads to the throttle linkage rod between the carb linkage and the doghouse. But that was all it took to finish the throttle linkage, it's done.Going to try and finish up the wiring and tidy it up this week.

    My 250 Swap - Page 6 ZmLkHq

    My 250 Swap - Page 6 JgDyyS

    My 250 Swap - Page 6 K8GaaT

    My 250 Swap - Page 6 6oW8uA

    My 250 Swap - Page 6 UpDYD1

    My 250 Swap - Page 6 5r5ZRz
    jrdunn96
    jrdunn96


    Number of posts : 691
    Location : Cashion, OK
    Age : 63
    Registration date : 2016-01-01

    My 250 Swap - Page 6 Empty Re: My 250 Swap

    Post by jrdunn96 Mon Aug 08, 2016 2:53 am

    Nice work!
    jdlaugh
    jdlaugh


    Number of posts : 298
    Location : Tulsa, OK
    Registration date : 2013-03-18

    My 250 Swap - Page 6 Empty Re: My 250 Swap

    Post by jdlaugh Mon Aug 08, 2016 5:50 am

    Is that a Duraspark iginition module bolted to the back of the doghouse? I've read they don't like heat and can fail pretty quickly if they get too hot. I did a DSII conversion and mounted my module on the front of the battery box to be on the safe side.

    Great build thread, by the way! Very Happy
    Seth G
    Seth G
    Vintage-Vans Listings Manager
    Vintage-Vans Listings Manager


    Number of posts : 2086
    Location : Anacortes, WA
    Age : 51
    Registration date : 2013-04-24

    My 250 Swap - Page 6 Empty Re: My 250 Swap

    Post by Seth G Mon Aug 08, 2016 8:05 am

    Yeah, I've read that to. I'm a little concerned. Good idea putting it on the battery box. I tried to find a better place to put it, but it was just so damned convenient to mount it there. I think if it fails, or when it fails, I'll swap to hei and use it for a heat sink. I've also read poor grounding is a cause of failure. I'm going to run aux grounds to the solenoid and the module.
    jdlaugh
    jdlaugh


    Number of posts : 298
    Location : Tulsa, OK
    Registration date : 2013-03-18

    My 250 Swap - Page 6 Empty Re: My 250 Swap

    Post by jdlaugh Mon Aug 08, 2016 9:19 am

    I ran my DSII cables thru the same hole used by the battery cables. You might consider doing the same and mounting the module under the seat on the outside of the doghouse. These things fail from heat stroke and you've got it in the hottest engine box known to man. Imagine you're 50 miles from home and it dies....

    A lot of people do convert their systems to an HEI/Duraspark hybrid setup. The HEI modules are said to be rock solid dependable and not bothered by the heat, if properly mounted to a heat sink.
    Seth G
    Seth G
    Vintage-Vans Listings Manager
    Vintage-Vans Listings Manager


    Number of posts : 2086
    Location : Anacortes, WA
    Age : 51
    Registration date : 2013-04-24

    My 250 Swap - Page 6 Empty Re: My 250 Swap

    Post by Seth G Mon Aug 08, 2016 6:54 pm

    Hey JD, did you use a coolant recovery tank? If so, where did you mount it?

    On moving the module, believe me I'm tempted. Wish I'd have thought of what you did beforehand. I didn't want it hanging off the outside of the doghouse. But I'm gonna give it go. wtf Smile Sometimes they're wrong right? I've got so much to do it's going to have to be good for now. If I go to an hei I can get rid of the ballast resistor as well. Did you reuse the ballast resistor wire or a resistor or run the coil at 12v?
    jdlaugh
    jdlaugh


    Number of posts : 298
    Location : Tulsa, OK
    Registration date : 2013-03-18

    My 250 Swap - Page 6 Empty Re: My 250 Swap

    Post by jdlaugh Mon Aug 08, 2016 7:31 pm

    Right now I'm not running a coolant tank, partly because I couldn't find a good place for it. I just check the coolant level periodically and so far it hasn't been an issue. Looks like you have lots of room there in front of your distributor. That's where the alternator is on my 240.

    I kept the stock resistance wire that came with our Econolines. I read somewhere that it was a suitable replacement for a ballast resistor.

    Seth G
    Seth G
    Vintage-Vans Listings Manager
    Vintage-Vans Listings Manager


    Number of posts : 2086
    Location : Anacortes, WA
    Age : 51
    Registration date : 2013-04-24

    My 250 Swap - Page 6 Empty Re: My 250 Swap

    Post by Seth G Sat Sep 17, 2016 9:30 pm

    My 250 Swap - Page 6 Alive

    cheers

    Here's a video of it firing off after the break in, got the base timing close enough to start adjusting the carb for idle just before this and as you'll hear I fired it up one more time for shit's and giggles Smile I've got the initial fire up/break in video but it's like 30 min long so I'll need to edit off the last 25 minutes or so. Everything went well.

    Tice84
    Tice84


    Number of posts : 124
    Location : Utrecht, The Netherlands
    Registration date : 2015-10-10

    My 250 Swap - Page 6 Empty Re: My 250 Swap

    Post by Tice84 Sun Sep 18, 2016 11:45 am

    Ah it's great to see you got it running, good job! I see you found a airfilter that is a little smaller, haha. To bad, the other one was very cool. When will you be driving it???
    uante
    uante


    Number of posts : 1466
    Location : Tempe, Arizona
    Age : 61
    Registration date : 2014-01-26

    My 250 Swap - Page 6 Empty Re: My 250 Swap

    Post by uante Sun Sep 18, 2016 6:52 pm

    Sounds Great! "It's Alive" Indeed!

    Sponsored content


    My 250 Swap - Page 6 Empty Re: My 250 Swap

    Post by Sponsored content


      Current date/time is Sat Sep 07, 2024 6:35 pm