VintAGE-Vans

Would you like to react to this message? Create an account in a few clicks or log in to continue.

BRINGING IT ALL TOGETHER.... A's, G's & E's


+15
jrdunn96
paradiddle
WYO George
cole63
Das Boot
vanny
Udo
Big W
jimthefred
stanyon
BoneMan
FIZGIG
SDEconoTruck
Barnabas
Seth G
19 posters

    My 250 Swap

    Seth G
    Seth G
    Vintage-Vans Listings Manager
    Vintage-Vans Listings Manager


    Number of posts : 2086
    Location : Anacortes, WA
    Age : 50
    Registration date : 2013-04-24

    My 250 Swap Empty My 250 Swap

    Post by Seth G Sat Mar 15, 2014 12:40 pm

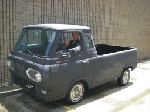
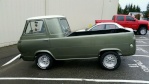
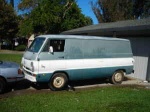
    OK so I'm swapping a 250 into the van so I thought I would make a thread on it's progress.

    Updates:
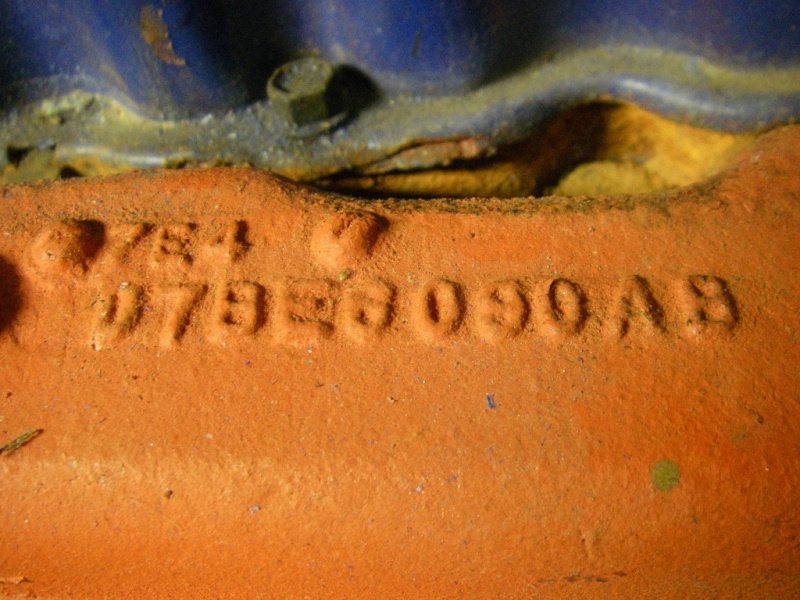
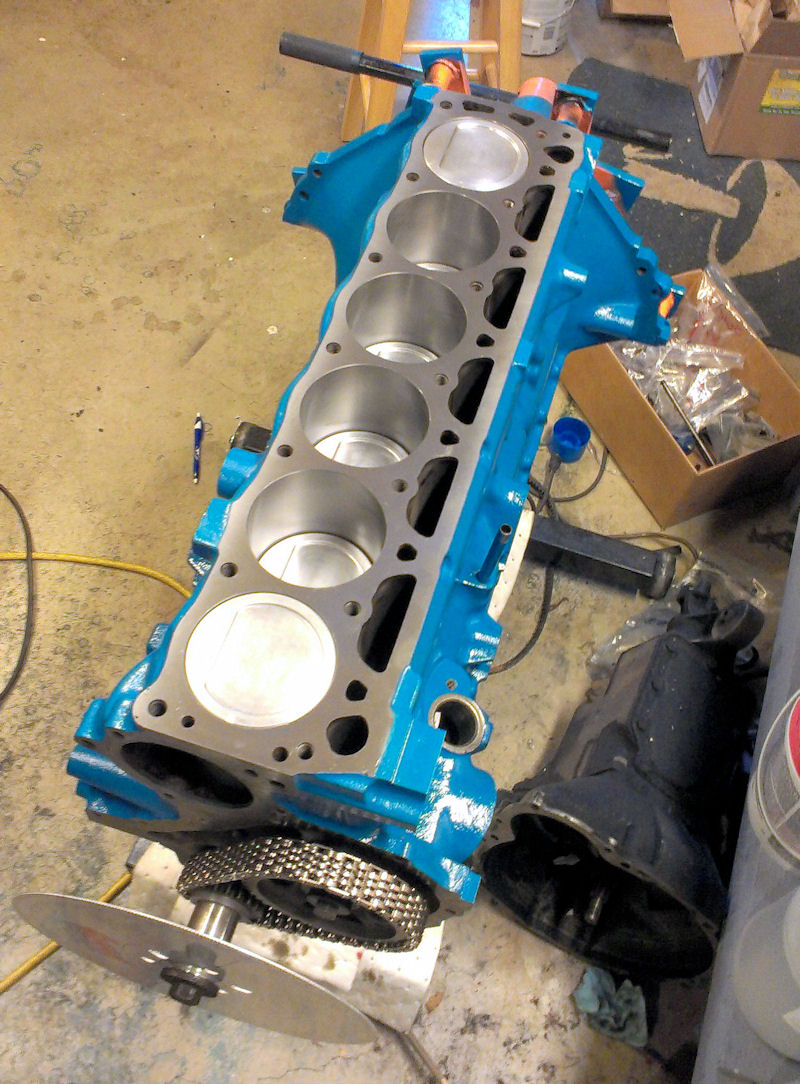
    Sent the block out to the machine shop, had it cleaned, magnafluxed, bored .040" over(could have went .030" but found the pistons I needed super cheap @ .040" and .020") and decked .032" and new cam bearings installed.
    Crank was ground -.010/-.010
    Obtained 8 Ford 2.5 HSC flat top pistons which have .056" higher compression height than stock
    Got new Erson 280101 cam and lifter package 208/208 @ .050" w/.42" lift, 111 lobe sep, 280 adv duration.
    Got new timing set
    Clevite 77 main and rod bearings(dirt cheap on Rockauto clearance)
    Clevite plasm moly ring set(same as above)
    NOS Sealed power oil pump and pick up tube/screen(same as above)

    Where I'm at:
    Deck height with gasket will be .064"-.070" versus the .158" it was when I got it.
    Static C/R will be 9.4-9.5:1 depending on which gasket I use and how much the head needs true'd, static compression before was 8:1 at best.
    Dynamic C/R will be 7.4-7.5
    Sent pistons to get chamber shaped 8cc dishes CNC milled into them, otherwise the C/R would have been 10.4:1 static and 8.3:1 dynamic
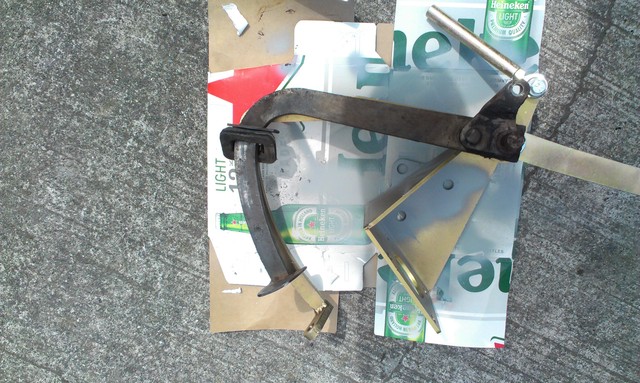
    Pulled the adjustable rocker assembly from the 144 and got it cleaned up for the 250
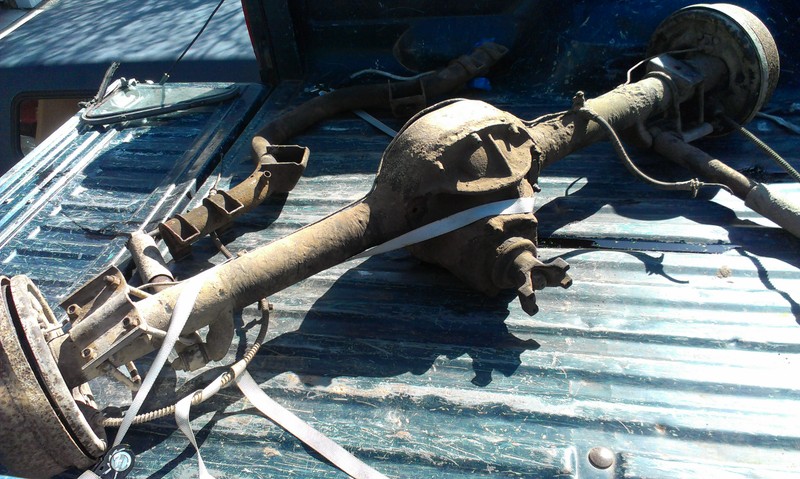
    Stanyon was kind enough to pull a 170 x-member and tall doghouse for me from the junk yard gotta go get them here soon Wink
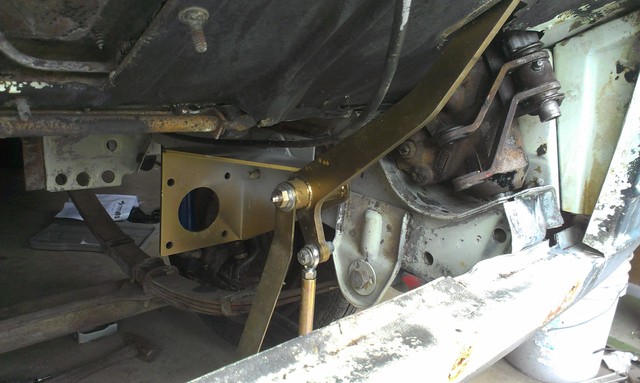
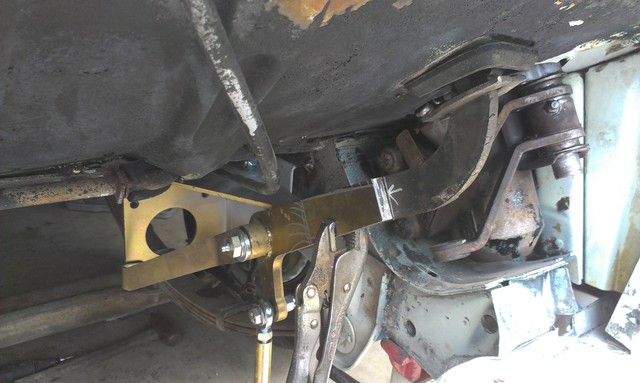
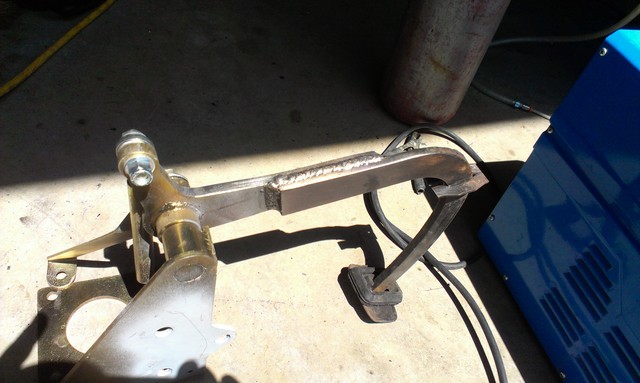
    Obtained NOS Maverick inline six motor mount/brackets
    Hopefully Vic is going to provide me a transmission x-member Smile
    I've got the the block painted and all but rear core plugs installed and the crank installed.
    Have the under chassis preliminarily scraped clean and rinsed, waiting on a nice Saturday to rent a oil fired pressure washer to finish the job and then I can paint it.
    I've pulled the engine harness out and am going to make a new one.

    My 250 Swap Kp4h

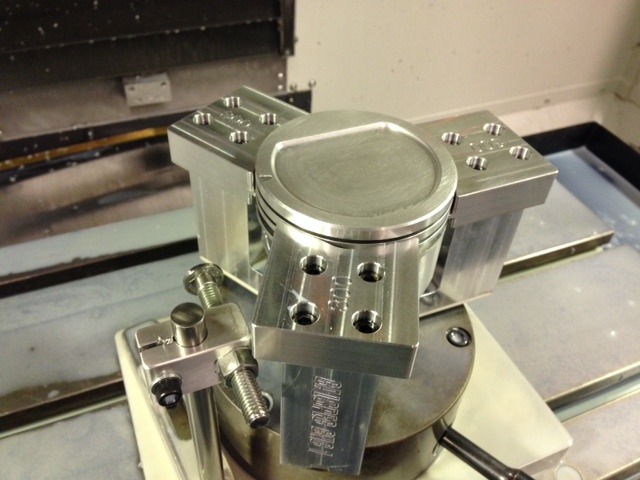
    Piston mounted for final deck measurement before dish milling

    My 250 Swap C9hl

    Picture from Cal @ http://www.calspeccnc.com/ of one of my pistons after they all got milled a couple days ago. Great guy to work with and very reasonable pricing.

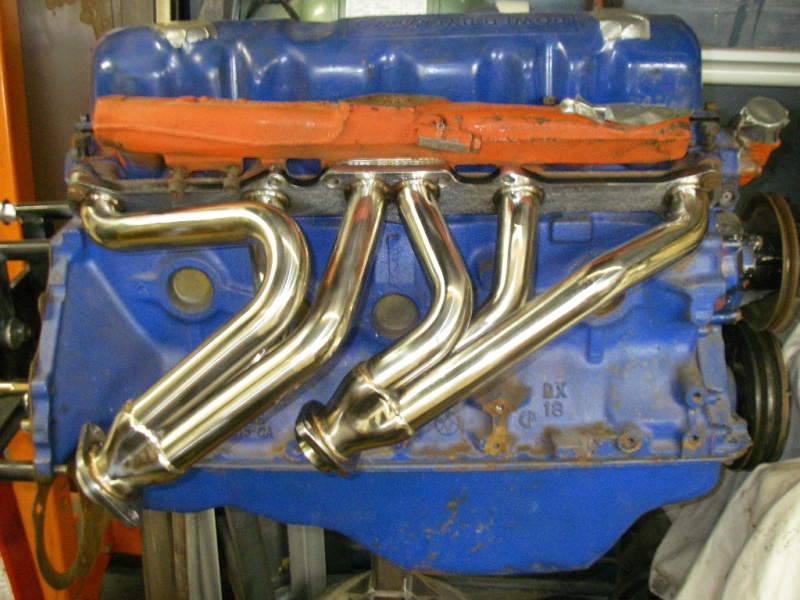
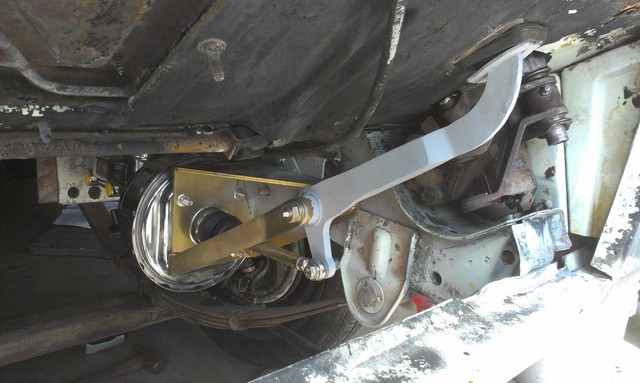
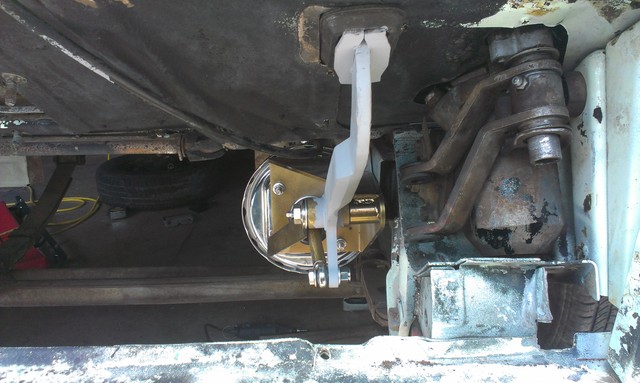
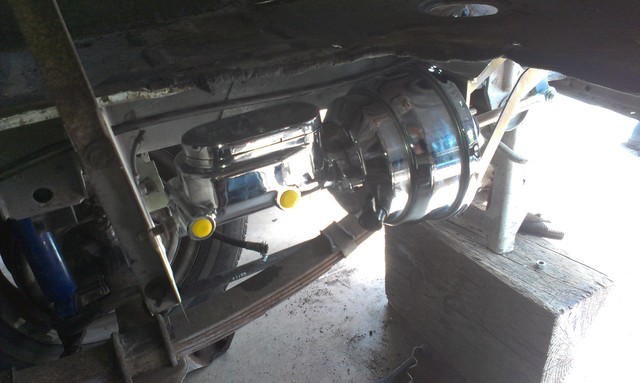
    I still need to obtain a good AOD, TV and shift cable linkage, a 300 aod flexplate, header, ball and cup pushrods, a '77 or later 200-250 head, DSII distributor and associated wiring harness from junk donor of head hopefully, A 3-core radiator with large electric fan w/thermostat, remote electric fan cooled trans cooler, carb(probably going Motorcraft 2150 or 2100 now)And alot of other odds and ends...

    If anyone needs any parts off the 144 besides the rocker assembly let me know...
    Barnabas
    Barnabas
    Vintage-Vans Listings Manager
    Vintage-Vans Listings Manager


    Number of posts : 2011
    Location : Raleigh, NC
    Age : 64
    Registration date : 2011-01-16

    My 250 Swap Empty Re: My 250 Swap

    Post by Barnabas Sun Mar 16, 2014 1:26 pm

    Wow, you are going all out on this one. Keep the pics doing.
    SDEconoTruck
    SDEconoTruck


    Number of posts : 310
    Location : San Diego, California
    Registration date : 2010-05-26

    My 250 Swap Empty Re: My 250 Swap

    Post by SDEconoTruck Sun Mar 16, 2014 10:17 pm

    Interesting build Seth!  I'm on my second 250/6 and I must say you won't be disappointed.  

    "...a '77 or later 200-250 head,"

    One thing, I see you  have your Static and Dynamic CR figured out but have not acquired a cylinder head.  The later model heads (desirable because of the valve size and shrouding) have 62cc chambers not 58cc.  I got flat top pistons because the OEM have an 8cc chamber which is not needed, in fact I ended up milling both the head and the deck to get the Dynamic CR to the desired 8.4:1 on pump gas.  Just wondering how you are going about the Cyl Head volumes.

    Best regards,
    George
    Seth G
    Seth G
    Vintage-Vans Listings Manager
    Vintage-Vans Listings Manager


    Number of posts : 2086
    Location : Anacortes, WA
    Age : 50
    Registration date : 2013-04-24

    My 250 Swap Empty Re: My 250 Swap

    Post by Seth G Mon Mar 17, 2014 12:26 am

    "you won't be disappointed"

    Well that's got to hear :)I have the original C9DE '70 large log head, it's got 62cc chambers, I measured a couple. I may stick with the head I have, I figure it will be 60-61cc's after it's trued up if I don't have them mill it further.

    I was thinking it would be cheaper to buy a junkyard head and rebuild it than it will be to have hardened exhaust seats and larger valves installed in mine. How's your's running on pump gas @ 8.4:1? I've been led to believe that with the long stroke and cast iron heads I should stay below 7.7, What is your static c/r? I'd have to mill the head to 52cc's, use the Victor gasket and have a static c/r of 10.7:1 to get the dynamic up to 8.4:1. This will be my daily driver so I'd like to be able to use 87 and I'm at sea level. I would have zero'd the deck but the folks over at fordsix were getting me all wig'd out about pinging and I've read you shouldn't deck a 250 more than .040". I was going to go with 255 flat top pistons, but literally couldn't find a set for less than $250 in the size I needed, .030", No one makes them anymore except silvolite. And I was going to mill those to, so I would have been @ $350 for the damned pistons! lol. So I found a couple of set's of the 2.5's cheap on ebay, they're somewhat hard to find cheap to, 2.3's are easy but no compression height gain over stock, just flat tops.
    SDEconoTruck
    SDEconoTruck


    Number of posts : 310
    Location : San Diego, California
    Registration date : 2010-05-26

    My 250 Swap Empty Re: My 250 Swap

    Post by SDEconoTruck Mon Mar 17, 2014 3:12 pm

    Hey Seth,

    Sounds like solid reasoning.  I ran premium 91 octane on my first engine, here is the spec sheet for the cam I used: (OPEN the pic to see the info which is out of frame)
    My 250 Swap 00111

    (I think the recommended CR for "pump gas" on the calculator is 93.)

    Anyways, that first motor was great, once I got the timing right man it had a LOT of grunt at low end, which made me want to do my present motor, but this time I am thinking of fuel mileage and using 87 like you are.  Still, the DCR should be higher than 7.7(?)   I'll talk to my machinist, he's an older drag racer and knowledgeable.  *I have not selected the cam yet, still debating going with an "RV cam" or something a little hotter.

    Did I mention this motor produces an incredible amount of torque???

    On the Cyl Head, I recommend doing the hardened exhaust seats of course, (Unleaded) and you can do some bowl work to flow better, mostly just a once over on the texture inside the ex port and unshroudning the valve guide stem bosses in both Int and Ex.  Didn't take long and was fun to do because I don't do it every day.  I'm using a D78E head this time around, from a Granada.  I'm 30-over on the virgin block.

    My 250 Swap 11410

    The head came in that orange color, LOL, it got tanked tho.

    Also recommend getting a Port Divider tacked in, and using a 2-Stage carb if budget allows.  Just got my Weber 32/36 DGV Progressive (better fuel mileage) and we milled the head to accept the adapter.  Also got Mike's first prototype stainless dual ex system:

    My 250 Swap Imgp7710

    Like that shallow Oil Pan! I do a lot of metal fab so the crossbar is getting some mods (keeping in mind the driveline angles are critical!)   Got a carb hat for the new carb as well to gain some clearance, the motor is pretty tall, but it can go in the Dog House, just need some mods.  The new exhaust clears the Low Starter (which is why Mike sent me the exhaust to check for him in the first place.) Cool 

    If you go to his website "classic inlines" he has some flow tests and I noticed that a mildly ported stock head can do pretty well.  Since I am not trying to win a race, just making a more efficient motor, the cost of the new alloy head plus the potential of the stock head made me go with modified stock.  Might want to research it.

    On the pistons, I just used cast in both motors, again, not racing and not revving to 7,000.  I'm just cruising with an occasional burn out Twisted Evil   Here is the link to the ones I am using this time around:

    (not affiliated)
    http://www.classicinlines.com/products.asp?cat=27

    Oh, another cool thing, again depending upon budget (and if your Econo has good brakes, ha ha) is the transmission.  Since the bolt pattern on the engine block is Small Block Ford, I found a 4R70W from a V6 Mustang has a great range, super deep first and high OD for the highway.  The flex plate from the later model Econoline w/300-6 is the link between the two, using stock Mustang torque converter.  The spendy part is using the programmable stand alone controller but I'll save that bit only if relevant or interested.

    Great engine build!  Keep the pics coming.
    Best regards,
    George
    Seth G
    Seth G
    Vintage-Vans Listings Manager
    Vintage-Vans Listings Manager


    Number of posts : 2086
    Location : Anacortes, WA
    Age : 50
    Registration date : 2013-04-24

    My 250 Swap Empty Re: My 250 Swap

    Post by Seth G Wed Mar 19, 2014 10:30 pm

    Thanks for you're help. Good to hear about the header clearing the starter, I was wondering about that or if I'd have to get a mini starter. Am planning on using the CI header. Sounds like your goals on the new motor are pretty similar to mine. The cam I got only spins up to 4300 but with higher lift and longer duration. I want all my power where I'll be using it most, around town, off the stop. And still get pretty good mileage. Also I'm planning on going to power brakes while I'm at it, so with that and the a/t I'm going to need good vacuum.

    I was considering using a progressive Weber, but after looking into it concluded, with some mild port work, direct 2-barrel and headers, I'm not sure there's enough carb there, esp. in that dinky first stage where I want it. As I understand it the 2nd barrel doesn't open until near WOT. Then I considered a 38 but now I'm thinking a 2100 will be a simpler/cheaper setup and easier to adapt to the transmission. If I go with a 2150 from an AOD car I'm good. And I'll get even flow through the entire band with synchronous barrels.

    I considered the 4R70W but the cost of the controller scared me away, but they are easier to find in good shape cheap.

    I'm still not sure how much to mill the head or, I guess, how high the dynamic C/R should be. I know the tighter quench and the dishes with help some with pre-detonation issues just not how much or how much I should push it and still stay on 87. From what you have said I think for now I will bump it up to at least 7.7

    Piston should be here any day now  Twisted Evil 
    FIZGIG
    FIZGIG


    Number of posts : 334
    Location : Lynnwood, WA
    Registration date : 2014-01-23

    My 250 Swap Empty Re: My 250 Swap

    Post by FIZGIG Thu Mar 20, 2014 10:11 am

    Hey Seth I would like to see how you attached to motor and trans b/c if you want to see how not to do it i will show you my truck.lol. i have a 250 with a c4 in mine dont know the year of the motor or trans
    Seth G
    Seth G
    Vintage-Vans Listings Manager
    Vintage-Vans Listings Manager


    Number of posts : 2086
    Location : Anacortes, WA
    Age : 50
    Registration date : 2013-04-24

    My 250 Swap Empty Re: My 250 Swap

    Post by Seth G Thu Mar 20, 2014 12:29 pm

    Yeah, I was planning on posting some pics when I get to that point. I'm getting a cross member for the transmission from Vic shipped up sometime soon and I need to pick up my engine x-member from stanyon and find a transmission. I'm planning on using the 170 cross member with maverick small six mounts. Looks like weather may be good enough this Saturday to finally finish cleaning the chassis and get to work on coating it with paint.
    SDEconoTruck
    SDEconoTruck


    Number of posts : 310
    Location : San Diego, California
    Registration date : 2010-05-26

    My 250 Swap Empty Re: My 250 Swap

    Post by SDEconoTruck Thu Mar 20, 2014 11:14 pm

    This is great Seth, keep the pics coming. I'm getting that info on the DCR once the machinist gets back in town. Thanks, George
    Seth G
    Seth G
    Vintage-Vans Listings Manager
    Vintage-Vans Listings Manager


    Number of posts : 2086
    Location : Anacortes, WA
    Age : 50
    Registration date : 2013-04-24

    My 250 Swap Empty Re: My 250 Swap

    Post by Seth G Sat Mar 29, 2014 3:08 pm

    Update, I've got the cam and lifters installed, new timing set on, and new pistons installed. Need to degree the cam, install the oil pump, clean the oil pan and timing cover and I can close up the short block :)Also may have found a good used AOD for $100

    My 250 Swap P32f
    BoneMan
    BoneMan


    Number of posts : 169
    Location : NorCal - Age 55
    Registration date : 2011-06-23

    My 250 Swap Empty Re: My 250 Swap

    Post by BoneMan Sat Mar 29, 2014 7:24 pm

    That's one sweet build. Great work you are doing.
    stanyon
    stanyon


    Number of posts : 147
    Location : Spokane, WA.
    Registration date : 2013-08-29

    My 250 Swap Empty Re: My 250 Swap

    Post by stanyon Sun Mar 30, 2014 1:21 pm

    Seth, what year did the AOD come out of ? I am torn between the options, but in all practical applications the AOD makes the most sense.
    FIZGIG
    FIZGIG


    Number of posts : 334
    Location : Lynnwood, WA
    Registration date : 2014-01-23

    My 250 Swap Empty Re: My 250 Swap

    Post by FIZGIG Sun Mar 30, 2014 6:44 pm

    Im dying to see how people are doing motor mounts when they are changing a stock motor out for a 250 like I have in my 1961 truck right now
    Seth G
    Seth G
    Vintage-Vans Listings Manager
    Vintage-Vans Listings Manager


    Number of posts : 2086
    Location : Anacortes, WA
    Age : 50
    Registration date : 2013-04-24

    My 250 Swap Empty Parts Score!

    Post by Seth G Sun Apr 13, 2014 10:51 am

    I made a road trip over to Spokane yesterday to meet with Stanyon and pick up some parts he had gathered and a rear end he sourced for me :)Beautiful day for a road trip and it was fun to meet a board member, make a couple yard runs and check out his truck, It's a beauty.

    Picked up a 9" out of a Falcon van at the pull and save for $200 and got a descent drivers wing window for $10. Picked up later doghouse and 170 crossmember from Stanyon. It was a great day.

    My 250 Swap T0fm
    jimthefred
    jimthefred


    Number of posts : 326
    Location : Parksley VA
    Registration date : 2012-01-15

    My 250 Swap Empty Re: My 250 Swap

    Post by jimthefred Sun Apr 13, 2014 3:00 pm

    coming along nice!
    FIZGIG
    FIZGIG


    Number of posts : 334
    Location : Lynnwood, WA
    Registration date : 2014-01-23

    My 250 Swap Empty Re: My 250 Swap

    Post by FIZGIG Thu May 08, 2014 6:53 am

    Hows the battle coming with your swap?
    Seth G
    Seth G
    Vintage-Vans Listings Manager
    Vintage-Vans Listings Manager


    Number of posts : 2086
    Location : Anacortes, WA
    Age : 50
    Registration date : 2013-04-24

    My 250 Swap Empty Re: My 250 Swap

    Post by Seth G Sun May 18, 2014 12:05 pm

    Ok, small update, been busy with other commitments and summer encroachment. Last week I found I had a problem with my Erson cam, there is a .007" bump or ramp on a 15 degree section of the base circle on the first intake lobe. I called Erson last week guy was out and then missed the call back. Got around to calling them again Friday and the rep was very helpful and is sending Fedex monday to pick up the cam and they are going to have a look at it and fix it or replace it. So that's good news at least.

    Last Saturday I spent the afternoon cleaning 50 years of gunk off the 9" rear end, free'd a stuck brake drum and am attempting to get the axles to release, they are being stubborn. Once I get the axles out I'm going to pull the 3rd member and take it to the driveline guy to have it gone over and a  new ring and pinion installed, most likely 3.7:1 but maybe 3.89:1. haven't decide yet. Meanwhile I'll take the axles to my local machinist and have him replace the bearings and seals. I'm going to go ahead and convert the rear to 11" discs while I have it apart. Not so much b/c I think it will be a huge improvement but more so b/c @ $340 shipped it's not that much more than going through the drum brakes, potentially replacing the drums, the effort ect. And it will make future brake work much easier.

    Here's a pic of the cleaned up 9"

    My 250 Swap Rn2z
    SDEconoTruck
    SDEconoTruck


    Number of posts : 310
    Location : San Diego, California
    Registration date : 2010-05-26

    My 250 Swap Empty Re: My 250 Swap

    Post by SDEconoTruck Sun May 18, 2014 12:11 pm

    Gonna be a nice ride SethG! How did you spot the 0.007" on the cam? Was it installed?

    George
    SDEconoTruck
    SDEconoTruck


    Number of posts : 310
    Location : San Diego, California
    Registration date : 2010-05-26

    My 250 Swap Empty Re: My 250 Swap

    Post by SDEconoTruck Sun May 18, 2014 12:12 pm

    Or was the bump pretty sudden/abrupt?
    Seth G
    Seth G
    Vintage-Vans Listings Manager
    Vintage-Vans Listings Manager


    Number of posts : 2086
    Location : Anacortes, WA
    Age : 50
    Registration date : 2013-04-24

    My 250 Swap Empty Re: My 250 Swap

    Post by Seth G Sun May 18, 2014 2:00 pm

    Thanks, I have a bad case of "while you're in there"  Laughing . I want the bottom end of this truck to be @ 90% or better when I get it back on the road. Another hinderance I've had recently is that my pick up truck has decided it's feeling left out and has demanded some attention in the form of a new heater core, radiator, battery and radio all over the last 2 months Mad 

    I noticed the little .007" ramp when I was degreeing the darn thing. I ignored it until I got the cam degree'd in knowing it was an issue. If it was like a .001" I wouldn't worry about it but @ .007" I'm worried it could budge the valve and affect compression. The bummer is I'm going to feel the need to check all lobes now, but don't have time to do it before tomorrow. I'm going to pull it today and examine the lobe visually and with my fingers before I box it up. I'm 99.999% sure it's ground into the cam b/c as a test I manually held the pushrod down against the lobe as I rotated over it and it was still there on the dial indicator, not just gunk, and always in the same spot.
    Seth G
    Seth G
    Vintage-Vans Listings Manager
    Vintage-Vans Listings Manager


    Number of posts : 2086
    Location : Anacortes, WA
    Age : 50
    Registration date : 2013-04-24

    My 250 Swap Empty Re: My 250 Swap

    Post by Seth G Tue Jun 10, 2014 12:49 pm

    So, now that the under carriage is clean, I got to looking into moving the crossmember frame brackets and the motor mount situation and have run into a snag. The maverick 250 motor mounts will not work Mad  The angle is wrong where the mount pad meets the crossmember perch. So after looking @ it a bit, I think my solution is going to be to go with 170 Econoline mounts. I'll have to elongate or drill new holes 3/4" out on the perches. This will raise the engine a bit, but since I need to move the frame brackets forward anyway, I will drop them down as well. The 250 is roughly 1 5/8" taller than the 200/170/144 and 1.5" wider @ the mount boss's. Once I determine the amount the motor will lift by elongating the holes, I will weld the brackets to the frame dropped by at least that amount, maybe a bit more, like another .5-1" to give me a little more head room in the doghouse. I'll have to keep an eye on the spindle connecting rod to be sure I don't go so low as to interfere with it  scratch
    FIZGIG
    FIZGIG


    Number of posts : 334
    Location : Lynnwood, WA
    Registration date : 2014-01-23

    My 250 Swap Empty Re: My 250 Swap

    Post by FIZGIG Tue Jun 10, 2014 12:59 pm

    Keep posting pics. I have my mechanic fabing up some motor mounts cross members and tranny mounts for my truck as we speak i will posst some pics.
    Seth G
    Seth G
    Vintage-Vans Listings Manager
    Vintage-Vans Listings Manager


    Number of posts : 2086
    Location : Anacortes, WA
    Age : 50
    Registration date : 2013-04-24

    My 250 Swap Empty Re: My 250 Swap

    Post by Seth G Sun Jun 22, 2014 2:50 pm

    This weekend I got my crossmember brackets off the frame and ready to be re welded in there new positions. I also got the old brake system out and removed the master cylinder bracket.

    I spent most of the weekend fabbing/modifying the new '55-'59 Chevy Brake lever for use and I made a bracket to position it far enough from the frame for the 8" dual diaphragm booster/master to fit. The bracket I made moved it 1" away from the frame. After getting it all together I see that it should have been around 1 1/4"-3/8" to center up the lever with the original hole for the brake pedal. At 1" it aligned near perfect before I cut the two levers and welded them into the final product. So now I will get some thick washers or just bend it a bit here and there to try and center it up a little better. The geometry of the lever arc was off slightly b/c I couldn't put the master as far back as it need to be b/c of the radiator bracket. I fiddled with it and found a pretty good compromise. I think it will work well.

    My 250 Swap Sauvz

    My 250 Swap 0s0e

    My 250 Swap Bjoik

    My 250 Swap Mp0t

    My 250 Swap Ic02u

    My 250 Swap Jgndi

    My 250 Swap 9bzbk

    My 250 Swap 6vxt

    Here I ground it and then did some fill/build welding to get it a little prettier

    My 250 Swap 7rbd

    Here's the whole assembly mocked up, still needs to be spaced away from the frame ~1/4" and I'm going to have to shorten the threaded connecting tube...

    My 250 Swap Wo9e

    My 250 Swap Xgr4

    My 250 Swap M59nu

    My 250 Swap Vuko
    Big W
    Big W


    Number of posts : 3282
    Location : Saskatoon,Sask,Canada
    Age : 60
    Registration date : 2011-01-13

    My 250 Swap Empty Re: My 250 Swap

    Post by Big W Sun Jun 22, 2014 9:07 pm

    That's looking real nice Seth. I plan on doing the same thing. I like the idea of power brakes and front disc as well.
    Seth G
    Seth G
    Vintage-Vans Listings Manager
    Vintage-Vans Listings Manager


    Number of posts : 2086
    Location : Anacortes, WA
    Age : 50
    Registration date : 2013-04-24

    My 250 Swap Empty Re: My 250 Swap

    Post by Seth G Sun Jun 22, 2014 9:12 pm

    Thanks, I'm going 4 wheel disc, that's why I went with the 8" dual diaphragm booster Smile From what I've read that's the way to go with all disc, 7" for disc/drum. I know other's have done it but Army of Six was my inspiration for going with this setup  Wink 

    Sponsored content


    My 250 Swap Empty Re: My 250 Swap

    Post by Sponsored content


      Current date/time is Fri Jul 26, 2024 10:04 pm