Will keep you posted.
MAP is taken at the carb base (full manifold vac), correct. The distributor (progression ign) has a MAP-sensor included. I ordered the one without logging (and no NOS and no launch control - no need for the latter two). The O2 sensor is an MTX-L from innovate motorsports. This one has logging capability with a connected laptop. In my charger I do have another MTX-L (they are around USD 300 +/- here in Germany, you get it for like 180 USD...) plus also an additional MAP-sensor (MTX-series, daisy-chained). I'm not going to switch that MAP-sensor to the A100, though.
No emissions rules here for a car first registered before 1.7.1969, so "all good" for the A100. It's a low comp engine, which can take some more advanced ignition than a high comp. I'll go 2° more advance (ending at like 32° at fully mechanically advanced (or without vac for a conventional distributor) and the at like 42° total mec + vac. That should do it, I guess. Perhaps I'll reduce the vac part of the total timing to situation with fully closed throttle - then the cylinder charge is very-very lean and takes a looong time to fully burn (as far as I understand).
The table shows the actual timing for the combination of rpm (horizontal) and vacuum (-> MAP, vertical).
My service manual says, I should start with 5° AFTER TDC (on the air cleaner it says 0°)... Which both is completely crazy waste of energy. Idle is now 16° before TDC...
But,
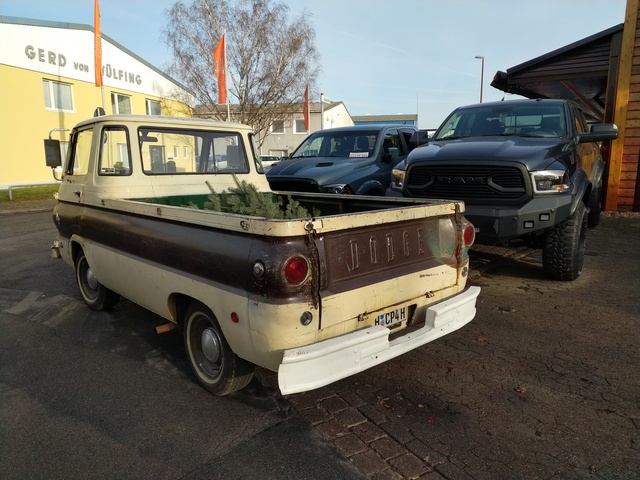
today I concentrated on my clunky rear bumper (I think, it was a re-welded Autobahn-guardrail...

), you might remember such pictures as this:

Now, I removed this "bumper" and found some 1/2 inch (!!!) plate, welded to another 1/2 inch piece of steel, which is screwed to the original two mount nuts at the frame. I think, those were used for train buffers, weren't they?
As I do not have a original / correct bumper mount assy, I decided to leave these quite raw but solid mounts in place and adjust them for some custom fabricating....
Cutting some pieces of that train-buffer with an angle grinder, taking some flat piece of steel (4mm thick, approx. 5/32"), bend it in place to hold the outer part of the original bumper, drill some 1/2" holes, file them rectangular for the mushroom head bolts.
Result so far pretty ok'ish. I know that the bumper is "upside-down", I'll turn it over tomorrow and fix my custom mounting assy to the existing one with some screws.
Here are some pics:


I do have the original license plate lights for the bumper (NOS, very expensive >100 USD, as they are a very special size and close to unobtainium...). But what-cha-gonna-do

Then, the truck looks much better on the street for its trip to Sweden (approx 600 mls one way) next tuesday.


