VintAGE-Vans

Would you like to react to this message? Create an account in a few clicks or log in to continue.

BRINGING IT ALL TOGETHER.... A's, G's & E's


+18
69
Kma4444
dix
Russell
68bigblock
whalemstr
OutofSight
JariV
gary h
vanny
benwah
wirepuller
Wadehawkins
bananappeal
Seth G
Digz
Big W
66e100pu
22 posters

    A-100 Project

    66e100pu
    66e100pu


    Number of posts : 199
    Location : So-Cal
    Registration date : 2011-04-02

    A-100 Project Empty A-100 Project

    Post by 66e100pu Mon Feb 02, 2015 9:33 am

    I finally have rounded-up most of what I need for my new A-100 project, and have posted some pictures in the gallery:

    http://vintage-vans.smugmug.com/Dodge-a100/66E100PUs-New-Toy/45028705_dkmHTZ#!i=3618796315&k=f2H2ftM

    I will try to keep the thread updated as I go.  This is a little on the radical side, so it should be fun!

    Jim
    Big W
    Big W


    Number of posts : 3282
    Location : Saskatoon,Sask,Canada
    Age : 59
    Registration date : 2011-01-13

    A-100 Project Empty Re: A-100 Project

    Post by Big W Mon Feb 02, 2015 3:36 pm

    WOW!!! that's going to be SWEEEET! cheers
    Digz
    Digz


    Number of posts : 3794
    Location : United States Six Lakes MI
    Registration date : 2008-05-17

    A-100 Project Empty Re: A-100 Project

    Post by Digz Mon Feb 02, 2015 4:23 pm

    Awesome ! Quite the combination.
    Seth G
    Seth G
    Vintage-Vans Listings Manager
    Vintage-Vans Listings Manager


    Number of posts : 2086
    Location : Anacortes, WA
    Age : 50
    Registration date : 2013-04-24

    A-100 Project Empty Re: A-100 Project

    Post by Seth G Thu Feb 05, 2015 10:03 pm

    That truck is going to be bad ass!!!
    66e100pu
    66e100pu


    Number of posts : 199
    Location : So-Cal
    Registration date : 2011-04-02

    A-100 Project Empty Re: A-100 Project

    Post by 66e100pu Fri Feb 06, 2015 8:27 am

    Have a 6 to 8 week delay in getting started - it's going out for media blasting and they are backed-up with work.  'Til then, check out the contender for one of the world's shortest driveshafts!

    A-100 Project Img_2211
    avatar
    bananappeal


    Number of posts : 3
    Location : Florida
    Registration date : 2009-11-13

    A-100 Project Empty Dodge `66 A-100 Gas Tank

    Post by bananappeal Sat Feb 07, 2015 10:49 am

    Hey Fellow Dodge A-100, first post since 2009! Found a schweet '66 bought upstate NY, home to Long Island and sold my waterfront house the day before Hurricane Irene! Now living the life in Florida, finished up van and loving it. Just redid carb but mechanic told me the gas tank is shot, which led to carb problems. Can't seem to find a place that sells new tanks and I've heard redoing them just postpones problems down the road, new tank is best. ANYONE knowing of someone who makes new tanks, please send an email to bananappeal@netzero.net Much thanks, Joe
    Wadehawkins
    Wadehawkins


    Number of posts : 12
    Location : Rock island, WA
    Registration date : 2015-02-09

    A-100 Project Empty Re: A-100 Project

    Post by Wadehawkins Sun Feb 22, 2015 6:26 am

    Can you tell me about the C4 front end? I'm doing a resto mod. Want it to ride like new and look like it just rolled off the line. Also a March pulley system would really set that motor off! I put one on my 450hp 340 and its badass!
    66e100pu
    66e100pu


    Number of posts : 199
    Location : So-Cal
    Registration date : 2011-04-02

    A-100 Project Empty Re: A-100 Project

    Post by 66e100pu Mon Feb 23, 2015 8:14 am

    Wadehawkins wrote:Can you tell me about the C4 front end? I'm doing a resto mod. Want it to ride like new and look like it just rolled off the line.  Also a March pulley system would really set that motor off! I put one on my 450hp 340 and its badass!

    I’m not sure what exactly you want to know, but I’ll give you some pics that might help.  This is not an easy or cheap swap.  Street Rod Garage is one vendor that makes a universal subframe, but you are looking at about $2K for just the bare cradle.  The picture from 21st Century is a good reference shot (this is the sub in my project), but they are no longer in business.  Due to the location of the upper coilover mounts, the front wheel wells have to be widened substantially (almost touching the side of the original doghouse).  If you really want to make a change, I would go with Mustang II hardware, especially if your engine is staying in the stock location.  The fabrication will be less and the cost of the components are far more reasonable, but any way you approach it, it is a huge undertaking.

    A-100 Project Untitl10

    A-100 Project C4ifss10

    A-100 Project Image_10

    A-100 Project Image_11
    66e100pu
    66e100pu


    Number of posts : 199
    Location : So-Cal
    Registration date : 2011-04-02

    A-100 Project Empty Re: A-100 Project

    Post by 66e100pu Wed Jul 08, 2015 4:15 pm

    FINALLY, picking this up from the blaster's tonight!  Had them shoot it in 2K white gloss primer so I can see all the imperfections.  It's pretty amazing how straight this truck is.  All the body work will be in lead so I can keep the filler to a skim coat.  I'll try to get the pictures up by the end of the week, and we'll see how this all comes together as the build begins.
    wirepuller
    wirepuller


    Number of posts : 176
    Location : Edmonton, AB, Canada
    Registration date : 2011-01-28

    A-100 Project Empty Re: A-100 Project

    Post by wirepuller Wed Jul 08, 2015 6:09 pm

    Cool project!

    Always good to see new ideas on how to put modern suspension under these vintage vehicles


    WP
    66e100pu
    66e100pu


    Number of posts : 199
    Location : So-Cal
    Registration date : 2011-04-02

    A-100 Project Empty Re: A-100 Project

    Post by 66e100pu Mon Jul 13, 2015 7:40 am

    Finally, a blank canvass!  For curious minds that want to know about media blasting:
    The pros are its clean, and you don’t have to do anything.  The cons are that EVERY imperfection shows up and every inch of factory seam sealer has to be replaced.  Is it worth it if you are building a driver?  Probably not.  You’ll have lots of extra time and expense with final body prep.  If you are doing a build that has to be perfect, or you are going to keep it forever then it makes sense, if you have a driver in fairly good shape, hitting it with a DA and shooting it is the far easier route.

    A-100 Project P7110010

    A-100 Project P7110016

    A-100 Project P7110019

    A-100 Project P7110023

    A-100 Project P7110021
    66e100pu
    66e100pu


    Number of posts : 199
    Location : So-Cal
    Registration date : 2011-04-02

    A-100 Project Empty Re: A-100 Project

    Post by 66e100pu Mon Jul 13, 2015 8:17 am

    First order of business was to figure out how to mount a GM power steering pump to a 315 Doge Hemi to power the Corvette rack.  The Dodge is a slightly different animal and nobody makes a bracket for it.  I had to cut some pieces that would allow me to use a BBC PS mount.  Major PITA, but it worked out well.

    A-100 Project P4070010

    A-100 Project P4070011

    A-100 Project P4070012

    A-100 Project P4070013
    66e100pu
    66e100pu


    Number of posts : 199
    Location : So-Cal
    Registration date : 2011-04-02

    A-100 Project Empty Re: A-100 Project

    Post by 66e100pu Mon Aug 10, 2015 1:11 pm

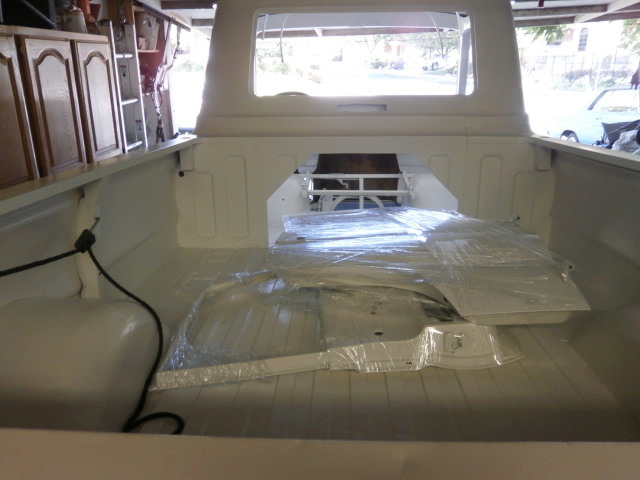
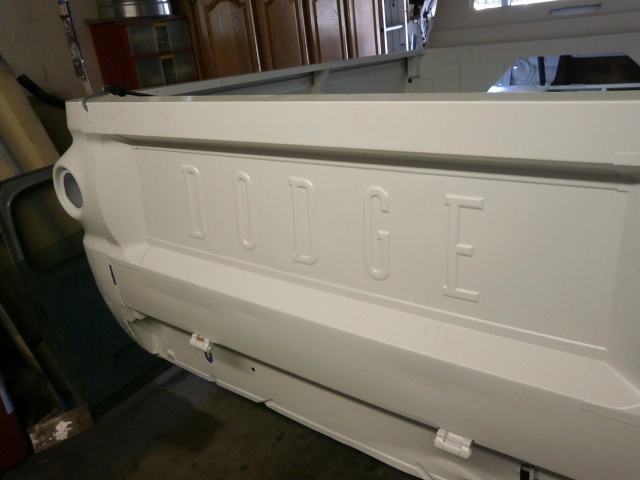
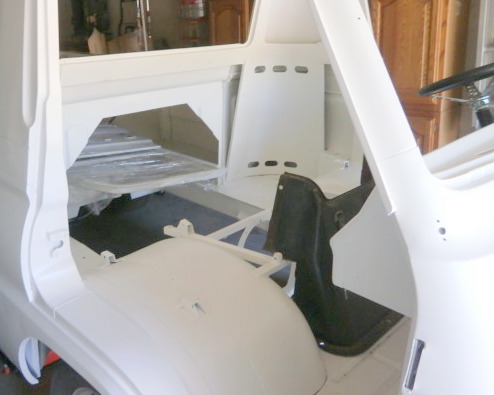
    I was hoping to get to the more fun parts of the project, but I have to concentrate on fabrication and body work first.  The problem is with all the metal cutting and grinding, along with skim filler dust, etc. is that it makes an unbelievable mess.  The overall plan is to get the messy part out of the way.  Fabricate and fit the components, remove everything and send the shell out for paint.  Once that’s done, everything can be refitted in a clean environment while hopefully holding the chips and scratches to a minimum.

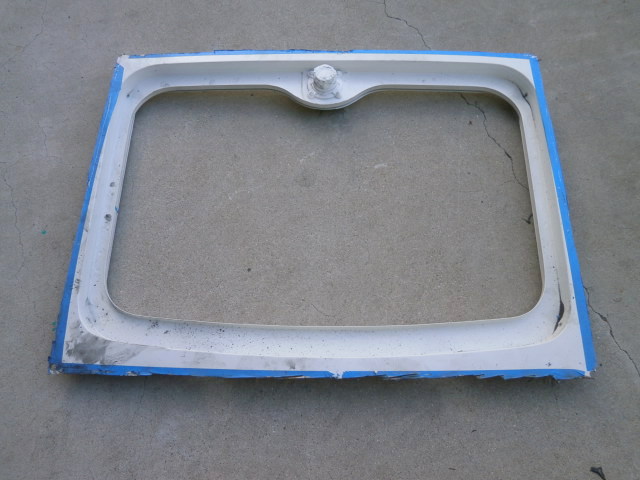
    The prior owner decided to install a modern pop-up sunroof.  I had 2 choices; the first was to patch the roof, and the 2nd was to somehow make this hole look somewhat period correct.  I ended-up going with a sliding ragtop.

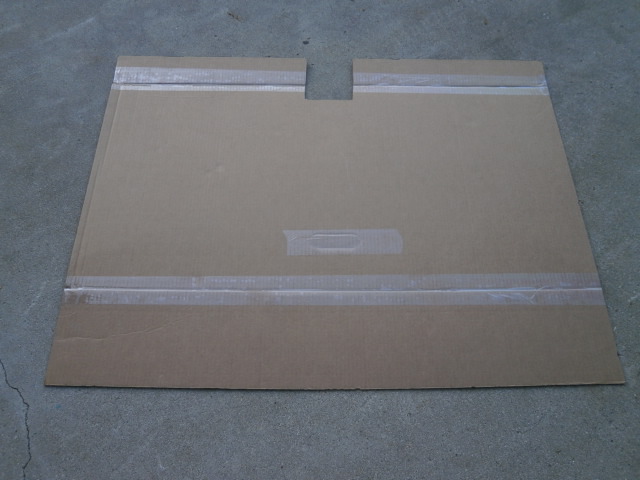
    This task truly involves measuring 50 times and cutting once!  First step was a cardboard template of the opening, followed by tape lines on the roof.  You need to find center, front edge, rear edge, side to side and square before you hit it with the body saw.  Thankfully, all the prep time paid off and the frame fit exactly as it should.  Next step is to drill all the frame mounting holes, remove everything, and primer the bare metal and go on to the next project which will be the dash.

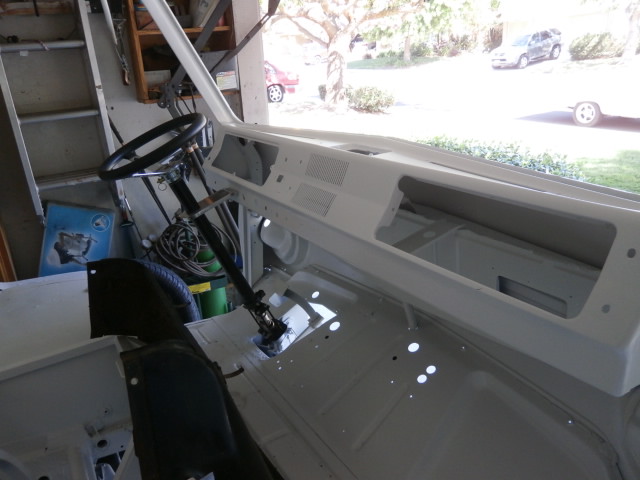
    I set the gauge panel in to see which holes need to be welded and smoothed (almost all of them as it turns out).  When that’s done, I’ll drill the holes for the headlight and wiper switch.  I want to keep the dash limited to those two switches and the ignition switch.

    A-100 Project 3-10-210

    A-100 Project P8080013

    A-100 Project P8080014

    A-100 Project P8080015

    A-100 Project P8080016
    Big W
    Big W


    Number of posts : 3282
    Location : Saskatoon,Sask,Canada
    Age : 59
    Registration date : 2011-01-13

    A-100 Project Empty Re: A-100 Project

    Post by Big W Mon Aug 10, 2015 9:06 pm

    Sliding rag top.....Kool idea. I like that gauge cluster also. Are you keeping the steering wheel? cus that looks great with the gauges.
    66e100pu
    66e100pu


    Number of posts : 199
    Location : So-Cal
    Registration date : 2011-04-02

    A-100 Project Empty Re: A-100 Project

    Post by 66e100pu Tue Aug 11, 2015 8:08 am

    Big W wrote:Sliding rag top.....Kool idea. I like that gauge cluster also. Are you keeping the steering wheel? cus that looks great with the gauges.

    The wheel is there to do it's job for now - I'm not sure if it'll stay or go until I get the interior completely finished.  It's not shown in the pictures because it's one of the last things to go in but it's one of my favorites; the Limeworks turn signal that matches the cluster.

    A-100 Project 68094710
    66e100pu
    66e100pu


    Number of posts : 199
    Location : So-Cal
    Registration date : 2011-04-02

    A-100 Project Empty Re: A-100 Project

    Post by 66e100pu Wed Sep 30, 2015 7:47 am

    I figured I’d tackle putting the seats in as I need them in position to determine the proper position of a lot of little items (gas pedal, dash switches and controls, 3 point belts, etc.).  The topic of fitting seats comes up periodically, so this may help someone in the future.  The buckets used for this project are Corbeau Classics, but this method will work for virtually any OEM or aftermarket seat you wish to fit.  The only real obstacle to overcome is having the seat mounting bosses line up with the OEM tracks.  Since that would have to be classified as a miracle if it all lined-up, a little fabrication work is almost always required.  Solid seat mounting is a safety issue, the last thing you want to do is try and drill some holes to somehow make it work.   The easiest method I’ve found and have used many times in the past is to just fabricate a base out of 16 gauge sheet steel.  The steel is drilled to match the bolt pattern of the sliders, and then drilled to match the bosses in the seat.  It’s nothing more than an adapter that allows you to place everything where it needs to go.  The 16 gauge is stout, but thin so it doesn’t increase your stock height by any appreciable amount, and if trimmed correctly it won’t even show when done.  

    A-100 Project P9290010

    Next on the list was the intermediate steering box.  The guy who originally started the project fitted an angle adapter made by Boston Gear.  It’s used in industrial machinery and is rated at 1750 rpm with a maximum of 4 hp.  Problem is the torque rating is less than 80 inch pounds.  I have to give him an E for effort, but am I going to trust my life that this thing is up to the task?  No, I’m just not that brave, so out it came and I spent some time adapting the Isuzu box which is far better suited to the job.  I have it mocked-up now, so I’ll take it all apart for the umpteenth time to cut the spacers and ditch the washers.

    A-100 Project Photo-11

    A-100 Project P9290011

    A-100 Project P9290013
    66e100pu
    66e100pu


    Number of posts : 199
    Location : So-Cal
    Registration date : 2011-04-02

    A-100 Project Empty Re: A-100 Project

    Post by 66e100pu Wed Sep 30, 2015 10:08 am

    Also spent a little time on the carburation.  I ordered the 3 Holley 94 bases – the center base is as designed with the idle circuit intact, while the two outer bases are minus the idle circuits.  The two outer carbs have the power valves blocked off.  The engine mainly runs on the center carb and the outers come in at 70% throttle with the progressive linkage and are set-up to run from there to wide open throttle.  The outers retain their accelerator pumps and their primary job is to just dump fuel and air under hard acceleration.

    A-100 Project Photo_10
    66e100pu
    66e100pu


    Number of posts : 199
    Location : So-Cal
    Registration date : 2011-04-02

    A-100 Project Empty Re: A-100 Project

    Post by 66e100pu Wed Oct 14, 2015 7:47 am

    Always nice to take a break and work on some on some of the fun details.  I wanted to do something more with the taillights than 2 flats lenses, but I wanted it to be Dodge in origin, or at least Mopar.  I also wanted them to fit inside the original body recesses, and not involve body alterations in case somebody down the line ever wanted to change them back to the originals.  These ’58 Coronet /Sweptline  units looked like they fit the bill.  The 3 mounting studs fit in the original opening, and I fabbed a backing plate to sandwich them in.  But….I know it’s been done before, but the ’53-’54 Ford Crestline tail lights look awful good too.  Body has to be drilled to mount them, but they do fit the body lines perfectly.  Not sure what direction to head in???

    A-100 Project Pa130010

    A-100 Project Pa130011

    A-100 Project Pa130012

    A-100 Project Pa130013

    A-100 Project Pa130014

    A-100 Project Pa130015

    A-100 Project Pa130016
    benwah
    benwah


    Number of posts : 1135
    Location : the land of broken dreams and shattered hopes CT
    Registration date : 2008-07-05

    A-100 Project Empty Re: A-100 Project

    Post by benwah Thu Oct 15, 2015 9:47 am

    As a Dodge guy., And looking at your options Id say Ford. Somewhere I have some 53 Buick or Cad taillights. You got me thinkin.....
    66e100pu
    66e100pu


    Number of posts : 199
    Location : So-Cal
    Registration date : 2011-04-02

    A-100 Project Empty Re: A-100 Project

    Post by 66e100pu Thu Oct 15, 2015 10:16 am

    benwah wrote:As a Dodge guy., And looking at your options Id say Ford. Somewhere I have some 53 Buick or Cad taillights. You got me thinkin.....

    I leaning in the Ford direction too, but in taking a closer look last night, if I took a 1" section out of the coronet lens so that it protrudes about a 1/4" past he chrome bezel it changes the overall look dramatically.  I think I'll waste an hour with a Dremel cut-off wheel and see what it looks like before I make a final decision on it.
    66e100pu
    66e100pu


    Number of posts : 199
    Location : So-Cal
    Registration date : 2011-04-02

    A-100 Project Empty Re: A-100 Project

    Post by 66e100pu Thu Oct 15, 2015 11:54 am

    I normally end up fabricating a metal panel for the glove box so I can mount a modern radio that’s out of sight, but in the A-100 I’d need a couple of extra feet or arm length to even reach it.  I accidently stumbled on a metal under-dash mount for a ’61-’62 Corvair.  The mounting studs have to be removed, and re-drilled and tapped along the front edge to mount to the dash, but that’s about it.  Looks like it was born there and allows for a more period correct unit to be within reach.  I centered it with the middle bar of the speaker grille, and mounted the front edge flush with the bottom edge of the dash.  After the install I removed it for storage until I’m ready for it, but I forget to get a picture.  I do have pictures of the mount though….

    A-100 Project S-l16010

    A-100 Project S-l16011

    A-100 Project S-l16r11
    vanny
    vanny
    Moderator


    Number of posts : 14775
    Location : Ashburnham, MA
    Age : 65
    Registration date : 2012-09-22

    A-100 Project Empty Re: A-100 Project

    Post by vanny Thu Oct 15, 2015 7:50 pm

    That under-dash mount is a Great Idea! Nice alternative that'll look like it's meant to be there! cheers


    _________________
    “The future will soon be a thing of the past."

    http://public.fotki.com/Vintage-Vans/vintage-vans-es/ruff-diamond-1/?cmd=fs_slideshow
    66e100pu
    66e100pu


    Number of posts : 199
    Location : So-Cal
    Registration date : 2011-04-02

    A-100 Project Empty Re: A-100 Project

    Post by 66e100pu Thu Oct 15, 2015 8:19 pm

    vanny wrote:That under-dash mount is a Great Idea! Nice alternative that'll look like it's meant to be there! cheers

    I wish I had a picture of it installed - it does look like the truck was built that way.  Should work really well with any Ford or Chevy early too.  I looked for months for a metal under dash mount, but all that I found are the abs plastic ones.  For anyone that may want to use this, be careful to look before you buy.  There are 2 different mounts.  One, and the most common has a very large hole on the left side for the GM Delco radio, and the one shown was a dealer item to mount an aftermarket radio with the 2 standand holes.  Either way they are easy to find on ebay.
    benwah
    benwah


    Number of posts : 1135
    Location : the land of broken dreams and shattered hopes CT
    Registration date : 2008-07-05

    A-100 Project Empty Re: A-100 Project

    Post by benwah Fri Oct 16, 2015 10:58 am

    Yah raido in glove box! I thaught of that long ago...Have you ever drove an early cross country? After you do just that you throw the idea out the window! The engine purring along does me fine.... Windows down engine roaring between the seats! Ahhh! 3000 miles shit 1500 miles your hearing impaired! Threw the cb in the back of the bus in Texas, couldn't hear a thing!!! Rolled out from Arizona headed to Ct with my 65 window. Always wanted a killer stereo in a custom van. Just by the time the stereo came to play the build budget was a radio shack 30$ special!
    66e100pu
    66e100pu


    Number of posts : 199
    Location : So-Cal
    Registration date : 2011-04-02

    A-100 Project Empty Re: A-100 Project

    Post by 66e100pu Thu Nov 12, 2015 9:17 am

    It’s time to get back to the heavy lifting.  I’m getting ready to finalize the mounts and fit the drivetrain, but without a lift it looks to be a major PITA.  I’m thinking if I can snake the motor through the R/S door opening and get it dropped to the floor, I can slide the tranny in from underneath and bolt them up.  I’ll raise the body as far as I can go and use the floor jack and cherry picker to wrestle it into position.  The tranny mount is already fabbed, so I can bolt the rear of the assembly in place, leaving only the front half to deal with.  I wish I could lower in the drivetrain as a complete unit, but it looks like the engine alone will be tight going in.  If I had enough ceiling height I would have raised the body high enough to slide it in from the rear, but that’s just not gonna happen.  If anybody has a better idea I’m all ears!

    A-100 Project P7110010

    A-100 Project Presen11

    Sponsored content


    A-100 Project Empty Re: A-100 Project

    Post by Sponsored content


      Current date/time is Fri Apr 26, 2024 2:40 pm