When I began my Scarebird Disc upgrade several weeks ago, I had no idea the can of worms I’d be opening up, and I’m not even half way done! The first hurdle was when I discovered my Kingpins needed to be replaced. That is half way done at this point too. This post is about the discoveries I made with regards to wheel studs. For the record, I’m working with a 2200lbs axle.
After I had driven out the old studs, it did not look like an exact replacement set would have been long enough to accommodate the new rotors and wheels. I know that there have been others that have installed longer Jegs or ARP studs that are 3 to 3.5 inches in length. I did not want to go through the trouble of cutting hardened steel studs to make them work for me. So, I proceeded to research and even purchase studs to test. I had to break down and purchase digital dial calipers to take some measurements. Not a bad investment and it really helped.
For starters, my driver side hubs had already been converted to right hand threads by the previous owner. The studs I drove out were Dorman 610-039 with a .625 Knurl. These are the ones I felt would be too short after the upgrade.
I have four pictures to share and I’ll explain them now.
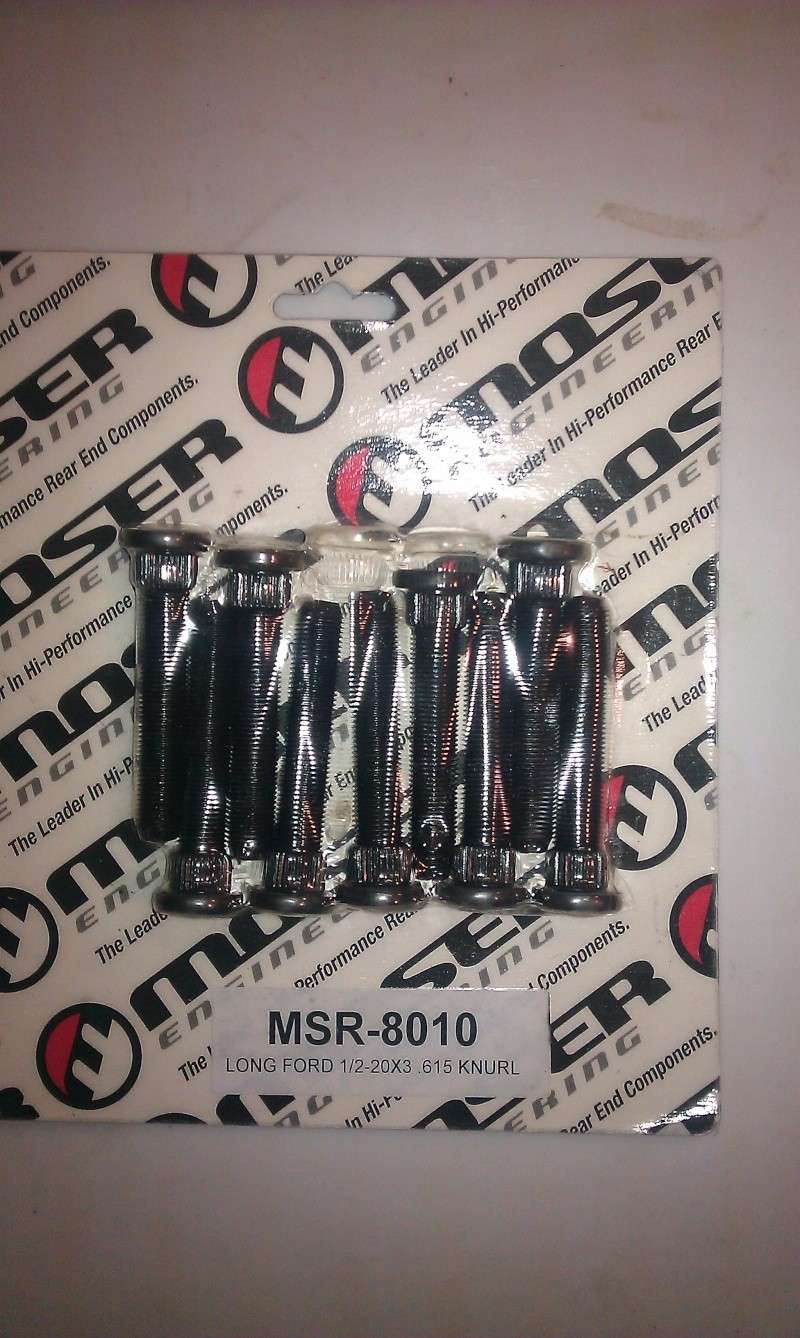
Photo 1: These are Moser 8010 Wheel Studs and they’re 3 inches long. Summit Racing’s description said the knurl was .625, the package says .615. I measured and they averaged about .620. In spite of the length that was too long, the knurl was too loose and I could almost just push the studs into the hub holes.

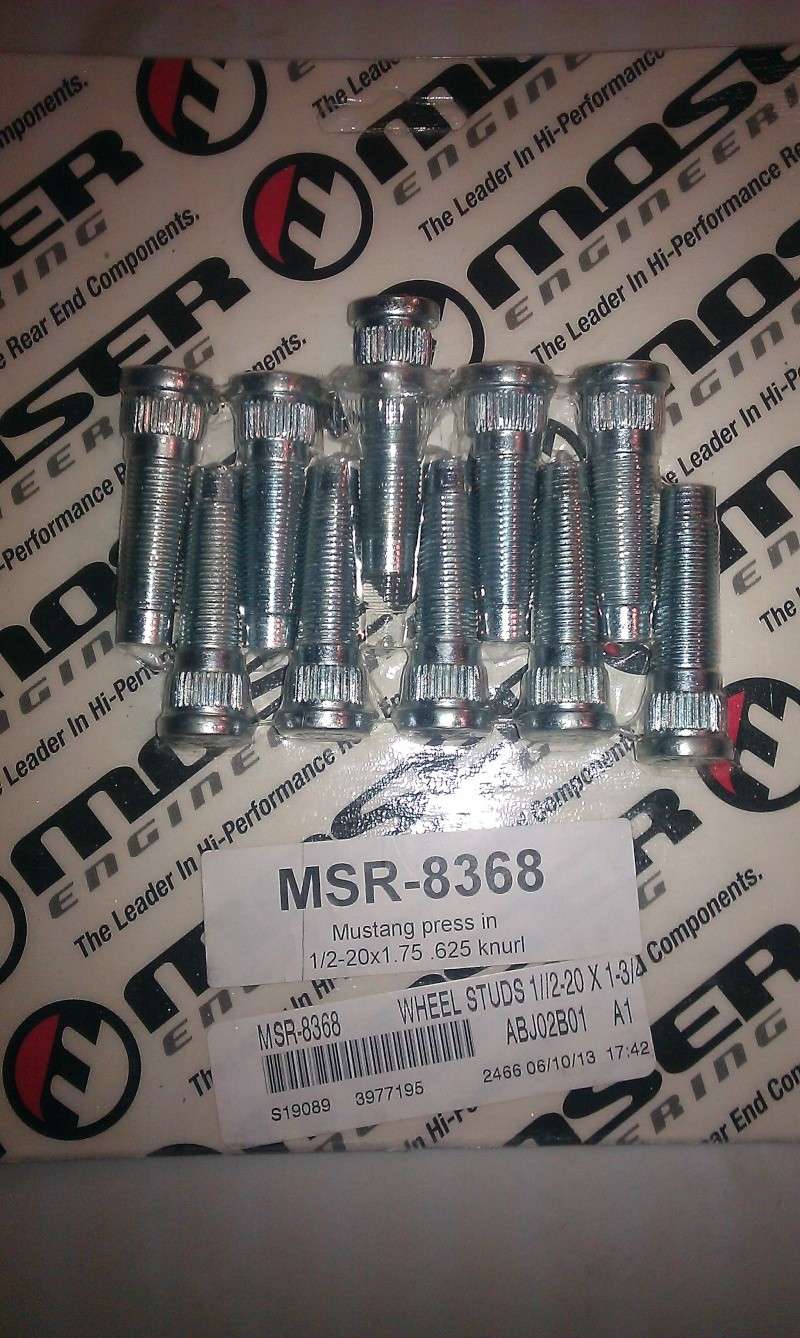
Photo 2: These are Moser 8368 and they’re 1.75 inches long with a .625 knurl. These are the studs I ended up using and they were a perfect fit. I was able to press them in with my arbor press. The hub from the driver side was upgraded to RH threads by the PO, and I think this may have widened the stud holes because the new studs did not require as much effort to install as the passenger side, but they were still a tight fit. I applied Loctite 640 Sleeve Retainer to all the knurls on the 10 new studs before pressing in. Loctite 640 will give up to .007 max gap fill, so I’m confident my studs will be very secure.

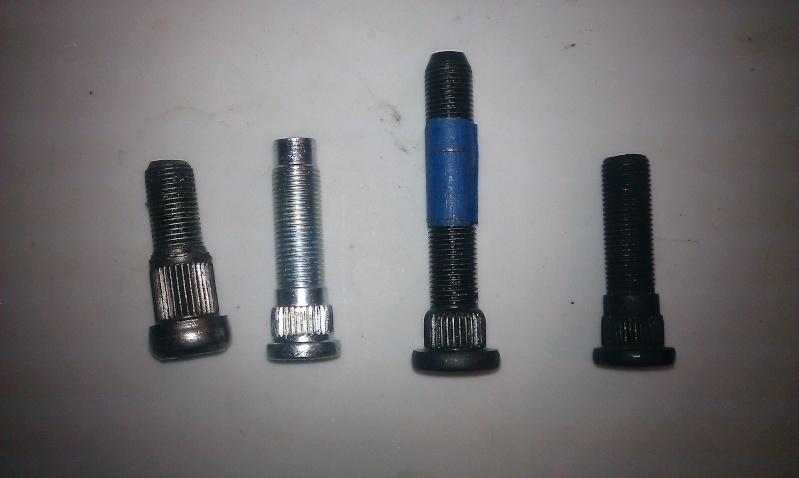
Photo 3: This is a side by side view of the studs. The far left is one of the removed original studs, Dorman 610-039. Second from left is Moser 8368 that I used for my hubs. Third from left is the Moser 8010 that I first bought. The edge of the blue tape closest to stud head is where the stud protruded after I mocked it up through the hub, rotor, and new wheel. It might be hard to see, but if I had used the Dorman 610-039, I would have had about 3/8” of stud sticking through the wheel for me to screw my lug nut on to. I did not feel comfortable with this. The last stud on the far right is a Dorman 610-449 that I purchased for testing. Its application is for a Jeep Wrangler and is almost 2 inches in length and claims to have a .627 Knurl. I measured and it was barely a .615 knurl. I could push these into my hubs with my finger, so these were a no-go.

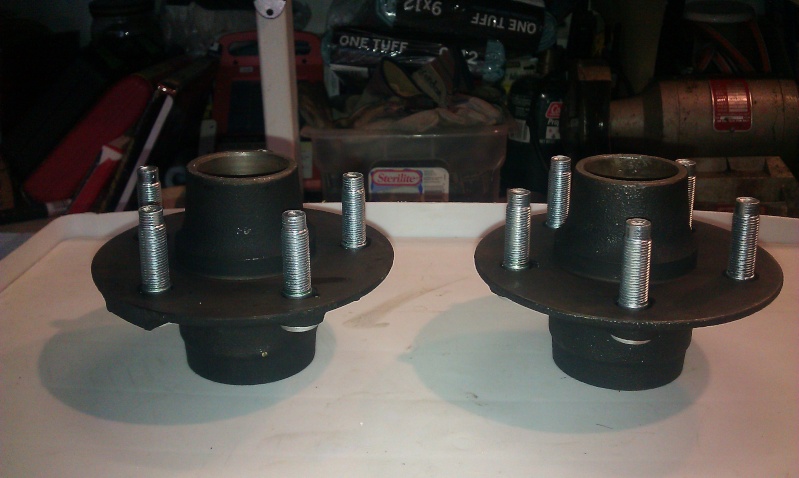
Photo 4: These are my hubs with the newly installed, Moser 8368 studs. I’m very pleased with the results. What I really like is that I don’t have to cut them down to size, and, since the knurls do not protrude past the hub flange (like the dorman 610-039), I don’t have to counter sink the holes on my rotors.

Sorry for such a long post. I hope that this will help others in the future. Please feel free to add any comments or info that I may have missed.
On Edit: I see that my photos were cropped to fit the post so photo #3 does not show all the test studs, but you'll get the idea. thanks
After I had driven out the old studs, it did not look like an exact replacement set would have been long enough to accommodate the new rotors and wheels. I know that there have been others that have installed longer Jegs or ARP studs that are 3 to 3.5 inches in length. I did not want to go through the trouble of cutting hardened steel studs to make them work for me. So, I proceeded to research and even purchase studs to test. I had to break down and purchase digital dial calipers to take some measurements. Not a bad investment and it really helped.
For starters, my driver side hubs had already been converted to right hand threads by the previous owner. The studs I drove out were Dorman 610-039 with a .625 Knurl. These are the ones I felt would be too short after the upgrade.
I have four pictures to share and I’ll explain them now.
Photo 1: These are Moser 8010 Wheel Studs and they’re 3 inches long. Summit Racing’s description said the knurl was .625, the package says .615. I measured and they averaged about .620. In spite of the length that was too long, the knurl was too loose and I could almost just push the studs into the hub holes.

Photo 2: These are Moser 8368 and they’re 1.75 inches long with a .625 knurl. These are the studs I ended up using and they were a perfect fit. I was able to press them in with my arbor press. The hub from the driver side was upgraded to RH threads by the PO, and I think this may have widened the stud holes because the new studs did not require as much effort to install as the passenger side, but they were still a tight fit. I applied Loctite 640 Sleeve Retainer to all the knurls on the 10 new studs before pressing in. Loctite 640 will give up to .007 max gap fill, so I’m confident my studs will be very secure.

Photo 3: This is a side by side view of the studs. The far left is one of the removed original studs, Dorman 610-039. Second from left is Moser 8368 that I used for my hubs. Third from left is the Moser 8010 that I first bought. The edge of the blue tape closest to stud head is where the stud protruded after I mocked it up through the hub, rotor, and new wheel. It might be hard to see, but if I had used the Dorman 610-039, I would have had about 3/8” of stud sticking through the wheel for me to screw my lug nut on to. I did not feel comfortable with this. The last stud on the far right is a Dorman 610-449 that I purchased for testing. Its application is for a Jeep Wrangler and is almost 2 inches in length and claims to have a .627 Knurl. I measured and it was barely a .615 knurl. I could push these into my hubs with my finger, so these were a no-go.

Photo 4: These are my hubs with the newly installed, Moser 8368 studs. I’m very pleased with the results. What I really like is that I don’t have to cut them down to size, and, since the knurls do not protrude past the hub flange (like the dorman 610-039), I don’t have to counter sink the holes on my rotors.

Sorry for such a long post. I hope that this will help others in the future. Please feel free to add any comments or info that I may have missed.
On Edit: I see that my photos were cropped to fit the post so photo #3 does not show all the test studs, but you'll get the idea. thanks


