VintAGE-Vans

Would you like to react to this message? Create an account in a few clicks or log in to continue.

BRINGING IT ALL TOGETHER.... A's, G's & E's


+49
sundanceuk
jimthefred
66mnecotruck
vanny
RipVanArkie
BlueSteel
Scotts_A100
RodStRace
campin'fool 2
jkr
Gothboy
dodge man
1040imp
transam400
Vanner63
dan nachel
sidspop
Vanadian
kykayaker37
white-lightning
Rayallen
southern man
whopman
Scott
VanninBlaino
Stoopid john
Zuffen
bumpbug
DanTheVanMan
Big W
Nightmoves
kgdb
wylee
EconoUSAparts
sasktrini
Vantastic
toad
Oldsmobubble
Twinpilot001
SDEconoTruck
econopoor
bugeye bob
Sy Hollinshead
dix
austinmodhouse
67a 100 pickup
G-Man
Van Halen
kevbarlas
53 posters

    1959 Ford Thames camper van restoration

    avatar
    kevbarlas


    Number of posts : 60
    Location : Edinburgh, Scotland
    Registration date : 2010-12-09

    1959 Ford Thames camper van restoration  - Page 9 Empty Re: 1959 Ford Thames camper van restoration

    Post by kevbarlas Sat Feb 22, 2014 4:12 pm

    February update

    This month I have been mostly focusing on getting the engine and its ancillaries in place. All the little adjustments I need to do to get it to fit. As I mentioned in my previous post the main culprits were the oil sump and the throttle body position. Before I started on them though I finished off the gearbox mount/cross brace.

    Im quite happy with how this turned out, I done it pretty much free-hand, not really following a plan. I added 2 curved pieces of box to what I had done in the previous update then put in a couple more box for strength.

    1959 Ford Thames camper van restoration  - Page 9 2em1wmc

    Once I box the chassis rails I will be adding gussets to make it a bit stronger, should do the trick though.

    1959 Ford Thames camper van restoration  - Page 9 4ucoja


    I was still juggling in my head with what to do to the air manifold. In my last update I mentioned about making an extension piece. That opened up a bit of discussion with others about how it would effect the engine. The main thing I would have felt was a very slight delay in response, which logically it would but I don't think it would have been so noticeable, probably more so if I was building a race car or track car. Anyway, in the end, after some more measuring and laying out of the seat plan I found out that even the extension coming out of the side would still interfere with some bits so that hit a brick wall.

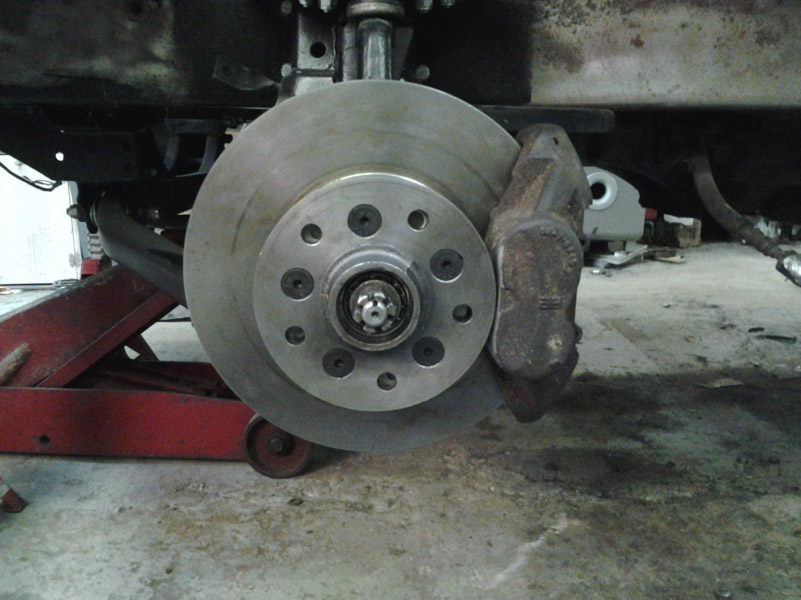
    As I was thinking of how to overcome the problem I made a start on the sump. The steering centre link was interfering with the front of the sump so I removed the sump then measured how far back the centre link came and found I needed to take 44mm off the front of the sump. It was also pretty close to the top of the sump flange so I had to bring the cut out off the sump right to the top.

    Here is how it looked when I took it off the van.

    1959 Ford Thames camper van restoration  - Page 9 O0e612
    (some of the more astute of you will notice I have actually already cut it Wink )

    I marked a line across, 44mm from the centre of the front bolt hole and cut it with the grinded then used a piece of thin card to make a template for the new metal.

    1959 Ford Thames camper van restoration  - Page 9 2yzd8no

    I put the sump in the caustic tank at work to help remove the remaining oil and give it a bit of a clean. Then I removed the paint from around the edge of where I will be welding and neatend the cut up. I cut out my templated piece of steel and tacked it into position.

    1959 Ford Thames camper van restoration  - Page 9 Jg2xht

    I also tacked the sump to the work table to try and minimise distortion.

    1959 Ford Thames camper van restoration  - Page 9 Ao7xog

    Then I got around to welding it. I used my Tig for this one. The benefits were good penetration meaning it would be sealed and a bit of a neater weld to tidy up. Also because I haven't used the Tig in a while and thought it would be fun.

    1959 Ford Thames camper van restoration  - Page 9 10xf4f4

    Gave it a nice bit of a tidy with the flap disc in the grinder and it turned out quite nice.

    1959 Ford Thames camper van restoration  - Page 9 2mm751t

    I also filled it up with water and left it over night to see if anything would leak out and by jove, it all remained in the sump with no leaks, good stuff.

    1959 Ford Thames camper van restoration  - Page 9 2bxqfm

    I temporarily put it bank in place.

    1959 Ford Thames camper van restoration  - Page 9 Dw6sfd

    1959 Ford Thames camper van restoration  - Page 9 2mxenfa

    And attached the centre link, right now at the minimum it has given me 15mm clearance above and 30mm clearance behind, should do the trick.

    1959 Ford Thames camper van restoration  - Page 9 2co4sbk

    1959 Ford Thames camper van restoration  - Page 9 1zeczlf

    1959 Ford Thames camper van restoration  - Page 9 2uhpf9f


    Ok, so, the next hurdle that I had to overcome was the air manifold. As I said already, the extension piece was a no starter. The only real alternative was to block the old throttle body flange and make a new one on the top. I done a fair bit of research and looked up how to weld aluminium as I haven't actually done that before. Unfortunately my Tig is DC only which means I would have to use my Mig for it.
    I came up with a plan of making a new flange out of aluminium, welding that to the top of the manifold. Drill a new hole through it then use one of my 90 degree stainless bends with 2 flanges cut from stainless and attach the whole thing together. Oh, and a blanking plate for the old hole.

    First up was to remove the manifold from the engine, easy enough job to do.

    1959 Ford Thames camper van restoration  - Page 9 Aenuib


    Then I needed a piece of aluminium. I was about to go to a few local fabricators and scrounge a piece when I remembered that my garage used to be a fabricators shop years ago and I was sure I saw some plate in the attic. Luckily I found it again and cut a piece out of 10mm thick aluminium, lucky or what eh!.

    1959 Ford Thames camper van restoration  - Page 9 33oph5d

    I may get heckled at this point for my lack of real engineering style but I don't have access to a milling machine and I don't want to pay some one else to do this process so I improvised. I needed to smooth down the groves in the manifold so I get a better seat of the plate. I scribed the edges then used a flap disc to remove the most of the material and then a file to get it flatter. Turned out not too bad, wasnted perfectly flat but it allowed a closer contact for the welding.

    1959 Ford Thames camper van restoration  - Page 9 19nu3l

    I then neatend up the plate I was using and cut it to suit. I drilled 4 small holes that I would use to clamp it down whilst welding. I drilled 4 holes in the manifold then tapped them to bolt it on.

    1959 Ford Thames camper van restoration  - Page 9 1193qyg

    Right, bit of a lecture coming up now. I checked out a few books and websites about Mig welding aluminium and I found it quite tricky to set up so I will share my findings here. I was told id need Aluminium welding wire, which I got from machine mart (0.8mm) . As the wire expands much more than steel wire I would need a tip the next size up (1mm) so I got some of those. I was also told id NEED a Teflon liner, which I made me think "psssh, nah I don't need that". Also, you need pure argon or an argon/helium mix, as I use a Tig aswell I already had some pureshield Argon. The length of the liner can also play an important part of the process. As aluminium is much softer it tends to snag on tight bends so you want it to be as short and as straight as possible. I didn't want to shorten my lead for a small job so I got a piece of 25mm Angle and cable tied it to the torch and lead, like so:

    1959 Ford Thames camper van restoration  - Page 9 2cmuqeh

    Then I made my first attempt at it on a scrap piece of aluminium. First go it melted the tip straight away. Next go it done the same, its so different from welding steel. I swear I went through atleast 15 tips trying a whole range of amps, wire speed combos. I just could nto get it right and ofcourse everytime it jammed it would "bird-nest" the wire and id have to pull it all through again. I was getting so frustrated with it. Then I thought, "maybe a Teflon liner would help out" so I went back along to machine mart, got a liner and some more tips. I put the new liner in and wow, what a fool I felt. It made all the difference and I could now get a proper weld going. So, after messing about again with amp and wire speed I felt comfortable enough to make a go of the manifold.

    I followed another bit of advice of pre-heating the manifold to help the welding process.

    1959 Ford Thames camper van restoration  - Page 9 261exdv

    If I could give some basic advice with the welding I would say to definitely get a Teflon liner, try to keep the cable as straight as possible and I found myself welding with the torch much further away from the weld than normal and moving it a lot faster. I was lucky that what I was welding was reasonably thick so I never got any blow-through but I think it would be very easy to do with thinner metal.

    I was so engrossed with the welding I never took any photos of the process, but here it is after I tidied it up a little.
    The manifold attaches to 4, dual port flanges with 3 bolts on each flange. I knew the manifold would distort slightly with that much heat going through it. The reason for the paper being in there was I wanted to bolt the manifold on with 4 bolts tight down and I thought if it traps the paper tight enough then it should seal back up nicely when I come to re-attach it. The pieces of paper wouldn't budge so that was good.

    1959 Ford Thames camper van restoration  - Page 9 2j1tmiv

    I had to drill a 3 inch hole in the top of the new flange so I went and bought a 76mm hole saw from tool-station and done that, to help take a bit of stress off the hole saw I also drilled small holes around. Then I drilled out the 4 holes and threaded them out to M8. That way not only is the weld holding the flange on but so will the bolts. When cutting through I noticed I but out a section of a piece of pipe that im assuming has something to do with the EGR system so I put another little blob of weld back on to seal it.

    1959 Ford Thames camper van restoration  - Page 9 Z6fk4

    Using some 6mm stainless sheet I cut out 3 flanges, one for the new hole I just added on top, one to attach the throttle body and one to act as a blanking plate. I put the bend in the hole which recesses down about 10 mm, should give a better seal . Here is the blanking plate I cut out.

    1959 Ford Thames camper van restoration  - Page 9 R0tfo7

    Then I tacked on the 2 other flanges.

    1959 Ford Thames camper van restoration  - Page 9 2m7673k

    I haven't Tig'd stainless in a very long time but I was getting the hang of it again. Once finished welding I put it in place to see how it looked.

    1959 Ford Thames camper van restoration  - Page 9 W2keiu

    1959 Ford Thames camper van restoration  - Page 9 Mipfk4

    1959 Ford Thames camper van restoration  - Page 9 Abjc75

    1959 Ford Thames camper van restoration  - Page 9 5aoyhh

    1959 Ford Thames camper van restoration  - Page 9 2125p28

    Not the neatest welding but I can live with it,

    1959 Ford Thames camper van restoration  - Page 9 Jucw01

    That's pretty much it for now. It still needs a little tidying up but its a big thing done. Im hoping I can get away with out having to get anything milled down. What I shall be doing is making up some crappy blanking plates for the whole manifold to seal everything I have done so far then fit a valve and do a pressure test to make sure none of my welds are leaking or that there is any distortion that will effect things later. If there is then I will need to take it somewhere to mill the faces, fingers crossed.

    The garage is turning into a bit of a pig-sty so I am doing my early spring clean. I spent today pretty much making a floor in the attic where I can hide some my crap and clear some space. Next month, mmmhmm, not sure what to start on next. I think I will attempt the seating area, get that back in , I think I need to raise it a couple o f inches and make a new frame to support it all.

    Oh, almost forgot, i did have a little fun project to do. My desk chair at home was looking abit tatty and i was going to buy a new one when i thought i could maek an evern better and comfier one than store bought.

    I got an old desk chair and removed the seat which left me with the base.

    1959 Ford Thames camper van restoration  - Page 9 Igbx3a

    Then i got my passanger seat from the old lexus.

    1959 Ford Thames camper van restoration  - Page 9 2zhl7a8

    Made a qucik little frame to go underneath it and join them both together.

    1959 Ford Thames camper van restoration  - Page 9 10xfwjt

    And voila, a new xomputer desk chair. First thing my darling wife said "it doesnt match anything else in the house...." Ohwell, i think it looks good so its staying.

    1959 Ford Thames camper van restoration  - Page 9 24mex7c
    vanny
    vanny
    Moderator


    Number of posts : 14775
    Location : Ashburnham, MA
    Age : 65
    Registration date : 2012-09-22

    1959 Ford Thames camper van restoration  - Page 9 Empty Re: 1959 Ford Thames camper van restoration

    Post by vanny Sat Feb 22, 2014 4:44 pm

    Kev, your updates never disappoint! Keep up the Superb work! That computer chair is just Awesome and looks mighty comfy also! Thanks again for the updates!!!


    _________________
    “The future will soon be a thing of the past."

    http://public.fotki.com/Vintage-Vans/vintage-vans-es/ruff-diamond-1/?cmd=fs_slideshow
    avatar
    kevbarlas


    Number of posts : 60
    Location : Edinburgh, Scotland
    Registration date : 2010-12-09

    1959 Ford Thames camper van restoration  - Page 9 Empty Re: 1959 Ford Thames camper van restoration

    Post by kevbarlas Sun Mar 30, 2014 1:30 pm

    March update

    I haven't really done quite as much as I'd hoped to on the van but I was giving a great opportunity to make some cash so I jumped at it. My wife's old boss just bought a new car because her old one was coming to its end of life and was worthless, as she said anyway. Its a 2003 Toyota Avensis D4D with 110,000 miles. The main reason she bought the new car was because this one would slip out of 5th gear all the time and she didn't think it was worth getting fixed.
    She actually gave me the car for free!, she didn't think it was worth her while trying to sell on. I stuck it on my mates drive whilst I worked out what was needed to get it fixed. 5th gear is a very common fault on these toyotas. I found a tutorial on what to do to fix it on a Rav4 forum and ordered the parts, 6 in total. I contacted Toyota UK and they were wanting something silly like £650 for the parts but I found a great website called anayama.com that import genuine Japanese parts worldwide at a much lower cost, £280 for me including delivery and customs tax.
    Anyway, I took the car to the garage , repaired the broken gearbox and gave it a dam good clean inside and out. It made me realise why my dad never let me eat in the car when I was younger. There was rotten bits of orange under the seats and sweetie wrappers everywhere. I think I wont be letting my future kids eat in my car either. After about 20 hours of hard work I had it finished and sparkling.

    1959 Ford Thames camper van restoration  - Page 9 2yvrj10

    1959 Ford Thames camper van restoration  - Page 9 169kuaa

    When it came to selling it on I wanted to get a fair price but not be stuck with the car for weeks so I went a little lower than the book price and put it up for £1495. Literally 5 minutes after the Ad went on I had a guy contact me wanting to look at it straight away. So I headed back up to the garage, showed the guy around, quick test drive and he bought. Knocked £95 off for him which left me with a cool £1400. Nice one! This means I have a pretty penny in the bank to splash out on the van when the time comes for all the bits I will be needing.

    Back to the van. I did manage to get a few things done in between sorting out the Avensis and day to day life.
    I needed to decide what my new seat height would be, after a bit of measuring I decided 8cm would give me enough clearance and still be driveable. I mocked up the seat height with a few bits of wood so I could physically sit in the right position.

    1959 Ford Thames camper van restoration  - Page 9 2e1rq0z

    I needed to have a good, strong support for the seat rail but it also had to be removable for when it came to removing the engine whenever I need to. I used 50mm box for the uprights and 50x5 angle for the top.

    1959 Ford Thames camper van restoration  - Page 9 2jalo2t

    I missed a few steps but basically I used a piece of angle I had pre-drilled as a template for marking my holes and 4 bits of angle to bolt the top piece onto.

    1959 Ford Thames camper van restoration  - Page 9 I40gsi

    After that I countersunk the holes on the top angle and welded nuts onto the uprights. Once I had both sides done I welded a plate to the chassis and tacked them on top.

    1959 Ford Thames camper van restoration  - Page 9 28kohfb

    I then started to workout how I would box it all in at the back. I took the spot welds off the top cover and removed the back piece.

    1959 Ford Thames camper van restoration  - Page 9 Jzuus8

    I spent a little bit of time trying to figure out how to do it. I want the back to be separate form the top and it will hold into place with 4 bolts.

    1959 Ford Thames camper van restoration  - Page 9 Imnwgm

    I made a simple panel to fill in the gap that I don't need to be removable, its also wide enough to get a fixing on for the centre section.

    1959 Ford Thames camper van restoration  - Page 9 2d0mo1c

    I marked out how I wanted to cut up the rear panel.

    1959 Ford Thames camper van restoration  - Page 9 2a8nbe9

    Once I cut out what I was keeping I laid it in place and put the top bit back on to get a feel for it.

    1959 Ford Thames camper van restoration  - Page 9 2uh4paf

    I then decided I'd need to strengthen the other parts of the seat area to stop it flexing. (the area where my hand is.)

    1959 Ford Thames camper van restoration  - Page 9 2mpgz8p

    I made up a simple bracket.

    1959 Ford Thames camper van restoration  - Page 9 23w8ehf

    Tacked into place underneath.

    1959 Ford Thames camper van restoration  - Page 9 F2qwk0

    That stopped all the buckling from happening.

    1959 Ford Thames camper van restoration  - Page 9 14j2uds

    Back to the top cover. I folded a lip on a piece of sheet I had cut and plug welded it back into place.

    1959 Ford Thames camper van restoration  - Page 9 B5ftsn

    1959 Ford Thames camper van restoration  - Page 9 B5ftsn

    Now onto the sides. I don't want a really harsh sharp angle so I made up a forming stake.

    1959 Ford Thames camper van restoration  - Page 9 V457va

    Which allowed me to tap a very slight curve into my side panel I had cut.

    1959 Ford Thames camper van restoration  - Page 9 T7lqig

    I also tapped the upper panel and tacked them both together.

    1959 Ford Thames camper van restoration  - Page 9 34dhemx

    1959 Ford Thames camper van restoration  - Page 9 97oaw8

    The front of the panel also had the same treatment.

    1959 Ford Thames camper van restoration  - Page 9 Afehhv

    tacked in.

    1959 Ford Thames camper van restoration  - Page 9 2vbx9ug

    1959 Ford Thames camper van restoration  - Page 9 34g6cf7

    I managed to set up the drivers side with door to see how it felt from the drivers side.

    1959 Ford Thames camper van restoration  - Page 9 Fvihkg

    Got my arm lean spot on!.

    1959 Ford Thames camper van restoration  - Page 9 Zix56u


    So, im getting there. I don't have anything else on my plate for the next few weeks so lets see how I get on next month. Oh, also , you may have noticed the throttle body is now facing the front. I think this will actually be better. As the area around the radiator is going to be 8cm taller it will be a great place to have the air intake coming through to get fresh air. It just means a little bit of modification to the "bonnet". The radiator is away getting re-cored as we speak aswell.
    vanny
    vanny
    Moderator


    Number of posts : 14775
    Location : Ashburnham, MA
    Age : 65
    Registration date : 2012-09-22

    1959 Ford Thames camper van restoration  - Page 9 Empty Re: 1959 Ford Thames camper van restoration

    Post by vanny Sun Mar 30, 2014 4:47 pm

    You are Truly Talented Kev! I've been following this thread since the beginning and you always keep me coming back for more...Fantastic progress once again. That van has got to wondering what it did that made it so lucky to have you bring it back to life and then some!!! cheers 


    _________________
    “The future will soon be a thing of the past."

    http://public.fotki.com/Vintage-Vans/vintage-vans-es/ruff-diamond-1/?cmd=fs_slideshow
    Zuffen
    Zuffen


    Number of posts : 165
    Location : Sydney Australia
    Registration date : 2011-07-28

    1959 Ford Thames camper van restoration  - Page 9 Empty Re: 1959 Ford Thames camper van restoration

    Post by Zuffen Sun Mar 30, 2014 7:54 pm

    Before you button the engine cover up remember to change the spark plugs as once it's all done it will a major task.

    The t/b facing forward makes a lot of sense.
    66mnecotruck
    66mnecotruck


    Number of posts : 327
    Location : Minneapolis
    Registration date : 2014-02-15

    1959 Ford Thames camper van restoration  - Page 9 Empty Re: 1959 Ford Thames camper van restoration

    Post by 66mnecotruck Sun Mar 30, 2014 8:18 pm

    Wow! I love the precision. Your hired.
    avatar
    kevbarlas


    Number of posts : 60
    Location : Edinburgh, Scotland
    Registration date : 2010-12-09

    1959 Ford Thames camper van restoration  - Page 9 Empty Re: 1959 Ford Thames camper van restoration

    Post by kevbarlas Thu May 01, 2014 2:49 pm

    Thanks for the comments guys, Zuffen, it will still be easy to remove the cover, its only about 16 bolts to remove and its off.


    April update-


    This month I've been busy getting the seat and 'bonnet' area sorted. I carried on fabricating the raised extension.

    I added a bit more to the flange that will bolt down to the body.

    1959 Ford Thames camper van restoration  - Page 9 Fleo43

    Then done the exact same for the drivers side.
    1959 Ford Thames camper van restoration  - Page 9 23vhisl

    With the main removable section tacked up I moved on to the radiator tunnel, I needed to raise that 85mm aswell to match the rest of the body. I marked out with my pencil where to cut.

    1959 Ford Thames camper van restoration  - Page 9 9jn0g7

    And used the grinder to cut the top off. I done a few measurements and cut out the extension piece to raise it. Then bent it around a piece of round bar I had lying around. I had to do it in 2 pieces to save metal.

    1959 Ford Thames camper van restoration  - Page 9 21ori11

    Then I tacked that to the body.

    1959 Ford Thames camper van restoration  - Page 9 K2e1z4

    I put the remaining pieces in place to mock up the final look

    1959 Ford Thames camper van restoration  - Page 9 2a7hkk0

    1959 Ford Thames camper van restoration  - Page 9 2j1x8va

    Next up was to work out a way to get the opposite side of the seat rail raised up to allow the seats to bolt in place. I found a piece of 100mm x 50mm box section which I could use.

    1959 Ford Thames camper van restoration  - Page 9 30dcr9j

    Unfortunately it was 15mm too tall so I had to cut it down its length and tack it back together.

    1959 Ford Thames camper van restoration  - Page 9 T68ide

    I wanted it to have a bit of shape to it so I cut a piece of tubing in half and tacked that to the end.

    1959 Ford Thames camper van restoration  - Page 9 2arnr6

    Then I plated the top of the half tubing and rounded it off to match the profile of the box. Perfect height for the seat now.

    1959 Ford Thames camper van restoration  - Page 9 10dgsud

    I was really happy with how it was looking so I decided to weld it all up. I used the Tig to minimise dressing and distortion on the removable section.

    1959 Ford Thames camper van restoration  - Page 9 54egzd

    Then I mig'd the radiator tunnel as there was a few larger gaps to fill.

    1959 Ford Thames camper van restoration  - Page 9 359lfyd

    And cleaned it all back up. I also marked out where I wanted the bolts to go that will hold it in place.

    1959 Ford Thames camper van restoration  - Page 9 R90ft5

    I was going to use Dzus fasteners but after realising they were about £4.50 each and I needed about 20 I passed on that and used some nice Stainless domed socket cap nuts and bolts. The nuts will be welded in place so I will only need an Allen key to remove the large section. Oh, also the seat belt latch is the old one and isn't the one being used, I just never got round to removing it yet.

    1959 Ford Thames camper van restoration  - Page 9 K4b5vl

    Then I attached the seat rails.

    1959 Ford Thames camper van restoration  - Page 9 2ywczlw

    And put the seat in place, all done for this side.

    1959 Ford Thames camper van restoration  - Page 9 2dv1isp

    I made up a seat rail bracket for the other side and done the bolts aswell. This seat looks like it has seen better days.

    1959 Ford Thames camper van restoration  - Page 9 289dbhk

    A view from the rear.

    1959 Ford Thames camper van restoration  - Page 9 2dsgsnd

    I was so happy I decided to christen the van and have my first picnic in it. McDonald's, yum!

    1959 Ford Thames camper van restoration  - Page 9 Xo49qf

    Now, if you remember the last time I wrote I had just sold a car and had a bit of extra cash for parts. I got on with ordering a bunch of stuff for the van. I bought a full re-bush kit for the front suspension and steering, along with 2 brand new shock absorbers. I also had to buy new hubs and stub axles but I will explain why in a moment.

    1959 Ford Thames camper van restoration  - Page 9 2hgrdoo

    I also got the radiator re-cored. The guy done a fantastic job and it was a semi-reasonable £168. ( I say semi-reasonable because I was quoted £130 at first)

    1959 Ford Thames camper van restoration  - Page 9 2i88vh0

    Now for the best thing I bought. I wanted a decent set of brakes upfront and ( boring history lesson coming up now) the easiest thing I could have done was get a set of solid discs with hubs and 2 pot callipers from a mk2/3 Zephyr or Zodiac as they would be a direct swap for the van hubs. I don't have any real knowledge of how powerful this set up is but I thought it would be cool to have something bigger and better. I have been emailing the owner of the 400e Thames club (Sandy Glen) and his knowledge of these vans is so vast its mind numbing. He suggested fitting mk2/3 transit solid discs and 2 pot callipers as he had done so before and according to him its a 30% improvement over the Zephyr or Zodiac brakes.

    I liked the idea of this and he sent me a few photos of how its done and an email with tips and advice about how to do it. I was quite set on this but I still wanted to try something a little different, so I can say I had my part on how the brakes were done. I found out that the long wheel base Transits came with 4 pot callipers and vented discs. Yep, this is what I wanted. Not only would it be and even bigger improvement over the 2 pots but they look pretty cool to boot. I found a polish website that breaks Transits and found a pair of 4 pot calliper for £105 including P&P, so I bought them. Then on another website I bought discs, pads and 2 calliper refurbishment seal kits.

    1959 Ford Thames camper van restoration  - Page 9 2ai07mh

    They look awesome eh.

    1959 Ford Thames camper van restoration  - Page 9 Flwuhi

    Now that I had the brakes I was trying to mock up how they would fit inside the wheels. When I came across a problem that took me forever to figure out.

    Sandy told me they should fit inside the standard Thames wheels as the transit also used 15 inch wheels but when I tried it seemed really tight, too tight infact. I spent about a week thinking the best way to overcome my problem.

    Actually, I better tell you what needs modified to make these brakes fit first then explain my woe. What you do is use the standard Thames hub. Knock off the old brake drum and then get the rear of the hub machined flat for the disc to sit flat on the back of the hub. The brake discs themselves are attached by 5 counter sunk bolts so you then need to drill 5 holes into The Thames hub at 5x100 PCD, the disc centre also needs enlarged slightly to sit on the back of the hub. Then the original wheel studs need knocked out and countersunk to fit countersunk wheel studs. This is one of the picture Sandy sent me to make it sound a bit clearer.

    1959 Ford Thames camper van restoration  - Page 9 1678d91

    Back to my problem, the only solution I could come up with was to use a spacer to push the wheel away from the calliper. I worked out I needed atleast a 25mm spacer to make it work. I used 5 M10 bolts to work out my spacer size.

    1959 Ford Thames camper van restoration  - Page 9 2va1rpz

    I was quite against that idea as it would put a lot of strain on the outer wheel bearing. I know I could just change the steel wheels but I want it to look as standard as possible (with the exception of being banded) from the outside.

    My brain started whirring into action and I realised something, That's it, the wheels! The wheels are wrong! That's why there not fitting! You know when something is staring you right in the face you don't see it anymore
    , well That's what happened to me. I got to the garage as soon as I could and checked the wheels out. 14 inch rims, yep, at some point over time someone changed the rims to 14 inch.

    1959 Ford Thames camper van restoration  - Page 9 1z2zktl

    These wheels were only ever fitted to mk4 Zephyr/Zodiac over about 2 years so it was abit strange but Sandy gave me a good reason for it. It was quite popular to do that as 14inch commercial tyres were a lot cheaper than 15 inch ones.

    Lucky for me there's a guy close to me who is also restoring a Thames and had a spare 15 Inch rim for me to borrow to double check

    1959 Ford Thames camper van restoration  - Page 9 5upanq

    I placed the disc and calliper in and it fitted a lot better. I think I may still need a spacer, but only about 5mm or so. This is because the 4 pot callipers are slightly podgier then the 2 pots.

    1959 Ford Thames camper van restoration  - Page 9 29w4ob9


    The reason I had to buy different hubs though was because I noticed mine were a lot thinner than the ones Sandy had shown me on his. If I were to do the same modifications then the part of the hub that gets machined down to accept the disc would only be down to about 6mm in thickness, not as strong as id hope for. I emailed Sandy about this and he told me about the 3 different generation of hubs that relate to the Thames (another history lesson coming up, copy/paste form the email Sandy sent me) :-

    "when the 400E was introduced in November 1957, the inside diameter of the inner or back) front wheel bearing was 1.0625 inches. This very soon proved to be a weakness, and from July 1958 a new stub axle was introduced using 1.125 inch inside diameter bearing. Ford also requested their dealers to upgrade all the earlier vehicles to the new parts, free of charge. Replacement parts to the first specification were also discontinued by Ford. A later service bulletin that Ford issued, is very insistent on this being done, sounding a bit panicky. This is before the formal recall system now in place. This too, proved to be not quite man enough, but not a major issue, and in March 1960 another new stub axle was introduced, with the inside diameter of the inner bearing now 1.25 inches. There was no campaign to replace the 1.125 inch bearings."

    My old hubs are on the left and the newer ones on the right, notice the thickness differences.

    1959 Ford Thames camper van restoration  - Page 9 2nlg6qd

    1959 Ford Thames camper van restoration  - Page 9 8vysf5

    Quite a lot of machine work I'm going to need done. Wish I had a lathe and 3 years spare to learn how to use one properly but I guess this is one of the things I will need to get someone else to do.

    Another thing that needs modified will be the shock absorber mounts. The new shocks I got are slightly shorter but much better quality than the reproduction ones you get now, plus they are adjustable so will be able to make them suit the extra weight over the front than stock. I just need to get a piece of tubing and lower the mounting point.

    1959 Ford Thames camper van restoration  - Page 9 2zoi0w6

    I now need to get my plan worked out, I feel a bit like a head less chicken right now as I'm jumping from one thing to the other, trying to think everything out. In the mean time though I have started stripping the front suspension into its component parts ready to get cleaned up and painted with the new chassis paint I ordered from Rust busters.

    1959 Ford Thames camper van restoration  - Page 9 K0z8i

    1959 Ford Thames camper van restoration  - Page 9 I3doja

    1959 Ford Thames camper van restoration  - Page 9 Aontdx

    Im also measuring and making a list of all the nuts and bolts that I'm taking off to replace with new ones.

    Anyway, I better get back to it, cheers!
    jimthefred
    jimthefred


    Number of posts : 326
    Location : Parksley VA
    Registration date : 2012-01-15

    1959 Ford Thames camper van restoration  - Page 9 Empty Re: 1959 Ford Thames camper van restoration

    Post by jimthefred Mon May 12, 2014 4:46 pm

    Damn it Man! Youre a machine!!!! Great work! I was kind of hoping to se a set of Cragars on her though  Cool 
    avatar
    kevbarlas


    Number of posts : 60
    Location : Edinburgh, Scotland
    Registration date : 2010-12-09

    1959 Ford Thames camper van restoration  - Page 9 Empty Re: 1959 Ford Thames camper van restoration

    Post by kevbarlas Fri May 30, 2014 4:32 pm

    jimthefred wrote:Damn it Man! Youre a machine!!!! Great work! I was kind of hoping to se a set of Cragars on her though  Cool 

    Ha, Cragars sound cool but i still want the "standard old van" look.


    May 2014

    I got the hubs and discs away to the machine shop to get turned down etc.. So in the mean time I've been busy with making it all look a bit neater and making the shock absorber extension piece.

    To do the extension piece I first measured how much of a difference between the old and new shock was. It was roughly 30mm. I went to my old work and got a piece of tubing 60mm x 5mm wall. Should be plenty strong enough.

    1959 Ford Thames camper van restoration  - Page 9 21bvwux

    I also used it to mark out on the shock mount.

    1959 Ford Thames camper van restoration  - Page 9 1267hna

    Plasma it out and use a grinder and die grinder to tidy it all up a bit.

    1959 Ford Thames camper van restoration  - Page 9 2n8a0pd

    Then I cut a piece of tube to length and tacked it all together making sure it was all plumb and square (or round in this case Wink )

    1959 Ford Thames camper van restoration  - Page 9 24mcnli

    1959 Ford Thames camper van restoration  - Page 9 2vngpqf

    To get it to fit I had to slightly enlarge the hole on the suspension top mount using the die grinder again.

    1959 Ford Thames camper van restoration  - Page 9 15wdt3q

    Then I tested it in place.

    1959 Ford Thames camper van restoration  - Page 9 2irt6cn

    1959 Ford Thames camper van restoration  - Page 9 B7xclj

    It looked good so I welded it up (pic later in post).


    I then moved onto cleaning all the suspension and steering components up. To get rid of the grease, dirt and old paint I dunked them in the caustic tank at work then washed them down with the jet wash. I was going to send them away to get blasted but the chassis paint I am using says I don't need to. As long as I get it clean with a machine wire brush it should be good enough. The chassis paint I am using is made by 'Rustbuster'. The same company I got the primer and rust converter from and I've been really happy with there products so far. I spent 2 weekends cleaning the parts up. After I cleaned them I washed them. Then I used an Acid wash to eat the little bits of pitted rust away then washed it all off afterwards. A very boring and tedious job.

    1959 Ford Thames camper van restoration  - Page 9 23uzzmd

    Now onto the paint. I thought that id give it all a good thick coat of this stuff so I will brush it on. It was going on thick but I hoped it would level out whilst it was drying.

    1959 Ford Thames camper van restoration  - Page 9 2hmhs10

    1959 Ford Thames camper van restoration  - Page 9 Neuf87

    Unfortunately it didn't level out as much as I'd hoped. Here's a lower arm as an example.

    1959 Ford Thames camper van restoration  - Page 9 16gwjk9

    1959 Ford Thames camper van restoration  - Page 9 6yfbs6

    I tried to tell myself that it will do but I don't want it to be "that will do". So I bit the bullet and sanded everything again smooth so I could have a go at spraying it on instead. I didn't want to remove all the paint, just to smooth it. Another weekend gone. Hey, atleast it will have one good thick coat and one fine spray coat. Here's the same arm after all the hassle.

    1959 Ford Thames camper van restoration  - Page 9 2ujqpsj

    1959 Ford Thames camper van restoration  - Page 9 2ahyuk9

    Much better! .

    I had put an order in for bolts to re-do the whole front end, £105 it cost!! Just for bolts,copper grease and lock-tite. Bloody hell.

    1959 Ford Thames camper van restoration  - Page 9 25pomqr

    I started by building up the cross member.

    1959 Ford Thames camper van restoration  - Page 9 Fo3sdk

    Then the lower arms. I have the label of the shocks pointing forward so people can see there not standerd, I'm so vain.

    1959 Ford Thames camper van restoration  - Page 9 6gzq7n

    Then the top mount.

    1959 Ford Thames camper van restoration  - Page 9 Xqci0m

    At this point I quickly mocked it up before I went home to see what it would look like. I had re-greased the ball joints and they seemed OK, I guess that's what test drives are for. The bump stops are the original ones, I just sanded the top layer off and they came out pretty well.

    1959 Ford Thames camper van restoration  - Page 9 33tim45

    1959 Ford Thames camper van restoration  - Page 9 Era7uc

    1959 Ford Thames camper van restoration  - Page 9 Ra9abs

    1959 Ford Thames camper van restoration  - Page 9 2nsayoy

    When I got back to the garage I had to compress the springs to get them to fit. I hate compressing springs at the best of times but these springs are tiny. I had to cut my compressors down a bit just to get them to fit. Also the top rubbers were pretty knackered so I doubled them up with some rubber used for roofing I had laying around.

    1959 Ford Thames camper van restoration  - Page 9 6oq04n

    Then I started to bolt it all back to the van.

    I had painted the bits of chassis that will hold the front end in place but I will do the rest later once I have finished welding on the chassis. I started with the passenger side first. It was a bit of a pain getting the new bushes installed but once I figured it out the other side was a lot quicker. Im going to be going on holiday on Sunday so I wanted to get the van off the axle stands and back on its wheels just incase so that's what I aimed for today. I put the old hubs back on for now until I get the machined ones back.

    1959 Ford Thames camper van restoration  - Page 9 Iedvmp

    1959 Ford Thames camper van restoration  - Page 9 Vesm69

    1959 Ford Thames camper van restoration  - Page 9 24x3ywx

    1959 Ford Thames camper van restoration  - Page 9 3461e2q

    It looks better in real life under natural light. But I'm happy how it has all turned out. Really glad I decided to smooth it all back down and re-paint them. I guess its one of those life lessons you pick up on the way.

    I had a little panic moment when I went to try the suspension out. I jumped on the passenger side and it was nice and bouncy but the drivers side was still stiff. It wasn't moving at all. So I thought about it for 10 mins then decided to slacken the bush mounts. Got underneath, done that and it was still stiff. Another closer look I had realized that I forgot to pull out the "emergency" jack stand I placed further along the chassis just incase the main ones failed. Pulled it out and it bounced quite well, doh!

    Next up is the steering and brakes. I never had enough time to put the tie-rods and centre link together so I will do that when I get back. Also I should have the new hubs and discs back from the machinist by then. All that shouldn't take too long so I'm also hoping to get the engine back out so I can weld the engine brackets in place and give the engine a good clean up. I also want to take the engine and gearbox one step further and paint it in the old Ford green that the Thames would have had. Maybe get "Lexus" writing in old 50's style on the cam covers.
    Zuffen
    Zuffen


    Number of posts : 165
    Location : Sydney Australia
    Registration date : 2011-07-28

    1959 Ford Thames camper van restoration  - Page 9 Empty Re: 1959 Ford Thames camper van restoration

    Post by Zuffen Fri May 30, 2014 4:55 pm

    If you're after some dress up for the cam covers check out "Sudsy's" thread on this link.

    http://www.lextreme.com/forums/showthread.php?t=15591

    He lives in Adelaide Australia and he can make what you want for the cam covers.


    jimthefred
    jimthefred


    Number of posts : 326
    Location : Parksley VA
    Registration date : 2012-01-15

    1959 Ford Thames camper van restoration  - Page 9 Empty Re: 1959 Ford Thames camper van restoration

    Post by jimthefred Fri May 30, 2014 6:45 pm

    Nice looking old school fins!  Cool 
    sundanceuk
    sundanceuk


    Number of posts : 2
    Location : Crawley, west sussex, England
    Registration date : 2014-07-09

    1959 Ford Thames camper van restoration  - Page 9 Empty Re: 1959 Ford Thames camper van restoration

    Post by sundanceuk Sun Jul 13, 2014 8:56 am

    Hi, Its taken me 2 days to read all of this thread, I was getting so engrossed in it that my wife thought I had left home.
    Any way, You are an absolute first class engineer, I am very impressed with how you solve problems and your workmanship is first class.
    I am looking forward to more installments.
    Ive been into vans for over 40 years, Seen plenty of Thames vans with six pot ford engines, Triumph Vittese 6 pots, The normal swap for a V8 was a Daimler 2.5 V8, nice compact engine with the right sound, also a few with Rover V8s and one with a 350 Chevy.
    Me I am A GM vanner myself working through Bedford CFs stock and V8s, and then Chevyvan, GMC Vandura, and lastly a Chevy Astro (A Nightmare)
    Keep up the good work.
    avatar
    kevbarlas


    Number of posts : 60
    Location : Edinburgh, Scotland
    Registration date : 2010-12-09

    1959 Ford Thames camper van restoration  - Page 9 Empty Re: 1959 Ford Thames camper van restoration

    Post by kevbarlas Sat Aug 16, 2014 12:06 pm

    sundanceuk wrote:Hi, Its taken me 2 days to read all of this thread, I was getting so engrossed in it that my wife thought I had left home.
    Any way, You are an absolute first class engineer, I am very impressed with how you solve problems and your workmanship is first class.
    I am looking forward to more installments.
    Ive been into vans for over 40 years, Seen plenty of Thames vans with six pot ford engines, Triumph Vittese 6 pots, The normal swap for a V8 was a Daimler 2.5 V8, nice compact engine with the right sound, also a few with Rover V8s and one with a 350 Chevy.
    Me I am A GM vanner myself working through Bedford CFs stock and V8s, and then Chevyvan, GMC Vandura, and lastly a Chevy Astro (A Nightmare)
    Keep up the good work.

    Thanks man, thats really nice of you to say Smile .

    August update

    Some of you may have been thinking I've dropped off the edge of the planet. Well, don't worry, I've just been upto a few other things plus a wee holiday abroad.

    What's happened to the van since the last update? Nothing really. This update is about another little project I've been wanting to do for a long time but never got around to it for various reasons, but its time has now came. I wanted to just do one post about it so I've waited until it was finished and road legal.

    When I was about 14, like a lot of kids I was into riding my BMX and I just heard about 'Beach cruisers' . They are bicycles styled like chopper/bobbers and I really wanted to build one but I never had the skills to do so back then. I did get so far to do a drawing of what I wanted. Which I happen to still have.

    1959 Ford Thames camper van restoration  - Page 9 2eyidqt

    I kind of kept coming back to the idea of building one but as I grew older and lazier I thought it would be cool to have an engine in it. I started changing my plans to buying an older moped with pedals and a small 2 stroke engine and modifying that into chopper or bobber. I have even went so far as to going to look at some mopeds but they were either way over priced or missing loads of stuff so I put it all on the back burner.

    Fast forward to about 3-4 months ago. I was at my friends garage buying a small hobby compressor off him for my brother. As I was leaving he said "you wouldn't be interested in a Honda CB 125 would you?" I wasn't, but I had a quick look over it anyway. It was a bog standard CB that had been MOT'd the year before but that had ran out. He just lost interest in it and had spent quite a bit on parts, new piston and barrel, new tyres etc..I told him I'd think about it but it wasn't really for me. He even told me he just wanted £100 to get rid of it, which made me a bit more interested but at the time I had no plans for another project.

    A few weeks later, Jana and I went to Ibiza for a little break together. When I was there I just saw lots of small capacity bikes, all different styles and conditions. It started to peak my interest in that bike my friend was selling. Then it started to become my obsession. I looked up all the info on them much to the disdain of my sunbathing darling wife. Then it clicked!, I could use this bike for my foundation of the bobber / chopper I always wanted to build. A quick few txt's later and the bike was mine.

    I had decided to make this as low budget as possible so I settled on a bobber style, this meant I didn't need to buy longer forks for a chopper. It had to be a hard tail and kept in an Old skool style. First task was to go pick it up. The day after I got back from holiday I borrowed the work van and collected it then took it back to the garage. Here it is the day I got it, a 1981 Honda CB125T.

    1959 Ford Thames camper van restoration  - Page 9 15eszs

    1959 Ford Thames camper van restoration  - Page 9 Ic5ijk

    1959 Ford Thames camper van restoration  - Page 9 2ih5kye

    Then I started to tear it down.

    1959 Ford Thames camper van restoration  - Page 9 2ljot3c

    1959 Ford Thames camper van restoration  - Page 9 2ik9vna

    It came apart really easy, about an hour later I was down to a bar chassis. I then cut the rear sub-frame off.

    1959 Ford Thames camper van restoration  - Page 9 5x3ko8

    Stripped it a bit more to leave just the frame then cleaned up left over bits from the sub-frame.

    1959 Ford Thames camper van restoration  - Page 9 14lr0wx

    As I was going to hard-tail it I needed to set my fork height first. I wanted the front to sit a bit lower so I took the bolt off the top of the forks, pulled the springs out and cut an inch and a half off to drop it a bit.

    1959 Ford Thames camper van restoration  - Page 9 21md7jc

    1959 Ford Thames camper van restoration  - Page 9 1z23mv4

    I placed a sheet of stirling board on a bench I had to extend it and mocked up the basic lay out of the new hard-tail section. This is the standard wheel base. Oh, I had also went to my other friend who works in a motorbike scrapyard for some bits and bobs. Keen to keep the price down I also took along some of my stuff (tank, rear light/mudguard, lights etc..) to part exchange for some more bobber looking bits. I got a tank off a DT125 Yamaha with a few dents, 4 retro indicators, side stand, chrome headlight, chrome pod gauges and a few other things.

    1959 Ford Thames camper van restoration  - Page 9 15690nl

    I settled on a 6 inch stretch. I wanted it to be long and low. That's a 5inch bit of box section the frame is on for reference.

    1959 Ford Thames camper van restoration  - Page 9 Ofsemb

    I had some copper tubing found outside my garage that someone had dumped so I used that to mock up the frame.

    1959 Ford Thames camper van restoration  - Page 9 2z73iaa

    MMhmm, seems uncomfortable enough.

    1959 Ford Thames camper van restoration  - Page 9 2q3599z

    I wasn't too sure how id do the exhaust but I did like the cone shape, I tried it on in its stock position as it was.

    1959 Ford Thames camper van restoration  - Page 9 S45ox4

    Once I was happy with the mock up I started to get serious. Preparing now would save me having to do it all over again so I wanted to get things as accurate as I could. I chalked a line down the board and marked the critical locations.

    1959 Ford Thames camper van restoration  - Page 9 Aktk53

    Tacked the frame to the box

    1959 Ford Thames camper van restoration  - Page 9 2ztje9s

    Added a few tabs for adjustment.

    1959 Ford Thames camper van restoration  - Page 9 2ephh5t

    Then squared the frame up.

    1959 Ford Thames camper van restoration  - Page 9 259j0hu

    To stop the front wheel from moving I boxed it in.

    1959 Ford Thames camper van restoration  - Page 9 M8lag6

    I cut the swing arm bits out that the wheel bolts to and tidied them up to re-use.

    1959 Ford Thames camper van restoration  - Page 9 K00ebp

    Then I fabbed up a replacement for the rear wheel that I could screw down into place.

    1959 Ford Thames camper van restoration  - Page 9 2hrzbcx

    Everything all set up its time to start on the rear frame.

    1959 Ford Thames camper van restoration  - Page 9 2ldfwo8

    I bought a few sections of 1inch thick wall tubing from my work for about £30 and used my pipe bender to bend it. I know a pipe bender isn't the best thing to use for structural stuff but as all my bends weren't huge angles it didn't kink the tubing at all. I done one side by eye then used that as a template for the other side.

    1959 Ford Thames camper van restoration  - Page 9 Mlt7ac

    1959 Ford Thames camper van restoration  - Page 9 281skti

    1959 Ford Thames camper van restoration  - Page 9 W12r7p

    With plenty of tacks in place I took the frame down and bolted the back wheel in to see how it looked.

    1959 Ford Thames camper van restoration  - Page 9 R6wikg

    Then I had to come up with a seat. I made a cardboard template for my butt, cut it out in 3mm plate and curved it slightly. As this was going to be hard tailed I wanted to make it as comfortable for my posterior as I could. My dad gave me a small shock absorber off a mountain bike he had so I welded in another bit of tubing and made a few brackets to join it all together. I used a bolt as a temporary pivot at this stage.

    1959 Ford Thames camper van restoration  - Page 9 A5km06

    1959 Ford Thames camper van restoration  - Page 9 N1b0x0

    The old tank slipped into place with a little tab but the DT tank never had that so after rinsing the tank out with gallons of water (with a few nuts inside to dislodge any rust inside) I welded 2 M5 bolts to it then made appropriate brackets welded to the frame to hold it in place. The tank never had a fuel tap I could use either so I had to do something with that.

    1959 Ford Thames camper van restoration  - Page 9 1562vly

    I got a tap of another DT125 but this was a completely different way off fitting to to the tank so I had to modify the tank a bit more.

    1959 Ford Thames camper van restoration  - Page 9 2pphidj

    I had to cut the old tap mount off, plate it, then used a bit of 10mm bar to make a new manifold to bolt the new tap to. It took a while as every time I made a weld I had to fill the tank up with water to make sure it was all fuel tight. Perseverance pays off though.

    1959 Ford Thames camper van restoration  - Page 9 9sggf7


    The tank also uses 2 rubbers at the front which under friction keep the tank in place so I had to weld 2 chunks onto the frame for that. I also found that an old foot pedal rubber was perfect to stop the tank rubbing on the from and keep it at the required height.

    1959 Ford Thames camper van restoration  - Page 9 2h588wk

    The steering lock was jammed so the easiest thing to do was to remove it and fill it with the Mig.

    1959 Ford Thames camper van restoration  - Page 9 P3uqh

    Next up is the foot pegs, I thought of moving them forward, just in front of the engine but as its a twin it never left me much room I stayed closer to the stock location.

    1959 Ford Thames camper van restoration  - Page 9 Dvfz89

    I just tacked them into position for now but later made "cups" so they would still fold. The pegs I got from my dad as well.

    1959 Ford Thames camper van restoration  - Page 9 Jhd3mc

    I had to buy a new chain as the old one was now a tad too short. I also tacked the side stand on, which I also had to shorten by about 3 inch's, don't know what it was off originally.

    1959 Ford Thames camper van restoration  - Page 9 Ffcz9j

    The position of the exhaust was the next thing to sort out.

    1959 Ford Thames camper van restoration  - Page 9 X6bqep

    I had another length of exhaust with a nice curve in it so I welded that in place then cut the original cone down to a nice stinger style. The chrome on the down pipes was quite tatty plus the new section I welded in was just bare steel so to tidy it all up I ordered some exhaust wrap which arrived later.

    1959 Ford Thames camper van restoration  - Page 9 9zpz4j

    My brother was down that day so I wanted to get the engine started and hear what it sounded like, he made a little video of it for me.

    https://www.youtube.com/watch?v=PLFy8O4YtaA

    It was quite loud so I made little silencer insert that I bolted down inside.


    You can also see here that I had also added the 2 small chrome pods to the top of the bars. One of them has the idiot lights in them the other has a bicycle speedo I managed to modify to fit inside.

    1959 Ford Thames camper van restoration  - Page 9 Dextuh

    1959 Ford Thames camper van restoration  - Page 9 Rkbyva

    Oh, I also mounted the rear mudguard. Originally this was off the rear wheel on an older CB125, I pulled it apart and the profile was pretty much perfect for the tyre. Later on I would round off the brackets.

    1959 Ford Thames camper van restoration  - Page 9 16axft3

    To make a bit more room for ground clearance I modified the rear brake lever.

    1959 Ford Thames camper van restoration  - Page 9 331dbav

    Which turned out fruitless as it still never gave me the ground clearance I wanted. I then made up my own lever to go above the exhaust, don't have any specific photos of that though, keep an eye out later on for it.


    I found an old aluminium fuse box that I was going to use as a battery/cable box but it just wouldn't sit symmetrically, nor would it have been big enough in hindsight. Did look cool though, may use it on something else later. I had to come up with another idea.

    1959 Ford Thames camper van restoration  - Page 9 11rf8mq

    I thought id make my own box for all the bits I needed to hide, to begin I welded a floor in. The bike uses 6V electrics so the battery was tiny. The box would have to contain the battery, rectifier, ignition switch and various wires.

    1959 Ford Thames camper van restoration  - Page 9 Vo5rvq

    A few more measurements and templates I had the basic design of the box sorted.

    1959 Ford Thames camper van restoration  - Page 9 Jqgkd1

    I also got a phone call from my brother. He had found a pair of carb trumpets he had lying around in his garage and said I could have the, bonus!

    1959 Ford Thames camper van restoration  - Page 9 10i5e6u

    1959 Ford Thames camper van restoration  - Page 9 2nsrj36

    1959 Ford Thames camper van restoration  - Page 9 106n3tu

    Getting closer to the basic design being completed. One of the last things to do was the position of the rear light and indicators all round. I went for the classic bobber style of an off-set rear light to the right hand side. The indicators went where I thought looked cool.

    1959 Ford Thames camper van restoration  - Page 9 293g17k

    1959 Ford Thames camper van restoration  - Page 9 2exlq20

    1959 Ford Thames camper van restoration  - Page 9 2j1tmgx

    And that was that, a complete mock up done.

    1959 Ford Thames camper van restoration  - Page 9 2a6vx8m

    1959 Ford Thames camper van restoration  - Page 9 2qscmqu

    1959 Ford Thames camper van restoration  - Page 9 287nrpi

    1959 Ford Thames camper van restoration  - Page 9 9pq7iw

    Next up was to take it all apart, weld everything up then get it painted. I painted it at my work on a weekend. Going along with the retro them I mixed up 2 different shades of blue to get the colour I wanted. I also wanted it o be a 2 tone so I mixed a bit of white in there too. I never took many photos of this stage, infact only one of the frame before paint.

    1959 Ford Thames camper van restoration  - Page 9 2mxeb9u

    Once painted it was time to put it back together. I really enjoyed this bit, seeing it all starting to become a proper bike. I also wanted to have white sidewalls for that classic look. I used spray on Plasti-dip for that and they turned out very well. I also made a chain guard form a piece of stainless sheet that was a cooker hood at one point. I also bought a retro Honda decal off Ebay

    1959 Ford Thames camper van restoration  - Page 9 Do46zl

    1959 Ford Thames camper van restoration  - Page 9 Wb5f2t

    I took the tank back into work to finish it off with the white and sprayed the rear wheel sidewall. The exhausts got the wrapping treatment. I covered the seat in some foam and vinyl I had lying around from when I done the pedal trike.

    1959 Ford Thames camper van restoration  - Page 9 Sysar7

    1959 Ford Thames camper van restoration  - Page 9 125rz1c

    I spent the next few days after work sorting out the wiring and cables. I did have an issue with getting the bike to run properly. It seemed like it would only start up one one cylinder then the other would kick in at higher revs. I gave the carbs a good cleans but that didn't really do much. I messed about with the adjustment screws etc.. But still , it wouldn't run right. It wasn't until after checking a few forums about idle issues that I thought maybe the carb is has a leak. So I started the engine, let it warm up then sprayed carb cleaner around the carbs and noticed that the side that wasn't firing right would build up in revs. I took the carb apart from the actual flange on the engine side and noticed that who ever put it together the last time forgot to add an O-ring. One O-ring later and the bike ran sweet as a nut.

    1959 Ford Thames camper van restoration  - Page 9 Wgz9t

    1959 Ford Thames camper van restoration  - Page 9 N4dpxz

    And that brings us up neatly to today, MOT day. The first proper test drive on the road was fun, I took it along to the MOT station and he sent me right back to go put a front mudguard on it. Fair enough, luckily the garage was only about a mile away. I put the mudguard back on and it passed first time, no issues! Then I took it for a nice drive around town. The Edinburgh festival is on in full swing right now so I was kinda showing off to all the tourists. I have had a really great day today, so happy the bike is now road legal and I can have fun with it, well, as soon as all this rain stops. Here's a few more pics of the finished bike.

    1959 Ford Thames camper van restoration  - Page 9 2wm10sm

    1959 Ford Thames camper van restoration  - Page 9 15fg8dh

    1959 Ford Thames camper van restoration  - Page 9 2djvxxt

    1959 Ford Thames camper van restoration  - Page 9 19s7sz

    1959 Ford Thames camper van restoration  - Page 9 24y95pc

    Oh, another little thing. No retro bike would look retro unless the rider was suitably dressed. Old second hand leather jacket and Easy rider style helmet Wink .

    1959 Ford Thames camper van restoration  - Page 9 15fgeih
    Zuffen
    Zuffen


    Number of posts : 165
    Location : Sydney Australia
    Registration date : 2011-07-28

    1959 Ford Thames camper van restoration  - Page 9 Empty Re: 1959 Ford Thames camper van restoration

    Post by Zuffen Sat Aug 16, 2014 4:06 pm

    Cool bike and a great effort.

    I've been hanging for a Thames update for a couple of months  Sad so you need to get back into the garage and get to it! Laughing
    Big W
    Big W


    Number of posts : 3282
    Location : Saskatoon,Sask,Canada
    Age : 60
    Registration date : 2011-01-13

    1959 Ford Thames camper van restoration  - Page 9 Empty Re: 1959 Ford Thames camper van restoration

    Post by Big W Sun Aug 17, 2014 8:08 pm

    That's a cool bike for sure. Sometimes a guy just needs a little fun project to ease the pressure of the big one. Looking forward to your next van update as well.
    vanny
    vanny
    Moderator


    Number of posts : 14775
    Location : Ashburnham, MA
    Age : 65
    Registration date : 2012-09-22

    1959 Ford Thames camper van restoration  - Page 9 Empty Re: 1959 Ford Thames camper van restoration

    Post by vanny Mon Aug 18, 2014 3:41 pm

    You've got a cool Retro bike and a really cool limo for it!!!


    _________________
    “The future will soon be a thing of the past."

    http://public.fotki.com/Vintage-Vans/vintage-vans-es/ruff-diamond-1/?cmd=fs_slideshow
    avatar
    kevbarlas


    Number of posts : 60
    Location : Edinburgh, Scotland
    Registration date : 2010-12-09

    1959 Ford Thames camper van restoration  - Page 9 Empty Re: 1959 Ford Thames camper van restoration

    Post by kevbarlas Mon Oct 20, 2014 2:51 pm

    October 2014

    Well, what a hectic and stressful couple of months I've had. Moving house took up about 2 weeks of my life and about 2 years off it. Getting time to do anything just seems so hard, I'm about a month late with this update, but, Im so happy that I am now in MY house and not someone else's that I am paying their mortgage. Another thing about moving into my own place is I now have this strange obsession to decorate. I guess its because I have never had the freedom to do so in all the places I have rented before. Of course this means its something else that takes my time up. I don't want to bore everyone to death about decorating so I will keep this part short and just show a few progress pics, skip past them if its not your thing.

    1959 Ford Thames camper van restoration  - Page 9 E0r9sy

    1959 Ford Thames camper van restoration  - Page 9 4iofud

    1959 Ford Thames camper van restoration  - Page 9 14dg19x

    1959 Ford Thames camper van restoration  - Page 9 204aih


    Enough of that crap, back to the main thing, the van.

    I've been lucky to get just a few weekends down to the garage. I would normally go atleast once a week after work but the route to the garage from work has been closed for major bridge works and the detour adds about 40mins during rush hour traffic which I cant be bothered with. I also found it a bit difficult top get back into the swing of things from when I last touched the van before the small bike project. It was also because I had to start back on the van with a tricky area to sort out that left me frustrated at times, the front disc set up.

    Just to re-cap, the vented discs and 4 pot callipers are taken from a 3.5 ton long wheel base mk2 Ford transit. The same as this.

    1959 Ford Thames camper van restoration  - Page 9 I4esxw

    I think I briefly mentioned a while ago that to get all this to fit I needed to modify a few bits. Because of the age of my van the stock wheel hub was a bit weedy compared to the later model ones so I managed to part exchange them with the owner of the Thames club for later versions, Here it is before having anything done to it.

    1959 Ford Thames camper van restoration  - Page 9 Vesm69

    If I remember correctly ( it has been a few months), I got an engineer to get it in the lathe and skim the front and rear face a bit to make it true, then the rear of the hub was turned down a little for clearance and to make a ring for the disc to register onto then I also got 5 holes on a pcd of 5 x 100 so I could bolt the Transit discs in from behind. It cost £180 for the pair and he done a great job of it.

    1959 Ford Thames camper van restoration  - Page 9 1586t8h

    He also skimmed the inner hole of the vented disc so it would sit behind the hub.

    1959 Ford Thames camper van restoration  - Page 9 Ajxb84

    Bolted together they make the complete hub/disc assembly. I was going to get him to press the wheel studs in but they hadn't arrived at that point so I will get that done later.

    1959 Ford Thames camper van restoration  - Page 9 Xu4xs

    With that sorted I had to get the calliper bracket mounted. Here is the standard stub axle. Those four bolts would normally hold the back of the drum assembly in place but I now need them to hold the calliper bracket instead.

    1959 Ford Thames camper van restoration  - Page 9 2zrgwts

    This is the standard transit calliper bracket, unfortunately its not a straight bolt on fit. Those holes are just ever so slightly the wrong pcd.

    1959 Ford Thames camper van restoration  - Page 9 V4wfau

    To remedy this I cut 4 bits of 10mm bar and placed them in the holes.

    1959 Ford Thames camper van restoration  - Page 9 Mihojl

    Quick zap with the mig and a clean up and I have a bracket ready for new holes.

    1959 Ford Thames camper van restoration  - Page 9 2qkm25e

    When I was working all this out I decided that I would keep the bracket at the same angle as the transit, that is, exactly at 90 degrees to the disc. I mocked it up to see what it was like.

    1959 Ford Thames camper van restoration  - Page 9 Qxwirm

    Everything was fine, until, I went to full lock. On full lock and the suspension fully extended the calliper would be hitting against the lower suspension arm, not good. By turning the calliper anti clockwise by about 5 degrees I was able to miss all the vital suspension parts on full lock. To get these holes done correctly I headed back to the engineers again and left them with him.
    I did try to drill one of the holes myself in the pillar drill but there was soo much wobble I couldn't get it to with in tolerances, the engineer done them in his milling machine so they turned out exactly correct.

    When I got them back I bolted it all together and with a 2mm shim to centralise the calliper everything was great.

    1959 Ford Thames camper van restoration  - Page 9 T66qti

    No more fouling of the lower arm at full extension.

    1959 Ford Thames camper van restoration  - Page 9 2usts9t

    1959 Ford Thames camper van restoration  - Page 9 2qtzbd5

    Plus, I think the look awesome.

    1959 Ford Thames camper van restoration  - Page 9 316amaq

    1959 Ford Thames camper van restoration  - Page 9 2dkdflw


    So, after a difficult re-start I managed to get it all to work. Well, the anti roll bar still hits the calliper but is much easier to move that back an inch than the rest of what I've done. Im sure these discs combined with the rear 9 inch drums will be adequate to the performance of the van. I also have a 1inch bore landrover mastercylinder installed and will be fitting a remote brake booster. I feel this is a good base to start from and can fine tune it once I get it running and can test drive it.

    I also managed to get a full set of 4 15 inch wheels from Sandy at the Thames owner club. I feel I will be taking another trip to the engineers so he can split these and I can get on with banding them.

    1959 Ford Thames camper van restoration  - Page 9 2rqj8th

    On another slight tangent, I'm getting kicked out of my garage. My boss knows I have just bought a new house and I told him I'm looking to get a garage built in the garden. He is being very reasonable about it though, I said I hope to have a garage installed before July next year so he has given me until then to get everything sorted. It makes sense, he could be renting the whole building out to someone and actually making profit and the same for me, I pay £100 a month which is very cheap for what I get but still, that's £1200 a year I will be saving.

    Oh, another little thing before I go, I managed to sell the bike. I wasn't sure what it was worth so my first Ebay adventure at £2500 was a test to see what kind of offers I would receive. A couple people offered £1500 so when it ended I put it back on starting at £1500. I kind of hoped id get a few people interested in it but it only got one bid, well, atleast I got my £1500.

    Bye-bye,

    1959 Ford Thames camper van restoration  - Page 9 35itx5f

    After all my costs I made about £1000 not including labour which is a nice tidy sum I have put away to go towards the garage build. I am on the look out for a second hand double pre-fab concrete garage if anyone knows of one going cheap?.

    Well, that concludes this months work. I wish I could split myself up, one to go to work, one to be with the wife, one to go to the van, one to decorate the house and one to get on with finding and building a garage plus foundations.

    Oh, oh, one last thing, be sure to get the next issue of Classic Ford, they sent a photographer down and its going to be featured in the grafters section, yippee!.
    vanny
    vanny
    Moderator


    Number of posts : 14775
    Location : Ashburnham, MA
    Age : 65
    Registration date : 2012-09-22

    1959 Ford Thames camper van restoration  - Page 9 Empty Re: 1959 Ford Thames camper van restoration

    Post by vanny Mon Oct 20, 2014 4:13 pm

    Congrats on the funding and on the magazine spread! Well deserved!!! cheers


    _________________
    “The future will soon be a thing of the past."

    http://public.fotki.com/Vintage-Vans/vintage-vans-es/ruff-diamond-1/?cmd=fs_slideshow
    Big W
    Big W


    Number of posts : 3282
    Location : Saskatoon,Sask,Canada
    Age : 60
    Registration date : 2011-01-13

    1959 Ford Thames camper van restoration  - Page 9 Empty Re: 1959 Ford Thames camper van restoration

    Post by Big W Mon Oct 20, 2014 8:11 pm

    Those discs brakes look right at home in there. Well done cheers It's always a great feeling when a person can have there own place. Even if it means putting your build on hold or even having to slow down on it till everything else is settled. And just think...once your garage is built, you can come home, eat and walk out to the garage. OHHH!!! how sweet it's going to be.
    avatar
    kevbarlas


    Number of posts : 60
    Location : Edinburgh, Scotland
    Registration date : 2010-12-09

    1959 Ford Thames camper van restoration  - Page 9 Empty Re: 1959 Ford Thames camper van restoration

    Post by kevbarlas Sun Jan 18, 2015 10:07 am


    January 2015 update

    Yep, I'm still alive. Just with a lot more responsibilities and stress than before, hence the lack of updates on the van. Yet again nothing has happened with the van due to life getting in the way over the past few months.

    I did get the livingroom finished for xmas though. If you are interested in it continue reading , if not then head to the end of the post for van related news.

    When I first moved into the new house the livingroom was very um, 'granny' friendly. The typical 80's brick wall/fireplace inside around the walls was taking up about 2ft of space. Basic electric fire. uncomfy sofa and chairs, textured wallpaper, basically it was needing a complete refresh. The good thing about the house is there is nothing that needs urgent attention.

    1959 Ford Thames camper van restoration  - Page 9 2mgt4l1

    1959 Ford Thames camper van restoration  - Page 9 2poqzx5

    One Sunday after lunch I was wondering just how easy it would be to take the wall down, I got my hammer and bolster and knocked a few bricks down.

    1959 Ford Thames camper van restoration  - Page 9 2hf1icg

    Then thought "well, looks like I've started the decorating now then" so I carried on.

    1959 Ford Thames camper van restoration  - Page 9 2lw6kvk

    With the walls down I made a start on digging out the fireplace and hearth. The chimney was still there and unblocked so I got a chimney sweep in to give it a good clean and test. It all came through OK, just a little pointing to do around the chimney stack on the roof but nothing major. I broke out the hammer drill and with a chisel bit I lifted all the tiles and broke the hearth down to leave me the sub-hearth. Also, the wall above the fireplace had been covered in some kind of 80's wood laminate with what felt like superglue.

    1959 Ford Thames camper van restoration  - Page 9 2my1eg

    1959 Ford Thames camper van restoration  - Page 9 10ndv9f

    That's the good thing about the salvage yard I work at. You have to be up for trying all aspects of the job, one of which is installing the fireplaces so I know how to remove one and clean the chamber out.

    1959 Ford Thames camper van restoration  - Page 9 219e44o

    It was going to be a lot of hassle to the walls skimmed with plaster so I opted to use plaster board. My boss told me the easiest way was to "dot and dab" it. Which is using an adhesive to attach the plasterboards. First I had to PVA the wall to seal it.

    1959 Ford Thames camper van restoration  - Page 9 10r0dxh

    Then the adhesive.

    1959 Ford Thames camper van restoration  - Page 9 R78uti

    I took my time to make sure everything was all square and level when I put the boards on.

    1959 Ford Thames camper van restoration  - Page 9 J67djl

    Then cut out the hole for the fireplace.

    1959 Ford Thames camper van restoration  - Page 9 Ngsq9x

    I wasn't too keen on the dot and dab method. Sure it was effective at holding the boards up but I seemed to make a complete mess everywhere, seriously, everywhere. For the 2 other walls I just done it the traditional way of using 1/2 x 1 inch timber and screwed the boards to that. Then I had to fill the gaps.

    1959 Ford Thames camper van restoration  - Page 9 14sopy

    The whole time I was doing this was after work and weekends so it took a few weeks to do, the upstairs spare room became our livingroom for the time being. Anyway, at this point I was ready for the other side of the wall.

    1959 Ford Thames camper van restoration  - Page 9 29ca0pw

    I really wanted a slate hearth for my fireplace but I couldn't afford it, even through my work it would cost atleast
    £250 as it needs backfilled for a solid fuel fire. Instead I made a small shutter around the fireplace then poured it with the ducamix (heat proof concrete) and let it set. Oh, I also had to extend the electrical sockets to the new plasterboard.

    1959 Ford Thames camper van restoration  - Page 9 N3urr5

    Then I got some nice porcelain tiles, 6 of them for £40 to use as the hearth.

    1959 Ford Thames camper van restoration  - Page 9 34owt1d

    Filled in the gaps with tile grout and it was done, saved me about £180 over a s;ate hearth and in hindsight I'm really happy with the outcome as the porcelain tiles are so much more durable than soft slate.

    1959 Ford Thames camper van restoration  - Page 9 5l7z1i

    I temporarily put the combination in place to see what it would be like and try pout sample of wallpaper. This is the same combination I restored that I used as a dummy fireplace in my old rented flat.

    1959 Ford Thames camper van restoration  - Page 9 34rj048

    With those walls done I had decided to take a long weekend off work so I could repair the lexus starter motor solenoid and do a lot more to the house. Worst weekend I've had in a long time. The started motor is right between the V of the cylinders, underneath the injectors, air manifold, 2 water pipes, LPG injectors etc.. and basically, long story short I was at the garage form 10am to 2am, 16 hours. Had to leave the car at the garage and find my own way home and took a while to diagnose the rubber o rings in the injectors were leaking so I had to blow £30 on 8 little rubber washers to get it to run right. I only had 1 day to do the house, hence the exhausted and pissed off face on me.
    I was adding another power socket to the other wall as I wanted the TV to be between the doors and didn't want to run cables around the door frames.

    1959 Ford Thames camper van restoration  - Page 9 29q1mdu

    I smoothed and filled all the other walls once they were stripped and started to line them with lining paper. If anyone else out there is new to this house renovating thing I really recommend spending £20 in a good thick book about it, I got the readers digest diy manual which was good at explaining all of the things I was needing to do. Here I am checking out how you do wallpapering.

    1959 Ford Thames camper van restoration  - Page 9 2i7mhsg

    Then trying it out, fairly easy once you get the hang of it.

    1959 Ford Thames camper van restoration  - Page 9 2qxrcq1

    With all that done I got the gratebuilder from work to do the chamber work for the fireplace. I would have given it a go myself but when its something that has the potential to destroy the house its probably best to leave it to the professionals.

    1959 Ford Thames camper van restoration  - Page 9 167mflv

    First fire ever Smile

    1959 Ford Thames camper van restoration  - Page 9 X1ip08

    Next thing was the floor. The wife and I wanted to have a nice sanded floor so I hired a floor sander for the weekend. Oh, I had also painted the other wall at this point too, a kind of stone white for the walls on the fire place side and a light green on the others.

    1959 Ford Thames camper van restoration  - Page 9 29ff0yb

    I worked through all the grades, then used the edging sander and finally filled the gaps with pva mix and a top coat of pine wood filler. Took all weekend, very dusty and very noisy.

    1959 Ford Thames camper van restoration  - Page 9 23maphu

    1959 Ford Thames camper van restoration  - Page 9 Axz3hc

    All that was left was to fit new skirting boards and give everything a little tidy and I was done, next step, the furnishings.

    1959 Ford Thames camper van restoration  - Page 9 1z73s74

    1959 Ford Thames camper van restoration  - Page 9 4fu4iw

    1959 Ford Thames camper van restoration  - Page 9 2iw0uvb

    1959 Ford Thames camper van restoration  - Page 9 Ra1b91

    Im really happy with how it turned out and quite proud of myself to do pretty much 99% of it myself. I still go by the motto " you don't know if you can do it unless you try it". You might just surprise your self.

    1959 Ford Thames camper van restoration  - Page 9 Ftn921

    I managed to finish about 2 weeks before the xmas holidays so I let myself have a good rest.

    Then I got some news from my boss that kinda annoyed me. Last time he was over from Florida we discussed when I would have a garage built assuming I moved into this house and I said June or July. To which he replied, "well, if we say July will be your last month at the garage would that be OK" so I agreed thinking id have plenty of time to build a garage. Then a few days before we broke up for the holidays he told me he needed me out by April.......

    Uuuuugggh, so that just added to my stress, if I knew that's what he was planning I would have started the garage before the livingroom.

    So my new project that I'm going to have to rush though is a double garage. Scotland's rules regarding a garage without having to get planning permission are actually quite relaxed. Here are those rules.

    (1) The provision within the curtilage of a dwellinghouse of a building for any purpose incidental to the enjoyment of that dwellinghouse or the alteration, maintenance or improvement of such a building.

    (2) Development is not permitted by this class if-

    (a) it consists of a dwelling;

    (b) any part of the development would be forward of a wall forming part of the principal elevation or side elevation where that elevation fronts a road;

    (c) the height of the eaves would exceed 3 metres;

    (d) any part of the development would exceed 4 metres in height;

    (e) any part of the development within 1 metre of the boundary of the curtilage of the dwellinghouse would exceed 2.5 metres in height;

    (f) as a result of the development the area of ground covered by development within the front or rear curtilage of the dwellinghouse (excluding the original dwellinghouse and any hard surface or deck) would exceed 50% of the area of the front or rear curtilage respectively (excluding the ground area of the original dwellinghouse and any hard surface or deck); or

    (g) in the case of land in a conservation area or within the curtilage of a listed building, the resulting building would have a footprint exceeding 4 square metres.

    The only part of that which has been my biggest challenge is the 2.5 metres max within 1 metre of the boundy, due to my garden being about 6 metres wide and the garage being 5 metres wide. Ive spent a lot of time drawing and measuring so I don't need written permission (I,e a huge amount of money and time).

    This is the garden when I moved in.

    1959 Ford Thames camper van restoration  - Page 9 6zvn0o

    Since then I've had to lift all the stone chips and mark out my dimensions for the monolithic slab I will be pouring in. Underneath the blue tarp I have about 40 concrete sectional panels I got for a steal second-hand.

    1959 Ford Thames camper van restoration  - Page 9 2jfc6j7

    The outer edges of the slab will be 300 x 300 then the centre will be 150mm thick, ofcourse I will also have rebar and mesh in there too. Gives me a good indication size, really happy to actually start my dream of my very own double garage Smile.

    1959 Ford Thames camper van restoration  - Page 9 2cohtgy

    Which brings me to today. The trenches are dug and I'm now skimming the top layer for the centre of the slab. A few people have already asked me why I'm not just hiring a digger and skip to do it all but to be honest I'm absolutely skint. I managed to get a small loan for the material but if I can save myself money by digging and disposing of the clay/soil in a trailer at the local tip I will. (even if that means roping in my poor brother to lend a hand, cheers bro)

    1959 Ford Thames camper van restoration  - Page 9 15ehe8g

    Im hoping next week will be the last weekend of digging. And I can get the rebar in and concrete poured maybe around mid February, we'll see........

    The only true van related news I have was I was in the December issue of classic ford which was nice. I'm missing not having done anything to the van for ages now but I guess I need to do all of these other things first so I can have the time and space to do the van, it should all be worthwhile in the end.

    1959 Ford Thames camper van restoration  - Page 9 Vpkdua
    Twinpilot001
    Twinpilot001


    Number of posts : 6186
    Location : spokane ,Wa.
    Registration date : 2009-09-28

    1959 Ford Thames camper van restoration  - Page 9 Empty Re: 1959 Ford Thames camper van restoration

    Post by Twinpilot001 Sun Jan 18, 2015 11:03 am

    Only 1 thing I can see -that needs attention /missing!! Nice work by the way!! Thas in the TV /living room- There is NOT a small fridge for that well deserved beer after all that work & to watch the sports on that nice TV !!
    Twinpilot001
    Twinpilot001


    Number of posts : 6186
    Location : spokane ,Wa.
    Registration date : 2009-09-28

    1959 Ford Thames camper van restoration  - Page 9 Empty Re: 1959 Ford Thames camper van restoration

    Post by Twinpilot001 Sun Jan 18, 2015 11:04 am

    Only 1 thing I can see -that needs attention /missing!! Nice work by the way!! Thas in the TV /living room- There is NOT a small fridge for that well deserved beer after all that work & to watch the sports on that nice TV !!
    vanny
    vanny
    Moderator


    Number of posts : 14775
    Location : Ashburnham, MA
    Age : 65
    Registration date : 2012-09-22

    1959 Ford Thames camper van restoration  - Page 9 Empty Re: 1959 Ford Thames camper van restoration

    Post by vanny Sun Jan 18, 2015 2:06 pm

    Good luck with the Garage project Kev...As a lot of others on this site, I love to see new postings on this thread. Hopefully, soon you'll be posting more pics of work done on the van. It's fun watching someone with your talent tackle these projects. Nice work on the fireplace too!!! Turned out really nice. url=https://servimg.com/view/17938138/285]1959 Ford Thames camper van restoration  - Page 9 Cheeri10[/url]


    _________________
    “The future will soon be a thing of the past."

    http://public.fotki.com/Vintage-Vans/vintage-vans-es/ruff-diamond-1/?cmd=fs_slideshow
    Zuffen
    Zuffen


    Number of posts : 165
    Location : Sydney Australia
    Registration date : 2011-07-28

    1959 Ford Thames camper van restoration  - Page 9 Empty Re: 1959 Ford Thames camper van restoration

    Post by Zuffen Sun Jan 18, 2015 2:27 pm

    Kev,

    I hate to tell you but you can swap the starter in a couple of hours if you remove the manifold mounting bolts and lift it straight up, without removing any fuel lines, wiring or disturbing water pipes.

    I've swapped starters by lifting the manifold and leaving the wiring and fuel lines intact and propping it up.

    This stop the leaking O rings you suffered.

    Any time you want 1UZ help PM me and I'll do what I can.
    BILL Carson
    BILL Carson


    Number of posts : 171
    Location : harrison mi
    Age : 67
    Registration date : 2011-05-02

    1959 Ford Thames camper van restoration  - Page 9 Empty welcome back

    Post by BILL Carson Mon Jan 19, 2015 3:59 am

    glad your back when do you think you will paint your van.mabe some day you an your family could bring it to the vintage van show here in the states .michigan we have room for you all an a place to stay

    Sponsored content


    1959 Ford Thames camper van restoration  - Page 9 Empty Re: 1959 Ford Thames camper van restoration

    Post by Sponsored content


      Current date/time is Sat May 11, 2024 1:19 am