I posted my project up on the RV.net forum and someone linked me to this forum, been good reading other peoples projects and stuff so i thought id post mine.
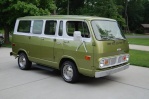
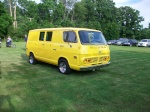
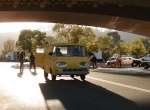
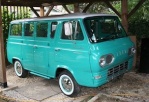
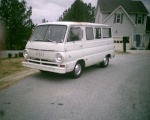
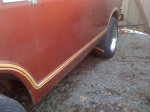
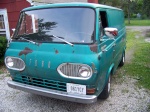
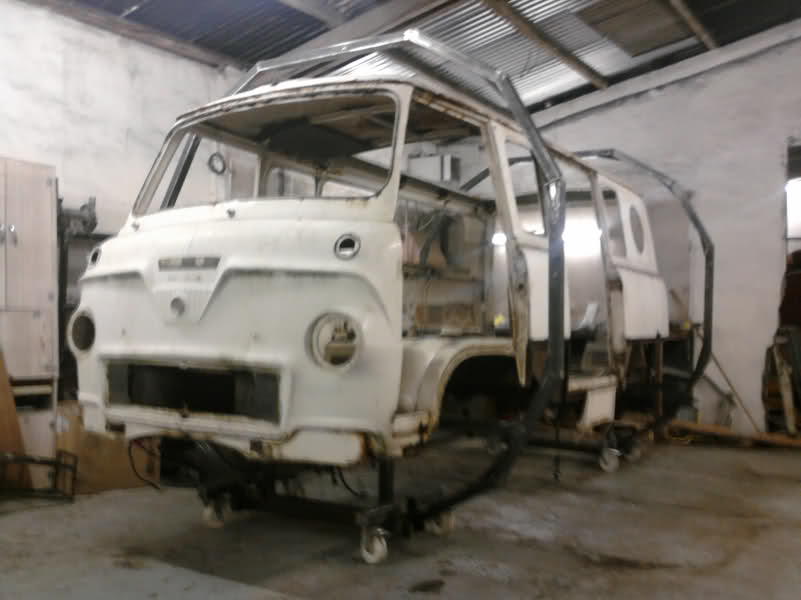
I wasnt really looking for another classic to have but it kind of found me. A guy I know from the scottish pre67 ford club had been having trouble with his Ford thames, namely the roof gutter and he was looking for another camper to strip out for parts. He posted these pics up of it lying in a field.


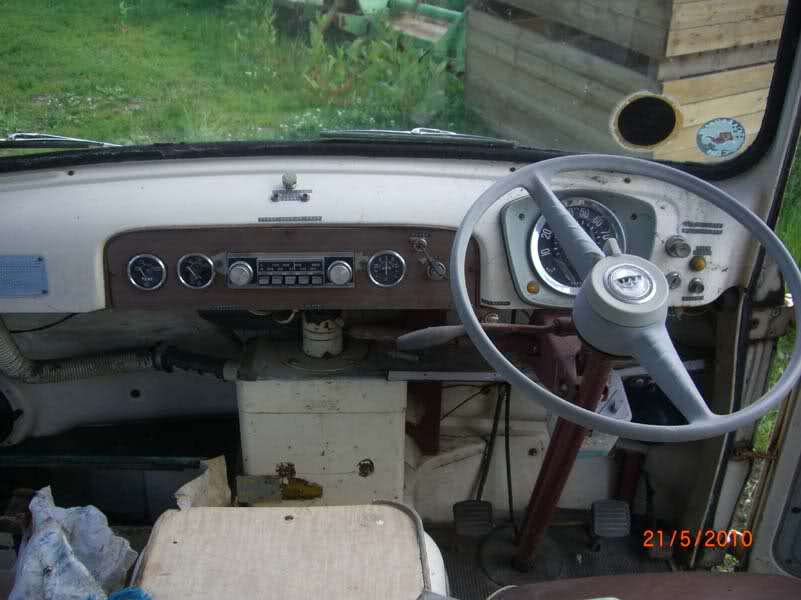
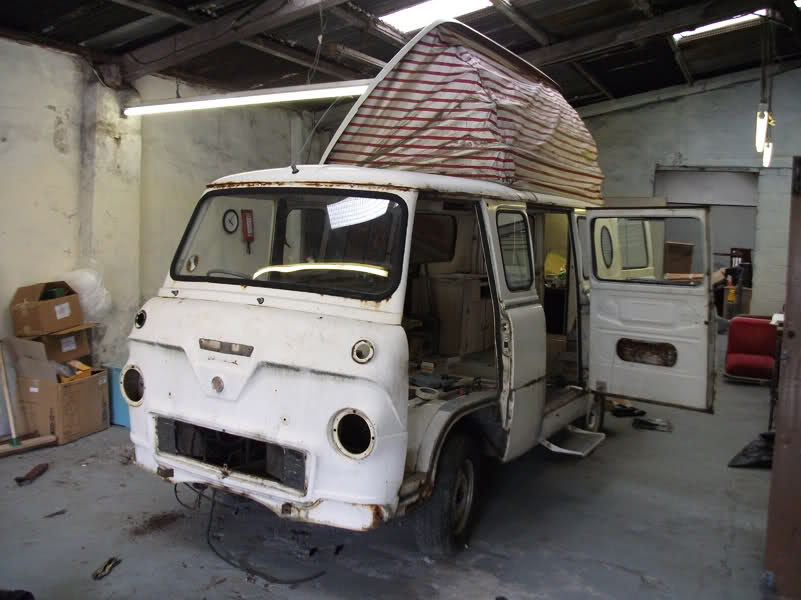
The specs are as follows: 1959 Ford Thames Dormobile, 1.7 engine (same as the Consul engine and running gear) 3 speed colomn shift, Grill, cupboards, sleeps 4 (allegedly), Fold down side step, heater, vacum operated wipers. Free bird and wasp nest.
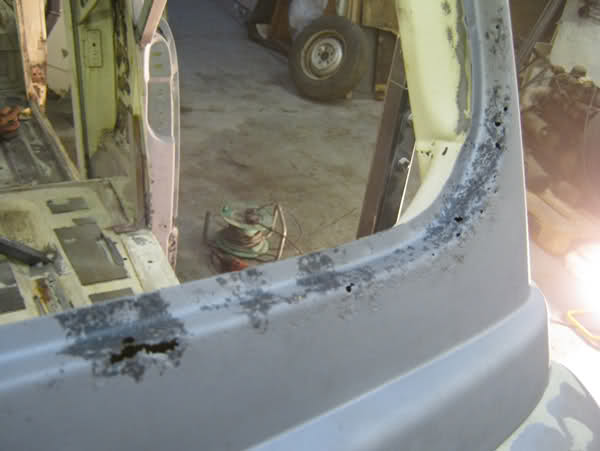
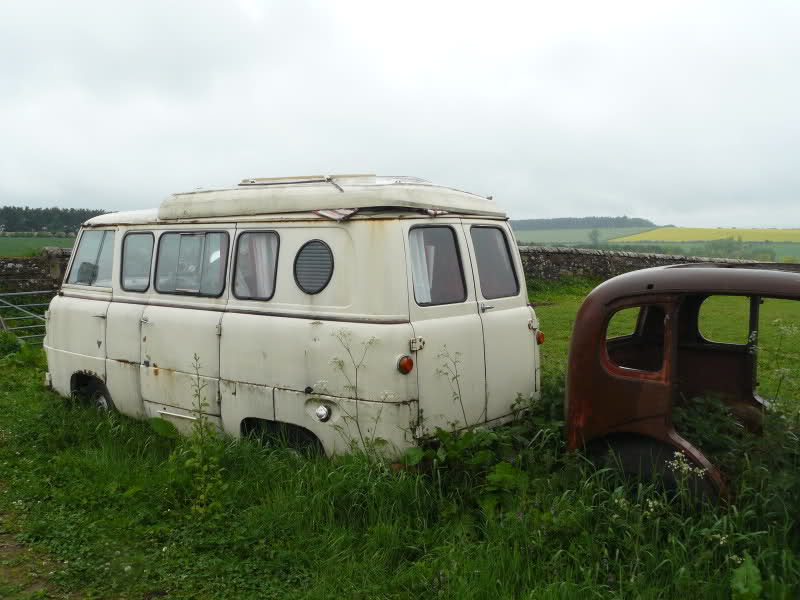
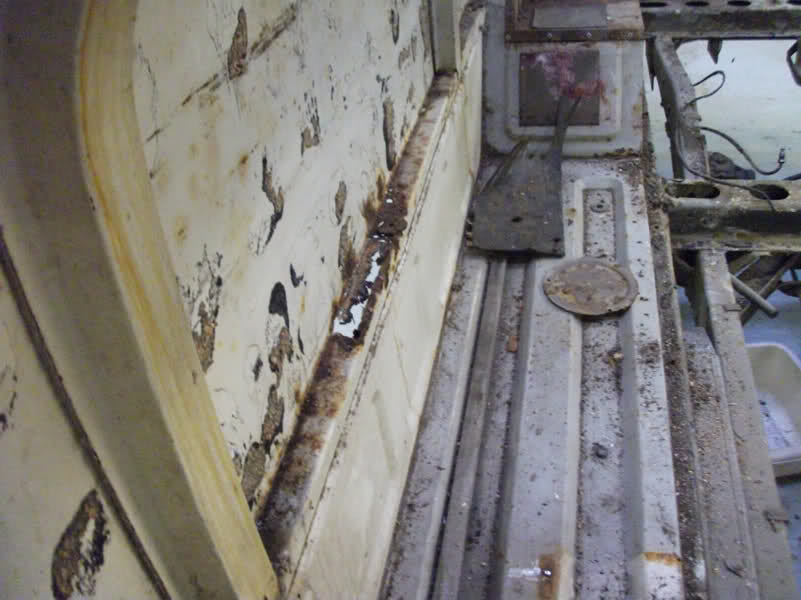
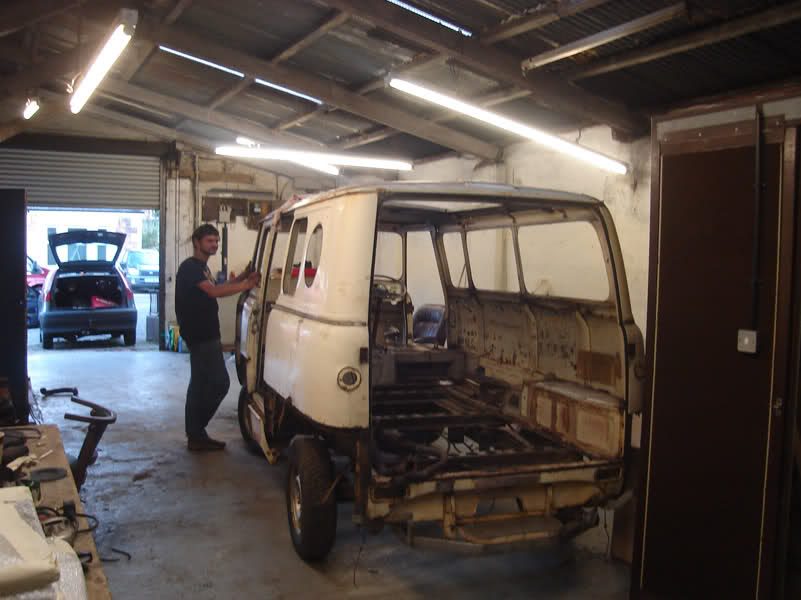
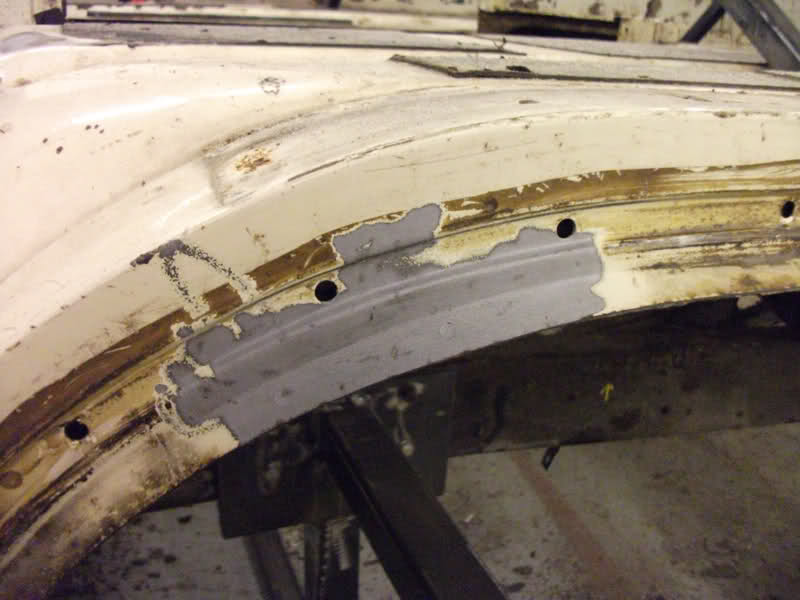
After a little bit of thought he realised that this van was a lot worse than his so he never bothered taking it. Foolishly, I felt sorry for it, thinking its a shame to see it rusting and rotten away back to the earth in some farmers field. I managed to get a hold of the owner to see how much she wanted for it. She said someone told her it was worth £400 - £450 and that I was welcome to go take a look. So a few weeks ago me and my brother took the 44 mile trip in my Consul , from Edinburgh to Ancrum to have a look. Straight away I thought it was never in a hundred years worth £450. I managed to persuade the farmer to pull it out using his tractor. The first time it had moved in 3 years, so I could get a better look at everything. Thankfully the seperate chassis and out-riggers are still solid. The main area of concern is around the roof. The gutter is practically oxide and the edges of the roof have disappeared. The pop up roof also has a bit plastic missing so the rain has gotten in over the years, luckily its just a wooden floor so that shouldnt be too hard to replace. Everything needs stripped out and cleaned/ repaired. Enough blabbing, more pictures.


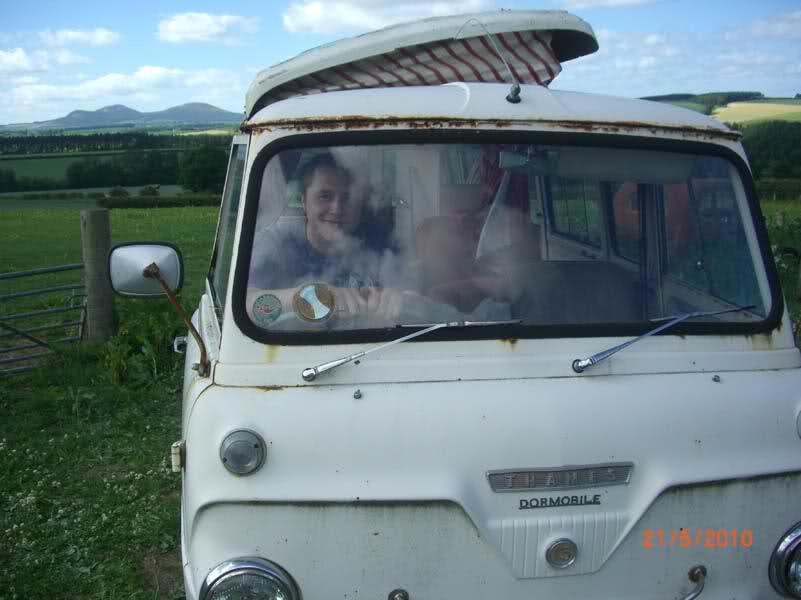
Thats my brother


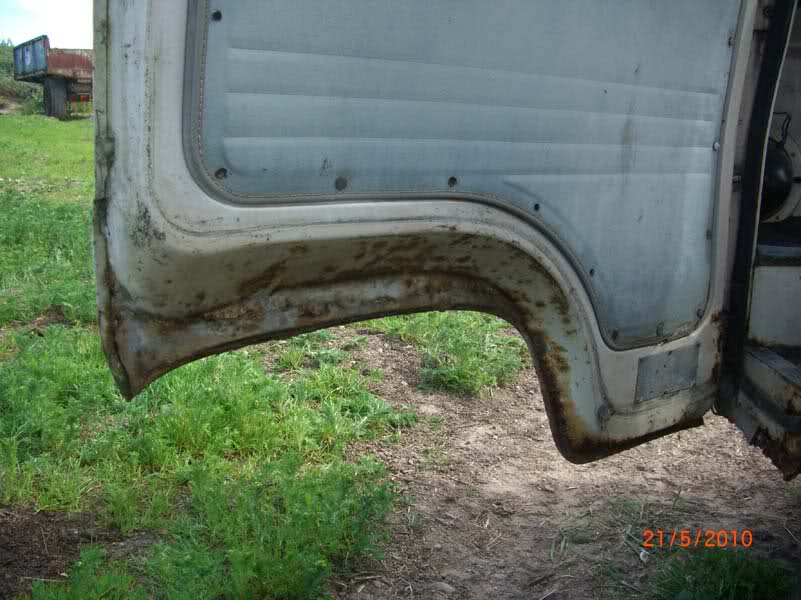
The bottom hinge has came away from the door.


Apparently the brochure says it can sleep 4, I think they lied.

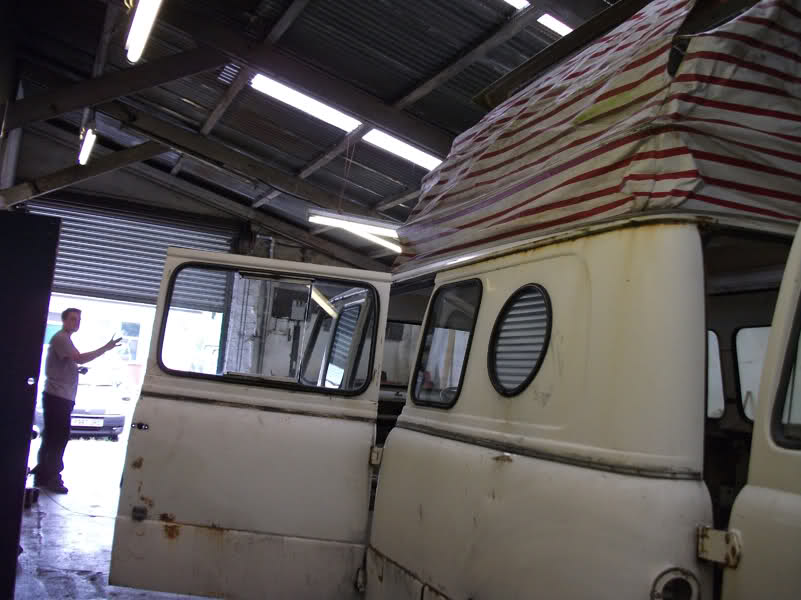
Whilst we were there we had a look at the other cars lying in the field


Some old morris 8 which I think has been lying there even longer. I hate seeing crap like this, not even a tarp thrown over it or anything.

An MG
There was a Land rover there too but I cant find the pic of that.
When I got home I wasnt too sure about buying it. One half of me said that I have enough crap to be getting on with, with the Consul but the other half was telling me how awesome it would be to go traveling in it once its all done. I decided to set my price at £200 and let fate decide. I phoned the woman up and told her what was wrong with it and how it wasnt worth £450 at all and I offered her £150, she declined so I upped it to £200 and she agreed, bonus! I think she was more glad that it was going to someone to restore than as a parts van.
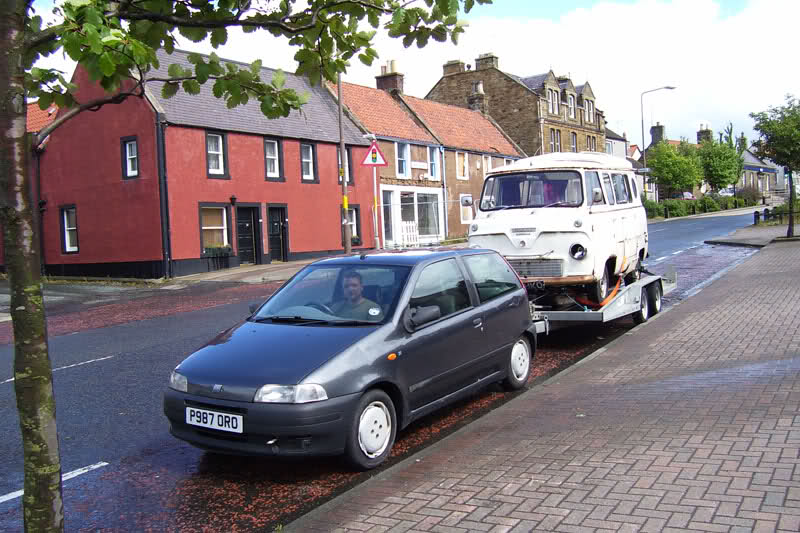
The next major hurdle was how do I get it from Ancrum 44 miles up to my garage in Edinburgh. The plan was for my brother to get his 2.4 Toyota estima/previa taxed MOTd and insured for this weekend and hire a trailer. Unfortunatly that went tits up on thursday as he found out the cost of insuring the Toyota just wasnt worth it. That left me in a bit of a pickle as to what to do next. I tried searching for a company to pick it up on a flat bed and drop it off but that was going to cost £240 at the cheapest. My next idea was to find a trailer to borrow and a car to hire, my dads friend came up with the trailer but to hire anything with a towbar was going to be £75, then I had to get my own insurance sorted. I tried phoning the only other person I know with a towbar on his VW golf estate buit I couldnt get a hold of him at all. I just about gave up on saturday when I looked at the full raging 1.2 litres of my 120,000 mile Fiat Punto and thought "Would it be stupid to try and tow a ton and a half of camper and trailer with this" so off I popped to the scrapyard and found a Towbar for the pricely sum of £15 and went to town installing it. It fitted pretty well and buoyed with confidence I got my dad to arrange the trailer for Sunday.
Sunday morning, its peeing down with rain and as we set off the engine is running on 3 cylinders, not the best of starts to the day. I pulled over at a garage and fiddled about with the HT leads and the problem dissapered. We went to my dads friends house to pick up the big ass trailer.
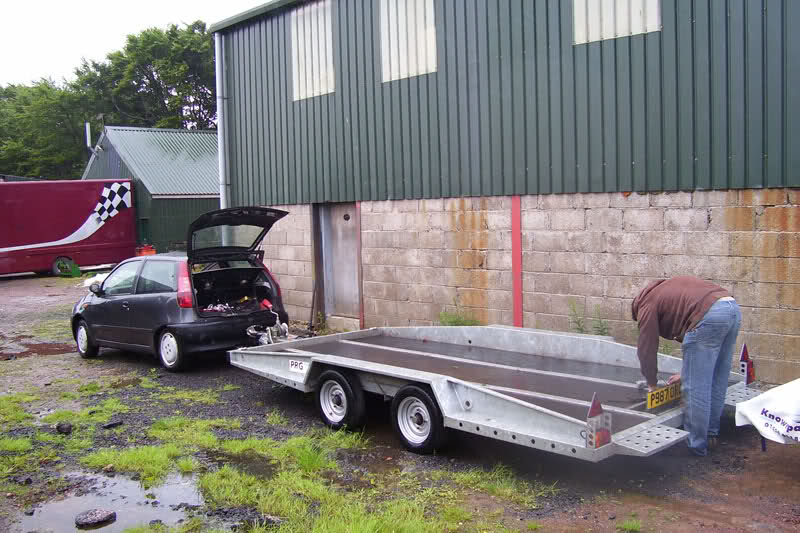
Its longer and wider than the car. I probably should have checked out the weight limit of the car but it was too late now. It was also the first time I had ever driven with a trailer so no better way to get used to it than with a proper man size trailer.

After another 44 miles of 'fun' driving we reached our destination, Thankfully Mr farmer was around to pull the Thames out of the soft muddy grass and onto a slightly less wet and muddy patch of grass for us to load up.

Seeing it again after 2 weeks made me kind of think did I make the right choice, too late now. It all paid for.

Loaded up and ready to go, dash you 4x4s and dash you torque! I have 75BHP and 78 lb-ft of raging FWD power.


BOO!
This was about as far as we got before we got stuck, all 15ft of it. I had to get the farmer to get his manatou and get us unstuck. I think he was a bit intoxicated off by this time as he draged us literally out of the hole 5ft and that was it "yeah, you will be fine from here", cheers mate......
Back on the main road the first hill we pull up I have to change down to 1st gear to get it up there. ME and my dad looked at each other, not muttering a word but both praying to the automotive gods that this blasted thing better get up these bastarding hills! Of course we had mental cross winds and no trailering experiance would be complete without the fluttering heartbeat you get that only a fish tailing trailer can provide at 50MPH. At one point the rain got so heavy it was like driving on a small lake and you still couldnt see crap with the wipers going at max. What a stressfull blasted drive.

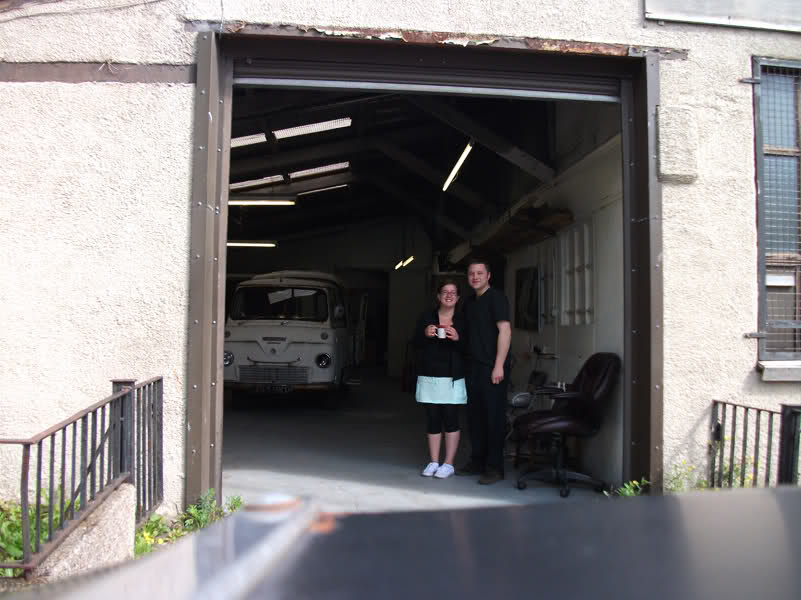
We stopped off for a coffee in Peterhead, about 15 miles out of Edinburgh.
We managed to get the Thames into the garage, I forgot to take more pictures. Then back another 10 miles to drop the trailer off. I must say, i'l never underestimate the Punto again, it is a cheap shity run around but it was a champ today, I think I may need to service the poor child born out of wedlock now.
I now need to come up with a restoration plan. I'm also toying with the idea of a V6 of somesort, either cologne, cosworth or Omega, etc... I want to keep the coloum change and have it as a cruiser so an automatic gearbox too

Ive decided that this needs work done a lot sooner than the Consul, I guess the Consul has a few more years for the road without needing too much attention to keep it road legal. Once the camper is done i'll get started, but in a way I like the slightly ratty look.
August update ----------------------------------------------------------------
Ive made a start stripping it out and assessing all the crap I have to do to get it back to life.
I figured out how the 'dining table' was set up

and how the seats fold out into 'beds'

This is the first weekend we went to the garage and the magic started.
My girlfriend has taken an unusual interest in helping me to restore the van. I think its great as if I was in the garage myself it could get a bit boring but its a good laugh having her around and helping me out. Its ok right now at the stripping down stage but I think she may get bored when I'm welding and cutting crap up. I was thinking I could buy her a sewing machine and she could re-upholster the seats and curtains etc..
Yeah, check out those comfy ugly slacks I'm rocking.

I got Jana started on removing the light lenses and units etc.. she even managed to get the rear bumpers off herself. I don't mean to sound patronizing but when someone calls a ratchet the "clicky-thing" its quite a big step for her.


I even bought her a special tool kit for the job, shes since bought herself a proper tool bag and pliers set.

First door removed. It was a bitch as the hinge bolts were rusted solid, lucky for me there is a huge tool store opposite the garage (machine mart) so I managed to get an impact screwdriver.
All the seats and interior came out easy, the gas cooker was a bit of a joke really, The cage that held the gas bottle underneath the floor was about 8 inches from the ground and about an inch from the propshaft, then the gas pipe went to the cooker where someone had used a T-piece for some reason, with one pipe going to the hob and the other pipe was bent round a few times to stop gas leaking.... I don't know why the never just used a single pipe. There was a lot of cork insulation which I think had been stuck on with tar. Oh what fun I had with a scraper. Jana 'helped', but well, she got bored of it a lot quicker than I did.


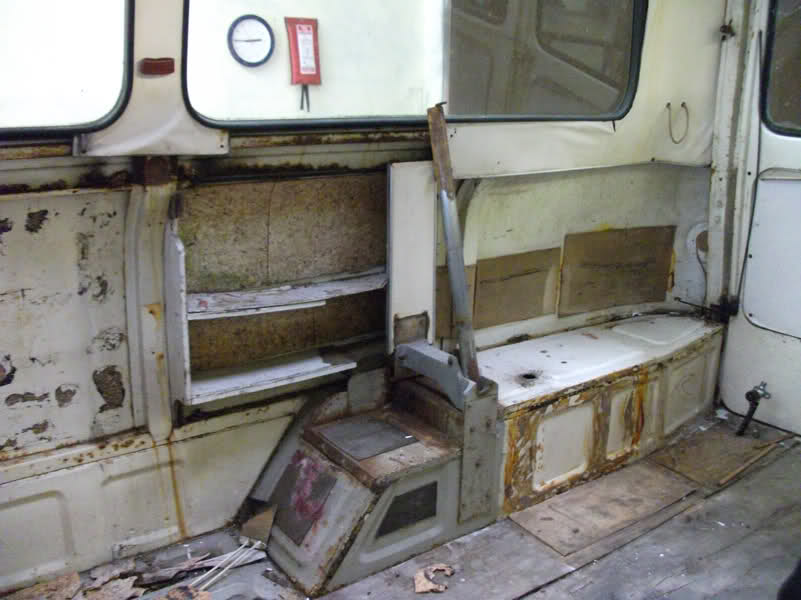

Handsome eh,
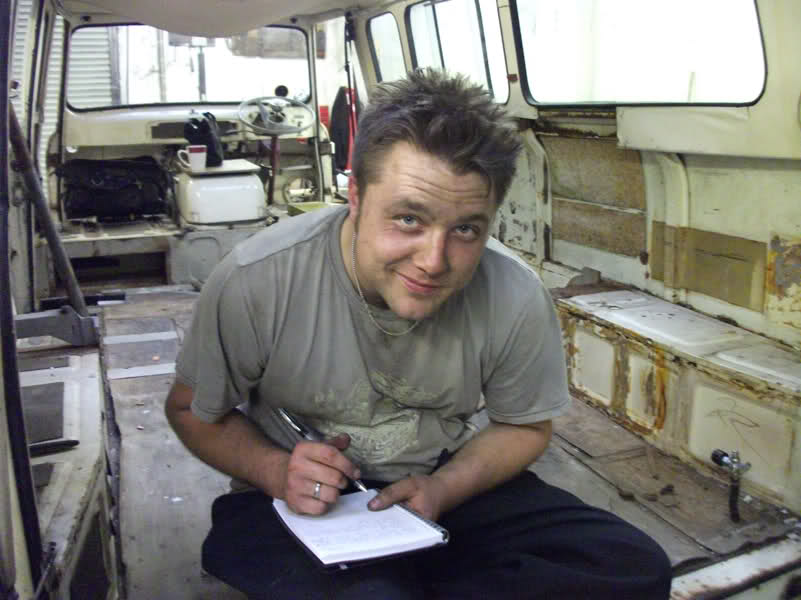
Then I got stuck into the wiring loom, there was a lot of house-hold wire in one colour for switches and lights all over the place. I know I'm going to be re-doing the interior lighting differently so those got binned and I kept the standard loom. Note the intensity of my concentration.


The next weekend we started on taking the pop-up roof off. The fabric of the roof its self isn't too bad. There is a rip in it but its along the seam so once stitched up it will be ok. It was held down with aluminium strips and brackets.

WEST SIDE Y'ALL
peek-a-boo

Starting to get quite bare now, in total we found 3 dead birds in the van, 2 of which were skeletons and the other was quite fresh looking underneath the radiator intake, perhaps from the drive home on the trailer, oops.

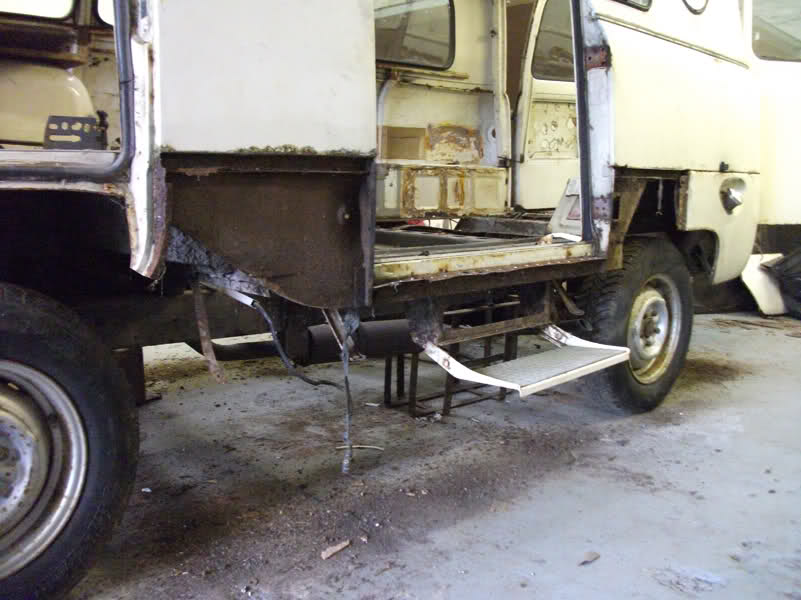
We got the other door off and then I set about the lower panels, there pretty easy to come off as there all bolt on panels, something Ford promoted as a key selling point apparently.


The right lower panel its self was not bad, just a bit of surface rust and a few dings. Even behind the panel it was not bad. You can see the battery tray is pretty much gone but thats not really a problem at all, its just a welded up box. Although a lot of rust came flaking off as you can see.


The back of the wheel well is the worst, good thing is a lot of the panels to replace are just flat sheet with bends in it.

The other side was a bit harder to take off as it had spot welds along the side door opening but it came off none the less.
During all this a few bolts were completely seized and I had to grind them off, sending sparks flying. I finally thought id be a lot safer doing all this crap with the petrol tank out. Only problem was the bolts underneath had seized and the only access was to rip the floor out and take them off from the top.
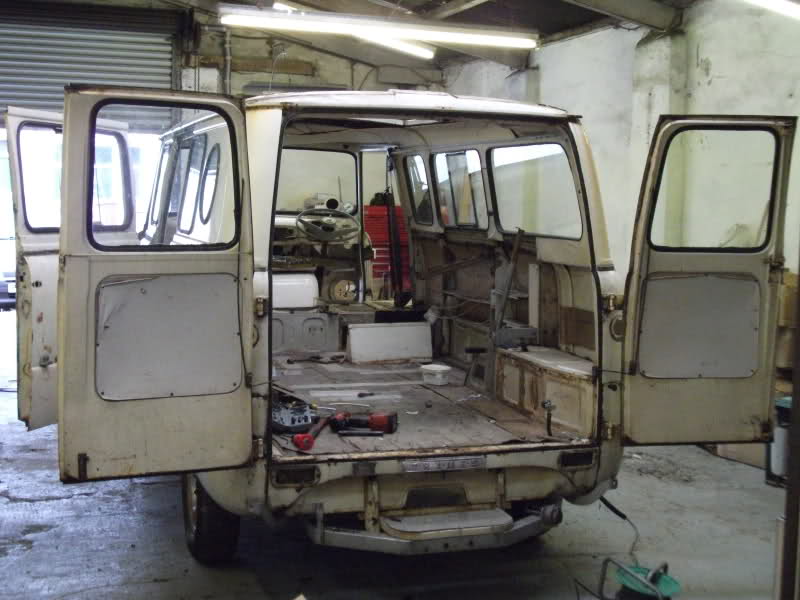
So out the floor it went. The guy that rents the other side of the garage popped down and gave me a hand. The floor was inch thick plywood and all the coachscrews holding it down were, as you could guess, seized. We came up with a plan of him using a big lever and me drilling lots of holes around the coachscrews. You can see the petrol tank is quite small for something to go travelling with, may need to find something bigger. Once I disconnected the tank I poured the petrol away and it was pure orange, like irn-bru. Must have been laying in the tank for years.


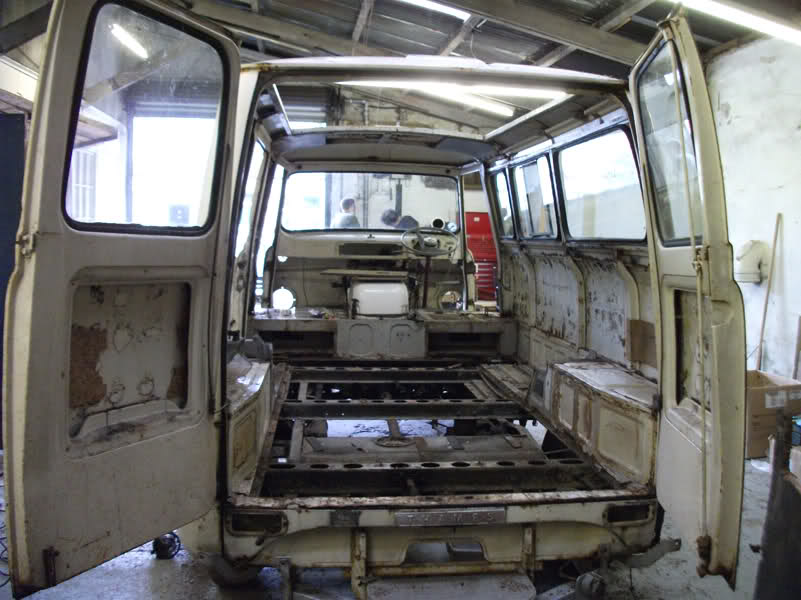
The weekend after my brother came along instead of Jana as I wanted to get the engine/gearbox and the rest of the glass out. We even managed to get the rest of the doors off.

Glass out
Checking out how to remove the engine. We disconnected the gearbox first and tied rope around the engine to lift it straight up.

My garage buddys engine crane came in handy.
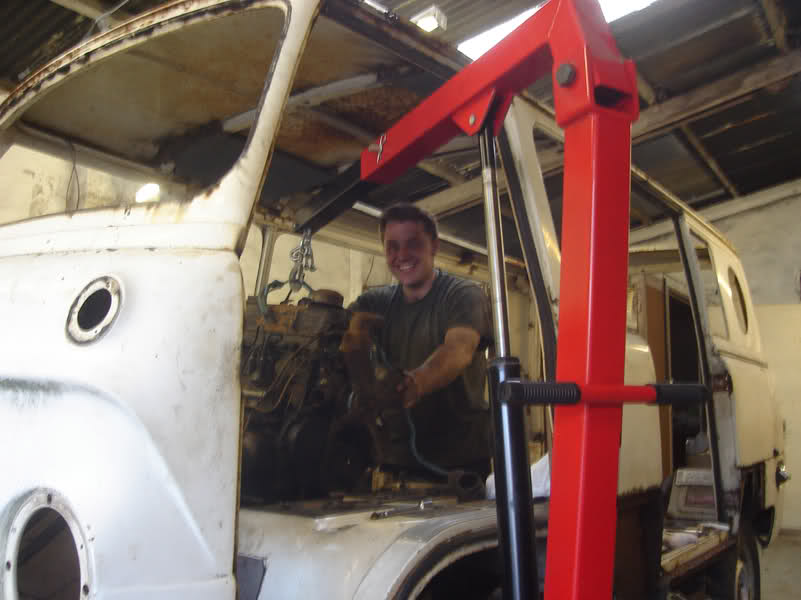
CHEEESE!!

A full 53bhp or so of pure antique metal

This is the hole that has been left from taking the motor out, The plan is to replace it with a 3 litre Cologne/Essex V6, I know it fits as ive seen the set up before in a Thames van. I'm going to go for an automatic box too as I just want it as a cruiser and I hope to keep the column change and rig it up to the autobox.

Thats as far as ive gotten with the van. I'm pretty much at the stage where I need to take the suspension, steering and rear axle off but before I do that I need to make up a way of supporting the van off the ground. I was looking at building a rotisserie but I came up with a slightly different idea. I'm going to build 2 huge dodecagons that split into 2 pieces. That way I can roll it on its side and sandblast/repair underneath then roll it back, unbolt the top half of the dodecagons and work on the roof etc..

Only thing is its going to cost about £180 in material so I need to do a few homers to make up the money for that. I also just put down a deposit to rent a new house with Jana so money is quite tight. Next update will probably be in a few more weeks.
September update -----------------------------------------------------------
Well its been a few weeks since I have made an update. To be honest I had no money to make the dodecagon chassis tilter so everything came to a standstill until I had more money. I managed to get 2 homers fabricating gates, each one took about 2 weeks to make and fit, only because I have a full time job 8-5 and I can really only fabricate my own stuff after work and on Saturdays. The first one I made was for some retro shop on cockburn street in Edinburgh. I'm not sure if anyones familiar really with Edinburgh but cockburn street is just of the royal mile so its good to be getting my work in a classy area (i.e., more money).

After that one his neighbor wanted me to fabricate a couple of gates for the front of his shop too, so, more money is better than no money and I done that too.

Finally I could start on my own stuff for the van. I bought 4 lengths of 50x50x3 box section for the frame and struts, 2 lengths of 25x25x3 for bracing the inside of the van, a 8x4 sheet of 1.2mm for the body and some 1.6mm for the underside and any other areas I want to protect a bit more. Last time I got as far as drawing the idea of the dodecagon.
I know that there is other ways for me to work on the underside of the van, from rolling it over onto old mattresses/tyres to make a proper rotisserie. The reason I decided on the dodecagon was its simplicity, I don't have to jack it up crap loads to rotate it and I can mount it straight onto the chassis using the suspension mounting points.
I decided before I go cutting anything to check over all my measurements and see if I can adjust the sizes. I went to the garage and made a cardboard template of the outline of the front of the van, after messing around with the sizes I realized I could make the bottom and top rail 37" the side rails 32" and the corners 20", meaning instead of the overall height and width being 104" its now only 87" (if my memory serves me right). I then got 2 sheets of 3mm plate from my work and laid them flat on the ground and tacked them together to make a 8ftx8ft working area. I traced around the cardboard template (you can vaguely see that) and then made a full size drawing of how the dodecagons should look in chalk. Once that was done and I was happy with it I cut 24 bits of 50x50 at 50 long angle and tacked them around the perimeter of the dodecagon. That way once everything was cut I could clamp the box to the angle and know its not going to move and warp.

I then started to cut the 50x50 box to the sizes I need with a 7inch grinder, Its not my chop saw so to save the blade a bit I cut them with the grinder square, so when it comes to cutting the 15 degree angle I'm only cutting 3 faces, therefore using less of the blade.

This photo is a bit crap but you get the idea, with everything cut I could place the metal on the sheet and using a crap load of clamps, clamp everything in place and start tacking. Once it was all tacked I kept the clamps in place and welded the top face.

I then stood it up so I could weld the inside and outside.

After that I then laid it back down with the other non welded face pointing up onto the jig to make sure it never warped and I laid the other bits of metal on top and tacked them to the complete dodecagon, that way I know both will be the exact same (or close enough anyway).

I then broke the tacks holding the dodecagons together and welded everything up completely.


The next again weekend I went back to finish them off but I forgot my camera so I'll need to show what I done later. I wanted to add strength to the corners so I cut some 25x10 flat bar and welded them in place like gussets. The other thing I done was to cut them in half and sleeved an insert inside both cuts. Unfortunately once I cut them in half they bowed in, so I had to cut 4 corners and pull them out a few degrees and weld them back up. Easy enough to do but time consuming.
The weekend after that I decided to fabricate trolley dollies so can move the whole thing around a lot easier. I bought 8x125mm castor/brake wheels, and 2 x 65x130 U channel @ 40" long. Using some left over 50 box I joined the whole lot together and I'm quite happy with how they turned out. I left a 60mm gap from the floor to the channel. I'm hoping that when I go to roll the dodecagons I can roll them into the channel, I'll just need to see how it goes. The wheels should be strong for the job, they hold 160Kg each, so altogether thats 1280kg in total and I'm guessing the van isn't even going to be 700Kg fully stripped.
I got them down to my garage and with the help of my beautiful although slightly unenthusiastic assistant got to see how they would look in place. It was exciting to see all the hard work starting to make sense and feeling worthwhile. You can see the gussets I welded in place here.

My brother and I went to the garage last Wednesday after work and started to strip the front suspension out. We got the whole front end out but by that time it was getting quite late and I had an operation the next day so thats as far as we got. I'm hoping next week to get back along and bolt the plates I have cut to the mounting points and weld more box to join the chassis to the dodecagons and fingers crossed it should go to plan. I also have to brace the inside of the van extensively as I plan to chop the roof of first. Thats why I have 3 sheets of MD, I'm going to join my 2 benches together and make a huge 12ft x8ft table, screw the roof down and repair it.
Hopefully I'll have another update next week and a video of it in action.


October update -----------------------------------------------------------------------------
Just to recap - The suspension at the front will remain standard, the layout will anyway. Its got double wishbones at the front with quite a bit of adjustment considering its a 50 year old van. I will change all the bushes ofcourse and depending on the weight of the engine and other stuff I'll need to fit tougher springs and shocks. It would be good to have a balance between comfort and handling. The brakes will get changed to discs. At the rear I'm going for a Ford Capri rear axle as its the exact same width and I know it can handle the power.
The steering could be changed to powersteering but id need to find a car that has a power steering steering box as its old school and isn't a rack and pinion . I know some Mercedes used them so I'll need to have a rake around the scrap yard. The Scorpio V6 does have a power steering pump though.
I want to try and find a Ford Granada Scorpio, the first model, because that has the same 5 stud bolt pattern (5x112). That way id have everything, the 24V V6, the gearbox, the discs brakes and hubs, the ECU etc....
As far as entertainment I'm happy with a cd/MP3 changer and a few decent speakers, I also have the idea of getting a TV which would mount flush to the headlining then flip down to watch. A cheap car PC or laptop to go with it would be good. I'm not going to go 'pimp my ride' style mental though and have a candy floss machine inside a candyfloss machine or some stupid crap like that.
For cooking I'll just have a basic double hob with a grill underneath. It does kind of scare me a bit that I'll have a flame less than foot from curtains or other flammable material so I'm going to plump in a racing car style fire extinguisher with pipes above the cooker and along the inside. That way if it catches on fire I can press a button and the whole inside of the van will be extinguished.
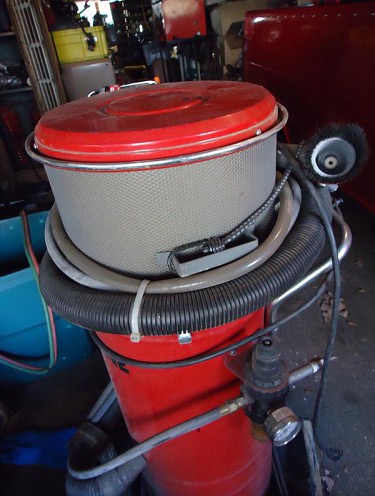
I managed to fix the works spare plasma cutter so my boss has let me borrow that and a guy I know form another forum has let me borrow his sandblaster so that is a huge help!
I've been a bit busy again but managed to get the tilter pretty much finished.
First thing I had to do was Clean up the chassis where I want to bolt the plates onto

I measured and cut up the plates, then drilled the holes out.

Then I bolted the plates to chassis and tacked them together, that way I knew it was going to be a good tight fit.
Unbolted the plates and welded them up. Before I welded them I tacked a few bracers between the angle so it wouldn't distort with the heat.

Whilst the plates were cooling down I took out the first bottom of the dodecagon and positioned it to where I needed. It took a while because your working with 3 different axis of movement and the only thing I had to hold it was a black and decker workmate. I first made sure the van its self was level then I leveled the dodecagon, trying to keep it centre to the van and then level it the other way. Awkward.

With that done I measured up for the supports, first the horizontal one was cut and tacked in.

Then the vertical.

Once all tacked I jacked the van up and let the frame drop. I tacked in a few more braces and welded it all up, gave it a quick dress up and bolted it back on the van. That was the first test over, if it would actually hold it and not bend or warp, which it did, success!


It looks like I'm advertising a can of GT85 but I'm really putting in the bolts so the top half doesn't come off when it gets rolled over.

The next again weekend my brother came along to give me a hand with the rear. He done a god job of stripping the axle out and disconnecting various bits. Then he cleaned up the chassis for me,.

just chilling out on the floor

Whilst he did one side I was measuring, cutting, marking and drilling the plates for the brackets. Same story as the front, bolted them up and tacked them.

Here you can see the bracers I tacked on so it wouldn't warp when welding up.
 .
.
That was that for that day. My brother had to go home for his dinner (family man) so I took the brackets to my work and welded them up there. Last weekend I went with my girlfriend for a wee cheeky long weekend away up north for our 4 year anniversary and she was kind enough to not be intoxicated off with me by letting me to go to the garage on the Sunday afternoon. I forgot to take photos as I was going along though, I think it was because I got intoxicated off after spending an hour trying to level up the rear dodecagon and cutting the horizontal supports when I suddenly realized that, yes I had everything level but the rear ring wasn't level with the front. Luckily I noticed just in time as it was off by about 40mm. Once I got it packed up it went pretty much the same as the front did.


It was good to see my creation starting to actually be complete. Next step was figuring out how to slide the trolley wheel frames underneath. For the rear I managed to just lift the van up myself and kind of kick and shuffle the frames under. The front is a bit heavier so I jacked that up , as I did the whole back off the van started to veer towards the wall. Once I put the brakes on the wheels I jacked it up again and slid the front wheels underneath.
Front:

Back:


I tested the van to see if it would actually tilt and I got it onto its first step. I want to brace the inside of the van properly before I go any further but atleast I know it works so far. I recorded it on my mobile so the quality isn't the best.
https://www.youtube.com/watch?v=mpW23wM3yrk
I also made a video of it being rolled about on the trolley wheels. I have a bit of a cold and sore throat so I pretty much cough all the time.
https://www.youtube.com/watch?v=DrcuuezMqBg
Next up I need to brace the van and make struts so that when its tipped over it will stay there and not roll back. Then finally , finally I can actually do something to the van , woohoo!
---------------------------------------------------------------------------------------------------------------------------------------------------------------------------------------------------------------------------------------------------
November update -
Not too much of a huge update but a bit of a milestone for me.
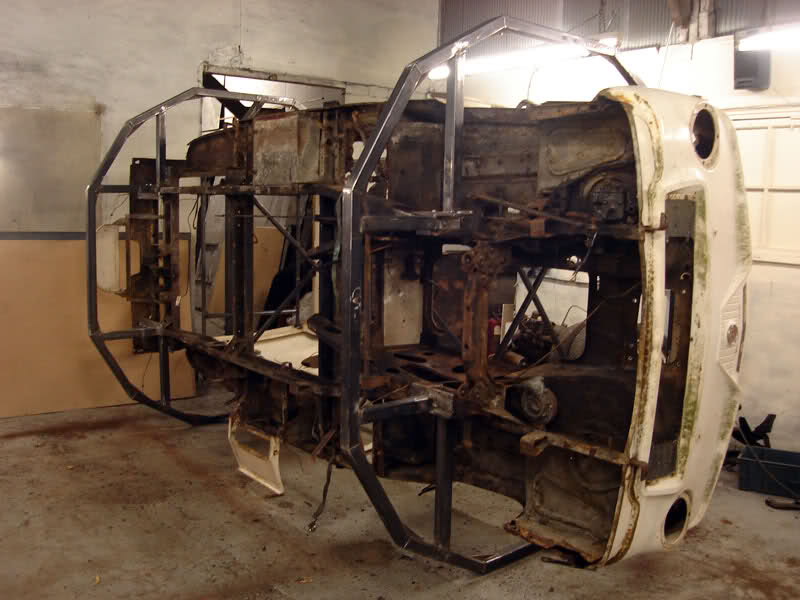
The dodecagon and bracing is now complete so i can roll the van around and not worry about distortion (thats the theory anyway).
Here its on the second step,


And on its side, I thought i took more photos of it on its side but apparently not. I will make some braces to attach to the side to stop it rolling back, it was steady enough to take photos but i wouldnt feel safe working on it like that.
I couldnt get a full shot of the underneath so this is a photomerge of 3 photos if your wondering why it doesnt look right.

It was a bit weird to see the underside at a decent viewing angle, not really something you see.
I also made another video of it being rolled on to its side.
https://www.youtube.com/watch?v=h1Kr22KSuAM
It is possible for one man to roll it on its side but i think any further over i would need some help.
Now that that is done i can on with actually fixing the bodywork. My plan is to shotblast the van body next. Im going to build a 6 metre x 5 metre shelter using clear tarpaulin in the corner of the garage. Ive never done shot-blasting before so it will be a bit of an experiment until i get the hang of it. I think it will be similar to painting the whole van with an artist paintbrush, joy....
-----------------------------------------------------------------------------------------------------------------------------------------------------------------------------------------------------------------------------------
December update : -
I havent been able to do much recently as im now working overtime and Saturdays at work to try and make some extra pennies for christmas.
Last weekend i started to strip the rest of the van. Being able to put it on its side meant taking the steering system, brake lines, fuel lines, master cylinders etc.. off a lot easier.

The next thing i have to do before i can repair the bodywork is to see exactly where i need to repair it. For that i need to strip all the paint and i decided to shot-blast the whole thing myself. I dont want to make a mess and create dust everywhere so i bought 3 heavy-duty polythene sheets to create a smaller space to shot-blast in. I was able to staple the sheets to the rafters on the roof.

The guy i share the space with gave me an old zip cable tidy he never needed anymore so i cut it in half and attached it at the corner so i could seperate the front and side of the sheets.

I also attached a weight to the bottom and rope so i can pull the sheets up and have a bit more room for the other people that have to gain access to the back of the garage.

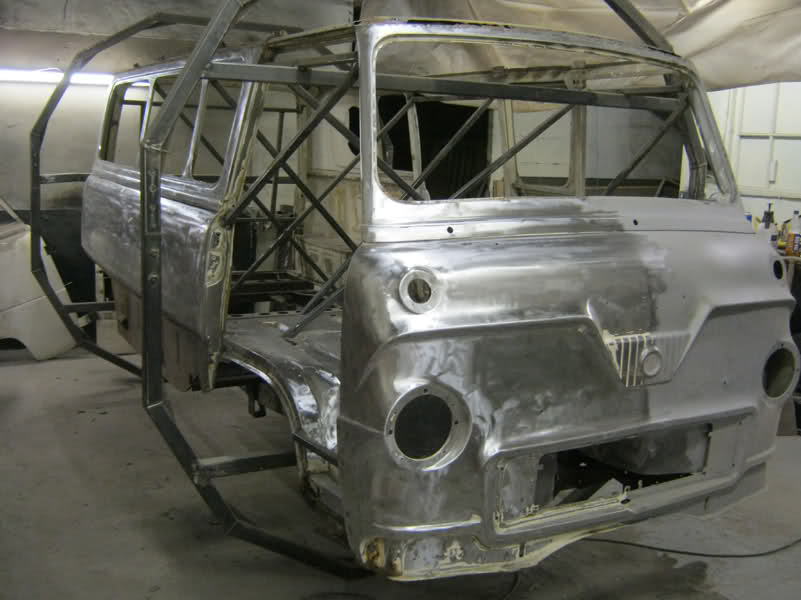
Before i went home i was able to get a quick shot of shot-blasting for the first time. I was able to get the hang of it pretty quickly, but i guess with practise il be able to do it better and i'll have alot of practise with this van.
This weekend i went shopping with the girlfriend in the morning to keep her happy and after that i buggered off to the garage. I wanted to do a little more of the blasting. I bought one bag of fine glass bead from a local media blaster for £10. I think that was a good price, much better than machine mart prices anyway. I continued on from where i left last weekend with the front corner.


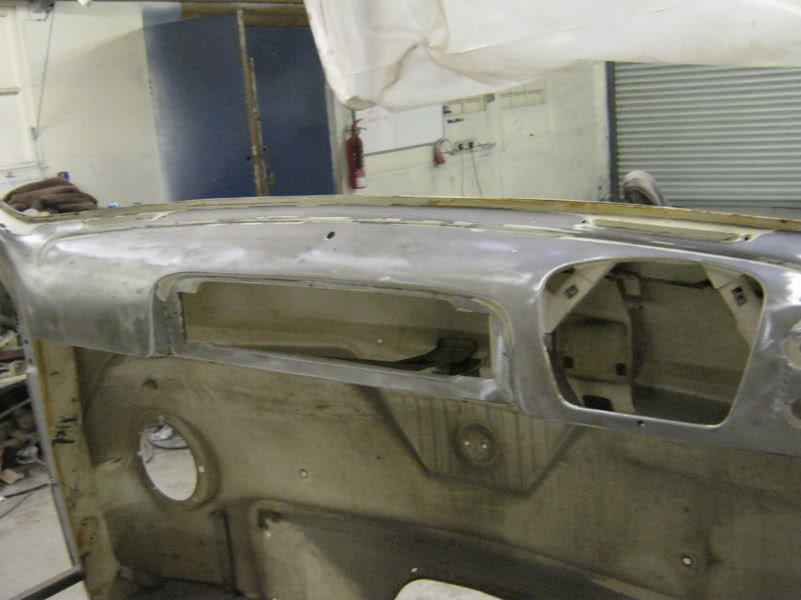
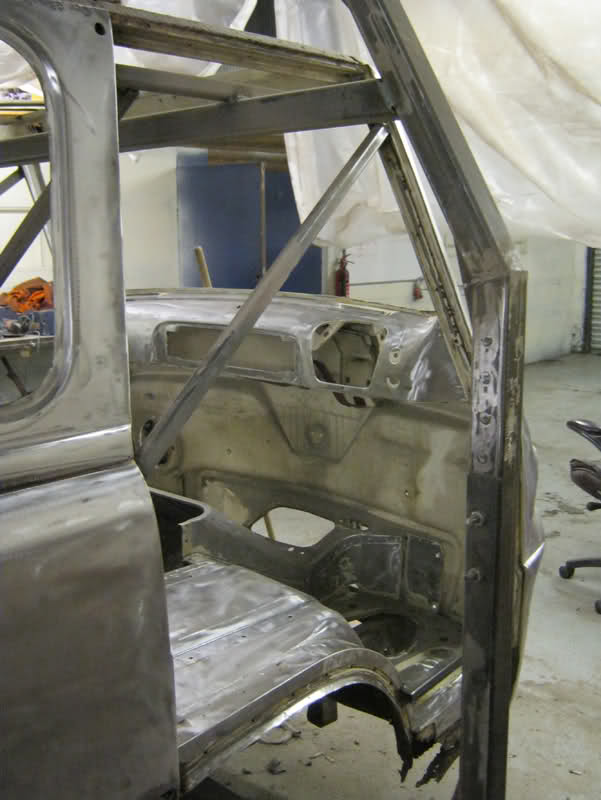
Shot-blasting seems the way to go for me. The finish you get is great and i like how it gets the paint and dead metal away so easily. The only other alternative for the DIY person would be using paint stripper and a wire cup brush/paint removing pad. For the bigger flat panels i do intend to use paint stripper as i dont want to distort them. for example, you can see in this photo of the A-post the rust and pinholes going all the way up. Before i blasted it it looked like it was just surface rust but giving it the once over i was surprised to see how bad it was. The repair of it wont be hard but it all adds up.

I was able re-use the glass bead. At first i just brushed it up and put it back in but i clogged it up when i started blasting again. I went to morrisons and bought a kitchen sieve and sieved the glass bead. I never realised just how much other crap i had swept up.
For a comparison shot heres a before.

And an after.

I never done too much as by the time i got to the garage it was 3pm and havign to set everything up etc.. took a bit of time. Plus Edinburgh is having its worst snow fall in years, this is the worst i've ever seen it anyway, and in the garage i only have a halogen flood light for heat so i went home for my dinner.

I wasnt really looking for another classic to have but it kind of found me. A guy I know from the scottish pre67 ford club had been having trouble with his Ford thames, namely the roof gutter and he was looking for another camper to strip out for parts. He posted these pics up of it lying in a field.
The specs are as follows: 1959 Ford Thames Dormobile, 1.7 engine (same as the Consul engine and running gear) 3 speed colomn shift, Grill, cupboards, sleeps 4 (allegedly), Fold down side step, heater, vacum operated wipers. Free bird and wasp nest.
After a little bit of thought he realised that this van was a lot worse than his so he never bothered taking it. Foolishly, I felt sorry for it, thinking its a shame to see it rusting and rotten away back to the earth in some farmers field. I managed to get a hold of the owner to see how much she wanted for it. She said someone told her it was worth £400 - £450 and that I was welcome to go take a look. So a few weeks ago me and my brother took the 44 mile trip in my Consul , from Edinburgh to Ancrum to have a look. Straight away I thought it was never in a hundred years worth £450. I managed to persuade the farmer to pull it out using his tractor. The first time it had moved in 3 years, so I could get a better look at everything. Thankfully the seperate chassis and out-riggers are still solid. The main area of concern is around the roof. The gutter is practically oxide and the edges of the roof have disappeared. The pop up roof also has a bit plastic missing so the rain has gotten in over the years, luckily its just a wooden floor so that shouldnt be too hard to replace. Everything needs stripped out and cleaned/ repaired. Enough blabbing, more pictures.
Thats my brother
The bottom hinge has came away from the door.
Apparently the brochure says it can sleep 4, I think they lied.
Whilst we were there we had a look at the other cars lying in the field
Some old morris 8 which I think has been lying there even longer. I hate seeing crap like this, not even a tarp thrown over it or anything.
An MG
There was a Land rover there too but I cant find the pic of that.
When I got home I wasnt too sure about buying it. One half of me said that I have enough crap to be getting on with, with the Consul but the other half was telling me how awesome it would be to go traveling in it once its all done. I decided to set my price at £200 and let fate decide. I phoned the woman up and told her what was wrong with it and how it wasnt worth £450 at all and I offered her £150, she declined so I upped it to £200 and she agreed, bonus! I think she was more glad that it was going to someone to restore than as a parts van.
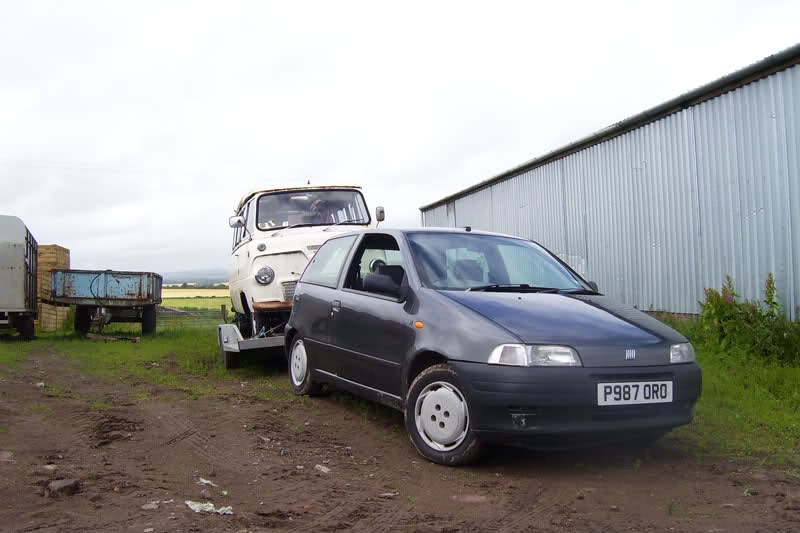
The next major hurdle was how do I get it from Ancrum 44 miles up to my garage in Edinburgh. The plan was for my brother to get his 2.4 Toyota estima/previa taxed MOTd and insured for this weekend and hire a trailer. Unfortunatly that went tits up on thursday as he found out the cost of insuring the Toyota just wasnt worth it. That left me in a bit of a pickle as to what to do next. I tried searching for a company to pick it up on a flat bed and drop it off but that was going to cost £240 at the cheapest. My next idea was to find a trailer to borrow and a car to hire, my dads friend came up with the trailer but to hire anything with a towbar was going to be £75, then I had to get my own insurance sorted. I tried phoning the only other person I know with a towbar on his VW golf estate buit I couldnt get a hold of him at all. I just about gave up on saturday when I looked at the full raging 1.2 litres of my 120,000 mile Fiat Punto and thought "Would it be stupid to try and tow a ton and a half of camper and trailer with this" so off I popped to the scrapyard and found a Towbar for the pricely sum of £15 and went to town installing it. It fitted pretty well and buoyed with confidence I got my dad to arrange the trailer for Sunday.
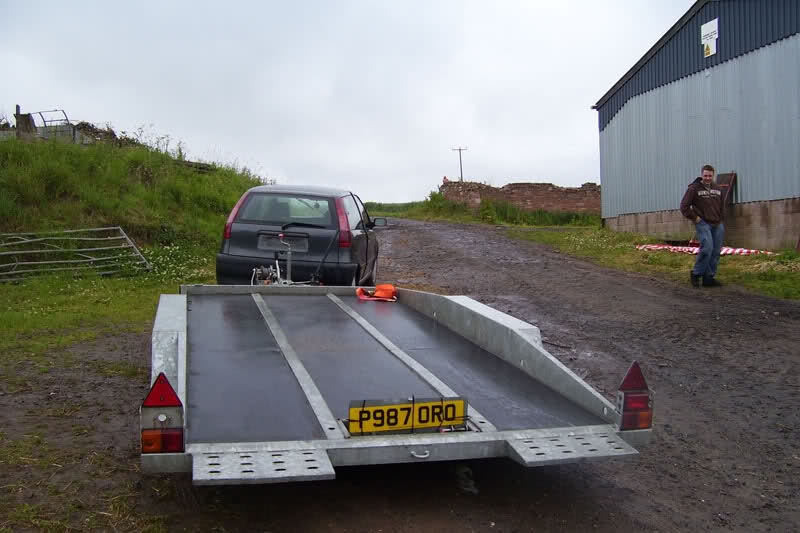
Sunday morning, its peeing down with rain and as we set off the engine is running on 3 cylinders, not the best of starts to the day. I pulled over at a garage and fiddled about with the HT leads and the problem dissapered. We went to my dads friends house to pick up the big ass trailer.
Its longer and wider than the car. I probably should have checked out the weight limit of the car but it was too late now. It was also the first time I had ever driven with a trailer so no better way to get used to it than with a proper man size trailer.
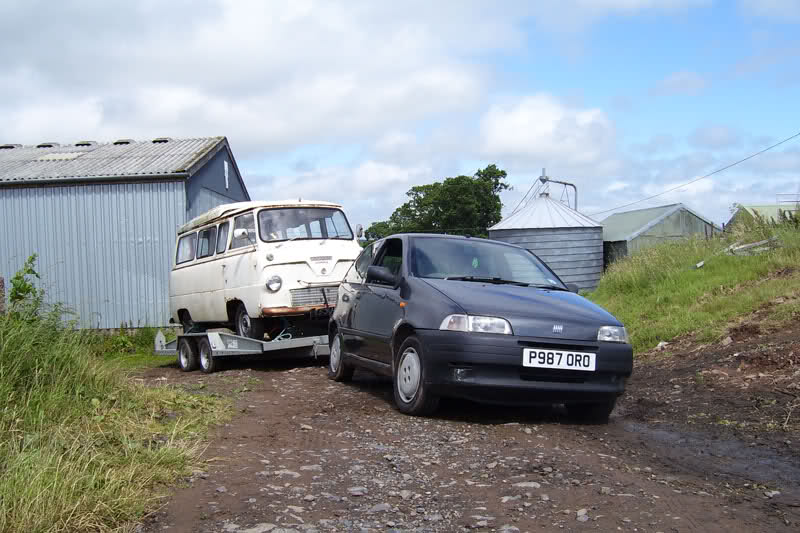
After another 44 miles of 'fun' driving we reached our destination, Thankfully Mr farmer was around to pull the Thames out of the soft muddy grass and onto a slightly less wet and muddy patch of grass for us to load up.
Seeing it again after 2 weeks made me kind of think did I make the right choice, too late now. It all paid for.
Loaded up and ready to go, dash you 4x4s and dash you torque! I have 75BHP and 78 lb-ft of raging FWD power.
BOO!
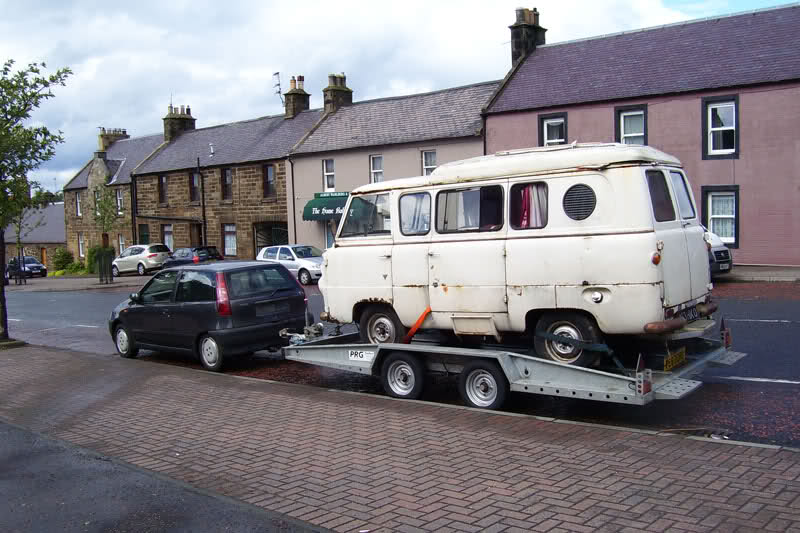
This was about as far as we got before we got stuck, all 15ft of it. I had to get the farmer to get his manatou and get us unstuck. I think he was a bit intoxicated off by this time as he draged us literally out of the hole 5ft and that was it "yeah, you will be fine from here", cheers mate......
Back on the main road the first hill we pull up I have to change down to 1st gear to get it up there. ME and my dad looked at each other, not muttering a word but both praying to the automotive gods that this blasted thing better get up these bastarding hills! Of course we had mental cross winds and no trailering experiance would be complete without the fluttering heartbeat you get that only a fish tailing trailer can provide at 50MPH. At one point the rain got so heavy it was like driving on a small lake and you still couldnt see crap with the wipers going at max. What a stressfull blasted drive.
We stopped off for a coffee in Peterhead, about 15 miles out of Edinburgh.
We managed to get the Thames into the garage, I forgot to take more pictures. Then back another 10 miles to drop the trailer off. I must say, i'l never underestimate the Punto again, it is a cheap shity run around but it was a champ today, I think I may need to service the poor child born out of wedlock now.
I now need to come up with a restoration plan. I'm also toying with the idea of a V6 of somesort, either cologne, cosworth or Omega, etc... I want to keep the coloum change and have it as a cruiser so an automatic gearbox too
Ive decided that this needs work done a lot sooner than the Consul, I guess the Consul has a few more years for the road without needing too much attention to keep it road legal. Once the camper is done i'll get started, but in a way I like the slightly ratty look.
August update ----------------------------------------------------------------
Ive made a start stripping it out and assessing all the crap I have to do to get it back to life.
I figured out how the 'dining table' was set up
and how the seats fold out into 'beds'
This is the first weekend we went to the garage and the magic started.
My girlfriend has taken an unusual interest in helping me to restore the van. I think its great as if I was in the garage myself it could get a bit boring but its a good laugh having her around and helping me out. Its ok right now at the stripping down stage but I think she may get bored when I'm welding and cutting crap up. I was thinking I could buy her a sewing machine and she could re-upholster the seats and curtains etc..
Yeah, check out those comfy ugly slacks I'm rocking.
I got Jana started on removing the light lenses and units etc.. she even managed to get the rear bumpers off herself. I don't mean to sound patronizing but when someone calls a ratchet the "clicky-thing" its quite a big step for her.
I even bought her a special tool kit for the job, shes since bought herself a proper tool bag and pliers set.
First door removed. It was a bitch as the hinge bolts were rusted solid, lucky for me there is a huge tool store opposite the garage (machine mart) so I managed to get an impact screwdriver.
All the seats and interior came out easy, the gas cooker was a bit of a joke really, The cage that held the gas bottle underneath the floor was about 8 inches from the ground and about an inch from the propshaft, then the gas pipe went to the cooker where someone had used a T-piece for some reason, with one pipe going to the hob and the other pipe was bent round a few times to stop gas leaking.... I don't know why the never just used a single pipe. There was a lot of cork insulation which I think had been stuck on with tar. Oh what fun I had with a scraper. Jana 'helped', but well, she got bored of it a lot quicker than I did.
Handsome eh,
Then I got stuck into the wiring loom, there was a lot of house-hold wire in one colour for switches and lights all over the place. I know I'm going to be re-doing the interior lighting differently so those got binned and I kept the standard loom. Note the intensity of my concentration.
The next weekend we started on taking the pop-up roof off. The fabric of the roof its self isn't too bad. There is a rip in it but its along the seam so once stitched up it will be ok. It was held down with aluminium strips and brackets.
WEST SIDE Y'ALL
peek-a-boo
Starting to get quite bare now, in total we found 3 dead birds in the van, 2 of which were skeletons and the other was quite fresh looking underneath the radiator intake, perhaps from the drive home on the trailer, oops.
We got the other door off and then I set about the lower panels, there pretty easy to come off as there all bolt on panels, something Ford promoted as a key selling point apparently.
The right lower panel its self was not bad, just a bit of surface rust and a few dings. Even behind the panel it was not bad. You can see the battery tray is pretty much gone but thats not really a problem at all, its just a welded up box. Although a lot of rust came flaking off as you can see.
The back of the wheel well is the worst, good thing is a lot of the panels to replace are just flat sheet with bends in it.
The other side was a bit harder to take off as it had spot welds along the side door opening but it came off none the less.
During all this a few bolts were completely seized and I had to grind them off, sending sparks flying. I finally thought id be a lot safer doing all this crap with the petrol tank out. Only problem was the bolts underneath had seized and the only access was to rip the floor out and take them off from the top.
So out the floor it went. The guy that rents the other side of the garage popped down and gave me a hand. The floor was inch thick plywood and all the coachscrews holding it down were, as you could guess, seized. We came up with a plan of him using a big lever and me drilling lots of holes around the coachscrews. You can see the petrol tank is quite small for something to go travelling with, may need to find something bigger. Once I disconnected the tank I poured the petrol away and it was pure orange, like irn-bru. Must have been laying in the tank for years.
The weekend after my brother came along instead of Jana as I wanted to get the engine/gearbox and the rest of the glass out. We even managed to get the rest of the doors off.
Glass out
Checking out how to remove the engine. We disconnected the gearbox first and tied rope around the engine to lift it straight up.
My garage buddys engine crane came in handy.
CHEEESE!!
A full 53bhp or so of pure antique metal
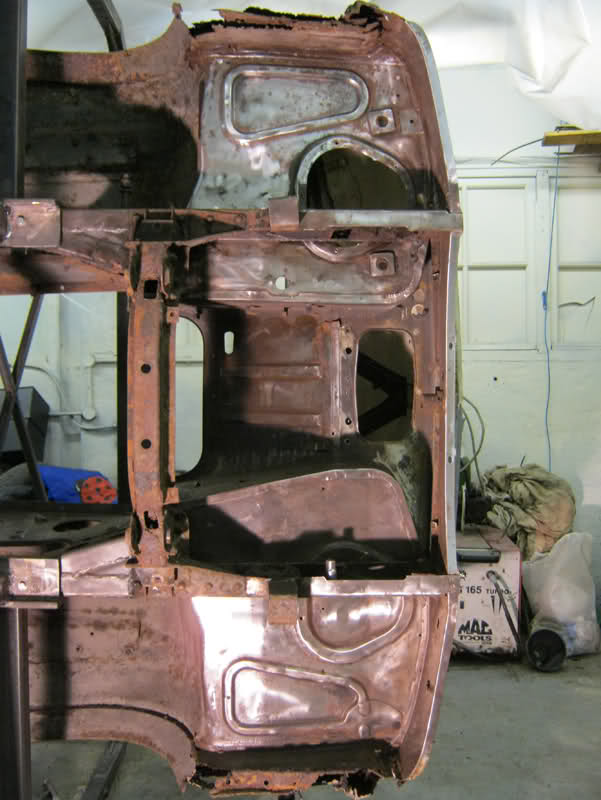
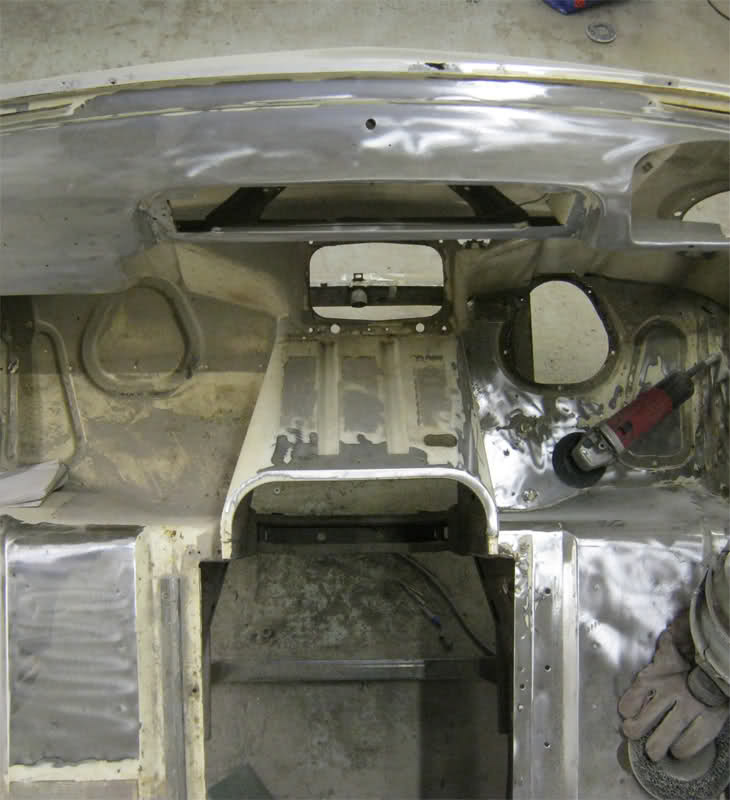
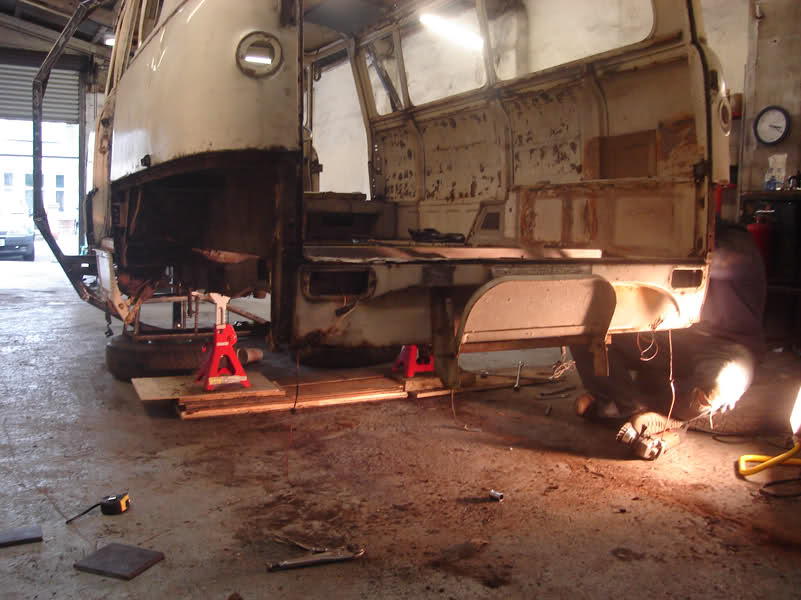
This is the hole that has been left from taking the motor out, The plan is to replace it with a 3 litre Cologne/Essex V6, I know it fits as ive seen the set up before in a Thames van. I'm going to go for an automatic box too as I just want it as a cruiser and I hope to keep the column change and rig it up to the autobox.
Thats as far as ive gotten with the van. I'm pretty much at the stage where I need to take the suspension, steering and rear axle off but before I do that I need to make up a way of supporting the van off the ground. I was looking at building a rotisserie but I came up with a slightly different idea. I'm going to build 2 huge dodecagons that split into 2 pieces. That way I can roll it on its side and sandblast/repair underneath then roll it back, unbolt the top half of the dodecagons and work on the roof etc..
Only thing is its going to cost about £180 in material so I need to do a few homers to make up the money for that. I also just put down a deposit to rent a new house with Jana so money is quite tight. Next update will probably be in a few more weeks.
September update -----------------------------------------------------------
Well its been a few weeks since I have made an update. To be honest I had no money to make the dodecagon chassis tilter so everything came to a standstill until I had more money. I managed to get 2 homers fabricating gates, each one took about 2 weeks to make and fit, only because I have a full time job 8-5 and I can really only fabricate my own stuff after work and on Saturdays. The first one I made was for some retro shop on cockburn street in Edinburgh. I'm not sure if anyones familiar really with Edinburgh but cockburn street is just of the royal mile so its good to be getting my work in a classy area (i.e., more money).
After that one his neighbor wanted me to fabricate a couple of gates for the front of his shop too, so, more money is better than no money and I done that too.
Finally I could start on my own stuff for the van. I bought 4 lengths of 50x50x3 box section for the frame and struts, 2 lengths of 25x25x3 for bracing the inside of the van, a 8x4 sheet of 1.2mm for the body and some 1.6mm for the underside and any other areas I want to protect a bit more. Last time I got as far as drawing the idea of the dodecagon.
I know that there is other ways for me to work on the underside of the van, from rolling it over onto old mattresses/tyres to make a proper rotisserie. The reason I decided on the dodecagon was its simplicity, I don't have to jack it up crap loads to rotate it and I can mount it straight onto the chassis using the suspension mounting points.
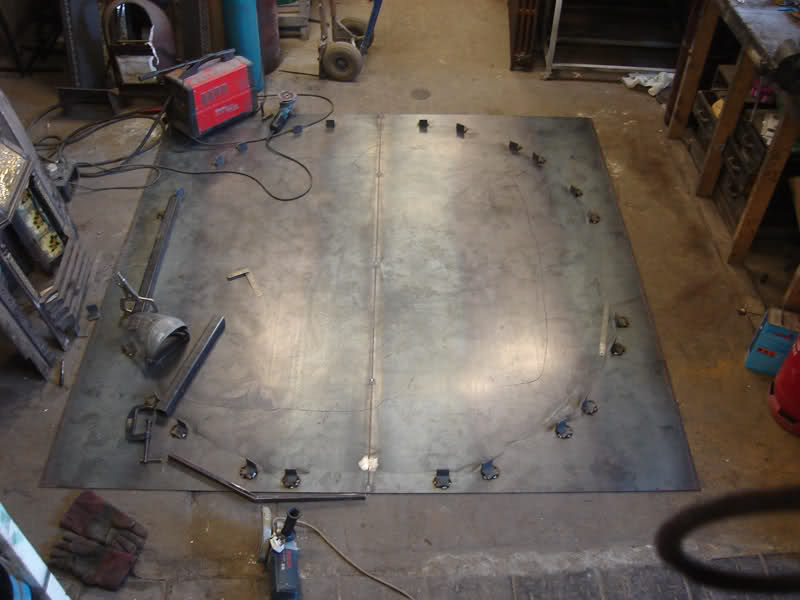
I decided before I go cutting anything to check over all my measurements and see if I can adjust the sizes. I went to the garage and made a cardboard template of the outline of the front of the van, after messing around with the sizes I realized I could make the bottom and top rail 37" the side rails 32" and the corners 20", meaning instead of the overall height and width being 104" its now only 87" (if my memory serves me right). I then got 2 sheets of 3mm plate from my work and laid them flat on the ground and tacked them together to make a 8ftx8ft working area. I traced around the cardboard template (you can vaguely see that) and then made a full size drawing of how the dodecagons should look in chalk. Once that was done and I was happy with it I cut 24 bits of 50x50 at 50 long angle and tacked them around the perimeter of the dodecagon. That way once everything was cut I could clamp the box to the angle and know its not going to move and warp.
I then started to cut the 50x50 box to the sizes I need with a 7inch grinder, Its not my chop saw so to save the blade a bit I cut them with the grinder square, so when it comes to cutting the 15 degree angle I'm only cutting 3 faces, therefore using less of the blade.
This photo is a bit crap but you get the idea, with everything cut I could place the metal on the sheet and using a crap load of clamps, clamp everything in place and start tacking. Once it was all tacked I kept the clamps in place and welded the top face.
I then stood it up so I could weld the inside and outside.
After that I then laid it back down with the other non welded face pointing up onto the jig to make sure it never warped and I laid the other bits of metal on top and tacked them to the complete dodecagon, that way I know both will be the exact same (or close enough anyway).
I then broke the tacks holding the dodecagons together and welded everything up completely.
The next again weekend I went back to finish them off but I forgot my camera so I'll need to show what I done later. I wanted to add strength to the corners so I cut some 25x10 flat bar and welded them in place like gussets. The other thing I done was to cut them in half and sleeved an insert inside both cuts. Unfortunately once I cut them in half they bowed in, so I had to cut 4 corners and pull them out a few degrees and weld them back up. Easy enough to do but time consuming.
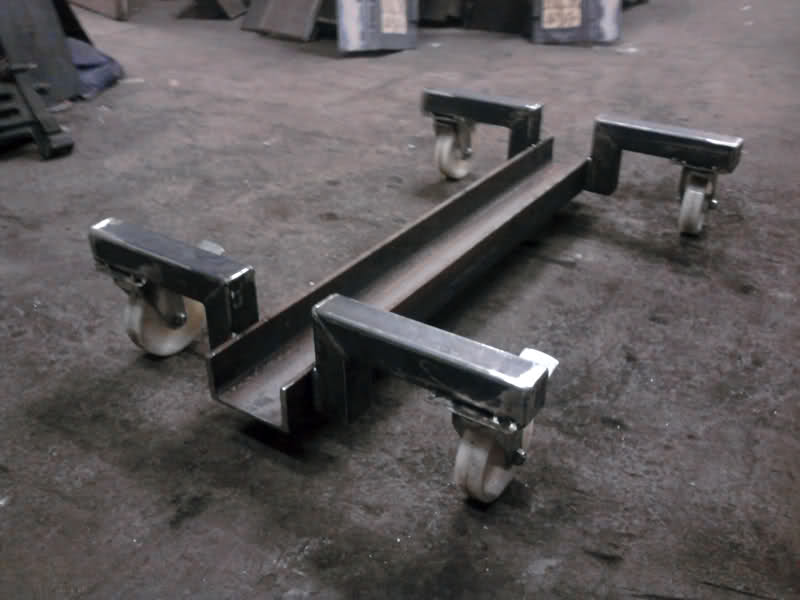
The weekend after that I decided to fabricate trolley dollies so can move the whole thing around a lot easier. I bought 8x125mm castor/brake wheels, and 2 x 65x130 U channel @ 40" long. Using some left over 50 box I joined the whole lot together and I'm quite happy with how they turned out. I left a 60mm gap from the floor to the channel. I'm hoping that when I go to roll the dodecagons I can roll them into the channel, I'll just need to see how it goes. The wheels should be strong for the job, they hold 160Kg each, so altogether thats 1280kg in total and I'm guessing the van isn't even going to be 700Kg fully stripped.
I got them down to my garage and with the help of my beautiful although slightly unenthusiastic assistant got to see how they would look in place. It was exciting to see all the hard work starting to make sense and feeling worthwhile. You can see the gussets I welded in place here.
My brother and I went to the garage last Wednesday after work and started to strip the front suspension out. We got the whole front end out but by that time it was getting quite late and I had an operation the next day so thats as far as we got. I'm hoping next week to get back along and bolt the plates I have cut to the mounting points and weld more box to join the chassis to the dodecagons and fingers crossed it should go to plan. I also have to brace the inside of the van extensively as I plan to chop the roof of first. Thats why I have 3 sheets of MD, I'm going to join my 2 benches together and make a huge 12ft x8ft table, screw the roof down and repair it.
Hopefully I'll have another update next week and a video of it in action.
October update -----------------------------------------------------------------------------
Just to recap - The suspension at the front will remain standard, the layout will anyway. Its got double wishbones at the front with quite a bit of adjustment considering its a 50 year old van. I will change all the bushes ofcourse and depending on the weight of the engine and other stuff I'll need to fit tougher springs and shocks. It would be good to have a balance between comfort and handling. The brakes will get changed to discs. At the rear I'm going for a Ford Capri rear axle as its the exact same width and I know it can handle the power.
The steering could be changed to powersteering but id need to find a car that has a power steering steering box as its old school and isn't a rack and pinion . I know some Mercedes used them so I'll need to have a rake around the scrap yard. The Scorpio V6 does have a power steering pump though.
I want to try and find a Ford Granada Scorpio, the first model, because that has the same 5 stud bolt pattern (5x112). That way id have everything, the 24V V6, the gearbox, the discs brakes and hubs, the ECU etc....
As far as entertainment I'm happy with a cd/MP3 changer and a few decent speakers, I also have the idea of getting a TV which would mount flush to the headlining then flip down to watch. A cheap car PC or laptop to go with it would be good. I'm not going to go 'pimp my ride' style mental though and have a candy floss machine inside a candyfloss machine or some stupid crap like that.
For cooking I'll just have a basic double hob with a grill underneath. It does kind of scare me a bit that I'll have a flame less than foot from curtains or other flammable material so I'm going to plump in a racing car style fire extinguisher with pipes above the cooker and along the inside. That way if it catches on fire I can press a button and the whole inside of the van will be extinguished.
I managed to fix the works spare plasma cutter so my boss has let me borrow that and a guy I know form another forum has let me borrow his sandblaster so that is a huge help!
I've been a bit busy again but managed to get the tilter pretty much finished.
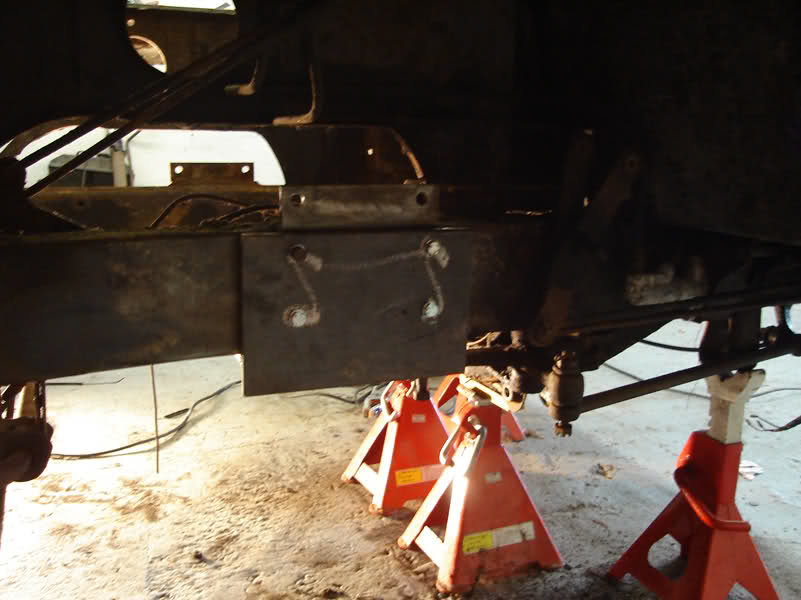
First thing I had to do was Clean up the chassis where I want to bolt the plates onto
I measured and cut up the plates, then drilled the holes out.
Then I bolted the plates to chassis and tacked them together, that way I knew it was going to be a good tight fit.
Unbolted the plates and welded them up. Before I welded them I tacked a few bracers between the angle so it wouldn't distort with the heat.
Whilst the plates were cooling down I took out the first bottom of the dodecagon and positioned it to where I needed. It took a while because your working with 3 different axis of movement and the only thing I had to hold it was a black and decker workmate. I first made sure the van its self was level then I leveled the dodecagon, trying to keep it centre to the van and then level it the other way. Awkward.
With that done I measured up for the supports, first the horizontal one was cut and tacked in.
Then the vertical.
Once all tacked I jacked the van up and let the frame drop. I tacked in a few more braces and welded it all up, gave it a quick dress up and bolted it back on the van. That was the first test over, if it would actually hold it and not bend or warp, which it did, success!
It looks like I'm advertising a can of GT85 but I'm really putting in the bolts so the top half doesn't come off when it gets rolled over.
The next again weekend my brother came along to give me a hand with the rear. He done a god job of stripping the axle out and disconnecting various bits. Then he cleaned up the chassis for me,.
just chilling out on the floor
Whilst he did one side I was measuring, cutting, marking and drilling the plates for the brackets. Same story as the front, bolted them up and tacked them.
Here you can see the bracers I tacked on so it wouldn't warp when welding up.
. That was that for that day. My brother had to go home for his dinner (family man) so I took the brackets to my work and welded them up there. Last weekend I went with my girlfriend for a wee cheeky long weekend away up north for our 4 year anniversary and she was kind enough to not be intoxicated off with me by letting me to go to the garage on the Sunday afternoon. I forgot to take photos as I was going along though, I think it was because I got intoxicated off after spending an hour trying to level up the rear dodecagon and cutting the horizontal supports when I suddenly realized that, yes I had everything level but the rear ring wasn't level with the front. Luckily I noticed just in time as it was off by about 40mm. Once I got it packed up it went pretty much the same as the front did.
It was good to see my creation starting to actually be complete. Next step was figuring out how to slide the trolley wheel frames underneath. For the rear I managed to just lift the van up myself and kind of kick and shuffle the frames under. The front is a bit heavier so I jacked that up , as I did the whole back off the van started to veer towards the wall. Once I put the brakes on the wheels I jacked it up again and slid the front wheels underneath.
Front:
Back:
I tested the van to see if it would actually tilt and I got it onto its first step. I want to brace the inside of the van properly before I go any further but atleast I know it works so far. I recorded it on my mobile so the quality isn't the best.
https://www.youtube.com/watch?v=mpW23wM3yrk
I also made a video of it being rolled about on the trolley wheels. I have a bit of a cold and sore throat so I pretty much cough all the time.
https://www.youtube.com/watch?v=DrcuuezMqBg
Next up I need to brace the van and make struts so that when its tipped over it will stay there and not roll back. Then finally , finally I can actually do something to the van , woohoo!
---------------------------------------------------------------------------------------------------------------------------------------------------------------------------------------------------------------------------------------------------
November update -
Not too much of a huge update but a bit of a milestone for me.
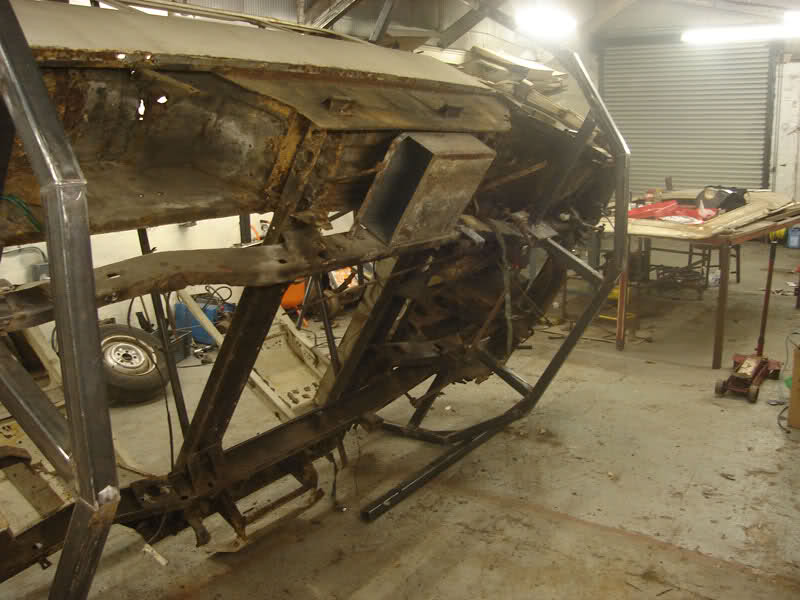
The dodecagon and bracing is now complete so i can roll the van around and not worry about distortion (thats the theory anyway).
Here its on the second step,
And on its side, I thought i took more photos of it on its side but apparently not. I will make some braces to attach to the side to stop it rolling back, it was steady enough to take photos but i wouldnt feel safe working on it like that.
I couldnt get a full shot of the underneath so this is a photomerge of 3 photos if your wondering why it doesnt look right.
It was a bit weird to see the underside at a decent viewing angle, not really something you see.
I also made another video of it being rolled on to its side.
https://www.youtube.com/watch?v=h1Kr22KSuAM
It is possible for one man to roll it on its side but i think any further over i would need some help.
Now that that is done i can on with actually fixing the bodywork. My plan is to shotblast the van body next. Im going to build a 6 metre x 5 metre shelter using clear tarpaulin in the corner of the garage. Ive never done shot-blasting before so it will be a bit of an experiment until i get the hang of it. I think it will be similar to painting the whole van with an artist paintbrush, joy....
-----------------------------------------------------------------------------------------------------------------------------------------------------------------------------------------------------------------------------------
December update : -
I havent been able to do much recently as im now working overtime and Saturdays at work to try and make some extra pennies for christmas.
Last weekend i started to strip the rest of the van. Being able to put it on its side meant taking the steering system, brake lines, fuel lines, master cylinders etc.. off a lot easier.
The next thing i have to do before i can repair the bodywork is to see exactly where i need to repair it. For that i need to strip all the paint and i decided to shot-blast the whole thing myself. I dont want to make a mess and create dust everywhere so i bought 3 heavy-duty polythene sheets to create a smaller space to shot-blast in. I was able to staple the sheets to the rafters on the roof.
The guy i share the space with gave me an old zip cable tidy he never needed anymore so i cut it in half and attached it at the corner so i could seperate the front and side of the sheets.
I also attached a weight to the bottom and rope so i can pull the sheets up and have a bit more room for the other people that have to gain access to the back of the garage.
Before i went home i was able to get a quick shot of shot-blasting for the first time. I was able to get the hang of it pretty quickly, but i guess with practise il be able to do it better and i'll have alot of practise with this van.
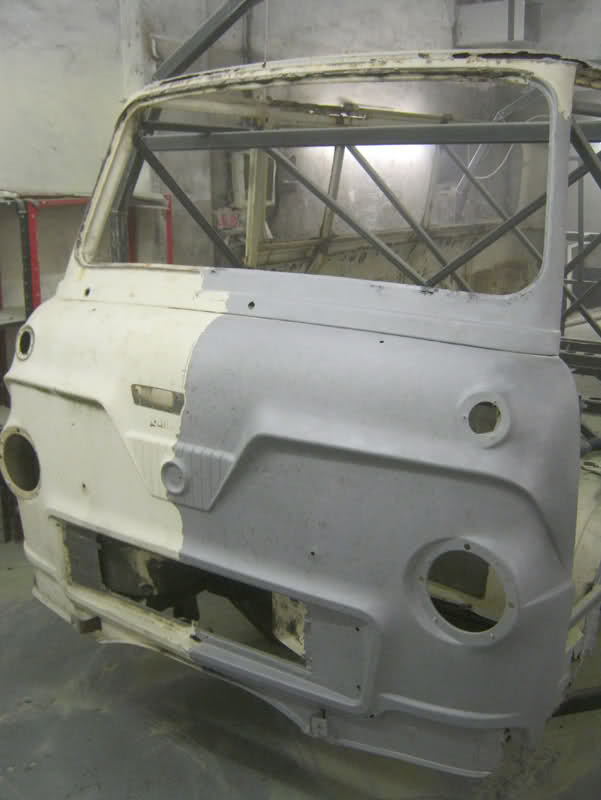
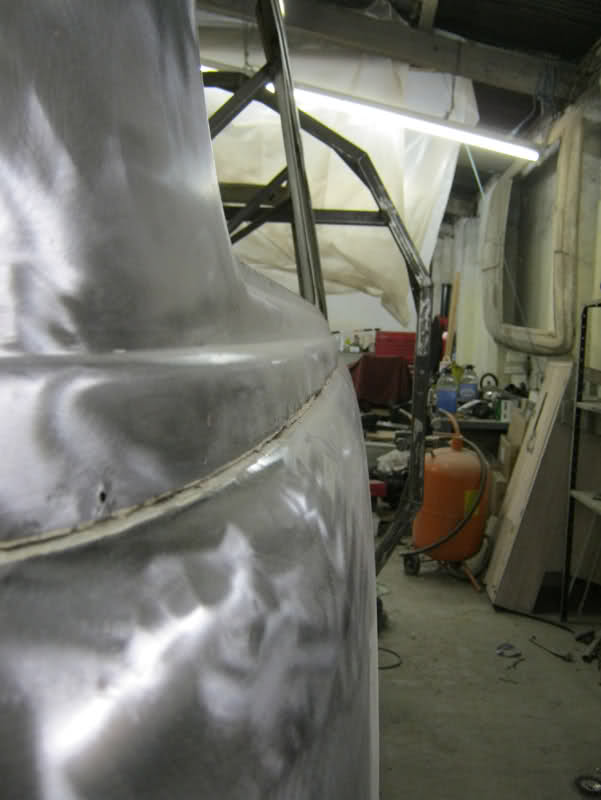
This weekend i went shopping with the girlfriend in the morning to keep her happy and after that i buggered off to the garage. I wanted to do a little more of the blasting. I bought one bag of fine glass bead from a local media blaster for £10. I think that was a good price, much better than machine mart prices anyway. I continued on from where i left last weekend with the front corner.
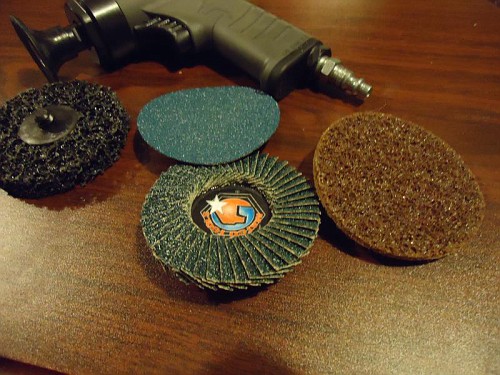
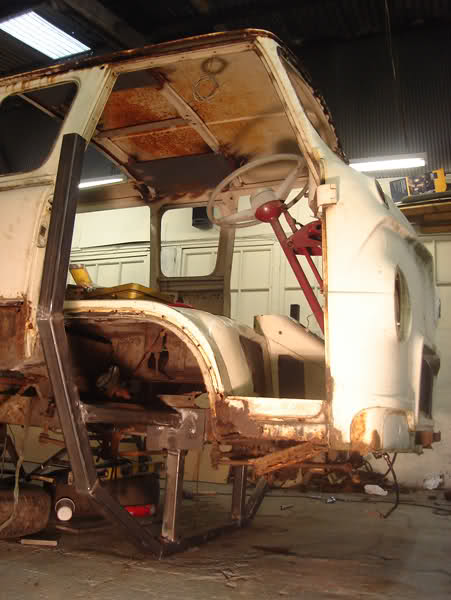
Shot-blasting seems the way to go for me. The finish you get is great and i like how it gets the paint and dead metal away so easily. The only other alternative for the DIY person would be using paint stripper and a wire cup brush/paint removing pad. For the bigger flat panels i do intend to use paint stripper as i dont want to distort them. for example, you can see in this photo of the A-post the rust and pinholes going all the way up. Before i blasted it it looked like it was just surface rust but giving it the once over i was surprised to see how bad it was. The repair of it wont be hard but it all adds up.
I was able re-use the glass bead. At first i just brushed it up and put it back in but i clogged it up when i started blasting again. I went to morrisons and bought a kitchen sieve and sieved the glass bead. I never realised just how much other crap i had swept up.
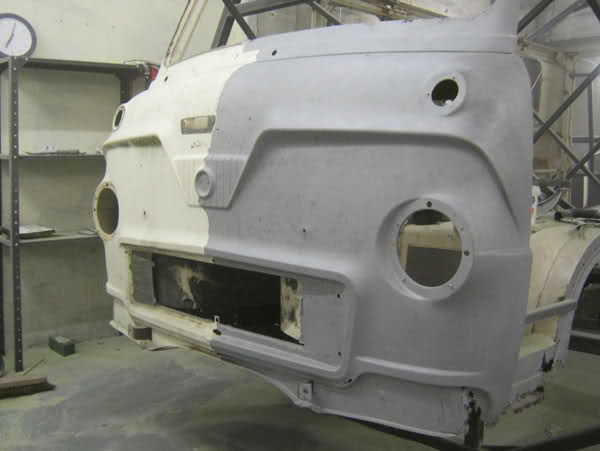
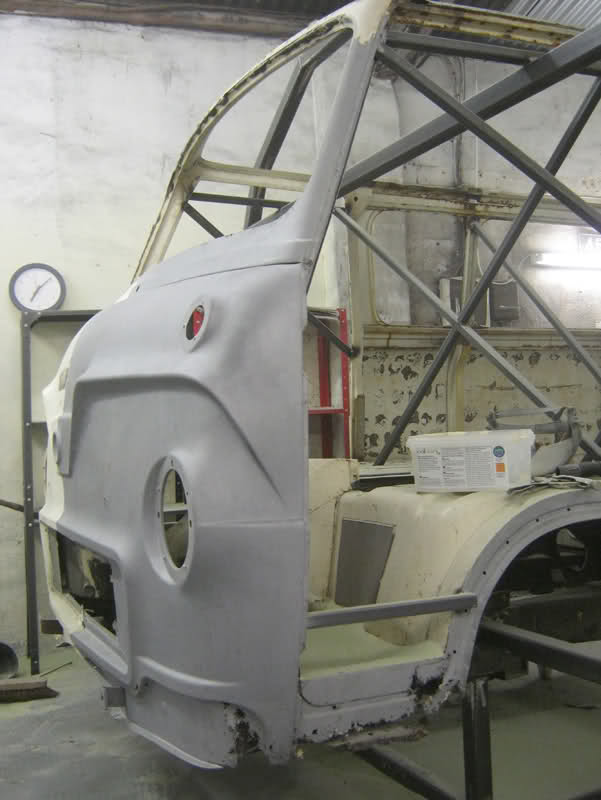
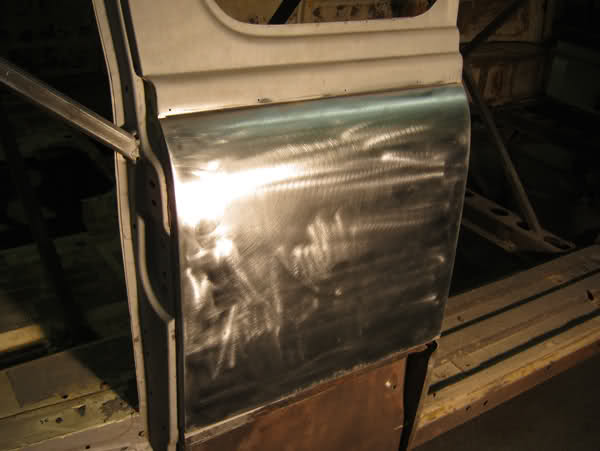
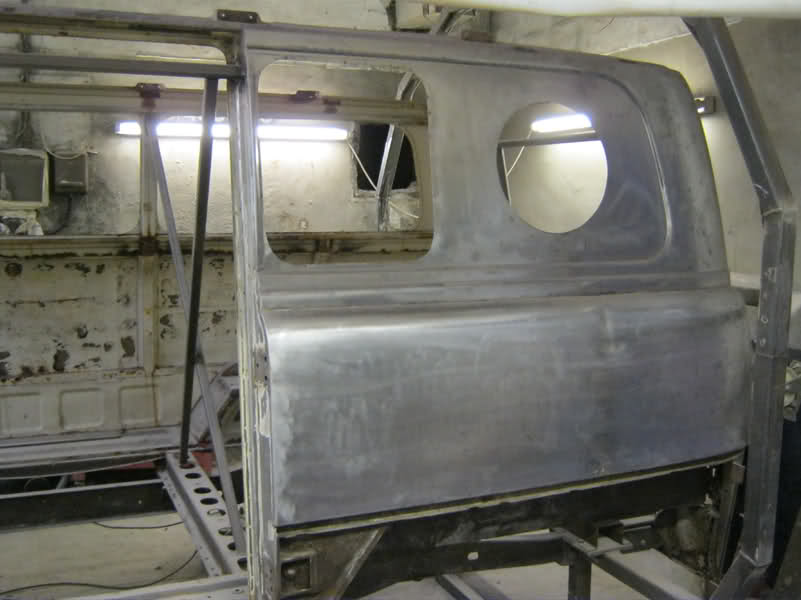
For a comparison shot heres a before.
And an after.
I never done too much as by the time i got to the garage it was 3pm and havign to set everything up etc.. took a bit of time. Plus Edinburgh is having its worst snow fall in years, this is the worst i've ever seen it anyway, and in the garage i only have a halogen flood light for heat so i went home for my dinner.