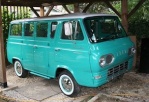
Blimey, its been a while since i updated this, as the van has been sat in my garden for quite a while now....!!
Anyway, the camper roof is now completely gone. I decided to fit a full length rag top to the van, and went ahead and bought one, without even thinking about the problems i would encounter fitting it to a roof with ribs in it.
I realized that the only way to sort it out would be to get rid of the ribs and have a nice smooth roof, which turned out to be a bit of a nightmare. I am not an expert with a welder, and the first attempt was a complete disaster, so i covered it up and forgot about it for almost a year.
So, we are going camping in a few weeks, and i thought how ridiculous to be using a tent when i have a camper van waiting to be finished....!!!! So i had another go at welding the roof up. Unfortunately i didn't take any pics of the work, but here is the finished article....


I decided to leave the ridges in at the very edges of the roof, but at the back i had to make the rest of the roof all one level. I cut lengthways slots in the roof either side of the ridges and jacked up the lower sections of the panel so that it was all the same level, and then seam welded it all back together with small strips of metal filling the gaps. Sounds simple enough, but it was a complete nightmare. Trying to do it and avoid warping and distortion was tricky, but i watched a few videos on youtube and figured it out from there.

I got 2 lengths of angled iron and cut slots every couple of inches, and then bent them to form a curve that matched the existing roof. You can see the 2 curved pieces in the 2nd photo above. These were then used to hold the roof in the right shape whilst welding. By clamping these in place, it ensured that the roof stayed where it was supposed to, and i didn't get too much warping.
It took about 3 days of welding and grinding to get this right, and after finishing it i was not looking forward to tackling the front, as the ridges were much longer, so i came up with the idea of welding in a smooth section just where the roof would sit, and leaving the rest of the roof as it was.

I cut s strip of metal about 6 inches wide, and clamped it to the curve, and then welded in the small vertical fillets that were cut to fit the shape of the roof. It actually went really well, and by the end i was getting really good at welding without it distorting. And thats it, job done. Took me weeks to get it right, but i'm really pleased with the finished result. The rag top is fitted quite loose, as they do shrink a small amount as soon as the sun gets on them. This will hopefully get rid of the remaining ripples in the vinyl.
Some other jobs i have tackled have been to fit some curtain rails. I fitted stainless rods along all the windows in the back, top and bottom.

I also bent a curtain track to go around the front of the van as well.

Just need the wife to finish the curtains now.....!!!

Another job i tackled was the side step. Its been bugging me for ages, as the pressure put on lower door hinge by the mechanism has caused all the paint to crack off all around the hinge. I was never very impressed with this method of opening the step, so i decided to fit a linear actuator to operate it electrically instead.

It moves in and out 200mmm which is the perfect amount, and is activated by a small dpdt momentary action push button switch which is commonly found on guitar effects pedals. I had to make a small recessed section for it, as the switch was too big to fit in the door gap as it was, so i welded up a small plate of metal and some tube to make a recessed hole for the switch. Getting quite good at welding now, and it looks really neat.

The step now opens on its own as soon as you open the door, and closes as soon as you close the door.
I also changed the steering box for one that Fred Carello sent me last year. It feels much better now, although i haven't driven anywhere yet. Got the annual MOT test on Saturday, and then as long as it passes, it will be back on the road again.....