


I am interested how the wiring harness works out, keep us posted.
+6
69
rekbender
dix
OutofSight
Brandon2
68vanman
10 posters
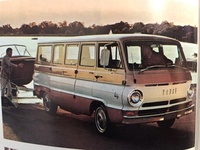
1969 A108 318 clean up and mods

Keith D- Number of posts : 405
Location : El Dorado Hills, Ca
Registration date : 2016-11-25
68vanman- Number of posts : 124
Location : Hayward, CA
Registration date : 2012-09-29
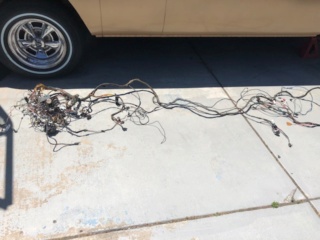
* I'll create a new post for the wiring harness install in the next day or so. This way it's only about this one subject.
Had a good day yesterday, I finished labeling all my connections and then removed the old wiring harness. The Painless kit arrived on Friday and I've already read and re-read it a few times. To me, the manual is very detailed and has provisions if you still want to use an ammeter. It may be another week before I start the install. Here's a list of what I've bought and have planned:
1. Purchased Painless PowerBraid kit to protect the wiring and give it a clean look, new battery cable kit, Powermaster retro round back 95 amp alternator, Powermaster mini starter.
2. I'm bypassing the gauges in the dash and will be using Stewar Warner electric gauges for Oil, Volts, Temp, and Fuel. New temp sending switch and oil pressure switch.
3. I'm not using an electric fan so those wires won't be used.
4. The wiring run from the front to the back of the van is still in good shape so for now I will consider connecting to the new harness. (Dome, parking lamps, tail lamps)

vanny- Moderator
- Number of posts : 14778
Location : Ashburnham, MA
Age : 65
Registration date : 2012-09-22
Thanks so much for doing this and please let us know if you run into any problems and what it takes to resolve. Knowing the good and the not so good can be helpful to others trying to install these. Looks like you’re thinking things through. I’m watching this thread carefully because I also have a painless kit that still needs to be installed.
_________________
“The future will soon be a thing of the past."
http://public.fotki.com/Vintage-Vans/vintage-vans-es/ruff-diamond-1/?cmd=fs_slideshow
68vanman- Number of posts : 124
Location : Hayward, CA
Registration date : 2012-09-29
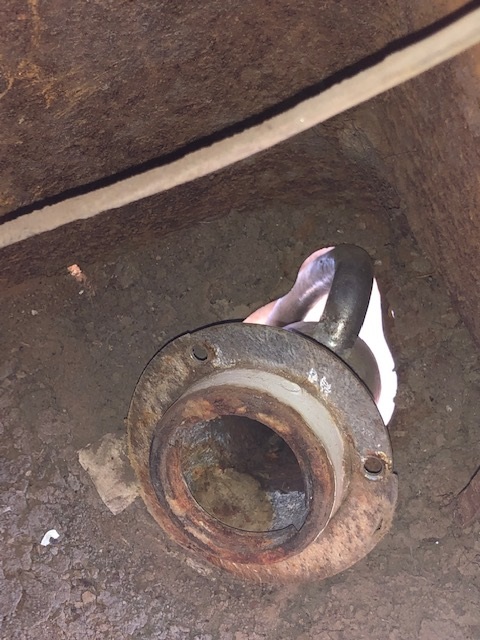
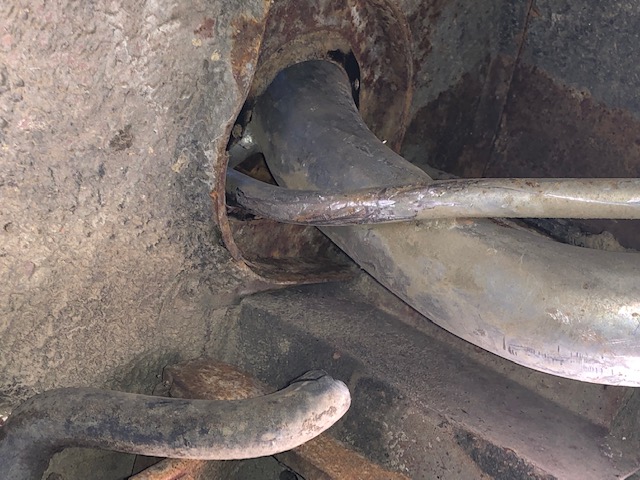
Something I forgot to add, regarding the installation of the new gas tank. When I had removed the filler hose that connects the filler tube and tank, a bunch of loose rust fell out of the filler tube. Again, the van hasn't been on the road since 2005 but I was a little surprised on how much rust fell out of there. I'm in the midst of trying to remove the filler tube because I need to clean it out really well. I had to raise the back of the van really high so it will drop. I'm having trouble getting that last part out.


69- Number of posts : 445
Location : Germany, Nds
Registration date : 2016-10-18
There is a part that can be removed to ease removing/mounting the filler hose. It's the part providing the through-hole on second and third picture; the outline of the part is visible.
Trust this helps.
Trust this helps.
68vanman- Number of posts : 124
Location : Hayward, CA
Registration date : 2012-09-29
Oh I think I see it now. I removed the plate and gasket from the bottom already. It looks like I need to push up on the piece that is tight around the filler tube.

sweetvan- Number of posts : 246
Location : Ventura, CA, 93003
Registration date : 2013-12-16
It looks like that piece could get rusted out and would be difficult to make or replace.
68vanman- Number of posts : 124
Location : Hayward, CA
Registration date : 2012-09-29
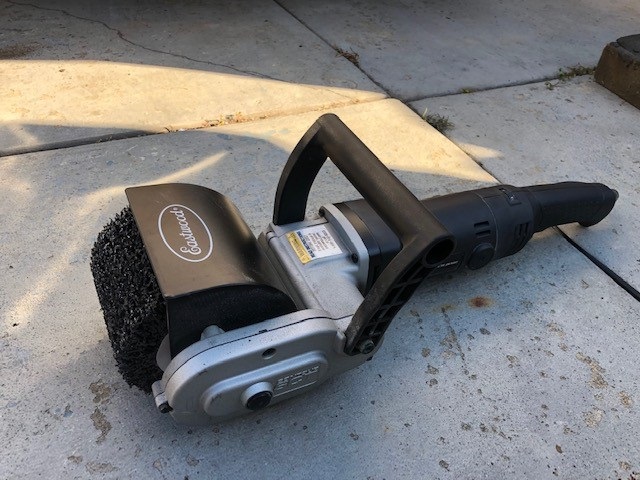
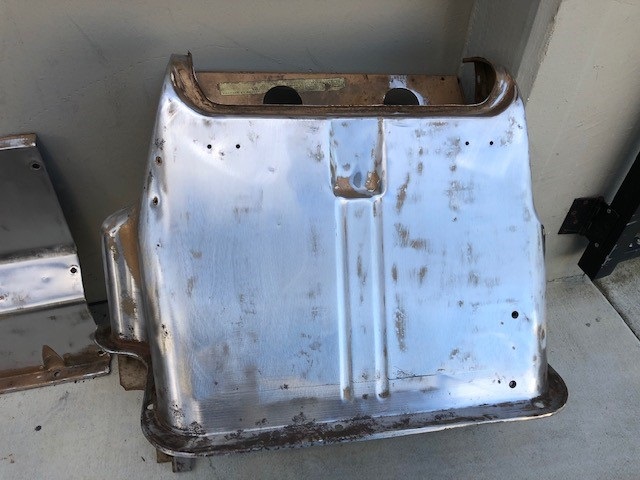
I can't stand using dirty greasy mounting hardware with newly installed parts so another time consuming process of this build involves a parts washer, wire wheels, disc sanders, blasting cabinets, etc. to get everything clean. Recently I decided to add a new tool to my collection when I ordered this Eastwood Contour SCT (surface conditioning tool). It came with 3 different sanding drums, abrasive, 60 & 120 grit. I gotta say that I really like this thing. I took the undercoating and paint off my gas tank straps within 5 minutes. The dog house panels had carpet glued to it so I'll be using this tool to strip it down. I also tried on the driver door on my 67 A100. Again, in a few minutes it took it down to metal easily. The right side of the lower wheel well is loaded with bondo from the previous owner. I've used 60 and 80 grit disc grinders in the past and they do work better is certain areas but for body panels this is what I'll be using from now on. It has a gear drive and runs off 120v with a 7' cord.

OutofSight- Number of posts : 1564
Location : Lake Oroville, Ca.
Registration date : 2015-11-19
Nice tool!
vanny- Moderator
- Number of posts : 14778
Location : Ashburnham, MA
Age : 65
Registration date : 2012-09-22
Thanks for the tip! 
_________________
“The future will soon be a thing of the past."
http://public.fotki.com/Vintage-Vans/vintage-vans-es/ruff-diamond-1/?cmd=fs_slideshow
68vanman- Number of posts : 124
Location : Hayward, CA
Registration date : 2012-09-29
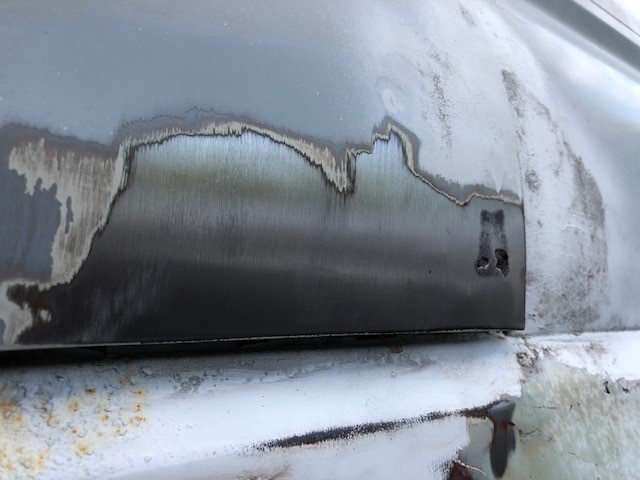
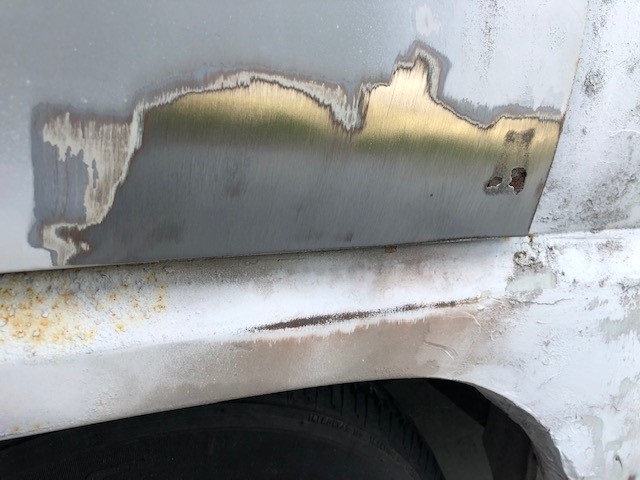
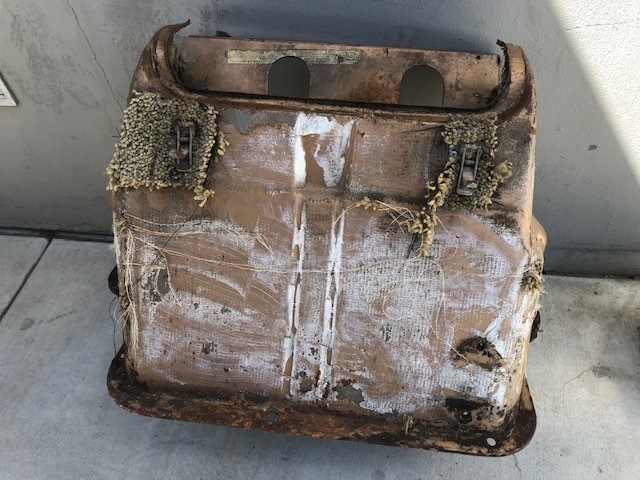
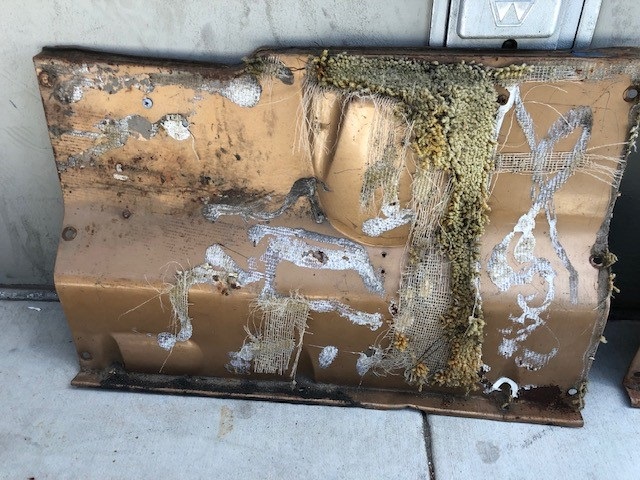
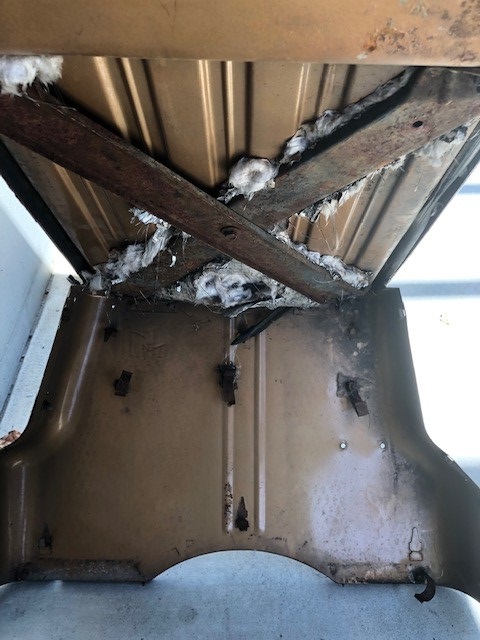
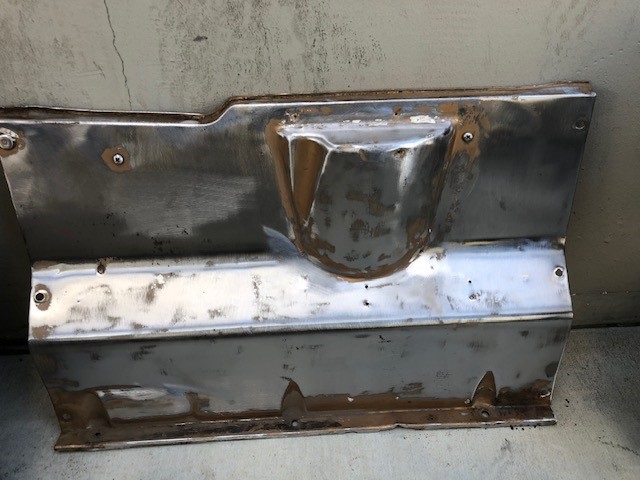
Had some free time this weekend so I started prepping the doghouse for new paint. I'm not entirely sure who did it, but this van was carpeted front to back including the doghouse, so I had a lot of adhesive to remove. I used a combo of the new Eastwood SCT tool, high speed flap disc and air grinder. I'm about 90% done with it.
I ordered a doghouse insulation kit from Quiet Ride Solutions so that will be installed once I'm done painting.
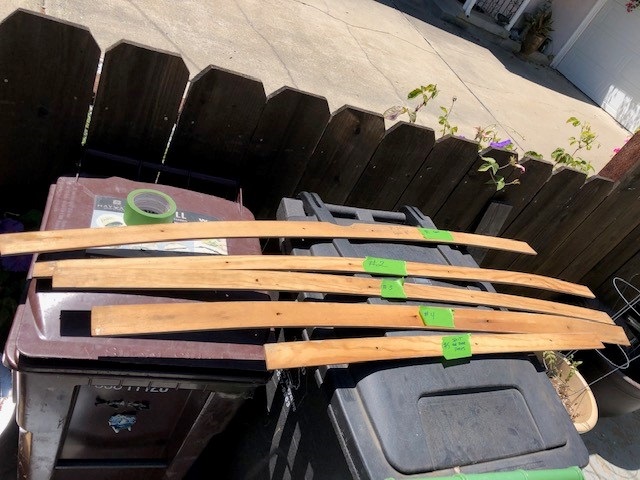
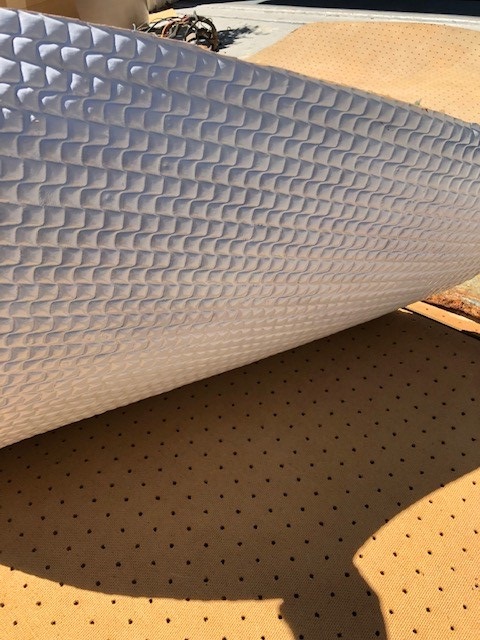
I removed the entire headliner as well. If you'd like to make a template for your van, let me know. I can give you the measurements of the panels and bows. The bows are approximately 56.5" to 57" long. The widths vary from 1.75" to 2 1/4". No sure if the padding was stock original of if someone replaced it.


I ordered a doghouse insulation kit from Quiet Ride Solutions so that will be installed once I'm done painting.
I removed the entire headliner as well. If you'd like to make a template for your van, let me know. I can give you the measurements of the panels and bows. The bows are approximately 56.5" to 57" long. The widths vary from 1.75" to 2 1/4". No sure if the padding was stock original of if someone replaced it.

Similar topics

|
|
|