Is there an aftermarket heater control valve that replaces the oem one. My tube rotted off right at the valve. Does anyone have one they would like to sell? I need to get her back on the road. Thanks, Dan
2 posters
heater / water control valve???

acme383- Number of posts : 41
Location : Chicago,IL
Registration date : 2009-08-25
- Post n°1
 heater / water control valve???

Guest- Guest
- Post n°2
 Re: heater / water control valve???
This is very close, just doesn't have the long metal tube. I suppose the hose would have to go all the way in to the heater box.
http://www.nostalgicairparts.com/air-conditioning/cable-operated-heater-control-valve-114.php
http://www.nostalgicairparts.com/air-conditioning/cable-operated-heater-control-valve-114.php

acme383- Number of posts : 41
Location : Chicago,IL
Registration date : 2009-08-25
- Post n°3
 Re: heater / water control valve???
i looked at that one. i was unsure it it would work. anyone try it?

Scotts_A100- Number of posts : 160
Location : Metro Detroit
Registration date : 2010-06-02
- Post n°4
 Re: heater / water control valve???

acme383- Number of posts : 41
Location : Chicago,IL
Registration date : 2009-08-25
- Post n°5
 Re: heater / water control valve???
Thanks Scott, I will get right on it. thanks for your help.

acme383- Number of posts : 41
Location : Chicago,IL
Registration date : 2009-08-25
- Post n°6
 Re: heater / water control valve???
scott, do you have a part number?

Scotts_A100- Number of posts : 160
Location : Metro Detroit
Registration date : 2010-06-02
- Post n°7
 Re: heater / water control valve???
This is a link to the Rock Auto list of parts. It is the last one in the list, item #74662. Ok, strike the link as I've tried several times to include the link but it would not copy/paste correctly.
Go to Rock Auto and specify the vehicle, in my case '69 Dodge A100 5.2L, and then under the Heat & Air Conditioning go down to the Heater Control Valve and click to expand, you will see a picture of the part on the right side of the listing. Scott...
Go to Rock Auto and specify the vehicle, in my case '69 Dodge A100 5.2L, and then under the Heat & Air Conditioning go down to the Heater Control Valve and click to expand, you will see a picture of the part on the right side of the listing. Scott...

acme383- Number of posts : 41
Location : Chicago,IL
Registration date : 2009-08-25
- Post n°8
 Re: heater / water control valve???
thanks. it didn't come up for a 66 with a 225 in it. it's on order.

acme383- Number of posts : 41
Location : Chicago,IL
Registration date : 2009-08-25
- Post n°9
 Re: heater / water control valve???
Hey, just to give you an update on the heater control valve. Be aware that the on/off of the valve is reversed from the original. Now you will have to have the knob on the dash pulled all the way out to shut off the the valve. I just thought I would let everyone know. Of course I realized this after I modified the valve. Oh and the original cable hold down doesn't work either. You have to fabricate a new one because the screw hole on the new bracket doesn't line up with the old hold down. Because if you drilled a new hole, it would be too close to the existing hole.

Scotts_A100- Number of posts : 160
Location : Metro Detroit
Registration date : 2010-06-02
- Post n°10
 Re: heater / water control valve???
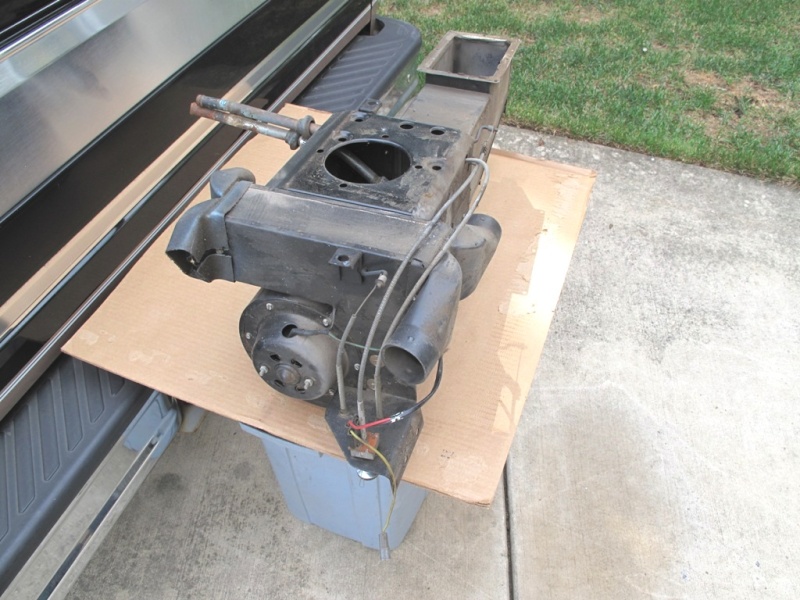
I happened to read this earlier this afternoon and just had to check this out. I felt like poop seeing that this was truly the case and is incorrect. I bought mine a couple years ago as a replacement and as I am restoring my van still hadn't put my heater back together and just didn't know. I'm truly sorry. What I did though was try to come up with a solution and I guess for me anyway it will be the solution that I follow. These are a couple pictures to try to show the location of the valve before I removed it and after:


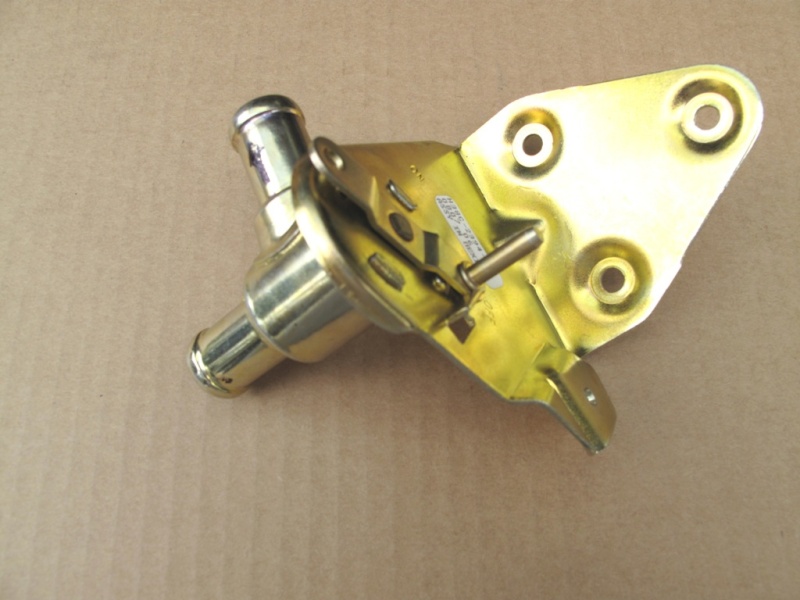
The next set of pictures are what the differences are between the two and how I chose to do to solve the problem. The first picture is the replacement valve from the top and you can see the on (left) and off (right) positions.

The next picture is the body of the valve after taking it apart and you can see the gasket.

In the next picture you can see the difference between the two heads looking top down. Note that the tabs are not in alignment between the two either.

Likewise the valve bodies show the location of the tabs that are not in alignment. This is important when putting the valve back together.

The next is shows the difference between the actual valves. The top one is the original and the bottom is the replacement. The little opening is on the incorrect side on the replacement valve to allow the valve to be open while pulling the cable.

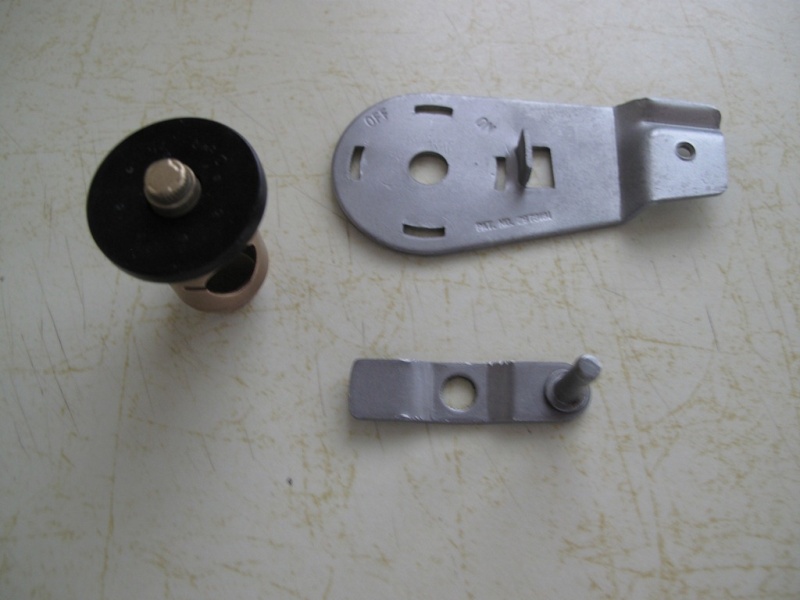
The next picture shows all the pieces that will be used to make a single heater valve that I will be using in my heater.

Next two pictures shows; first the gasket that fits on the top of the valve and will rest under the cover, the second shows the correct postion of the gasket being fitted. (the flat surface is on top).


This picture shows the valve with the gasket installed along with the top plate and the control lever that is attached to the top of the valve. The control lever is removed by using a thin flat screwdriver and walking it around the level and the top plate. It is a press fit and the top of the valve is knurled. It can not be put back on until the postion of the top plate is decided because it has to align with the opening. See the next comments/photos.

The last two pictures shows the remaining challenge using this valve. Because the tabs are not in the same position on the valve body the postion will be off a bit in either direction it is placed. The original has the cable attacking 180 degrees from the out tube which can be seen in the initial pictures of the original valve. I've not decided yet which I will chose as I do not have my heater box painted and ready to reassemble.


Again, I am really sorry that I suggested a part that actually does not work as listed from the vendor and one that I didn't fully check before I suggested it to you. Scott...


The next set of pictures are what the differences are between the two and how I chose to do to solve the problem. The first picture is the replacement valve from the top and you can see the on (left) and off (right) positions.

The next picture is the body of the valve after taking it apart and you can see the gasket.

In the next picture you can see the difference between the two heads looking top down. Note that the tabs are not in alignment between the two either.

Likewise the valve bodies show the location of the tabs that are not in alignment. This is important when putting the valve back together.

The next is shows the difference between the actual valves. The top one is the original and the bottom is the replacement. The little opening is on the incorrect side on the replacement valve to allow the valve to be open while pulling the cable.

The next picture shows all the pieces that will be used to make a single heater valve that I will be using in my heater.

Next two pictures shows; first the gasket that fits on the top of the valve and will rest under the cover, the second shows the correct postion of the gasket being fitted. (the flat surface is on top).


This picture shows the valve with the gasket installed along with the top plate and the control lever that is attached to the top of the valve. The control lever is removed by using a thin flat screwdriver and walking it around the level and the top plate. It is a press fit and the top of the valve is knurled. It can not be put back on until the postion of the top plate is decided because it has to align with the opening. See the next comments/photos.

The last two pictures shows the remaining challenge using this valve. Because the tabs are not in the same position on the valve body the postion will be off a bit in either direction it is placed. The original has the cable attacking 180 degrees from the out tube which can be seen in the initial pictures of the original valve. I've not decided yet which I will chose as I do not have my heater box painted and ready to reassemble.


Again, I am really sorry that I suggested a part that actually does not work as listed from the vendor and one that I didn't fully check before I suggested it to you. Scott...

Guest- Guest
- Post n°11
 Re: heater / water control valve???
The valve in my first post says it's set up as "pull to open." The hold down for the cable with the screw looks exactly the same as the original part on our Dodges. The only differance is the tube to connect the hose goes straight out. I figure just run the hose all the way up and connect it, or find some short ninetey degree tube to modify it. I plan on buying this part in the future and trying that myself, as mine is corroded. It's just too bad they didn't make both the delivery and return out of copper. The copper one is almost like new!

acme383- Number of posts : 41
Location : Chicago,IL
Registration date : 2009-08-25
- Post n°12
 Re: heater / water control valve???
Don't worry about it. I t will just be opposite of the original. this is not a show van.


