VintAGE-Vans

Would you like to react to this message? Create an account in a few clicks or log in to continue.

BRINGING IT ALL TOGETHER.... A's, G's & E's


+9
ChevyVanMan1
Big W
Digz
RodStRace
sasktrini
BILLS66
donivan65
whopman
mbasaraba
13 posters

    Body off Rebuild

    mbasaraba
    mbasaraba


    Number of posts : 823
    Location : North Central Alabama
    Registration date : 2009-01-08

    Body off Rebuild - Page 2 Empty Re: Body off Rebuild

    Post by mbasaraba Wed Jan 11, 2012 5:20 am

    Next step is to connect the jackholder/upright guide.

    I measured from the top of the mount on the jack to about midway on the tube, came out to 7 inches. I cut these 2 pieces on the miter and cleaned up the material since I had a big of rust and grime on the tubing.

    Body off Rebuild - Page 2 6inch10

    I squared and centered these pieces to the cross member, that has now been cut to size. I welded one side with my mig and one side with the tig to show the difference in weld. Again I stress I have only had this machine a week and have put in only about 1 hour of torch time with the TIG. It is a nice strong weld even if it doesnt look so pretty.

    MIG...

    Body off Rebuild - Page 2 Migwel10

    TIG...

    Body off Rebuild - Page 2 Tigwel10

    And here is the cross member with the guides attached.

    Body off Rebuild - Page 2 6incha10


    mbasaraba
    mbasaraba


    Number of posts : 823
    Location : North Central Alabama
    Registration date : 2009-01-08

    Body off Rebuild - Page 2 Empty Re: Body off Rebuild

    Post by mbasaraba Wed Jan 11, 2012 6:20 am

    Here is where I ran into issues and have come up with a fix. I am sure this step will depend on the style of jack or cylinder used but I will describe how I did it with my style.

    First off I cut out a slot for the 2.00 tubing to slip by the jack mount once it was mounted on the 2.25. This ended up being a waste of time since I failed to look at the top of the jack that has 2 bolts and the other side of the shaft for the handle. I will make this change later. I will need to remove the jacks and add a 3/8 piece of bar stock between the 2.25 and the jack.

    Also, I will be moving the jack to the opposite side of the guide. This will allow me more lift without the guide getting so high on the 2.00 upright. Regardless, can see how the tube of the jack is connected.

    BE AWARE! The tubing on the jack is like 16/14 gauge and since this is such a long weld you should swap weld to keep away from burn through on the tubing. I welded 1-2 inch then moved to the other side at the opposite end and went back and forth to allow the tube to cool.

    I will remove some of the info above once I correct the issue but here is a picture that gives a good idea of how this will mount.

    Body off Rebuild - Page 2 Mounte10

    As you can see from this picture, the mount on the jack will clear fine, but the post and nuts for the bolt will hit and the 3/8 bar stock will correct this.

    Body off Rebuild - Page 2 Mounte11
    RodStRace
    RodStRace


    Number of posts : 3046
    Location : Chino Valley
    Registration date : 2010-01-21

    Body off Rebuild - Page 2 Empty Re: Body off Rebuild

    Post by RodStRace Wed Jan 11, 2012 7:46 am

    Just a hint, but the rotesserie I'm borrowing uses engine hoist jacks. Here's one I found. http://www.agrisupply.com/-ton-long-ram-jack-for-engine-hoist/p/39038/

    It's fairly cheap, plenty strong and easy to fab mounts for.
    On yours, the jacks don't leak down, so you don't have to plan on stops or supports. Mine has longer lengths of the tubing that fits over the posts, with horizontal holes that accept trailer hitch pins. This is the part the round pivot is welded to in the picture.
    Also note the part the top of the jack is connected to is also sleeved and pinned, so you can lift the pivot higher than the jack's stroke. Just lock the pivot, collapse the jack and move the top mount down. It looks like yours is designed to only lift, not pivot, so this is just for information.
    Body off Rebuild - Page 2 IMG_1319
    mbasaraba
    mbasaraba


    Number of posts : 823
    Location : North Central Alabama
    Registration date : 2009-01-08

    Body off Rebuild - Page 2 Empty Re: Body off Rebuild

    Post by mbasaraba Wed Jan 11, 2012 7:50 am

    Yep mine will only lift, about 45 inches. I figured this was better than no lift at all. We will be able to get under the van to clean and rebuild without laying on our backs, which kills my neck.

    I am making some scooter chairs that will be only 2 inches off the floor to wheel around under there also.
    RodStRace
    RodStRace


    Number of posts : 3046
    Location : Chino Valley
    Registration date : 2010-01-21

    Body off Rebuild - Page 2 Empty Re: Body off Rebuild

    Post by RodStRace Wed Jan 11, 2012 7:56 am

    If you weld flat plates on the base for more support, add the horizontal holes and also weld up another sleeve, you could jack it up, pin it, raise the other sleeve with a support for the bottom of the jack, pin it, then raise the van with the jack again, the sky is the limit!
    mbasaraba
    mbasaraba


    Number of posts : 823
    Location : North Central Alabama
    Registration date : 2009-01-08

    Body off Rebuild - Page 2 Empty Re: Body off Rebuild

    Post by mbasaraba Wed Jan 11, 2012 9:52 am

    I wasnt going to get to that part yet. Razz

    It will have a "cup" for the bottom of the jack to go in that is pinned front to back(if looking a the van) and another set of holes, offset 3 inches, side to side, for a holding pin once it has reached it max stroke on the jack.

    Forgot to say these will be spaced at 12 inches with 3 sets. The reason I am only going 40-45 inches is that is all the longer I am making the uprights.
    avatar
    Guest
    Guest


    Body off Rebuild - Page 2 Empty Re: Body off Rebuild

    Post by Guest Wed Jan 11, 2012 6:26 pm

    way to go mat im really enjoying your threads..
    mbasaraba
    mbasaraba


    Number of posts : 823
    Location : North Central Alabama
    Registration date : 2009-01-08

    Body off Rebuild - Page 2 Empty Re: Body off Rebuild

    Post by mbasaraba Sat Jan 14, 2012 2:55 pm

    Thanks man. If you need to work UNDER your van, you are more than welcome to use the lift after I am done with it.

    So next installment.

    Previously I stated I needed to change the mounting of the jacks.

    1. They were too high and I would lose about half the lift capacity.

    2. The 2 inch stand tubes were not going to pass the top of the jacks and I needed to space the jacks out.

    So thats where I started. I cut the jacks off the previous mounting location and then welded 2 pieces of 2 inch wide 1/2 thick bar stock to the back of the jack and reattached them to the cross memeber. This could also be done with a couple pieces of the 2 inch tubing notched for the jack to fit in.

    The "Cup" which the jack will push against needs to be removable since the jacks can not lift the full height. I took 2 4" pieces of tubing and drilled them out with a 7/8 bit to accommodate the 3/4 tubing that will go through the uprights. bolts could also be used but I had this tubing laying around from some go karts I had built for someone so decided to use it instead.

    The Parts...

    Body off Rebuild - Page 2 Cuppar10

    Now Welded...

    Body off Rebuild - Page 2 Cupwel10


    After they were reattached I had to figure the lift distance for each jack. I found they could lift about 16 inches but they were pretty wobbly that high so decided on 12 inch strokes per.

    I took my uprights and drilled them out at 12 inch centers.

    Body off Rebuild - Page 2 Uprigh10
    mbasaraba
    mbasaraba


    Number of posts : 823
    Location : North Central Alabama
    Registration date : 2009-01-08

    Body off Rebuild - Page 2 Empty Re: Body off Rebuild

    Post by mbasaraba Sat Jan 14, 2012 3:06 pm

    I drilled 1/2 holes in the sides 2 inch offset from the holes that will hold the "Cups". When the stroke is all up the bolts will go in the sides to hold the stand, the jacks retracted, then the "Cups" moved.

    Here it is back together and on the van.

    Body off Rebuild - Page 2 Sideli10

    The last step to finish the front of the lift is to attach the bottom frame that will attach all uprights.

    I cut an 8 foot piece of 2.25 tubing and 2 pieces at 3" that the uprights will be bolted into.

    Here is the front welded together and inplace. I lifted the front wheels off the ground easily. All I need to do now is cut 2 pieces of angle iron and drill holes in them that will connect the cross member to the original brackets next to the frame.

    Body off Rebuild - Page 2 Frontd10
    G-Man
    G-Man
    Mayor
    Mayor


    Number of posts : 30743
    Location : Fowlerville, MI
    Age : 62
    Registration date : 2008-05-06

    Body off Rebuild - Page 2 Empty Re: Body off Rebuild

    Post by G-Man Sat Jan 14, 2012 3:42 pm

    Looking good Matt!!!!
    avatar
    Guest
    Guest


    Body off Rebuild - Page 2 Empty Re: Body off Rebuild

    Post by Guest Sat Jan 14, 2012 4:51 pm

    will do matt..im glad your not to far from me...would like to visit sometime and see your project in person..
    mbasaraba
    mbasaraba


    Number of posts : 823
    Location : North Central Alabama
    Registration date : 2009-01-08

    Body off Rebuild - Page 2 Empty Re: Body off Rebuild

    Post by mbasaraba Sat Jan 14, 2012 7:06 pm

    Thanks G. I should get it wrapped up tomorrow. Then I just need to finish up my butt sliders and i am ready to get working on cleaning the bottom.

    I guess I should start thinking about ordering some POR 15 to cover the bottom? Do I want to put undercoat over that?

    Chillin, anytime at all.
    mbasaraba
    mbasaraba


    Number of posts : 823
    Location : North Central Alabama
    Registration date : 2009-01-08

    Body off Rebuild - Page 2 Empty Re: Body off Rebuild

    Post by mbasaraba Wed Jan 25, 2012 4:19 am

    So the last steps were to duplicate the front mount for the rear and connect it all with side rails.

    I had cut and welded all the pieces but my drill bits were such garbage that I was fighting getting the holes drilled for bolting it together. I could have welded it together but then it would have to be cut apart when I was done and didnt want to do that.

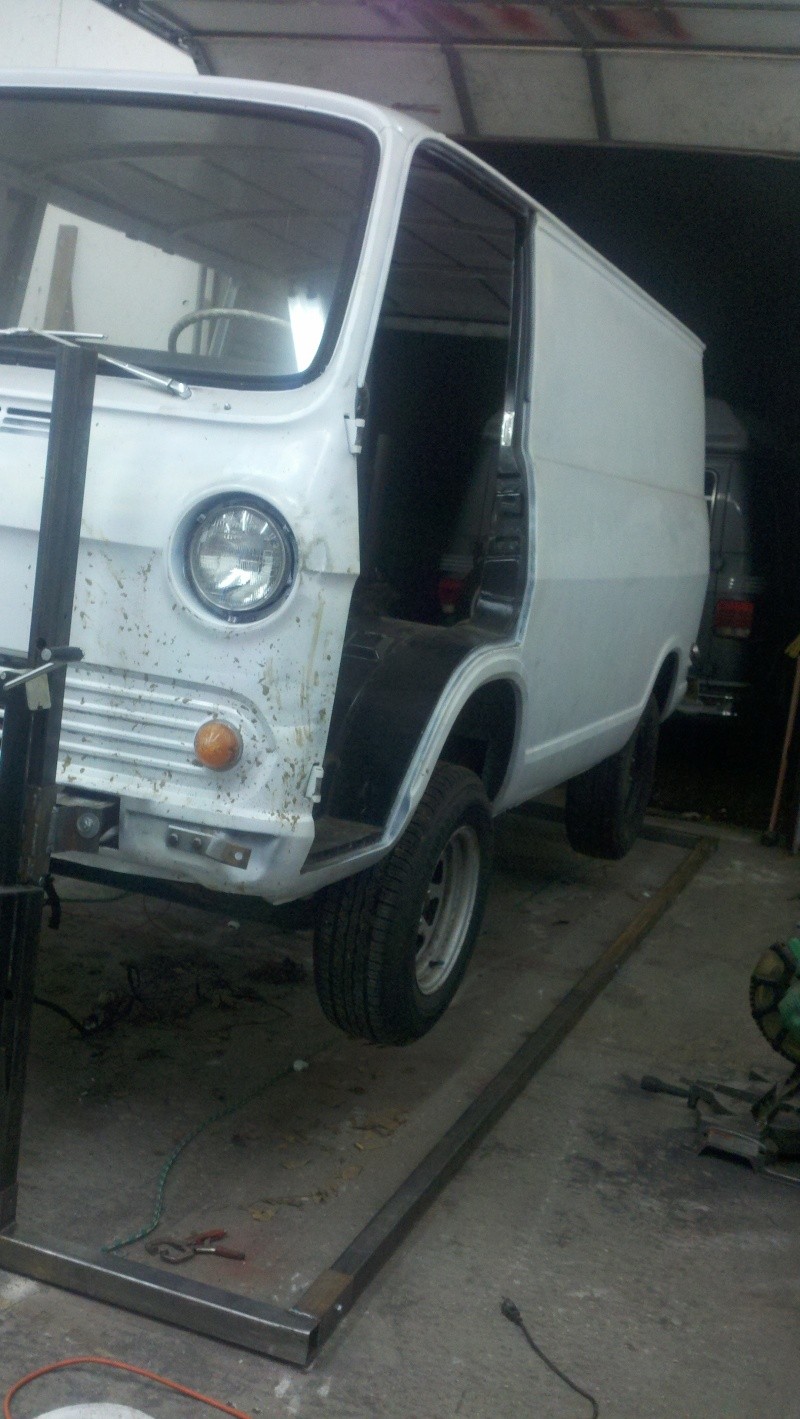
    The van is now in the air on a test lift by my 16 year old and myself. We will drop it again, take off all the under body components and then lift it 42 inches up so we can get underneath to start cleaning it up.

    After lifting it, we each grabbed an upright and shock the HELL out of it to see how stable it was, we got about 2 inches of sway at 24 inches. I am sure this will increase at 42 but still very steady, and we will have at least another 400lbs off the van with all the under body components off I am sure.

    Here is the final result.

    Body off Rebuild - Page 2 Front11

    Body off Rebuild - Page 2 Back210


    RodStRace
    RodStRace


    Number of posts : 3046
    Location : Chino Valley
    Registration date : 2010-01-21

    Body off Rebuild - Page 2 Empty Re: Body off Rebuild

    Post by RodStRace Wed Jan 25, 2012 6:44 am

    Looking good! I will suggest one more thing.
    Once you have it up in the air without the axles, you will want to move it around. Will you really wash, grind, sand, blow off, paint and undercoat all in the same place?
    See if you can incorporate removable wheels somehow.
    Even if it's bracing at each corner so you can use the cheap car dollys there. You can lower the body, raise the frame and put them under so it can be moved around as needed.
    Body off Rebuild - Page 2 Image_2087
    mbasaraba
    mbasaraba


    Number of posts : 823
    Location : North Central Alabama
    Registration date : 2009-01-08

    Body off Rebuild - Page 2 Empty Re: Body off Rebuild

    Post by mbasaraba Wed Jan 25, 2012 6:55 am

    Good call! I have open ends on both bottom cross members I can Fab up a removable wheel insert.
    sasktrini
    sasktrini


    Number of posts : 2067
    Location : Saskatoon, SK, Canada
    Registration date : 2008-05-20

    Body off Rebuild - Page 2 Empty Re: Body off Rebuild

    Post by sasktrini Wed Jan 25, 2012 10:55 am

    POR-15 is a different monster... I think they have a primer that they use to seal the POR-15 coat if you want to topcoat it. There eare lots of colors though, so maybe you can get away with a color that will be close to matching your intended body color. Alternatively, if it's FULLY cured, you then have to scuff it to apply your topcoat, and it is tough to scratch already. Study the POR-15 website and see what you should do... I mean get a white and an isolator, see if you can minimize the prep to paint a topcoat on it. Let us know.
    mbasaraba
    mbasaraba


    Number of posts : 823
    Location : North Central Alabama
    Registration date : 2009-01-08

    Body off Rebuild - Page 2 Empty Re: Body off Rebuild

    Post by mbasaraba Wed Jan 25, 2012 11:25 am

    I guess I was talking more about the under body of the van, not the sides or inside. I guess I am not sure what others use to redo the bottom. Some kind of spray under coating?
    RodStRace
    RodStRace


    Number of posts : 3046
    Location : Chino Valley
    Registration date : 2010-01-21

    Body off Rebuild - Page 2 Empty Re: Body off Rebuild

    Post by RodStRace Wed Jan 25, 2012 11:48 am

    Factory used primer underneath, with a dusting of paint, then maybe some undercoating in the wheelwells.
    I plan on painting the underside, then using bedliner for the wheelwells.
    Raptor has Black or tintable bedliner I'm buying locally.

    http://www.tptools.com/p/2600,233_U-Pol-Raptor-Spray-On-Truck-Bed-Liner-Kit.html
    austinmodhouse
    austinmodhouse


    Number of posts : 575
    Location : austin
    Registration date : 2010-07-30

    Body off Rebuild - Page 2 Empty Re: Body off Rebuild

    Post by austinmodhouse Wed Jan 25, 2012 12:41 pm

    por-15 should be ok for under the van w/o any topcoat. that's how the jeep guys do it. it's not UV resistant so if you plan on it laying on its back in the sun... it'd need a topcoat. otherwise you should be good.
    pan58head
    pan58head


    Number of posts : 512
    Location : new hampshire
    Registration date : 2010-03-15

    Body off Rebuild - Page 2 Empty Re: Body off Rebuild

    Post by pan58head Thu Jan 26, 2012 5:36 am

    I have found that por works better if you top coat it, even on the underside. I usually blast the metal, por, the top coat. Can't have to much protection from the elements Bob
    G-Man
    G-Man
    Mayor
    Mayor


    Number of posts : 30743
    Location : Fowlerville, MI
    Age : 62
    Registration date : 2008-05-06

    Body off Rebuild - Page 2 Empty Re: Body off Rebuild

    Post by G-Man Thu Jan 26, 2012 6:19 am

    I agree that this stage it will be easier to over do it and never have to mess with it again
    Rayallen
    Rayallen


    Number of posts : 648
    Location : San Antonio, TX
    Registration date : 2011-06-27

    Body off Rebuild - Page 2 Empty Re: Body off Rebuild

    Post by Rayallen Fri Jan 27, 2012 11:10 am

    Por 15 takes more steps than most rust preventers but its worth it. I am using it on my van. Rust bullet is also a good product.

    Sponsored content


    Body off Rebuild - Page 2 Empty Re: Body off Rebuild

    Post by Sponsored content


      Current date/time is Fri May 10, 2024 6:23 am