How to Wire up Lights in Your Van!
Wiring up your lights doesn't have to be too complicated.
However, there are some things that can screw everything up if not taken into consideration.
First off , make sure you have good switches, light housings, connectors, etc. If you have an older car, corrosion can be a major problem.
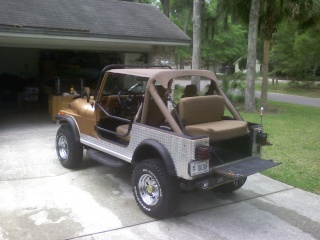
I have a Jeep that wasn't all that old (1984 CJ-7). I would be driving along, and all of a sudden, all the lights would just go out. Lots of fun on the highway...
That would be this one...
But I couldn't find anything wrong.
Finally, I figured out that what was happening was the light switch itself had corrosion inside it where you couldn't see it. However, it worked just fine when it was cold. Then, when I was running down the road for a while, the heater would finally make it warm enough under the dash that the corrosion in the switch would shut off the power. When I would try to figure out what was wrong, I had the door open, the switch cooled back down, and worked fine. Took me awhile to find that one...
So, make sure you are starting out with good stuff.
Second, make sure you are able to tie into good power. If you have too big of a draw at the fuse panel already, you won't have full voltage and you're gonna have dim lights.
Only a 2 volt drop in a 12 volt system is a 17% loss in voltage to the headlights. That's why so many people have trouble with dim headlights.
The easy way is to use relays. Basically, what you are doing with relays is supplying a short cut for the power. Instead of the power having to go through all kinds of connections, switches, tons of wire, etc., you create a short path for it to go, free of all that other stuff. Now you have lots of power and full voltage.
That's why you need relays nowadays... All modern cars have them. That's because ignition systems are more powerful, headlights need more power, etc.
Relays are simple to wire into the front harness. (See the lighting diagram below.)
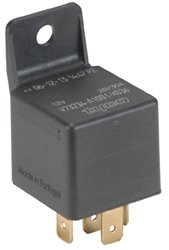
Just get the good Bosch 30 amp relays anywhere...
Third, make sure you use the right gauge wire. Too small a wire can cause resistance, low voltage, and dim lights.
Many people will just try to copy what their car had. However, many cars suffered from dim lights from the factory...
Tri five Chevy's are a bit under wired to the headlights from the factory...
So are Buick's and Pontiac's...
Pretty much all of the other manufactures used 16 or 14 gauge wire on the headlamps... Chevy's choice was 18 gauge... Very small considering todays lighting requirements.
Then add in the years of corrosion at connections, wear at the light and dimmer switches and the amount of resistance in the circuit goes way up.
So, use the right size wire. (See the lighting diagram below.)
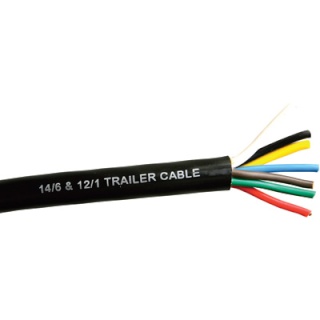
Tip: You can buy trailer wire cable to run wiring to the back of a car. It's fully insulated and contains up to 7 wires. It's cheap, by the foot, and protects the wiring from any cuts, wear, etc. Just make sure the gauge is ok for what you want.
Ok, so let's get to wiring. The wiring diagram below will get you good, bright lights without overloading the switches and wiring. It's set up for a basic system.
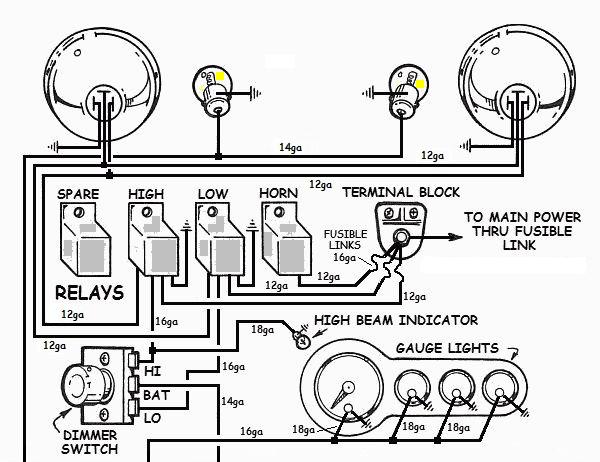
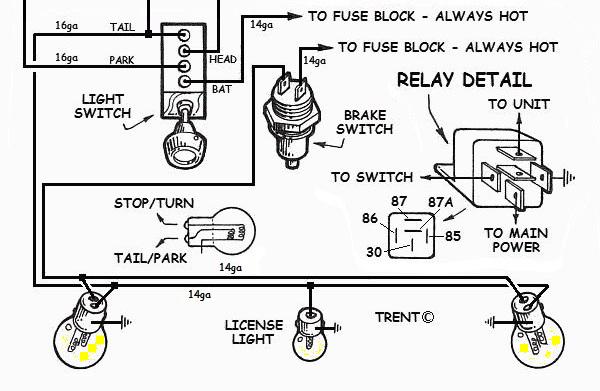
However, it doesn't include turn signals. If you want to run turn signals, AND YOU SHOULD.
Learn more about Turn Signals
Dan
Wiring up your lights doesn't have to be too complicated.
However, there are some things that can screw everything up if not taken into consideration.
First off , make sure you have good switches, light housings, connectors, etc. If you have an older car, corrosion can be a major problem.
I have a Jeep that wasn't all that old (1984 CJ-7). I would be driving along, and all of a sudden, all the lights would just go out. Lots of fun on the highway...
That would be this one...

But I couldn't find anything wrong.
Finally, I figured out that what was happening was the light switch itself had corrosion inside it where you couldn't see it. However, it worked just fine when it was cold. Then, when I was running down the road for a while, the heater would finally make it warm enough under the dash that the corrosion in the switch would shut off the power. When I would try to figure out what was wrong, I had the door open, the switch cooled back down, and worked fine. Took me awhile to find that one...
So, make sure you are starting out with good stuff.
Second, make sure you are able to tie into good power. If you have too big of a draw at the fuse panel already, you won't have full voltage and you're gonna have dim lights.
Only a 2 volt drop in a 12 volt system is a 17% loss in voltage to the headlights. That's why so many people have trouble with dim headlights.
The easy way is to use relays. Basically, what you are doing with relays is supplying a short cut for the power. Instead of the power having to go through all kinds of connections, switches, tons of wire, etc., you create a short path for it to go, free of all that other stuff. Now you have lots of power and full voltage.
That's why you need relays nowadays... All modern cars have them. That's because ignition systems are more powerful, headlights need more power, etc.
Relays are simple to wire into the front harness. (See the lighting diagram below.)
Just get the good Bosch 30 amp relays anywhere...

Third, make sure you use the right gauge wire. Too small a wire can cause resistance, low voltage, and dim lights.
Many people will just try to copy what their car had. However, many cars suffered from dim lights from the factory...
Tri five Chevy's are a bit under wired to the headlights from the factory...
So are Buick's and Pontiac's...
Pretty much all of the other manufactures used 16 or 14 gauge wire on the headlamps... Chevy's choice was 18 gauge... Very small considering todays lighting requirements.
Then add in the years of corrosion at connections, wear at the light and dimmer switches and the amount of resistance in the circuit goes way up.
So, use the right size wire. (See the lighting diagram below.)
Tip: You can buy trailer wire cable to run wiring to the back of a car. It's fully insulated and contains up to 7 wires. It's cheap, by the foot, and protects the wiring from any cuts, wear, etc. Just make sure the gauge is ok for what you want.

Ok, so let's get to wiring. The wiring diagram below will get you good, bright lights without overloading the switches and wiring. It's set up for a basic system.


However, it doesn't include turn signals. If you want to run turn signals, AND YOU SHOULD.
Learn more about Turn Signals
Dan
Last edited by DanTheVanMan on Fri Aug 19, 2011 8:30 am; edited 2 times in total


