+55
Vannin Ken
SportVan
chester42
NipRing
Scotts_A100
millwright71
ndjarrett
66 Surf Wagon
Joe Van
Wheelie
Jay 13
Chevboner
Gothboy
sandyvan
dix
the_surfing_guy
southern man
kookykrispy
Space Truckin
vanny
dodge man
thatcherworks
ScottyJones
pan58head
Big W
m1dadio
austinmodhouse
mbasaraba
Lazarusvan
mrclean
LiveWire64
sparky
SDEconoTruck
EconoCarl
Twinpilot001
Nightmoves
BILLS66
sasktrini
Scott
Digz
64chevy
wylee
wacko
RipVanArkie
wideload
DanTheVanMan
mo_1040
itruns
savage
BvrWally
Vanish
G-Man
Kakster
VANagain
donivan65
59 posters
Back to......VANagains NEWest 65 Chevy SportVan Deluxe

sasktrini- Number of posts : 2067
Location : Saskatoon, SK, Canada
Registration date : 2008-05-20
SUH-WEET!!! That's excellent work!
wideload- Moderator 1st Class

- Number of posts : 1389
Location : Kevil, Kentucky
Age : 71
Registration date : 2008-05-11
LOOKS REALLY NICE !!!!!!!!!!!
_________________
Mike
WIDELOAD
https://vintage-vans.smugmug.com/Chevy-GMC-Vans/Wideloads-65-66-67-68/i-CK5s29s

VANagain- Number of posts : 1048
Location : San Diego, CA
Age : 63
Registration date : 2008-05-16
- Post n°103
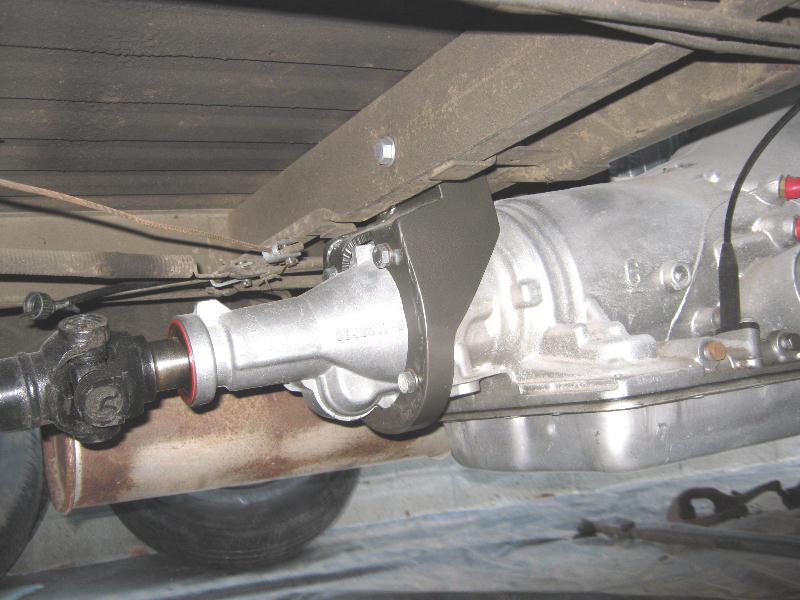
 Tranny hanger done, gas tank installed
Last weekend the things I tried to install and be done with all had problems that forced me to take them back off. The gas tank went in but came back out, and same with the tranny hanger.
But this weekend everything worked out! I trimmed the tranny hanger here and there so it fit better and the countersunk bolt made room to install the speedometer cable housing. And for some reason this time the hanger came out and went back in without the use of a hammer! Oh, and while the hanger was off, I tightened up the tail shaft and found that the output shaft still was not centered vertically within the rear seal. But I can move the shaft by hand to center it, so I figure when the driveshaft's yoke goes in there, the bushing centers everything up. I'll cross my fingers and hope for no leaks.
Now, back to the gas tank. I thought I was done adapting the Impala sending unit but ran into a couple more things. I was so wrapped up in bending it to fit inside the tank that I neglected to measure the part the sticks outside the tank! This photo shows how I had to trim off the two alignment tabs so I could have the inside parts aimed the right way (pointing forward in the tank). One of these tabs had the ground wire spot welded to it. I cut the wire off the old stock sending unit and drilled a hole in it and screwed it to the new unit.


Then when went to mount the tank, it seemed like something was hitting on the top. I measured and determined there is 1.75" of clearance between the floor and the top of the tank. This photo shows how I used some wood to recreate this spacing on the bench and saw that the stainless fuel line need to be bent down some. You can also see how I used a long hose so it can wind its way around to come straight thru the crossmember.

Oh, and I ordered a 3/8" sending unit, not realizing that our vans have the smaller 5/16" fuel lines. I had to really force the rubber hose onto it but it will work. I don't think there's any harm in having a larger size in the sending unit. But it was very difficult to bend. I wish I'd have gotten the smaller size.
The tank went in nicely. I recommend taping the four pads to the tank first because they are about impossible to adjust when the tank is up in there. I put strips of tar paper between the two straps and the tank. The hardest part was hooking up the hoses. No one makes the right diameter hose for the big one so I got the next size up. That went on real easy. But the breather hose was extremely tight going on and there isn't much room to man handle it. I used dish soap to lube the pipes but it took everything I had to get them on as far as I did. I reused the original, old style clamps because they look cool and they cleaned up so nice. And I had put a nice paint job on the filler tube.

Speaking of which, let me know if you could use a nice clean filler tube. I've got two. Both cleaned up pretty nice but I only need one. And I noticed the metal on these is kind of soft. A scraper would take metal off. I'm wondering if there isn't some lead in it. Anybody know? Maybe to reduce the risk of sparks when filling?
But this weekend everything worked out! I trimmed the tranny hanger here and there so it fit better and the countersunk bolt made room to install the speedometer cable housing. And for some reason this time the hanger came out and went back in without the use of a hammer! Oh, and while the hanger was off, I tightened up the tail shaft and found that the output shaft still was not centered vertically within the rear seal. But I can move the shaft by hand to center it, so I figure when the driveshaft's yoke goes in there, the bushing centers everything up. I'll cross my fingers and hope for no leaks.
Now, back to the gas tank. I thought I was done adapting the Impala sending unit but ran into a couple more things. I was so wrapped up in bending it to fit inside the tank that I neglected to measure the part the sticks outside the tank! This photo shows how I had to trim off the two alignment tabs so I could have the inside parts aimed the right way (pointing forward in the tank). One of these tabs had the ground wire spot welded to it. I cut the wire off the old stock sending unit and drilled a hole in it and screwed it to the new unit.


Then when went to mount the tank, it seemed like something was hitting on the top. I measured and determined there is 1.75" of clearance between the floor and the top of the tank. This photo shows how I used some wood to recreate this spacing on the bench and saw that the stainless fuel line need to be bent down some. You can also see how I used a long hose so it can wind its way around to come straight thru the crossmember.

Oh, and I ordered a 3/8" sending unit, not realizing that our vans have the smaller 5/16" fuel lines. I had to really force the rubber hose onto it but it will work. I don't think there's any harm in having a larger size in the sending unit. But it was very difficult to bend. I wish I'd have gotten the smaller size.
The tank went in nicely. I recommend taping the four pads to the tank first because they are about impossible to adjust when the tank is up in there. I put strips of tar paper between the two straps and the tank. The hardest part was hooking up the hoses. No one makes the right diameter hose for the big one so I got the next size up. That went on real easy. But the breather hose was extremely tight going on and there isn't much room to man handle it. I used dish soap to lube the pipes but it took everything I had to get them on as far as I did. I reused the original, old style clamps because they look cool and they cleaned up so nice. And I had put a nice paint job on the filler tube.

Speaking of which, let me know if you could use a nice clean filler tube. I've got two. Both cleaned up pretty nice but I only need one. And I noticed the metal on these is kind of soft. A scraper would take metal off. I'm wondering if there isn't some lead in it. Anybody know? Maybe to reduce the risk of sparks when filling?
Digz- Number of posts : 3794
Location : United States Six Lakes MI
Registration date : 2008-05-17
Thats some nice work. I maybe lucked out and got the right size hoses at the local Auto Value Store. The 3/8" is good if you ever go to a V8 install and I was wishin' I had an extra filler tube when I did the side gas door thing, ended up doing some surgery(cut and weld) on the old one to get the angles right, so it isnt all bad having an extra around to play with if ya ever think of going that way. Also you made me realize I didnt put any pads back in on the top of the tank,,,lol,, I had nothing there to start with so didnt know any better. Thanks 

donivan65- Governor

- Number of posts : 12248
Location : San Diego, California
Registration date : 2008-05-12

VANagain- Number of posts : 1048
Location : San Diego, CA
Age : 63
Registration date : 2008-05-16
Since I've got the front brakes, brake hoses, backing plates, shocks, and steering knuckles all removed, it seemed like the perfect time to. Check out the kingpins and bushings. I was fortunate enough to get the pins out that hold the kingpins in but when the kingpins didn't just "fall out on my foot" as Don said they should, I didn't think I should mess with them. They have brass bushings so that tells me that they've been replaced. I was afraid to upset the magic pixie dust in this crucial component. I felt the same way about removing the pin in the rear end, but Don showed me how it all worked so I no longer feared the unknown. And I'm sure he's right about these kingpins. Like everything else on these vans, ya gotta know what you got.
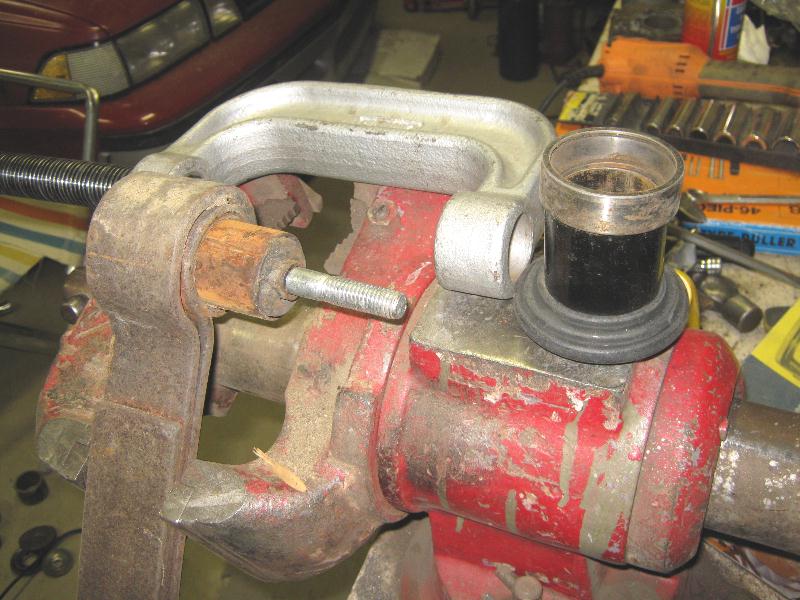
Just before dark tonight Don dropped by with a tool that allowed us to press the kingpins out. There was enough rust on them resist but they did come out. And we found that the bottom drivers side had nit been lubed enough. It. Either rusted, worn, or both. Now I just have to decide between brass or plastic bushings.
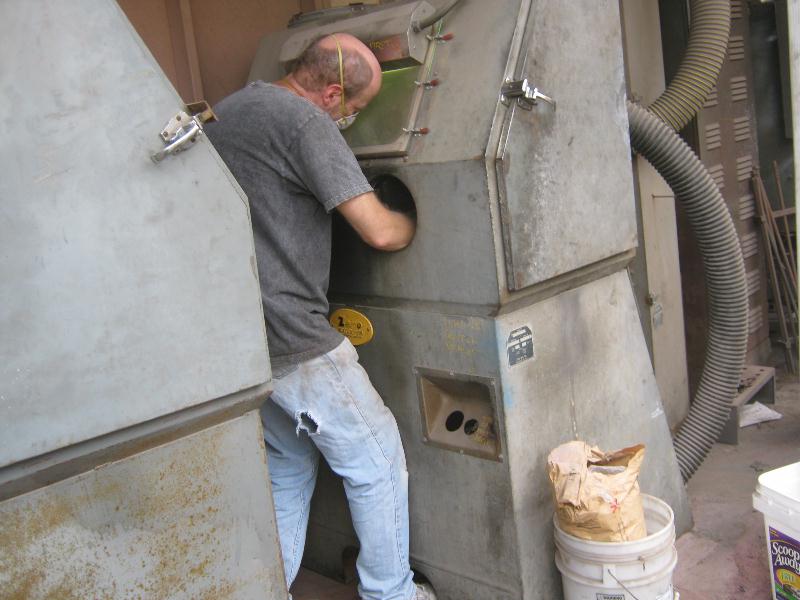
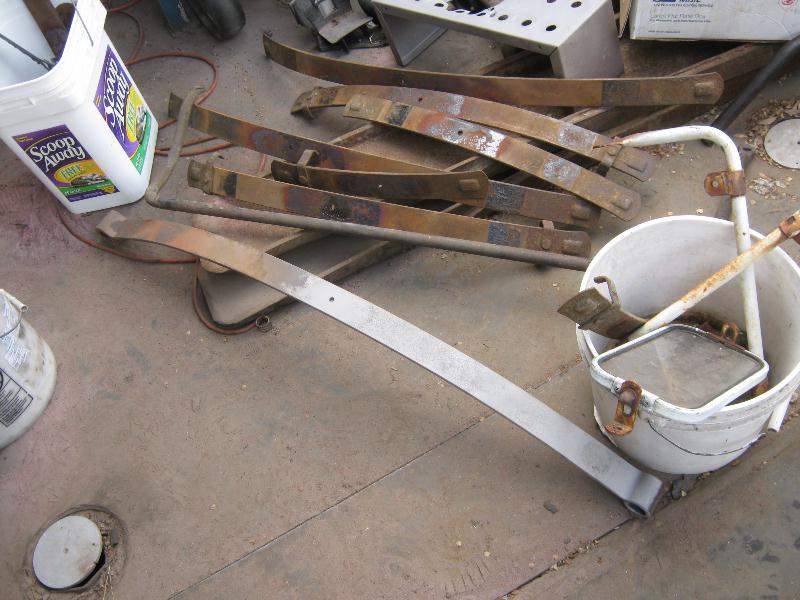
While I've got these parts off I'm going to sandblast and paint them, of course.

donivan65- Governor

- Number of posts : 12248
Location : San Diego, California
Registration date : 2008-05-12
,,,,,you ought to be more afraid of the spiders than the pixie dust,,,,,,,,

donivan65- Governor

- Number of posts : 12248
Location : San Diego, California
Registration date : 2008-05-12

BvrWally- Number of posts : 946
Location : Earlyville,Ohio
Registration date : 2008-05-19
Now your cheating Don!!! You are suppose to use a BFH!!!! JK 
B.W.
B.W.

donivan65- Governor

- Number of posts : 12248
Location : San Diego, California
Registration date : 2008-05-12

sasktrini- Number of posts : 2067
Location : Saskatoon, SK, Canada
Registration date : 2008-05-20
Wow, serious work there! I like your air impact / c-clamp press!

donivan65- Governor

- Number of posts : 12248
Location : San Diego, California
Registration date : 2008-05-12

VANagain- Number of posts : 1048
Location : San Diego, CA
Age : 63
Registration date : 2008-05-16
Another important thing to realize about Don's cool tools is that most of them are portable. So he can handle just about any job on the roadside or in a junkyard!
Here's shot of more parts I sandblasted:

After a bit more painting I can start putting these parts back on! Should go pretty smoothly, compared to the disassembly!
Here's shot of more parts I sandblasted:

After a bit more painting I can start putting these parts back on! Should go pretty smoothly, compared to the disassembly!

wideload- Moderator 1st Class

- Number of posts : 1389
Location : Kevil, Kentucky
Age : 71
Registration date : 2008-05-11
Vanagain how did the sending unit come out????????? The bidding on the NOS one on e-bay is getting scary.
_________________
Mike
WIDELOAD
https://vintage-vans.smugmug.com/Chevy-GMC-Vans/Wideloads-65-66-67-68/i-CK5s29s

donivan65- Governor

- Number of posts : 12248
Location : San Diego, California
Registration date : 2008-05-12
He is in Minnesota recovering from too much Turkey right now,,,,,,,,
mo_1040- Number of posts : 645
Location : Hibbing, Minnesota...The land of 10,000 rednecks
Age : 53
Registration date : 2008-07-04
donivan65 wrote:He is in Minnesota recovering from too much Turkey right now,,,,,,,,
Where in Minnesota? He didn't even come by to visit...had alot of left over turkey for him

donivan65- Governor

- Number of posts : 12248
Location : San Diego, California
Registration date : 2008-05-12
He will be there until Tuesday,,,,,,,I will find out exactly where,,,,,,,but I think Minneapolis,,,,,,,,,he probably would like to see someone other than his RELATIVES

VANagain- Number of posts : 1048
Location : San Diego, CA
Age : 63
Registration date : 2008-05-16
Hey Mo, Nice to meet a fellow Minnesotan! Wish I could drop by to see you but it sounds like you're up north, probably a ways from the Twin Cities.
I have not had a chance to test out my sending unit yet! I poured in 4 or 5 gallons of gas so I could start her up again but the van's not ready to drive to a gas station yet. I wish I would have thought to turn on the ignition to check the guage when I first installed the tank to make sure they guage was on E. It's not too often that you know your tank is bone dry. But I'll be sure to let you all know how my adapted sending unit works as soon as I find out.
I have not had a chance to test out my sending unit yet! I poured in 4 or 5 gallons of gas so I could start her up again but the van's not ready to drive to a gas station yet. I wish I would have thought to turn on the ignition to check the guage when I first installed the tank to make sure they guage was on E. It's not too often that you know your tank is bone dry. But I'll be sure to let you all know how my adapted sending unit works as soon as I find out.

wideload- Moderator 1st Class

- Number of posts : 1389
Location : Kevil, Kentucky
Age : 71
Registration date : 2008-05-11
Thanks for the update Vanagain. Hope you have a safe trip back home.
_________________
Mike
WIDELOAD
https://vintage-vans.smugmug.com/Chevy-GMC-Vans/Wideloads-65-66-67-68/i-CK5s29s

mo_1040- Number of posts : 645
Location : Hibbing, Minnesota...The land of 10,000 rednecks
Age : 53
Registration date : 2008-07-04
Yea the cities is about 3 1/2 hours away... I'm up in Hibbing... Been a really nice fall/winter up here so far. Hoping for a calm winter so I can get more work done in the garage... Have a safe trip home!!!

donivan65- Governor

- Number of posts : 12248
Location : San Diego, California
Registration date : 2008-05-12
At least he got there on time,,,,,,,he takes the same route that those pilots forgot to land and had to turn around because they flew past Minneapolis.

VANagain- Number of posts : 1048
Location : San Diego, CA
Age : 63
Registration date : 2008-05-16
- Post n°122
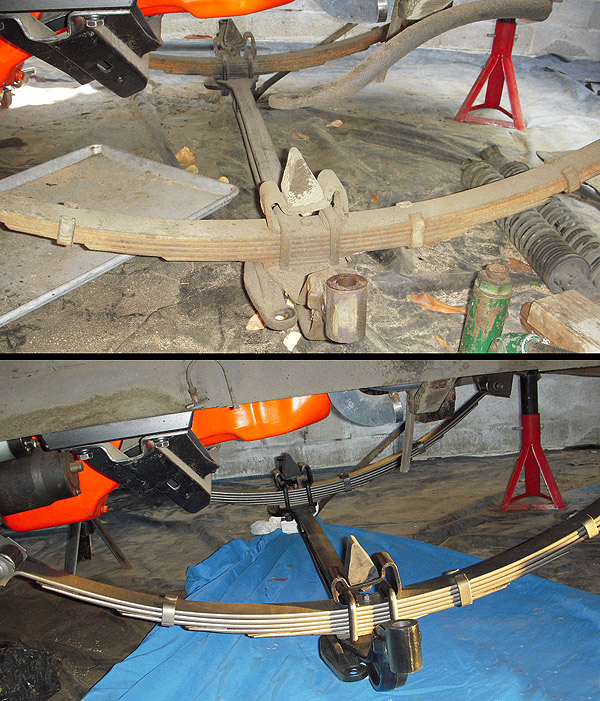
 Front End going back in
I've got some time off work and in between shopping and other holiday distractions, I've been able to get some front end parts put back on. Here's a before and after shot of the leaf springs and axle:
Hey, check out my steering link. Is it supposed to have this subtle bend in it? You can hardly notice it except when viewed straight-on like this:

I have found some evidence of of some bumps and scrapes under here. One of the U bolts was bent, along with the anti-sway bar mounting bracket. And look at this tie rod end. How long would you say since it was last lubed?!

Tomorrow I'll put on the steering knuckles with the new king pins!

Hey, check out my steering link. Is it supposed to have this subtle bend in it? You can hardly notice it except when viewed straight-on like this:

I have found some evidence of of some bumps and scrapes under here. One of the U bolts was bent, along with the anti-sway bar mounting bracket. And look at this tie rod end. How long would you say since it was last lubed?!

Tomorrow I'll put on the steering knuckles with the new king pins!
wylee- Number of posts : 922
Location : middletown,ny
Registration date : 2009-04-03
looking good...
DanTheVanMan- Commissioner

- Number of posts : 7905
Location : Escanaba, Michigan
Age : 62
Registration date : 2008-10-08
Sure is looking good... That's how we do it. "One Piece at a time" 
_________________
DanTheVanMan
1965 Chevy G10 Sportvan Custom
1984 Jeep CJ-7 Laredo, Restored
2004 Kawasaki KLR650
1997 Jeep TJ Sport
My Mini Gallery

BILLS66- Number of posts : 1383
Location : Salem Or.
Age : 64
Registration date : 2008-05-17
WoW What a sano job! Bill


