


Now I get it but the first 3 pics don't really show the ashtray even if you click on the pic and look at the original. The last two pics you can see where the ashtray would have been. So, if I'm getting this correct, you cut out where the ashtray was and just used another partial cluster opening to fill in the space over to the right and make the opening bigger?
+11
FIZGIG
66mnecotruck
Seth G
dix
rickland
EcoPU
vanny
Big W
Magic Bus
G-Man
stanyon
15 posters
Started on 65 Truck

vanny- Moderator
- Number of posts : 14775
Location : Ashburnham, MA
Age : 65
Registration date : 2012-09-22
_________________
“The future will soon be a thing of the past."
http://public.fotki.com/Vintage-Vans/vintage-vans-es/ruff-diamond-1/?cmd=fs_slideshow

stanyon- Number of posts : 147
Location : Spokane, WA.
Registration date : 2013-08-29
That's it Vanny, sorry for my lack of clarity, like a lot of things its simple to me because Ive done it but trying to explain it to someone else is another issue. I should have taken more pictures during the fix.
vanny- Moderator
- Number of posts : 14775
Location : Ashburnham, MA
Age : 65
Registration date : 2012-09-22
That's OK, now I get it and don't feel like I'm losing my mind...Yet!!! 

_________________
“The future will soon be a thing of the past."
http://public.fotki.com/Vintage-Vans/vintage-vans-es/ruff-diamond-1/?cmd=fs_slideshow

Joe Van- Moderator 1st Class

- Number of posts : 4619
Location : Ocala fl
Registration date : 2012-10-11
WOW..!!!..Great Job on the dash pad and gauges...I also like the side storage compartments I had a old F 250 pick up that had them it would also be a good spot to put your detailing stuff there Wax,,tire shine,, towels,,ect... Heck of a job on the bed also its gonna be a "Sharp Looking" early when you get finished with it...  ..
..
_________________
1966 GMC Handivan "Panel"....1975 Chevy Van G10 "Panel"....1991 Chevy Van G20 "Conversion"
Old Skool- Econoline Guru
- Number of posts : 1306
Location : North Hills, CA
Age : 72
Registration date : 2009-06-13
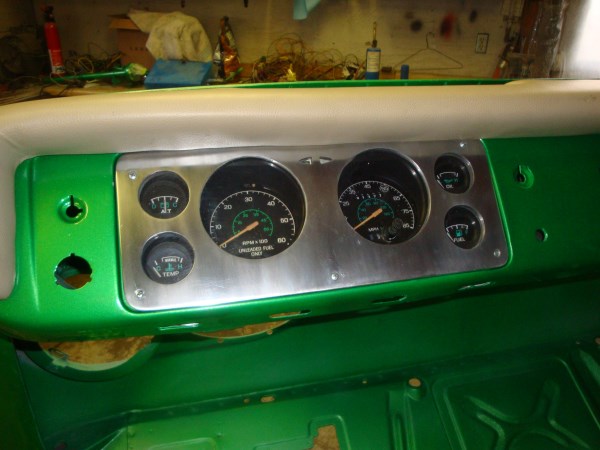
That is NICE!!! KLEEN look. Been thinking of the idea but never got to it and envious,,, Our gauge setup really needed some help and looks like you nailed it.
Was the unit from a computer controlled vehicle and if so how did you get the wiring to work?
Old Skool
Was the unit from a computer controlled vehicle and if so how did you get the wiring to work?
Old Skool
stanyon- Number of posts : 147
Location : Spokane, WA.
Registration date : 2013-08-29
The Cluster came out of a 1979 Mustang, no computer.

cali2chitown- Number of posts : 188
Location : Crown Point Indiana
Registration date : 2014-03-14
I'm diggin your color stanyon! Nice job on the cluster toooo!
stanyon- Number of posts : 147
Location : Spokane, WA.
Registration date : 2013-08-29
Read all I could on removing the shock mounting bolts on the front axel, and decided to have one more go at it before grinding and drilling. Started two days ago by applying a good shot of home brew penetrating oil ( 50% ATF & 50% acetone ) gave it another good drenching the following day. This morning I figured it probably had seeped in as much as it was going to so 1st thing was I put a double nut onto the bolt.
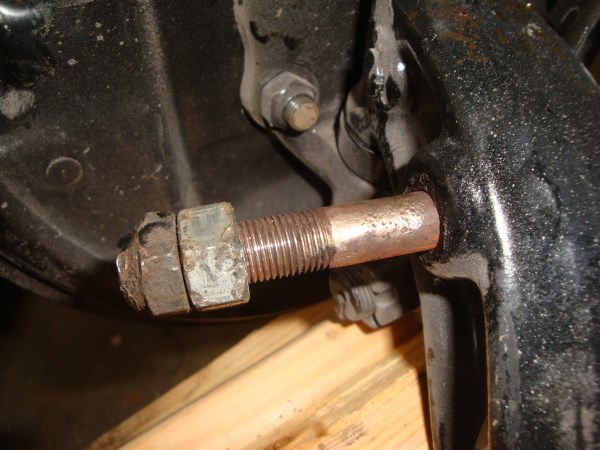
I then got a deep well impact socket and slid onto the bolt, the double nuts help keep the socket resting squarely over the bolt.

Next I got the biggest hammer I have which I think is a 24 oz head and started hitting the top of the socket. Both sides released after about 10 good whacks.
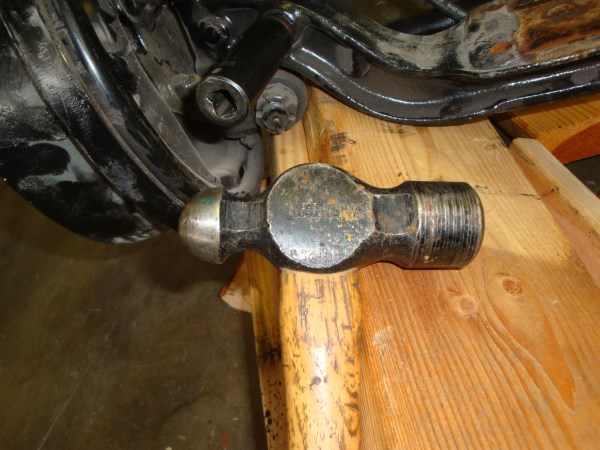
Be sure to support the back side of the axel, this insures the impact is absorbed by the nut and also reduces the risk of damage to the axel.
I then got a deep well impact socket and slid onto the bolt, the double nuts help keep the socket resting squarely over the bolt.
Next I got the biggest hammer I have which I think is a 24 oz head and started hitting the top of the socket. Both sides released after about 10 good whacks.
Be sure to support the back side of the axel, this insures the impact is absorbed by the nut and also reduces the risk of damage to the axel.
Old Skool- Econoline Guru
- Number of posts : 1306
Location : North Hills, CA
Age : 72
Registration date : 2009-06-13
Good luck,, they don't look to be that rusted in compared to what I have dealt with,, try some head on the axle to expand it away from the bolt.
Old Skool
Old Skool
stanyon- Number of posts : 147
Location : Spokane, WA.
Registration date : 2013-08-29
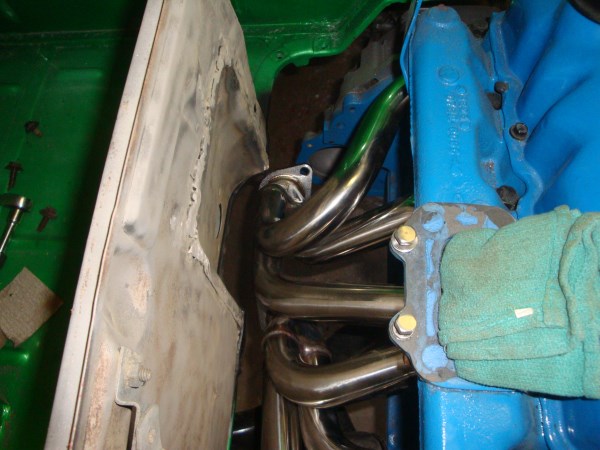
I have the engine and transmission in the truck, and of course there is more work to do. The headers were to close to the dog house, maybe 1/8th of am inch

So out came the die grinder and made some cut outs on the passenger side to accept a small bump out.

I used pieces from the left side of a parts van, the area where you see the oil filter

So out came the die grinder and made some cut outs on the passenger side to accept a small bump out.
I used pieces from the left side of a parts van, the area where you see the oil filter
stanyon- Number of posts : 147
Location : Spokane, WA.
Registration date : 2013-08-29
Final results were good, I think if I were to repeat this I would open up the length by another 2 inches and the width by a 1/2 of an inch.
[img]http://i38
[url=https://servimg.com/view/18526914/97]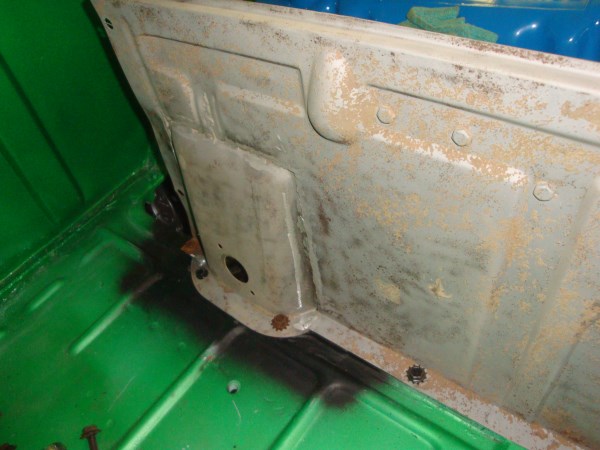
[img]http://i38
[url=https://servimg.com/view/18526914/97]
Seth G- Vintage-Vans Listings Manager

- Number of posts : 2086
Location : Anacortes, WA
Age : 50
Registration date : 2013-04-24
Looking good man! How's that starter clearance looking? Did you use the SS headers widely available on Ebay?
Last edited by Seth G on Thu Feb 26, 2015 8:38 pm; edited 1 time in total
stanyon- Number of posts : 147
Location : Spokane, WA.
Registration date : 2013-08-29
Yeah the headers were E-Bay specials, welds are all clean and continuous, and all the openings and holes matched the gasket.

Magic Bus- Number of posts : 1422
Location : -Gateway to the West - St Louis Missouri
Registration date : 2009-12-02
Looking Good Stanyon!
stanyon- Number of posts : 147
Location : Spokane, WA.
Registration date : 2013-08-29
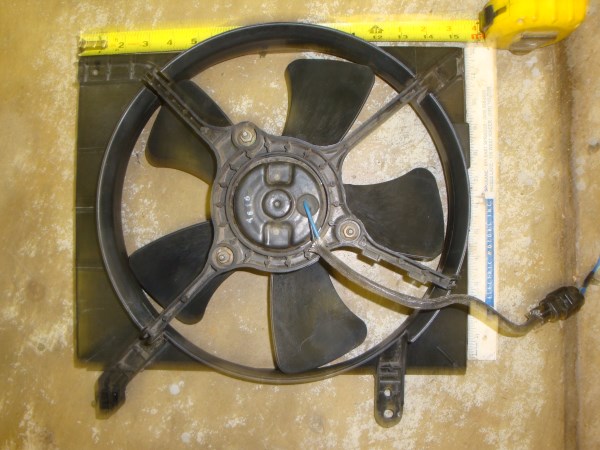
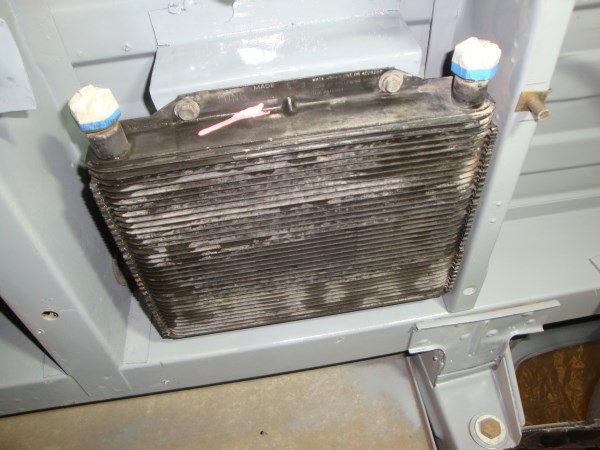
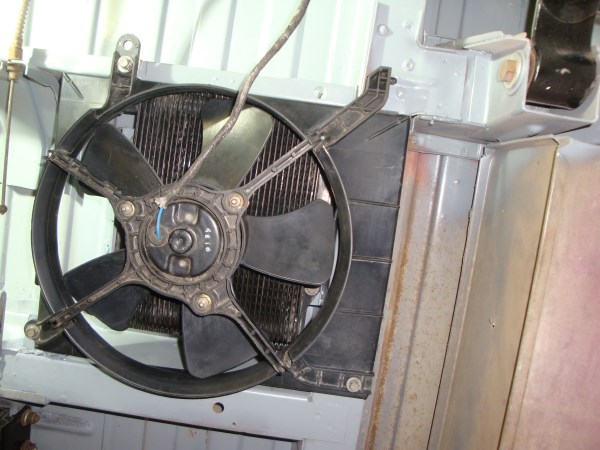
I got the Oil Cooler & Fan set up and mounted today, Thanks to Vic for posting the pictures of his work, really helped speed up the process. I built the brackets for the Oil Cooler out of some scrap metal

The cooler came off a early 90s Chevy full size truck, it seemed to me if it worked their it would be good for my application. 11" X 8-1/4" & 1-1/2" deep

I don't know what the fan came off of, it was laying in the back of a Hyundi.
The cooler came off a early 90s Chevy full size truck, it seemed to me if it worked their it would be good for my application. 11" X 8-1/4" & 1-1/2" deep
I don't know what the fan came off of, it was laying in the back of a Hyundi.
stanyon- Number of posts : 147
Location : Spokane, WA.
Registration date : 2013-08-29
Every thing came out good
Cleared the E-Brake arm but not by much
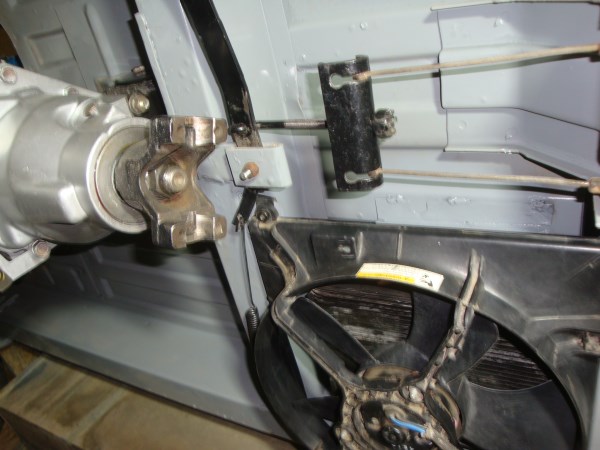
Now I will try and figure out where to place the temp.sensor
Cleared the E-Brake arm but not by much
Now I will try and figure out where to place the temp.sensor

Big W- Number of posts : 3282
Location : Saskatoon,Sask,Canada
Age : 60
Registration date : 2011-01-13
That looks like it should work real well. Your install looks real nice.
stanyon- Number of posts : 147
Location : Spokane, WA.
Registration date : 2013-08-29
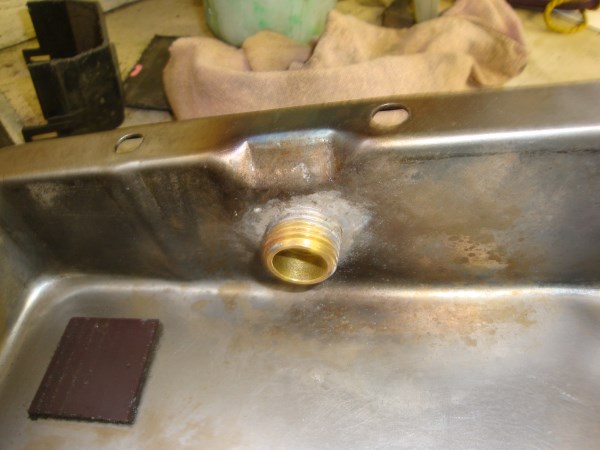
I ordered a Fan Sensor kit off E-Bay ($26.78) and it has everything you need. I used the oversized adaptor as a Bung in the oil pan of my C4. Just made more sense to use this rather then a oil line or the radiator itself.

I made the hole a tight fit so that the threads on the adaptor would have some bite into the oil pan, then soldered both sides to insure a leak proof seal.
The thermal switch lead lines up with the four wires coming out of the transmission switch so there will be one common bundle of wires from this location.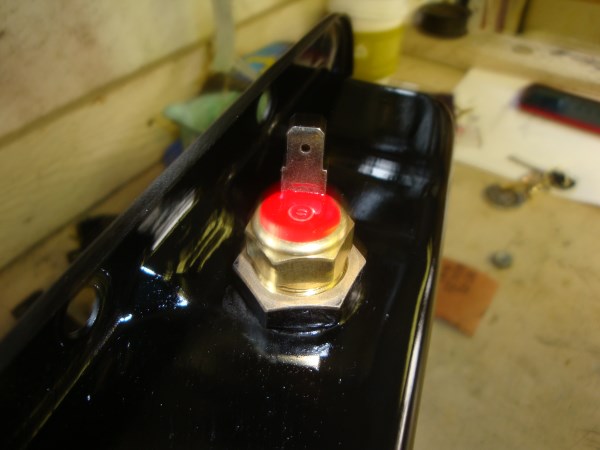


|
|
|