VintAGE-Vans

Would you like to react to this message? Create an account in a few clicks or log in to continue.

BRINGING IT ALL TOGETHER.... A's, G's & E's


+6
chicanoline
Donn
donivan65
EconoUSAparts
Old Skool
SDEconoTruck
10 posters

    BELLY PAN information

    SDEconoTruck
    SDEconoTruck


    Number of posts : 310
    Location : San Diego, California
    Registration date : 2010-05-26

    BELLY PAN information - Page 2 Empty Re: BELLY PAN information

    Post by SDEconoTruck Sat Jun 12, 2010 11:23 pm

    Vic, I will post those pics if okay by you. Very informative and helpful.
    Can' t thank you enough for producing these parts, I never knew they
    existed until now!

    I will be hitting you up when it comes time to convert (getting more inclined
    to do a conversion- I have a 5.0L, 4R70W, 9-inch (needs narrowing) and
    I even have a tubular engine mount/crossbar.) Looks like you are using
    a bar for the rear mount too, that's what I had planned, lots available from
    the F-100 vendors. Also, thinking about dropping the entire drivetrain an
    inch or two for lower CG. Just thoughts....

    In answering the automatic shift indicator question, here also are those pics:
    BELLY PAN information - Page 2 01610
    Automatic Column

    BELLY PAN information - Page 2 100_0510
    Shifter Shaft Detail

    BELLY PAN information - Page 2 100_0511
    Columns Ramped Up

    BELLY PAN information - Page 2 100_0610
    Indicator Plate (green version)

    BELLY PAN information - Page 2 100_0810
    Column Shift Levers

    BELLY PAN information - Page 2 100_0910
    Conversion to Cable Shifter on Automatic Lever

    BELLY PAN information - Page 2 100_1112
    Cable Routing Detail and Tranny Mount Detail

    BELLY PAN information - Page 2 100_1113
    Cable Routing at front end

    BELLY PAN information - Page 2 100_1010
    Disc Brake Kit 1

    BELLY PAN information - Page 2 100_1011
    Disc Brake Kit 2 Caliper Bracket

    BELLY PAN information - Page 2 100_1014
    Disc Brake Kit 3 Cad Plated Calipers

    Thanks for sharing this Vic!

    George


    Last edited by SDEconoTruck on Sat Jun 12, 2010 11:27 pm; edited 1 time in total (Reason for editing : correcting the pics)
    avatar
    Old Skool
    Econoline Guru


    Number of posts : 1306
    Location : North Hills, CA
    Age : 72
    Registration date : 2009-06-13

    BELLY PAN information - Page 2 Empty Re: BELLY PAN information

    Post by Old Skool Sun Jun 13, 2010 11:54 am

    George,, THNX for posting the pics,, will have to figure it out on my own, something stupid and easy I'm sure.
    On the conversion shown, its a 351W with a C6, so no other way to go than the under tranny mount and cross member. No one seems to make one with a deep enough drop, so I will be making these now also, the front cross member was a one of custom to keep EVERYTHING in its correct spot. When I figure out the picture thing, I will post all of the steps needed in order to get the drive line correct, as well as all the other things needed for everyone. My suggestion, would be to not try and drop the drive line as you are suggesting, for what little you might gain, I think you would loose too much in getting things lined up where they need to be. There are a lot of things to get lined up correctly. Just a note on the trans cross member mounting,, they look like they might be weak, however the mounting plates are fully button and seam welded up on each side to the floor board, one side pushing and pulling against each other and no way it going to move,, I could have put some gussets in there, however would have accomplished exactly nothing.
    I have in stock now, the shift cable conversion setup, the custom length V8 throttle cables, as well as stock 240 throttle cables,, all high end top notch stuff.
    vic
    SDEconoTruck
    SDEconoTruck


    Number of posts : 310
    Location : San Diego, California
    Registration date : 2010-05-26

    BELLY PAN information - Page 2 Empty Re: BELLY PAN information

    Post by SDEconoTruck Mon Jun 14, 2010 11:54 pm

    You are very welcome Vic! and Thank YOU for producing these parts
    and services, especially with the high end quality you are getting!

    Question, I want to know more about the issues of having the engine
    and tranny a little lower? I've done some re-powers and basically could
    place the powertrain just about anyplace. I weld, do my own fab work,
    and know of a local shop that can build a good stout driveshaft at a great
    price. I've got almost all the parts to do something like this. I have a
    crossbar/motormount that I can cut off the mounts and reposition them
    as well as the chassis hardpoints. I understand driveline dynamics pretty
    well with my Mechanical Engineering background. BUT, I've never messed
    with an Econoline, and you have, which is HUGE in my book...

    Thanks man,
    George
    avatar
    Old Skool
    Econoline Guru


    Number of posts : 1306
    Location : North Hills, CA
    Age : 72
    Registration date : 2009-06-13

    BELLY PAN information - Page 2 Empty Re: BELLY PAN information

    Post by Old Skool Thu Jun 17, 2010 11:52 pm

    Was afraid of that?? posted a long reply, and don't see it up here,, dratzzzz

    I always cut the towers off and make them to fit where I want them to.
    Try to make this reply a little shorter???
    Many things to take into account when "setting" the engine. Have seen many engines hitting the tie rod and bending it, so my first consideration is to set the oil pan at least 1" behind the tie rod, if you get full bump stop and rearward travel of the axle during compression. A point against setting the engine lower????
    I use the CRANKSHAFT CENTER LINE to measure everything from.
    The transmission yoke is exactly in the center of the truck, so I set the center of the crank shaft exactly in the center also,, insuring the engine is exactly straight in the truck. Using the stock transmission mount and hanging the tranny as a pivot point, I set the drive line angle exactly as it came from the factory,, again using the crankshaft center line, to set the front of the block (which is 90 degrees to the crankshaft center line) exactly parallel to the radiator support,, thereby, having the drive line angle exactly the same.
    I then use a measuring fixture I made that pushes up against each of the bottom of the two frame rails,, and measure to each side of the block at the oil pan gasket surface,, there by insuring the engine is straight and not cocked from one side to the other,, both side measurements EXACTLY the same. That pretty much sums it up. It is a LOT of time consuming work, each time you move something, it moves the other that you don't want moved in the first place,, LOTS of juggling until you get it PERFECT. In my opinion,,, setting the engine down is definitely NOT WORTH IT,, its a truck with a straight front axle, not a Ferrari??? LOL.. for what little you would gain, I really don't see any advantage by setting it a little lower???
    I make the cross members on an exchange basis, outright basis, or yours,, its hard to beat the freight any way you look at it,, but cores are pretty much gone here, except for the ones I have been grabbing just for this over the yrs...
    Also, just another reason, I make the custom throttle cables already for this,,,
    vic,,,,,, sorry if short,, but dead tired,,and a whole bunch more I dont want people to think I am ignoring them,,,
    SDEconoTruck
    SDEconoTruck


    Number of posts : 310
    Location : San Diego, California
    Registration date : 2010-05-26

    BELLY PAN information - Page 2 Empty Re: BELLY PAN information

    Post by SDEconoTruck Fri Jun 18, 2010 12:26 am

    Got it Vic,

    Points well taken- and will take into consideration when/if I go for
    the re-power. We did similar when dropping a Cummins diesel
    into a Landcruiser. Alignment is crucial for durability and for
    peace of mind...

    George
    uante
    uante


    Number of posts : 1466
    Location : Tempe, Arizona
    Age : 61
    Registration date : 2014-01-26

    BELLY PAN information - Page 2 Empty Re: BELLY PAN information

    Post by uante Sat Sep 13, 2014 5:22 pm

    Belly Pan? What? Are these required...I ain't got one Crying or Very sad
    Big W
    Big W


    Number of posts : 3282
    Location : Saskatoon,Sask,Canada
    Age : 60
    Registration date : 2011-01-13

    BELLY PAN information - Page 2 Empty Re: BELLY PAN information

    Post by Big W Sun Sep 14, 2014 4:16 pm

    The soul purpose of the belly pan was to direct air up into the front of the radiator by creating a tunnel between grill opening and bottom of radiator, to help keep things cool. So if you have one on, it will probably help keep your engine cool while moving. But when stopped in traffic, engines would still over heat somewhat regardless. But for those of us that have upgraded to new radiators and some electric fan systems, boiling over doesn't seem to be a problem anymore. I don't run my belly pan yet, but once I finish closing in my doghouse side panels around that 350, I my need it. As of right now the motor stays cool and around 185ish degrees while idling in the hot sun for over an hour with Taurus electric fan and knew 3 core radiator. So I guess it's a matter of trial and error. If your van is getting hot try the belly pan. If not, then run it the way it is. It's also a lot easier to get to everything under there without it on...lol.
    uante
    uante


    Number of posts : 1466
    Location : Tempe, Arizona
    Age : 61
    Registration date : 2014-01-26

    BELLY PAN information - Page 2 Empty Re: BELLY PAN information

    Post by uante Sun Sep 14, 2014 5:01 pm

    Good info...a Taurus electric fan huh? Is it a pretty easy hook up?
    Big W
    Big W


    Number of posts : 3282
    Location : Saskatoon,Sask,Canada
    Age : 60
    Registration date : 2011-01-13

    BELLY PAN information - Page 2 Empty Re: BELLY PAN information

    Post by Big W Mon Sep 15, 2014 6:42 pm

    Well that depends on whether or not your running the inline 6 or have a V8...(sorry I can't remember what you have in there). With a V8 you have a little more room up front between rad and water pump. As for wiring it in...that's a breeze. lots of relay kits out there for electric fans. Those that have them will likely add to this. As for mine...I have a chevy 350 with the stock ford 240 rad that was re cored to a 3 core (no trans cooler in this rad), I run external cooler.BELLY PAN information - Page 2 Copy_o15BELLY PAN information - Page 2 Copy_o16. Now it seems quite close, but if I need to I can always lean the rad forward a we bit to help the clearance. As of right now it works great right where it sits. If this is something that you want to try, look up all the threads on electric fans, as this has been discussed quite a bit in here.
    uante
    uante


    Number of posts : 1466
    Location : Tempe, Arizona
    Age : 61
    Registration date : 2014-01-26

    BELLY PAN information - Page 2 Empty Re: BELLY PAN information

    Post by uante Mon Sep 15, 2014 9:00 pm

    I will thanks!
    Btw, I have the stock 6 inline 170 in there
    avatar
    Old Skool
    Econoline Guru


    Number of posts : 1306
    Location : North Hills, CA
    Age : 72
    Registration date : 2009-06-13

    BELLY PAN information - Page 2 Empty Re: BELLY PAN information

    Post by Old Skool Wed Sep 17, 2014 9:08 am

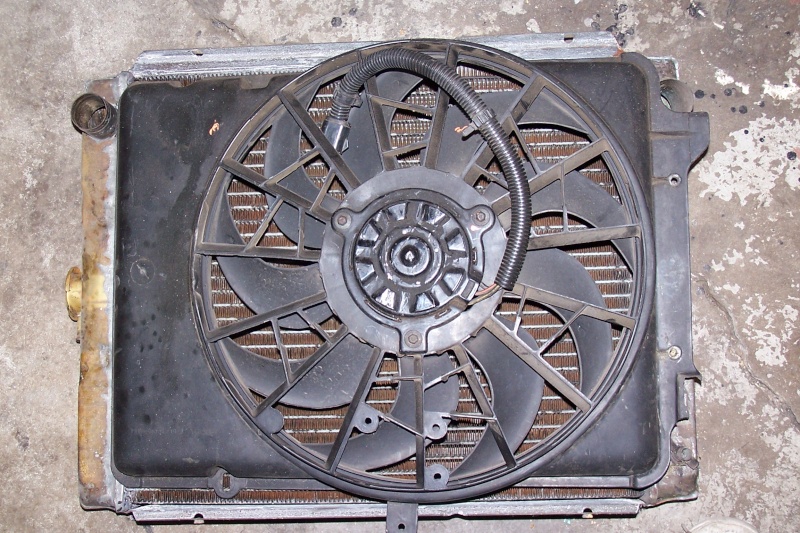
    Here is a picture of a Taurus fan I first posted for everyone about 5 or 6 years ago.  This one was a custom 4 row aluminum radiator that copied the 240 size for a built x flow aluminum head 250. The idea being that the Taurus fan hard to beat for $18 bucks.  Rumored CFM at 4200.  When I first found the link and info I didn't realize an issue that could creep up to do with the alternator. 
      On my V8 conversions I have the stock 3 row 240 radiator bumped up to a 4 row,, I have four of them now done and the cost usually about $350.  One replacing the smaller Champion aluminum four row with their factory fan and shroud which does not blow much air and not as good as the Taurus fan.
      The Taurus fan has a HIGH AMP load when running but even more of a HIGH AMP load on start and it will blow fuses if not wired up correctly for it. I also posted using a VOLVO dual relay setup for high and low speeds that you can buy at the yards for about $10 bucks also. The Volvo fan is about 18" in diameter and fits ours perfectly also??  Have not used one YET,,, but it wants to fly like a helicopter if it was a little lighter in weight,,, LOL....  Plans are to try one here some day and have a shroud made for it,,,,
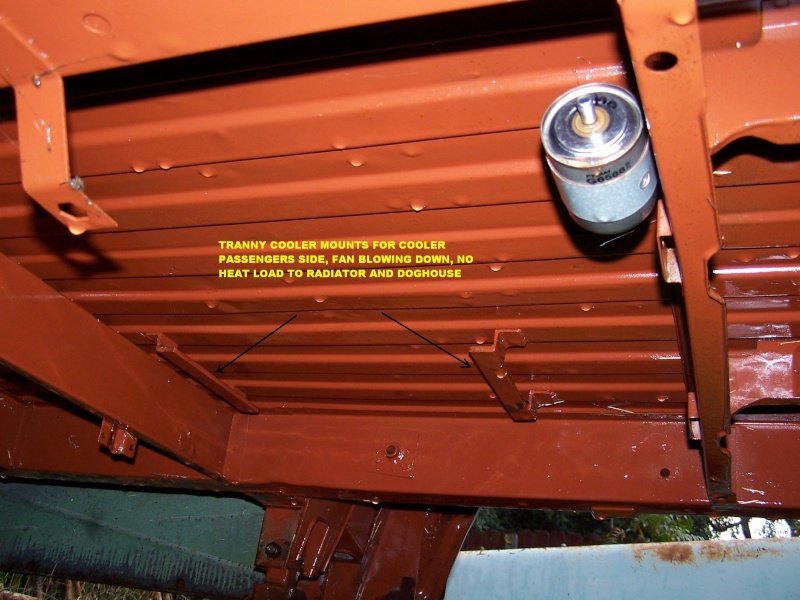
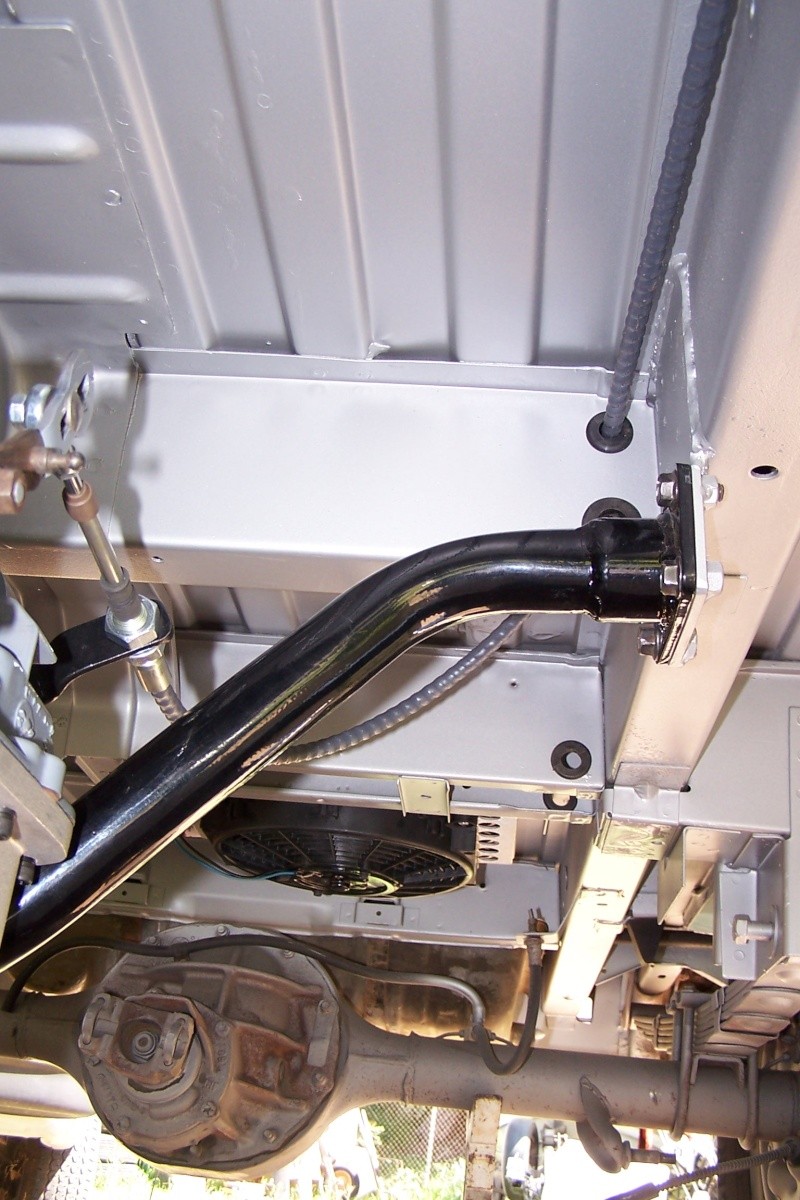
      Back to the Taurus fan. About 20 years ago, I came up with a remote fan cooled transmission cooler and is now pretty much a standard feature on our late model trucks,,, IT WORKS,,,, the point here that I have been talking about forever is that our doghouse is nothing more than a BIG OVEN and what ever heat load you can take off of the radiator exchange load is a plus. So,, WHY add the heat from the torque converter slipping in stop and go traffic to the doghouse heat?? 
     I also don't run the belly pan as IMO its a band aid and does exactly nothing in stop and go traffic when its so hot you could cook eggs on the roof of your van!!!! 
     My point here is that our alternator was  and is NOT designed for the loads that we now put on our trucks,, amps, stereos, electric fans, so on, so on,, etc.  Even a high output 60 AMP alternator or even the famous one wire 100 AMP Delco alternators do not put out their posted maximums at idle!!!  They have to run at 1500 rpm,,,,  My question being it makes no sense to be stuck in traffic, with the heater running to help get rid of heat, an electric fan for the radiator and my foot on the gas pedal keeping the RPM up in order for the fans to run at their full CFM ratings??????  and then adding more heat because of my foot on the gas pedal,,,,  duh,,,,,
      SO,, I use the 3G alternator as it puts out 90 amps at 600 rpm,,,,, The Taurus fan will eat some juice,, and the reason why I use this alternator.
      A SIDE BENEFIT,, is that it has a piggy back regulator on it and you can ditch our regulator in front of the radiator.  In regards to fan to water pump shaft clearance, that is very easy even with my four row copper raditators..   I use a piece of aluminum channel. The reason for channel is that I can mount bolts on each flange and not squash it by using one bolt all the way through it.  Its easy. Mount it to the stock mounting bracket and move the radiator all the way forward.. In regards to wiring the fans,, I ALWAYS wire the relays HOT ALL THE TIME and have been doing it for over 15 years. IF your batteries are good and your charging rate keeping up with your usage, it will NOT drain your battery after you shut the motor off... it has NEVER happened to me. Ask yourself how many cars do you hear the fan running with no one in the car???  Its a common setup.
      The idea is that the doghouse is an oven, and with no air circulation after you shut the truck off, the gasoline in the carb has nothing to do but cook!!!  So, the reason why I wire it hot all the time. Its a good thing to hear my transmission cooler fan and the radiator fan running when I leave the truck, and then when I come back they are both off.  Wired hot with the thermostat so that it shuts off when cooled down.  Yes, I have heard the point about no fluid movement after shut down also, but heat transfers, and at least with the radiator fan running it is moving some air in the doghouse after you shut the motor off.
      In regards to a V8 and fan clearance,, I gave up on using the long shaft water pumps a gazillion years ago,, LOL,,,  and use the Motorsport standard rotation short nosed water pump just for a ton of room.  If you bump up your standard three core 240 radiator up to a 4 row and move it forward you will still clear the water pump shaft,, AND if you use the 3G alternator its even better with no more voltage regulator trapped in front of the radiator anymore...
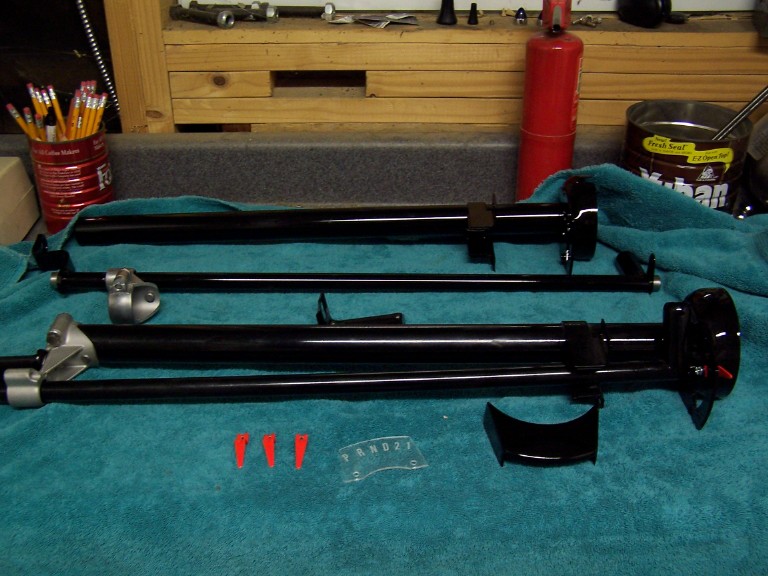
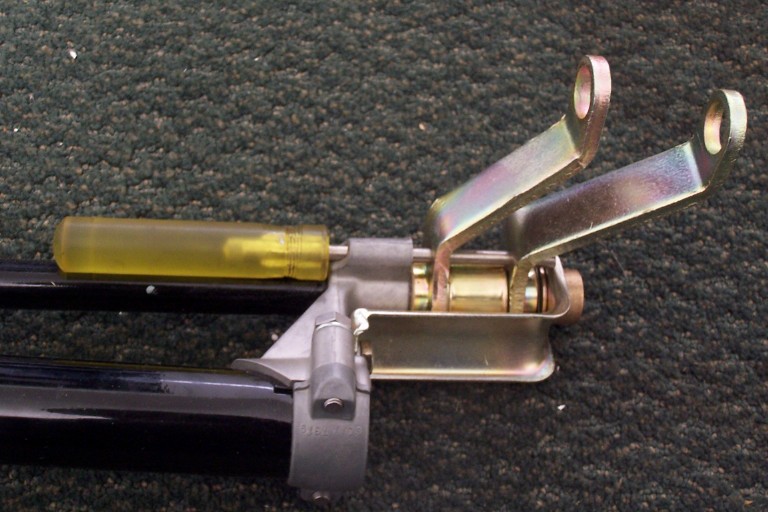
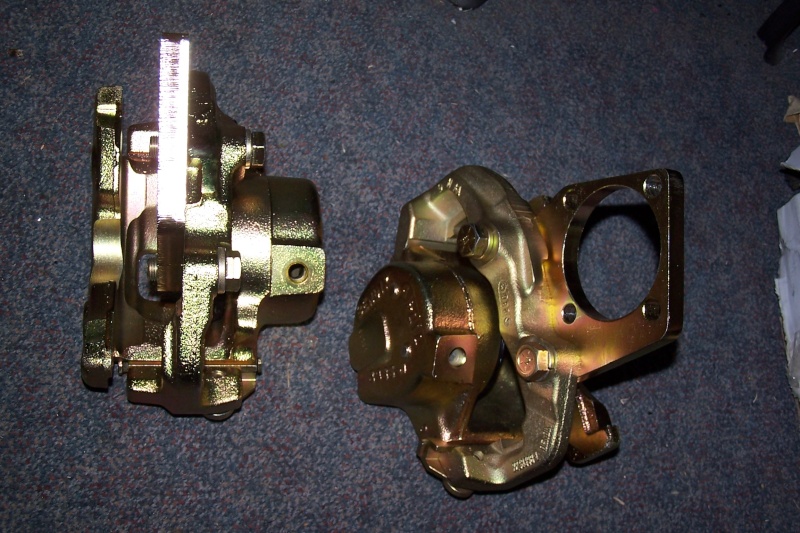
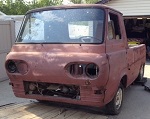
     Here are few pictures,,,   LOL,,, its hot and late for working on orders,, gotta run...
    Vic

    BELLY PAN information - Page 2 013111

    BELLY PAN information - Page 2 100_1015


    BELLY PAN information - Page 2 100_1714

    BELLY PAN information - Page 2 100_1912

    BELLY PAN information - Page 2 100_0512

    BELLY PAN information - Page 2 100_0513

    BELLY PAN information - Page 2 100_1128

    BELLY PAN information - Page 2 100_1218

    BELLY PAN information - Page 2 100_1219

    BELLY PAN information - Page 2 111

    BELLY PAN information - Page 2 P1010010


    BELLY PAN information - Page 2 100_1220
    vern01
    vern01


    Number of posts : 32
    Location : Saskatoon Sask Canada
    Registration date : 2015-05-29

    BELLY PAN information - Page 2 Empty Re: BELLY PAN information

    Post by vern01 Mon Jun 15, 2015 10:44 am

    Fellow Econoliners, bear with me during my 2 cents worth here. I am new to the econoline ranks and quite frankly ignorant to some of the challenges and learnings ahead. I do not claim to know much about the GM or Dodge offerings either. However as a long time race car and race truck builder, I have learn a bit about the efficentcies of effective cooling. Disclaimer! just because I did it this way, doesn't make it the end all be all solution, you may find a variation on this that will serve you well.

    The process of the problem is simple air comes in cool and leaves hot. Efficient ducting ahead of the rad=as much unobstructed air flow as possible. Behind the rad create a vacuum with a fan shroud that completely covers the rear of the rad. I know space can be limited but the longer the tunnel of the shroud and placing the fan[for now I am speaking only of an engine driven fan]about 1/2 way in to it works well. Yes an electric fan placed the same position will work as well. I has been my experience that when an electric fan is placed either side of the rad it in a sense become a restriction its self, I am not saying don't use one. When using an electric fan to cool after shut down, keep in mind there is no flow through the cooling system, just the rad. The engine is just a big heater. Side note back in the day when travelling racing and sleeping in the trailer, we would run the race car for a bit before we slept to keep us warm for the night.
    I understand the concept of the belly pan for protecting underside components, we use them on our highway trucks in the winter to keep them warm, but they will restrict the out flow of air for cooling somewhat.

    Cool the rad/engine, get rid of the heat is the goal. We have had instances where our drivers footwear has melted to the floor due to temperature extremes in the engine compartment and near exhaust under the floor, we found a gold self adhesive product at your local performance shop that is no thicker than kitchen foil that we put in the effected areas, problem solved, maybe line the complete inside of the doghouse.
    Wrapping headers and fuel lines can't hurt, lots of cost effective products/solutions available out there. Some times changing heat in an area is as simple as a creatively fashioned aluminum heat shield between headers and a fuel pump.
    Fans, not unlike those used on marine applications or like run in race cars to cool drivers and brakes could to help draw out heat, but a fan bolted in this application is only as effective as the air able to get to it and remove it.
    Quality system yields quality results, talk to the local late models racers and see what they do to cool their equipment. Quality coolant, correct thermostat and the right rad, duct and fan combination will take a little home work, creativity and imagination. As a fabricator, I build a lots of odd ball one off things, don't be scared of a challenge, it doesn't have to come out of a catalog to be effective, effort =reward.
    Something else some racers use is called water wetter, this product claims to change the boiling temperature, do your research on that.
    Once I figure out the photo posting thing I will share some photos
    Seth G
    Seth G
    Vintage-Vans Listings Manager
    Vintage-Vans Listings Manager


    Number of posts : 2086
    Location : Anacortes, WA
    Age : 50
    Registration date : 2013-04-24

    BELLY PAN information - Page 2 Empty Re: BELLY PAN information

    Post by Seth G Mon Jun 15, 2015 6:51 pm

    Old Skool wrote:

    BELLY PAN information - Page 2 P1010010


    That is a sweet looking 200. Wish I could score on of those aussie heads

    Sponsored content


    BELLY PAN information - Page 2 Empty Re: BELLY PAN information

    Post by Sponsored content


      Current date/time is Thu May 02, 2024 6:48 am