VintAGE-Vans

Would you like to react to this message? Create an account in a few clicks or log in to continue.

BRINGING IT ALL TOGETHER.... A's, G's & E's


+7
sweetvan
busman78
Big W
whalemstr
OutofSight
vanny
Kma4444
11 posters

    My long suffering A100 Pickup project

    Kma4444
    Kma4444


    Number of posts : 44
    Location : Anderson, SC
    Registration date : 2016-07-28

    My long suffering A100 Pickup project Empty My long suffering A100 Pickup project

    Post by Kma4444 Fri Jul 29, 2016 4:49 am

    I thought I had, a long time ago, started a thread here on my truck project. But I had to re-register so I thought I would take a little time and post some pics here in case they could be helpful to someone else.

    So here's some pics and details of my A100 project. I looked for a long time before I found one I could afford,,,, I probably got what I initially paid for,

    It was an eBay find and she was a BEAUT!!!! I didn't know then it was a she, but I learned over time her gender. She has been challenging.

    My long suffering A100 Pickup project Attachment
    Kma4444
    Kma4444


    Number of posts : 44
    Location : Anderson, SC
    Registration date : 2016-07-28

    My long suffering A100 Pickup project Empty Re: My long suffering A100 Pickup project

    Post by Kma4444 Fri Jul 29, 2016 4:51 am

    Well, let's see if I can do better on pics here. The before ones I saved from the eBay ad so they may have to stay small. Here are some more.

    My long suffering A100 Pickup project Attachment

    My long suffering A100 Pickup project Attachment
    Kma4444
    Kma4444


    Number of posts : 44
    Location : Anderson, SC
    Registration date : 2016-07-28

    My long suffering A100 Pickup project Empty Re: My long suffering A100 Pickup project

    Post by Kma4444 Fri Jul 29, 2016 4:52 am

    It was in Kansas and I lived in the Atlanta Ga area at the time. It ran, which was one of my desires when I started looking for one. This proves that I am a glutton for punishment, so I flew to where she was and drove her back. The gentleman I bought it from told me "I have no reason to believe it won't be alright to drive that far, but I wouldn't do it".. Pretty good line really. So as I climbed in and backed it out of the heated shop into a snow storm, I began my journey. I first decided to swing by a parts store and grab a few essentials. When I stopped in the parking spot and put it in park, I could hear the parking pawl rattling. Seems we only had front brakes and I was sitting there spinning the rear tire (not a sure grip). SO I grabbed a few things, bundled up and headed off.

    Sure there is a heater, but it was fighting against the many air leaks in the floor/front bulkhead and around the pedals. The engine cover was putting off enough heat to melt my portfolio I had stuck between the seat and it. But cold was the order or the day(s). Yeah, it was a long drive home with the 3.91 gear, freezing my extremities mile by slow mile.

    We made it home with no problems minus one stoppage for running out of fuel. The gauge was a bit optimistic, seems she and I might be friends after all since we shared a cheery disposition and bright outlook on things. Time will tell how that works out.

    So here's the initial plan, replace the front wheel arch areas as they were very rusty and it came with replacements.

    My long suffering A100 Pickup project Attachment

    My long suffering A100 Pickup project Attachment
    Kma4444
    Kma4444


    Number of posts : 44
    Location : Anderson, SC
    Registration date : 2016-07-28

    My long suffering A100 Pickup project Empty Re: My long suffering A100 Pickup project

    Post by Kma4444 Fri Jul 29, 2016 4:55 am

    Next up was the bedsides. Nice how they used galvanized metal almost everywhere on the truck, except the bed floor, which rusted and fell down into the rocker and ate it's way through the nicely galvanized stuff. They almost had it figured out.

    My long suffering A100 Pickup project 600_A100_Left_fender_tacked

    My long suffering A100 Pickup project 600_A100_Left_bedside_cutout
    Kma4444
    Kma4444


    Number of posts : 44
    Location : Anderson, SC
    Registration date : 2016-07-28

    My long suffering A100 Pickup project Empty Re: My long suffering A100 Pickup project

    Post by Kma4444 Fri Jul 29, 2016 4:58 am

    So after cutting out the rubbish and getting some Ospho in there along with other rust removal I started with the inner bed floor which is also the inner rocker.

    My long suffering A100 Pickup project 600_A100_inside_bed_floor

    My long suffering A100 Pickup project 600_A100_interior_bedside_first_fit

    This was originally a California truck as I have the original Identicard with the owner's name and address. I did a google maps search and found the house, not sure if the owner is still with us or not. But it was neat to see it's original residence.
    Kma4444
    Kma4444


    Number of posts : 44
    Location : Anderson, SC
    Registration date : 2016-07-28

    My long suffering A100 Pickup project Empty Re: My long suffering A100 Pickup project

    Post by Kma4444 Fri Jul 29, 2016 5:00 am

    So I finished the panel and primed everything in the area and started welding it all together. If you are wondering why the panel is in two pieces, my brake is only 4 feet, that limited what I could form.

    My long suffering A100 Pickup project 600_A100_Left_bedside_interior_primed

    Then it was time to make the outer panels.

    My long suffering A100 Pickup project 600_A100_Left_bedside_fitted


    Trial fit of the pieces, not too bad and it sure was nice to see it unrusty, at least in some spots.

    My long suffering A100 Pickup project 600_A100_Left_bedside_complete
    Kma4444
    Kma4444


    Number of posts : 44
    Location : Anderson, SC
    Registration date : 2016-07-28

    My long suffering A100 Pickup project Empty Re: My long suffering A100 Pickup project

    Post by Kma4444 Fri Jul 29, 2016 5:02 am

    So after that I moved back to the rear wheel tub area. It had rusted between the inner lip of the tub and the outer bedside. The tub has a flange that bends down to allow them to weld the two together and it was obviously a moisture trap. So out with the old.

    My long suffering A100 Pickup project 600_A100_Left_fender_cutout_interior

    My long suffering A100 Pickup project 600_A100_Left_fender_cutout_outside


    Then I made the inner lip for the tub and welded it in place. This was a bit of a challenge as you can see, there was a lot of contour and shape to follow. I would do it differently now, but there you go. It worked but it wasn't without it's difficulties.

    My long suffering A100 Pickup project 600_A100_Left_fender_inner_lip_on

    Kma4444
    Kma4444


    Number of posts : 44
    Location : Anderson, SC
    Registration date : 2016-07-28

    My long suffering A100 Pickup project Empty Re: My long suffering A100 Pickup project

    Post by Kma4444 Fri Jul 29, 2016 5:05 am

    I tried making it in one piece and didn't have a lot of luck so I went with four parts. It made some extra work getting it straight afterwards and yeah, some extra filler. Again, I would do it differently now but I won't be redoing it any time soon, hopefully!!!!!

    My long suffering A100 Pickup project 600_A100_RR_fender_front_patch_fitted

    My long suffering A100 Pickup project 600_A100_RR_fender_patch_rear_detail

    My long suffering A100 Pickup project 600_A100_RR_fender_patch_top_rear_half

    And what it looked like welded in place,,,, Ok, Ok, Ok, so this is actually the other side but they looked much the same, really. When I started this, I didn't know anything about online forums and such. It's been a while, and a marriage, and a couple moves ago when all this started.

    My long suffering A100 Pickup project 600_A100_RR_fender_patch_ground
    Kma4444
    Kma4444


    Number of posts : 44
    Location : Anderson, SC
    Registration date : 2016-07-28

    My long suffering A100 Pickup project Empty Re: My long suffering A100 Pickup project

    Post by Kma4444 Fri Jul 29, 2016 5:07 am

    So here's some miscellaneous pieces for the inside of the bed.

    My long suffering A100 Pickup project 600_A100_RR_bed_12_sep_07

    My long suffering A100 Pickup project 600_A100_RR_bed_filler_2

    My long suffering A100 Pickup project 600_A100_RR_bed_filler_fitted


    And, just because I am not all that bright, all the pieces I made were from 16ga. I think I must have measured a piece of the bed floor when I decided on thickness so that's what I used. You can imagine the fun of shaping that for the contours on the outside of the bed....... Brilliant!!!! But hey, it won't dent easily.
    Kma4444
    Kma4444


    Number of posts : 44
    Location : Anderson, SC
    Registration date : 2016-07-28

    My long suffering A100 Pickup project Empty Re: My long suffering A100 Pickup project

    Post by Kma4444 Fri Jul 29, 2016 5:10 am

    Here's a little more on the project.

    So in this pic you can see there is something not right with the area under the headlight. Lots of curves and contours coming together there and they don't do so correctly.

    My long suffering A100 Pickup project 600_A100_RF_headlight_before

    So a little poking and prodding revealed this little blemish.

    My long suffering A100 Pickup project 600_A100_RF_headlight_no_bondo_closeup

    Hmm, creative body filler sculpting to be sure.

    The scene from inside.

    My long suffering A100 Pickup project 600_A100_RF_headlight_no_bondo_interior


    Yuck, that's gonna take some buffing to come out right.
    Kma4444
    Kma4444


    Number of posts : 44
    Location : Anderson, SC
    Registration date : 2016-07-28

    My long suffering A100 Pickup project Empty Re: My long suffering A100 Pickup project

    Post by Kma4444 Fri Jul 29, 2016 5:13 am

    So I'll trim out some of the poo and see what I can come up with.

    My long suffering A100 Pickup project 600_A100_RF_headlight_teardown1

    Ya know what,,,,, I have another plan.

    My long suffering A100 Pickup project 600_A100_RF_headlight_panel_cutout


    Believe it or not, in the local pull a part yard there was a van. As you can see it wasn't a perfect part but it was a lot better than what I had started with.

    My long suffering A100 Pickup project 600_A100_RF_donor_panel

    The hole to be filled.....

    My long suffering A100 Pickup project 600_A100_RF_headlight_cutout

    And fitting the "New" piece

    My long suffering A100 Pickup project 600_A100_RF_headlight_frame_fitted2

    Kma4444
    Kma4444


    Number of posts : 44
    Location : Anderson, SC
    Registration date : 2016-07-28

    My long suffering A100 Pickup project Empty Re: My long suffering A100 Pickup project

    Post by Kma4444 Fri Jul 29, 2016 5:15 am

    More fitting and such of the headlight area.

    My long suffering A100 Pickup project 600_A100_RF_headlight_panel_fitted_interior

    Here you can see where I straightened the bent part and made some replacement pieces.

    My long suffering A100 Pickup project 600_A100_RF_headlight_patch_panel_fitted

    And tacked in place.

    My long suffering A100 Pickup project 600_A100_RF_headlight_panel_tacked

    Kma4444
    Kma4444


    Number of posts : 44
    Location : Anderson, SC
    Registration date : 2016-07-28

    My long suffering A100 Pickup project Empty Re: My long suffering A100 Pickup project

    Post by Kma4444 Fri Jul 29, 2016 5:19 am

    The next area of adventure was the rear valance. It had some filler in it, which after seeing the front should have given me an idea of what I was on for. So I started grinding the glop out.

    My long suffering A100 Pickup project 600_rear_valance_before

    Riiiiight, so out came the drill, grinder, sawzall and other implements of chaos.

    My long suffering A100 Pickup project 600_Rear_Valance_cut_off

    You can see in the previous picture where I had to heat and straighten the panel behind the valance. It had been hit and pushed in pretty well. That explained the 1/2" or so of filler.

    So I began making something else.

    My long suffering A100 Pickup project 600_Rear_valance_first_half_fit


    And the other half, again, it's wider than my brake.

    My long suffering A100 Pickup project 600_Rear_valance_fit_check

    And somewhere to put the plate.

    My long suffering A100 Pickup project 600_Rear_valance_license_cutout

    Plate area boxed in.

    My long suffering A100 Pickup project 600_Rear_valance_license_plate_ground_and_fit_side_view

    And welded in place.

    My long suffering A100 Pickup project 600_Rear_valance_done

    And outside because I liked the lighting.

    My long suffering A100 Pickup project 600_Rear_valance_done_outside
    Kma4444
    Kma4444


    Number of posts : 44
    Location : Anderson, SC
    Registration date : 2016-07-28

    My long suffering A100 Pickup project Empty Re: My long suffering A100 Pickup project

    Post by Kma4444 Fri Jul 29, 2016 5:26 am

    A few more pics of the metal work.

    So, my tailgate. You can see the lower area that is pushed in and when I would shake it there was a sound like a maraca. Even I knew that must mean rust inside it somewhere.

    My long suffering A100 Pickup project 600_Tailgate_before

    Peeling it open revealed,, you guessed it.

    My long suffering A100 Pickup project 600_Tailgate_disassembly1

    My long suffering A100 Pickup project 600_Tailgate_disassembly4

    Ugh, makes my tummy hurt.

    SO I figured I would go with a smooth look for it. Not sure if I had to do it over again if I would go this way or just fix the bad spots. I like what I ended up with but I also like the stock look. Not going to change it now, that's for sure.

    My long suffering A100 Pickup project 600_Tailgate_skin1

    My long suffering A100 Pickup project 600_Tailgate_skin2

    Again, doing this in 16 gauge is just not the easy way. But it should be plenty sturdy.

    My long suffering A100 Pickup project 600_Tailgate_skin3

    So it fits alright.

    My long suffering A100 Pickup project 600_Tailgate_skin4

    And it even fits the hole it came out of.

    My long suffering A100 Pickup project 600_Tailgate_first_install

    Well, except for having to increase the bottom clearance so it could fit very close without rubbing. I added a joggle piece here.

    My long suffering A100 Pickup project 600_Tailgate_jam_modified

    My long suffering A100 Pickup project 600_Tailgate_final_fit_outside
    Kma4444
    Kma4444


    Number of posts : 44
    Location : Anderson, SC
    Registration date : 2016-07-28

    My long suffering A100 Pickup project Empty Re: My long suffering A100 Pickup project

    Post by Kma4444 Fri Jul 29, 2016 5:50 am

    So that's the end of the major metal work. I did more patching in the bed and some in the floor in the interior. but didn't take pictures. These pics were from several years ago, not going to figure out when it was cause I don't want to think about it. The interim has been just getting the entire thing straight. There was some effort because of all the new metal but honestly most of the effort was to get where the stock panels were put together to resemble something decent. The build quality on it was amazingly bad. Obviously it was just a truck and who cared what it looked like.

    I have hundreds and hundreds of hours in sanding, filling, shaping, hammering, did I mention sanding? And had one side of it after sitting for a couple months start to have the filler crack and separate. I called the filler manufacturer and they sent a rep by, he took samples of the breaking apart and falling off material back with him and issued me a credit so I could get more material. I would have much rather he sent someone over to strip and redo that side. Never did get an answer as to why it happened. Good news is it hasn't happened again anywhere and it's been allowed to sit a long time now.

    Like I mentioned I am to painting. The interior and inside the bed are done and the inside of the doors and roof are sprayed. I will have to sand the vertical roof sections as the paint was just terrible to spray. It was just glopping on and I managed to get it on too thick and get plenty of sags fighting to get it on smooth. A real pain and frustrating as normally I do pretty good with the painting stage. Done quite a lot of it and haven't had trouble like this since my very first time. Oh well, I'm getting close. It may just be completely sprayed this week.

    This post was from a couple years ago on another forum. It was the first time I was painting it. I had lots of fun with the paint on this thing. I have done a reasonable amount of painting through the years but none fought me like this one did. I will see what pics I have to continue the story.
    vanny
    vanny
    Moderator


    Number of posts : 14775
    Location : Ashburnham, MA
    Age : 65
    Registration date : 2012-09-22

    My long suffering A100 Pickup project Empty Re: My long suffering A100 Pickup project

    Post by vanny Fri Jul 29, 2016 7:27 am

    Nice work, Kma! I like the look of the smooth tailgate! I'm looking forward to seeing it all painted. Thank you for posting pics. It's very interesting and inspiring when you see how much work and effort goes into bodywork. Glad you came back and shared!!!


    _________________
    “The future will soon be a thing of the past."

    http://public.fotki.com/Vintage-Vans/vintage-vans-es/ruff-diamond-1/?cmd=fs_slideshow
    Kma4444
    Kma4444


    Number of posts : 44
    Location : Anderson, SC
    Registration date : 2016-07-28

    My long suffering A100 Pickup project Empty Re: My long suffering A100 Pickup project

    Post by Kma4444 Sat Jul 30, 2016 5:43 am

    Thank You Thank You!! Here's another installment.....

    So a little progress on the brakes.

    Shabby looking rear stuff, but it fits and is ready to be cleaned up and installed.

    My long suffering A100 Pickup project IMG_20141202_162826

    Fronts were more challenging but I got it done. All Mopar stuff which is cool. It wasn't a requirement to me but I like that I could use Mother Mopar goodies.

    My long suffering A100 Pickup project IMG_20141202_144245

    My long suffering A100 Pickup project IMG_20141202_144340


    It was tight in there, I could have used a rotor with a little less deep a dish but these worked, just barely. Upside is I have lots of wheel room this way.

    My long suffering A100 Pickup project IMG_20141202_144554

    My long suffering A100 Pickup project IMG_20141202_144801

    So I have the front axle out to go to the blasters and the rear will come out today. Take the springs apart, blast them and make UHMW bushings for them. Paint it all and stuff it back in. I will work at painting the underside as I go along. Probably not right away as I am going to get it driving first.


    Last edited by Kma4444 on Sat Jul 30, 2016 6:46 am; edited 2 times in total
    Kma4444
    Kma4444


    Number of posts : 44
    Location : Anderson, SC
    Registration date : 2016-07-28

    My long suffering A100 Pickup project Empty Re: My long suffering A100 Pickup project

    Post by Kma4444 Sat Jul 30, 2016 5:49 am

    It seems I may tend towards the pathological,,,perhaps I've missed my calling to politics,,,,,, laying under it removing the rear end and springs I couldn't imagine not taking what little there was left under there out and doing the painting now..... I would always save myself time when I start a project by completely dismantling it right from the beginning. I usually cost myself lots of time trying to work around things and do it well enough.... Yeah, it's all apart now.

    A good surprise was the gas tank has been sealed and looks great inside. Bad news is a couple days of laying on my back scrubbing and then painting. Not sure what I will do for paint under there. It looks like the factory used red oxide and left it at that.

    The, sigh, bottom..... Sure do wish I had a rotisserie to put this on, the laying on your back scrubbing, scraping, sanding and other unmentionable horrors was no and I repeat, NO fun. But I persevered and in the course of a week, working yes, every day, yuck, I got it to this.

    My long suffering A100 Pickup project IMG_20150601_142512

    My long suffering A100 Pickup project IMG_20150601_142521


    And it happened that I couldn't stand it and had to take the engine out. I had resisted but it was for naught. It was only a couple wires and 12 bolts so out it came.


    My long suffering A100 Pickup project IMG_20150601_201624

    And pretty much ready for the painting

    My long suffering A100 Pickup project IMG_20150601_201636


    Last edited by Kma4444 on Sat Jul 30, 2016 6:47 am; edited 2 times in total
    Kma4444
    Kma4444


    Number of posts : 44
    Location : Anderson, SC
    Registration date : 2016-07-28

    My long suffering A100 Pickup project Empty Re: My long suffering A100 Pickup project

    Post by Kma4444 Sat Jul 30, 2016 5:52 am

    So did you see in that first pic, the emblem that was evidently on the steel when it was stamped out to build the truck??? Here's a closer shot.

    My long suffering A100 Pickup project IMG_20150601_142456

    Hard to read it but the circular letters looked like it might have said Detroit. That seems to point to the fact that they received the metal already primed in the red oxide, then stamped the shapes and assembled the thing. No further paint or work required!!!!!! Of course the lack of a dip prime or any other kind of painting on anything that wasn't the visible bodywork certainly led to the rust so common on these. It's really something that they went as far as using galvanized metal and this pre primed steel on most of the truck but then left other parts just in raw steel. Bizarre to be sure.

    So bla bla bla, the money shot.

    My long suffering A100 Pickup project IMG_20150603_083239

    My long suffering A100 Pickup project IMG_20150603_083250

    That right there is way better. And yeah, I'm leaving it white cause I like it, that's the way the factory should have done it as far as I'm concerned. The paint is SPI white epoxy. Just the right amount of gloss and really tough I'm sure.


    Last edited by Kma4444 on Sat Jul 30, 2016 6:47 am; edited 2 times in total
    Kma4444
    Kma4444


    Number of posts : 44
    Location : Anderson, SC
    Registration date : 2016-07-28

    My long suffering A100 Pickup project Empty Re: My long suffering A100 Pickup project

    Post by Kma4444 Sat Jul 30, 2016 6:13 am

    So in some of those previous posts, you will have to right click and open in new tab to see the entire picture. I will have to work on that.

    So the next week has been blasting and painting the rest of the pieces,,,, I thought I was about done but noooooooooooo. This is just one of the batches

    My long suffering A100 Pickup project IMG_20150604_154156

    Yep, actual, in the booth pics, I know, impressive.

    My long suffering A100 Pickup project IMG_20150604_154204

    My long suffering A100 Pickup project IMG_20150604_154209

    My long suffering A100 Pickup project IMG_20150605_135106

    So I've not given up, not even close. I may have sprayed the last of the real primer today, no pics right now but trust me, I'm close. Just little pieces and spraying the outside of the grille with the colors. A few interior pieces have to be sprayed blue and maybe a couple brackets here and there but I'm having trouble finding things to paint so that's good news.


    Kma4444
    Kma4444


    Number of posts : 44
    Location : Anderson, SC
    Registration date : 2016-07-28

    My long suffering A100 Pickup project Empty Re: My long suffering A100 Pickup project

    Post by Kma4444 Sat Jul 30, 2016 6:23 am

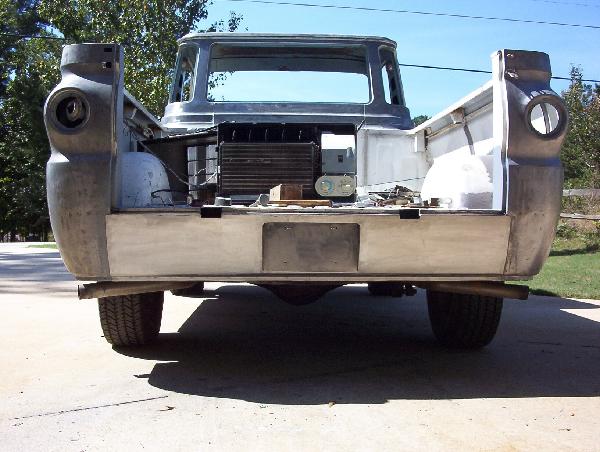
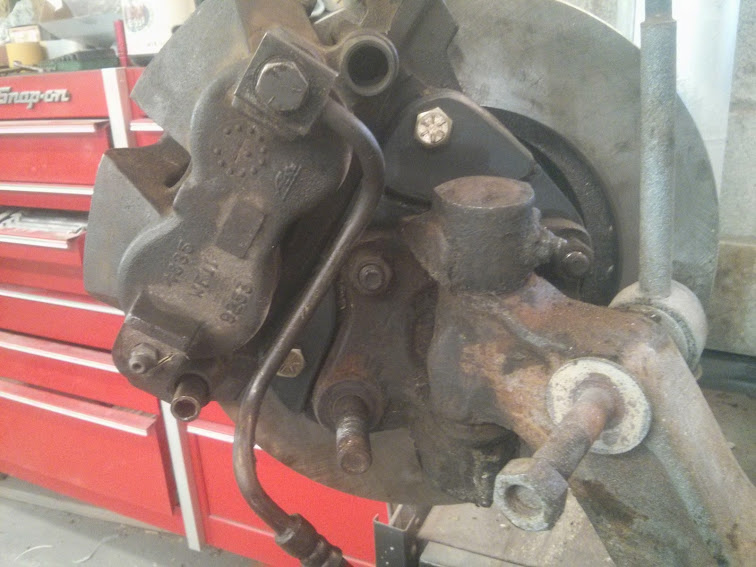
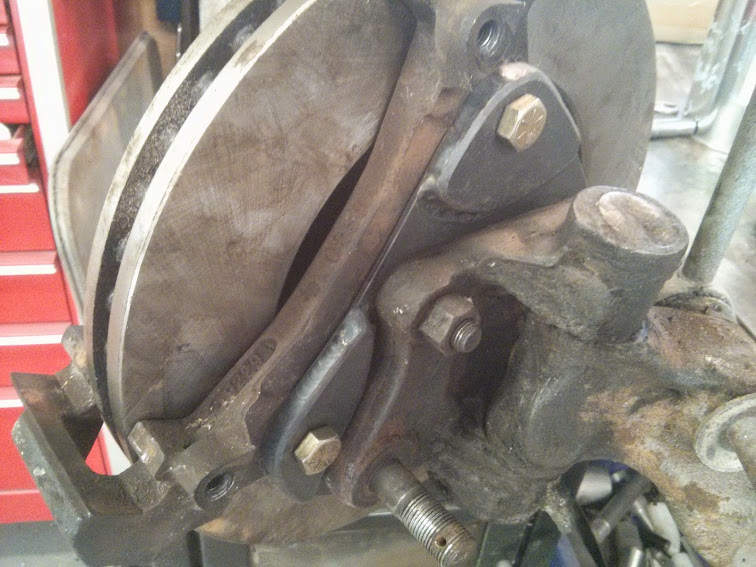
    SO I had a bit of change of plan, actually it's a whole change of direction in an area that I didn't suspect I would be doing much work in. The Engine. I pulled it out before I painted the underside. I wasn't even going to pull it out but it just made the painting easier. So as long as I had it out I got a gasket set to open it up and reseal it. When I pulled the heads I saw that it had been recently rebuilt and bored .020. No ridge, everything looked good if not a bit gooky from sitting for so long.

    One thing that caught my eye was the deck height seemed really low. Now the 318 is not known for lots of compression and this one fell right in line with that. I measured a few things and did a little math and came up with 7 to 1 compression,,, that can't be right so I measured everything again carefully and came up with,,,, wait for it,,,,, 6.98 to 1. Yuck, so a set of the KB raised compression height pistons will fix that, and the .325 lobe lift cam isn't going to do either so a cam, springs etc and that is alright.

    The valve train looked a bit odd from the top, all the exhaust valves had a lot taller installed height so I popped one out. They were all recessed about .070. Sigh, so a set of heads right? Not worth putting seats in plain old 318 heads. SO I go to a pull a part in 95 degree weather and pull a set of magnum heads off a B van. Get them home, check them out and,,,, cracked...

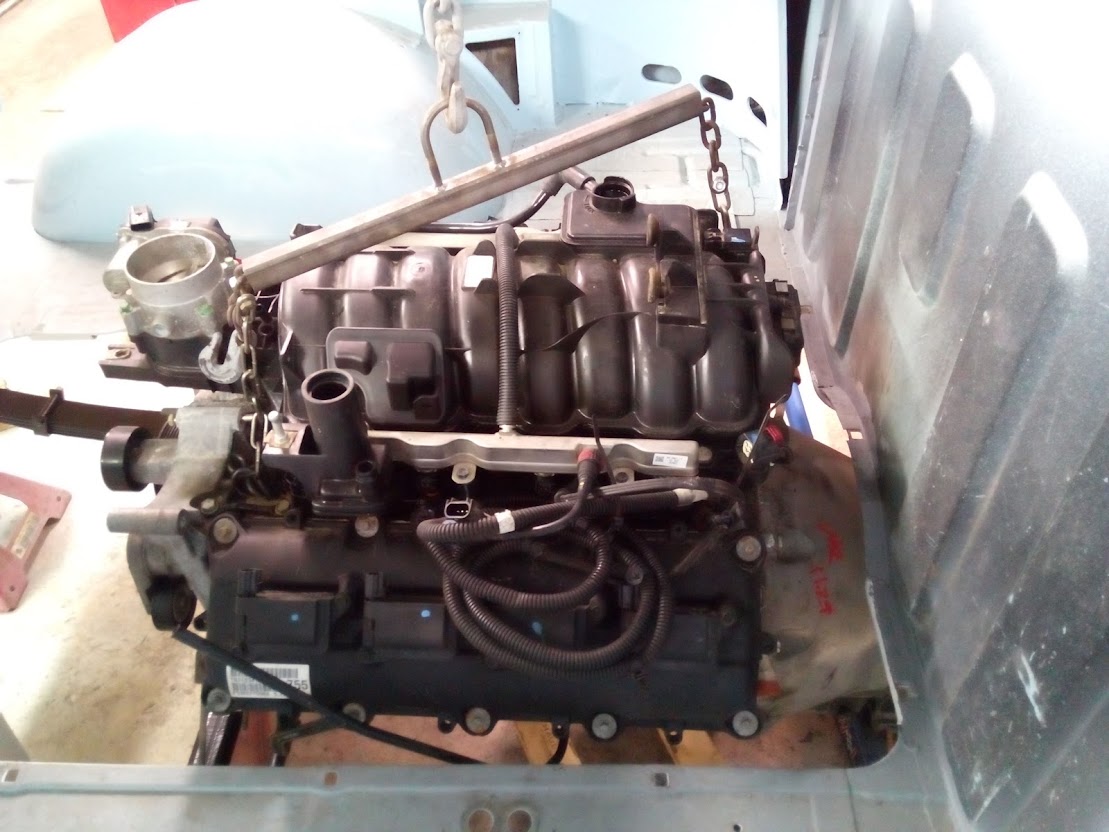
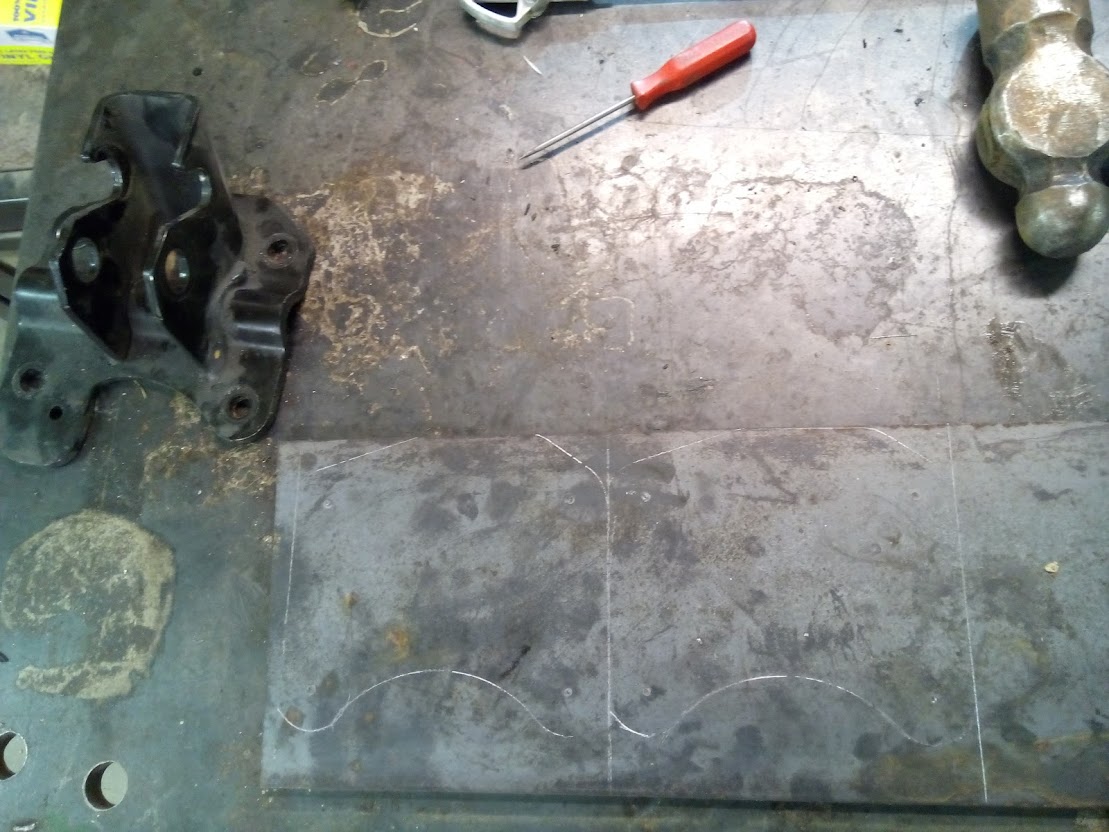
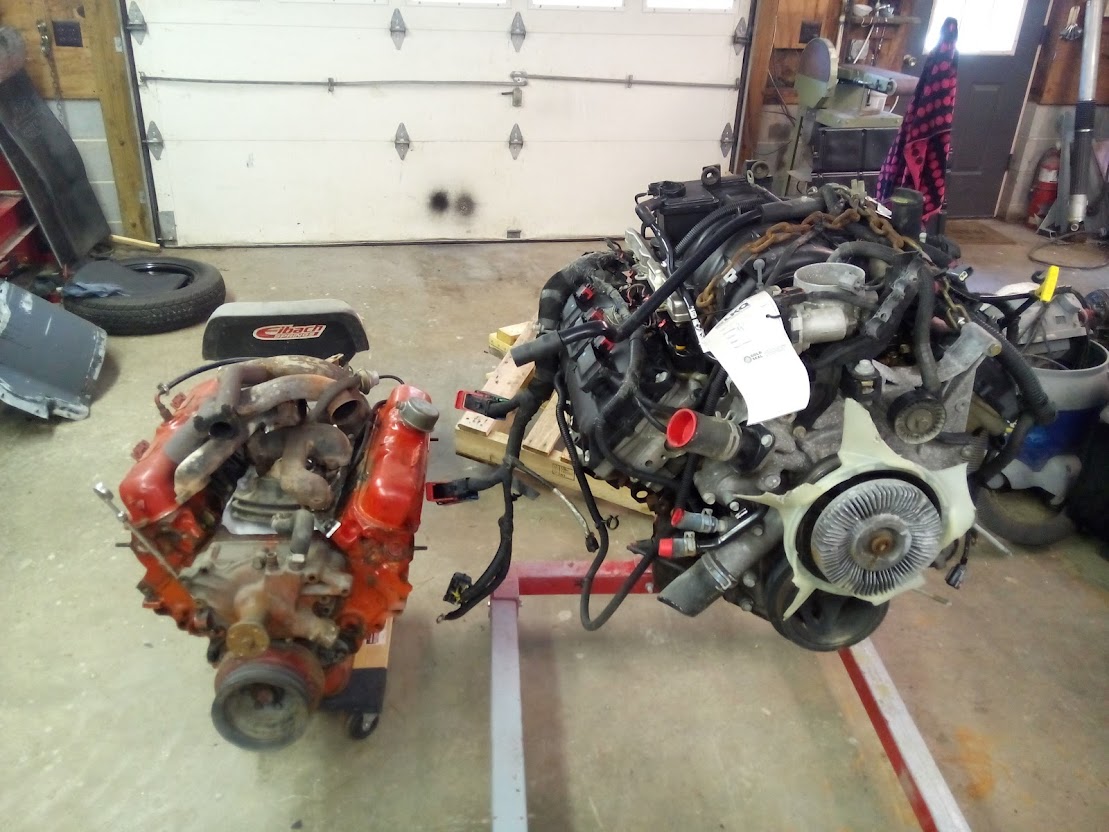
    At this point I am assuming the universe doesn't want an LA engine going back in the little A100. So more math and it works out that I would be just a few hundred dollars more to do this.

    My long suffering A100 Pickup project IMG_20150625_134221

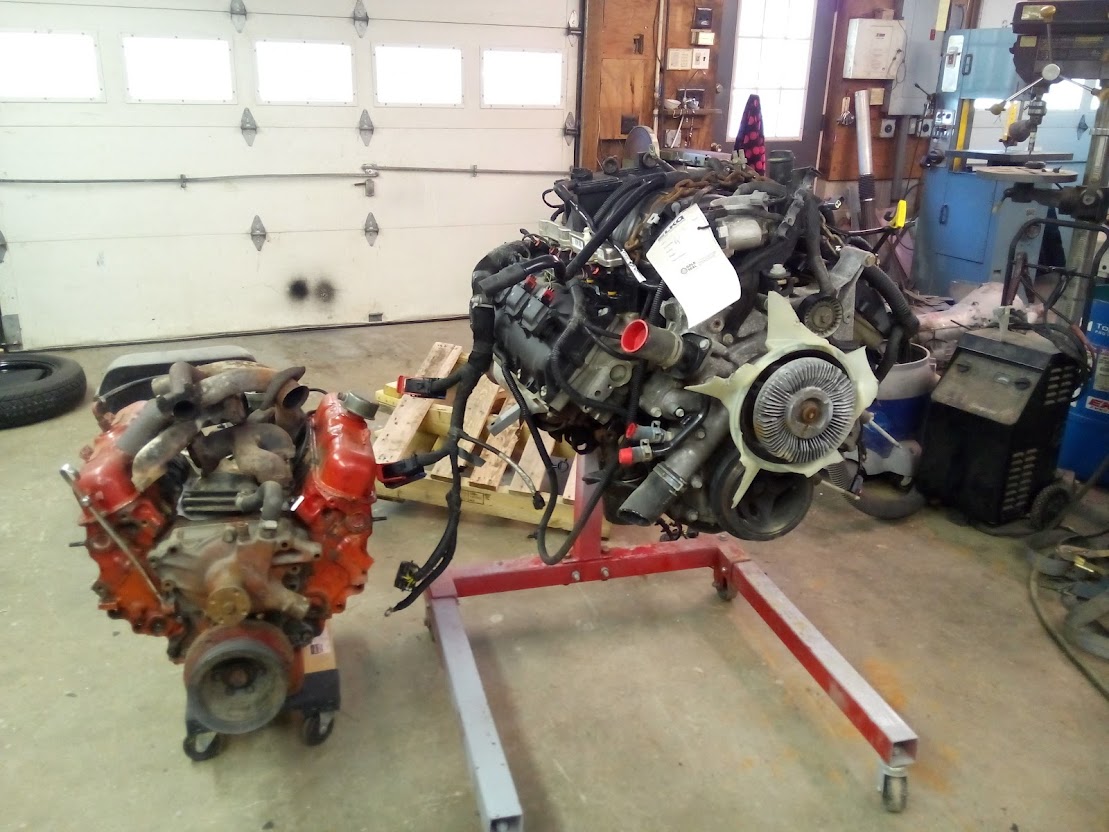
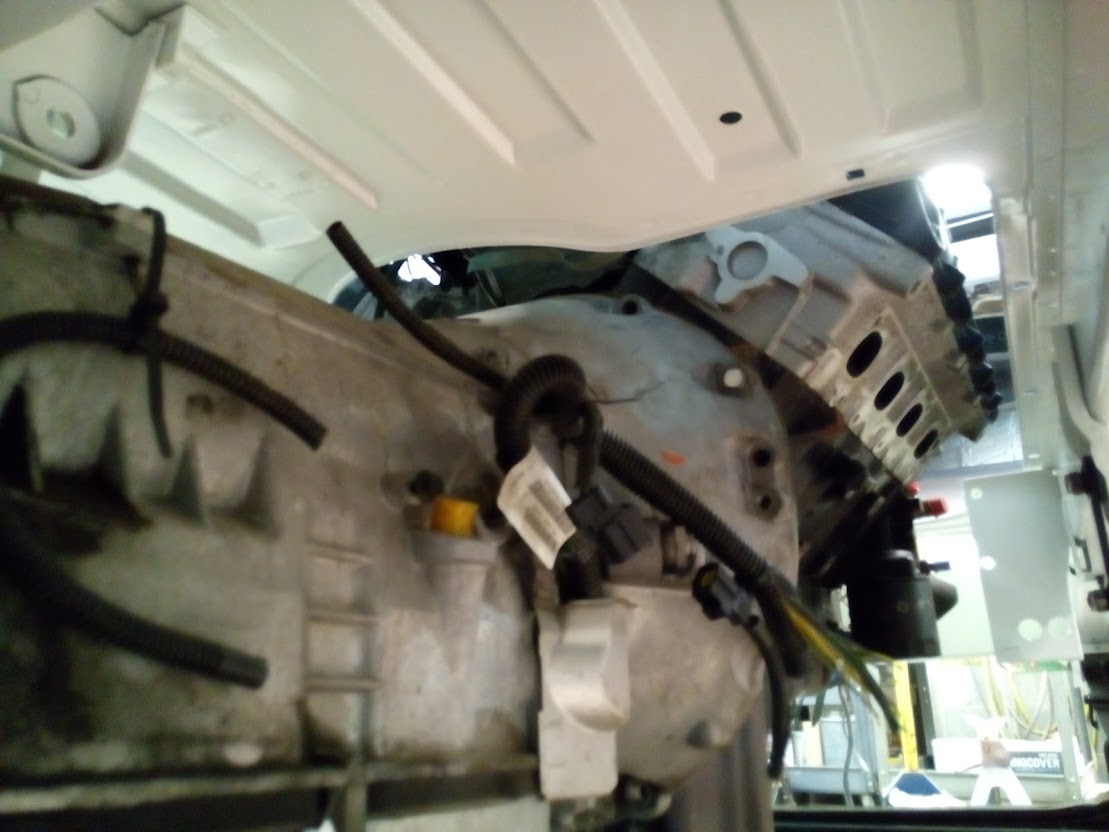
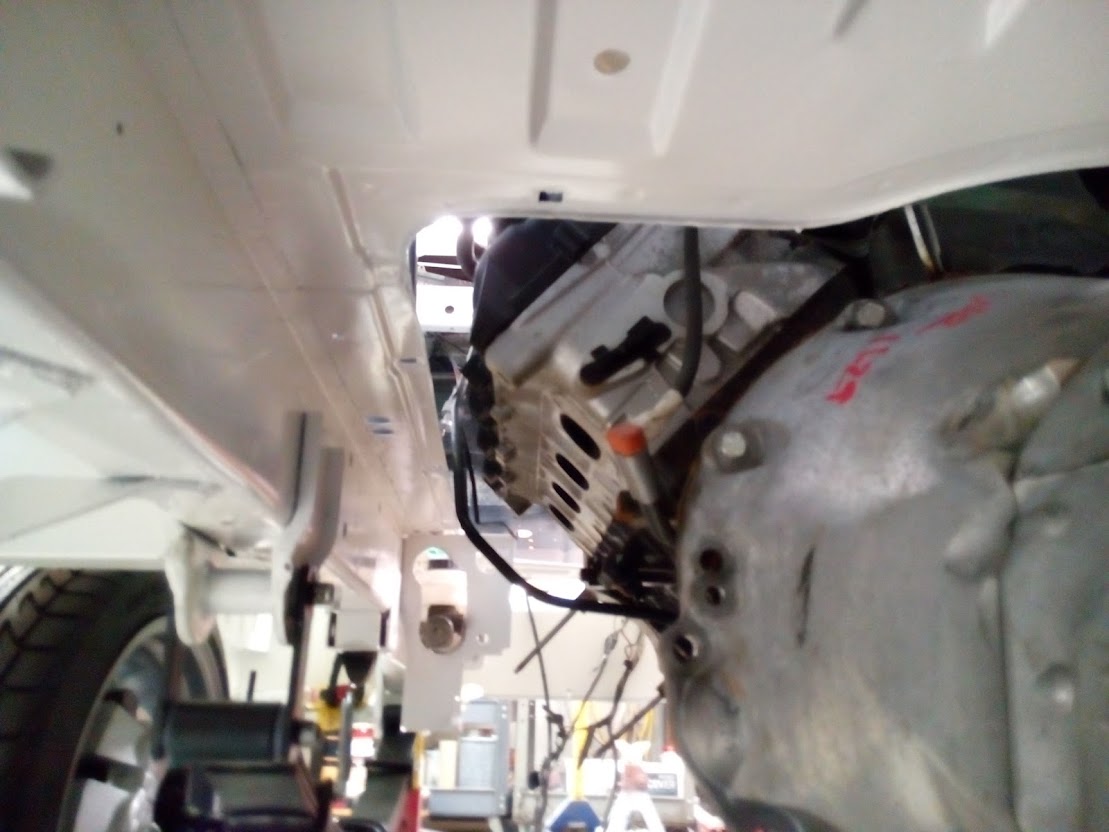
    It's a 2013 5.7 Hemi from a truck with 38k miles. It's an ugly rascal but it should make plenty of power and the AC is going to be really easy. Also the drive belt is already largely sorted. I will probably go with the MegaSquirt plug and play with it just to save time and the complexity of modifying the stock harness. Surprisingly enough LKQ only cut two little spots on the harness so if I wanted to I could use this one with a stock controller and an HP tuners programmer. The only hold up with that would be being able to defeat the SKIM, security, in the stock computer. They are close to having that sorted so we will see how that goes. I'm hoping I am done before they are actually cause I want to be DONE!!!

    My long suffering A100 Pickup project IMG_20150625_134226

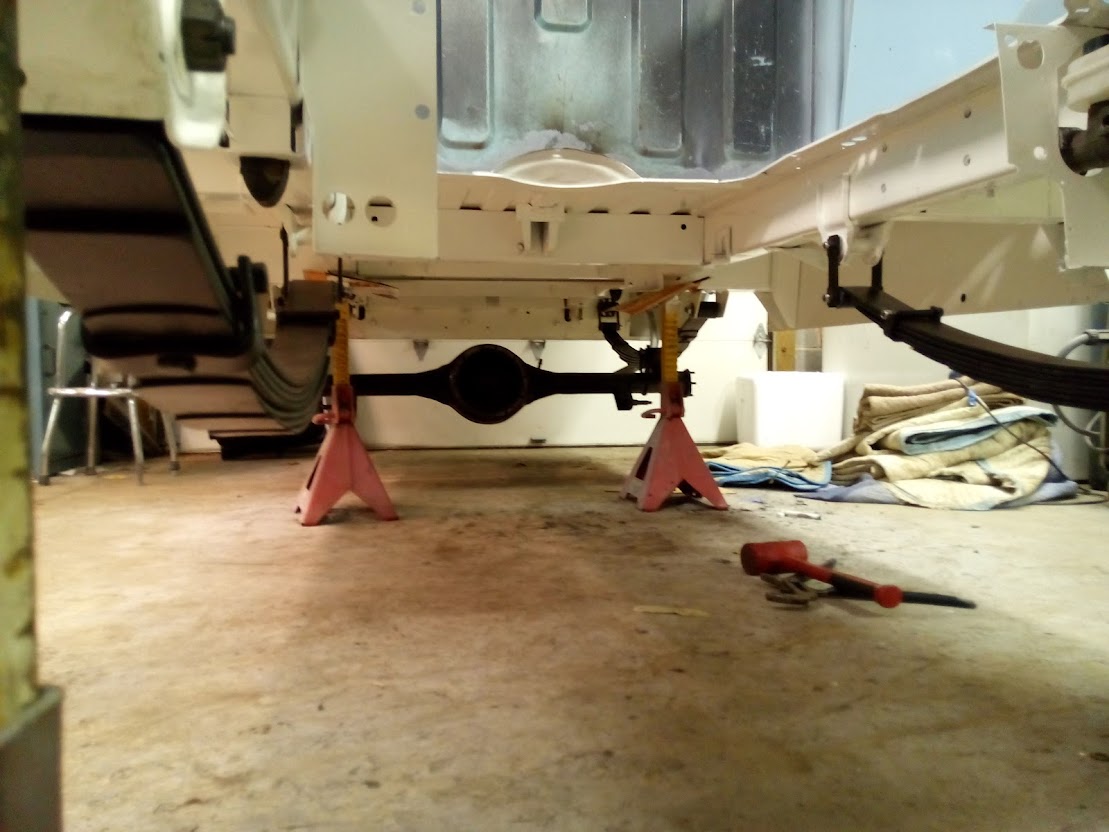
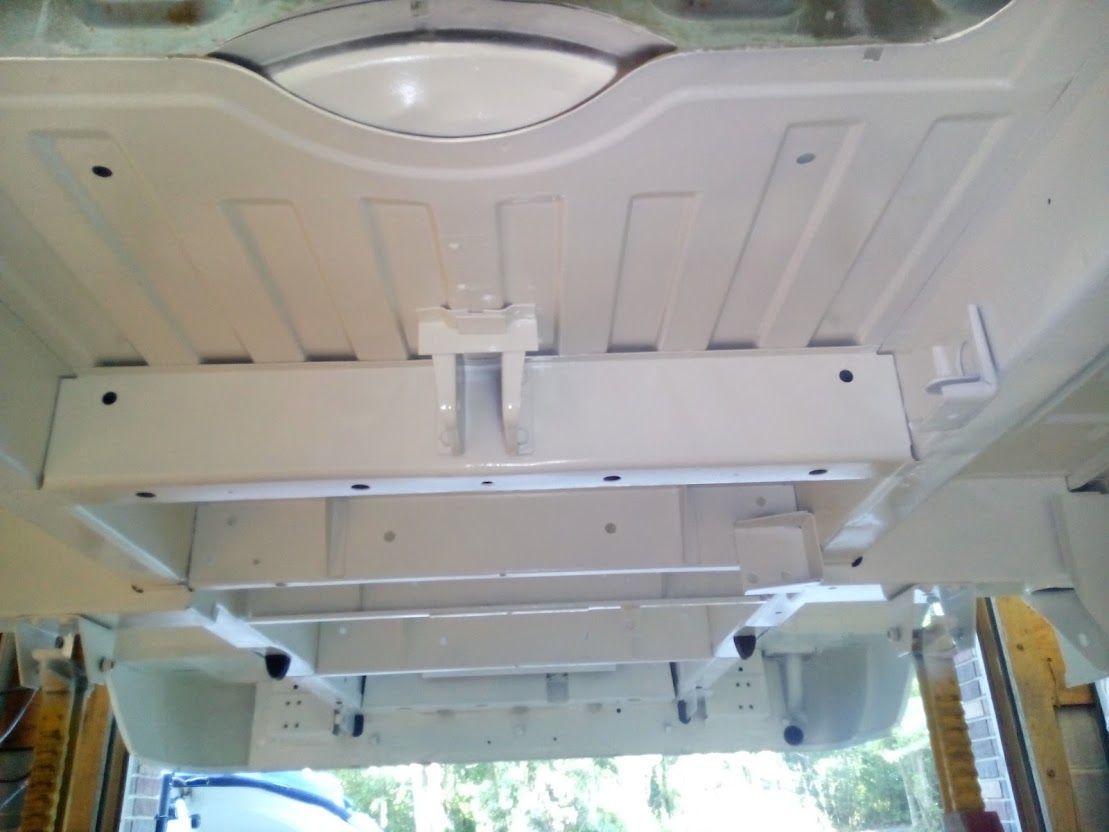
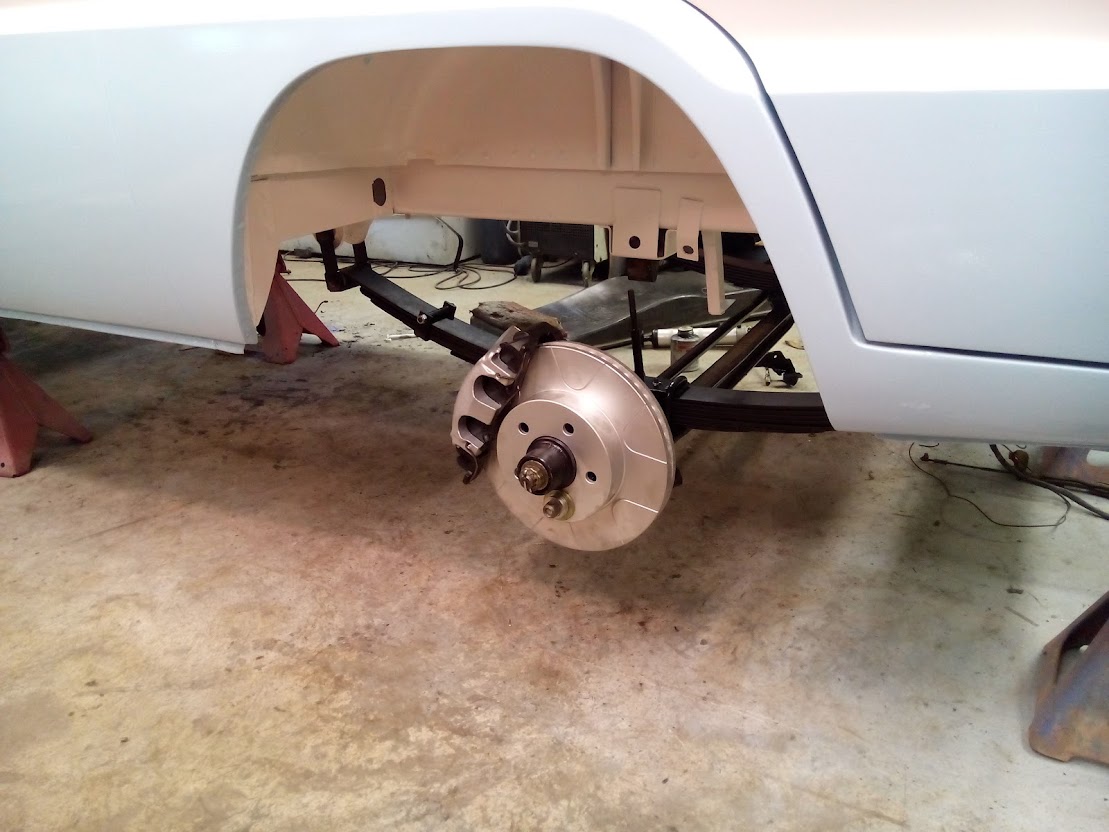
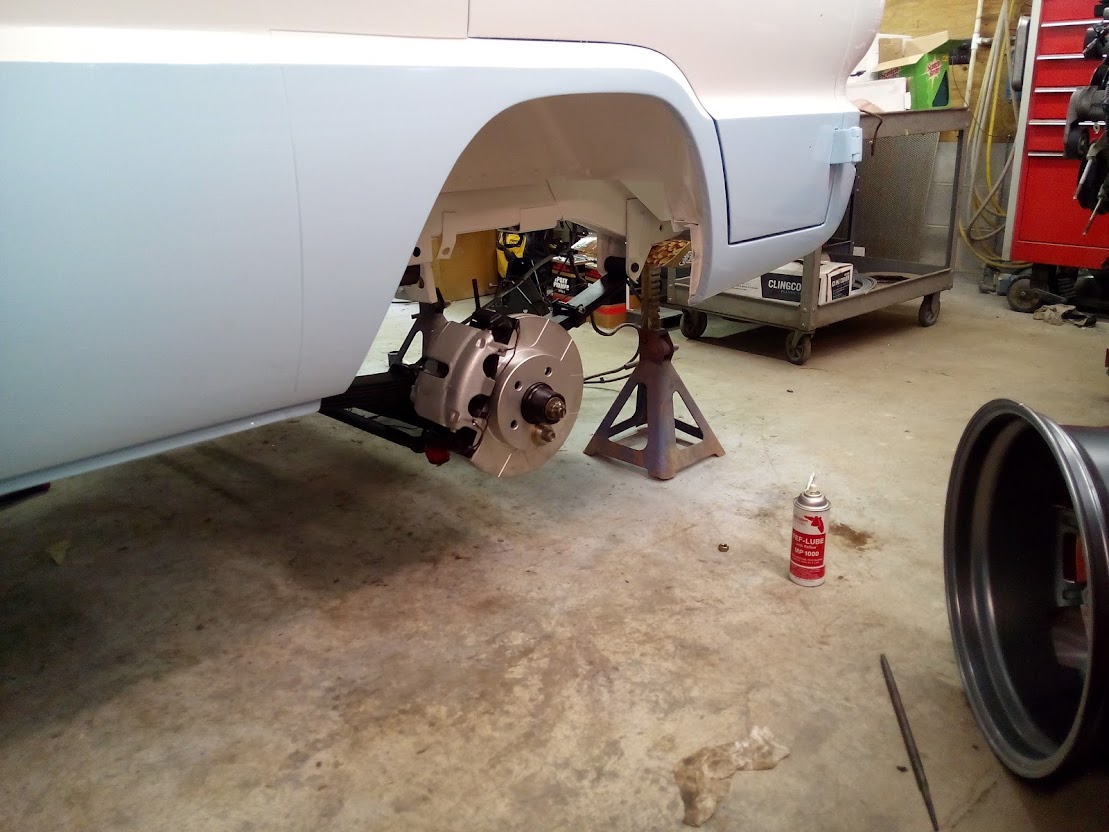
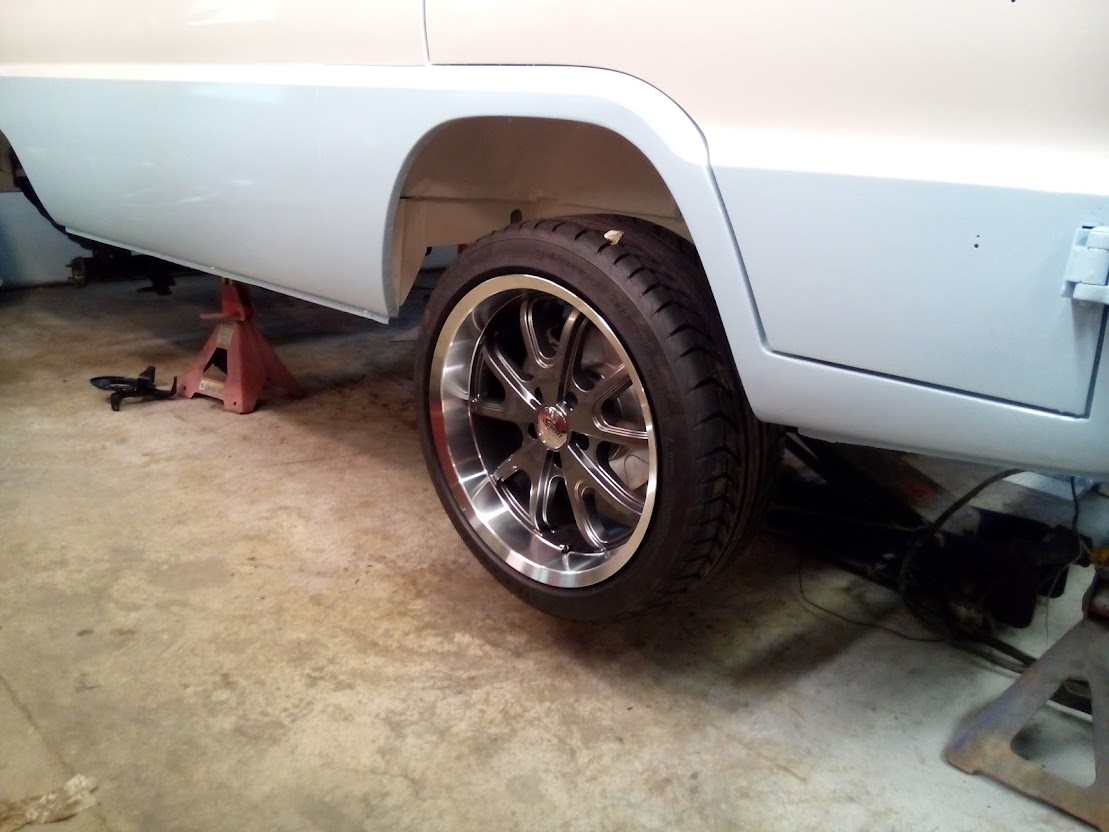
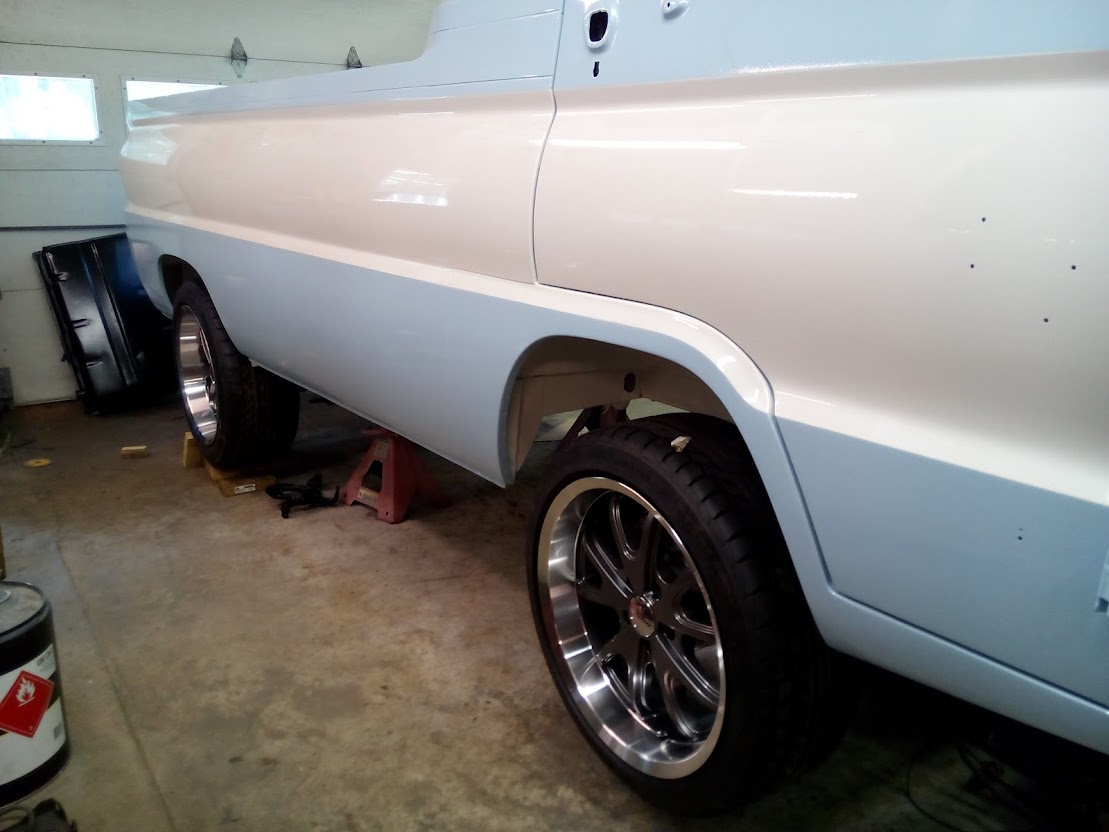
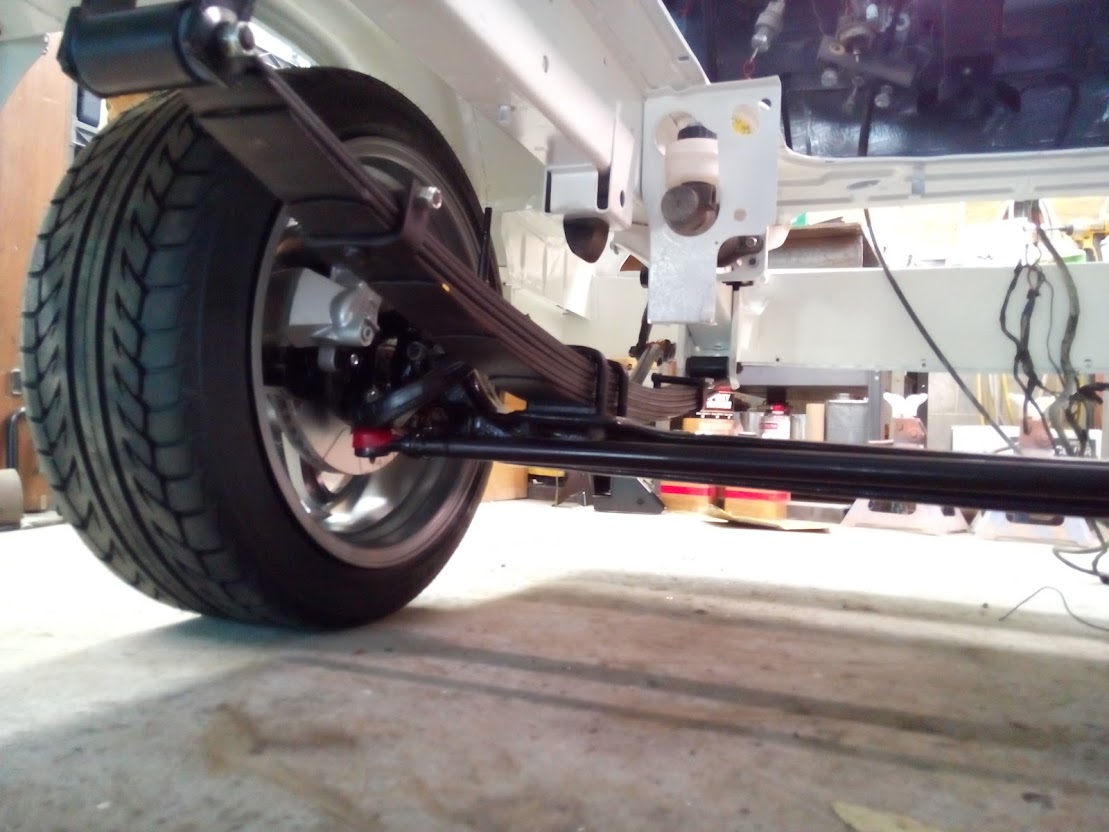
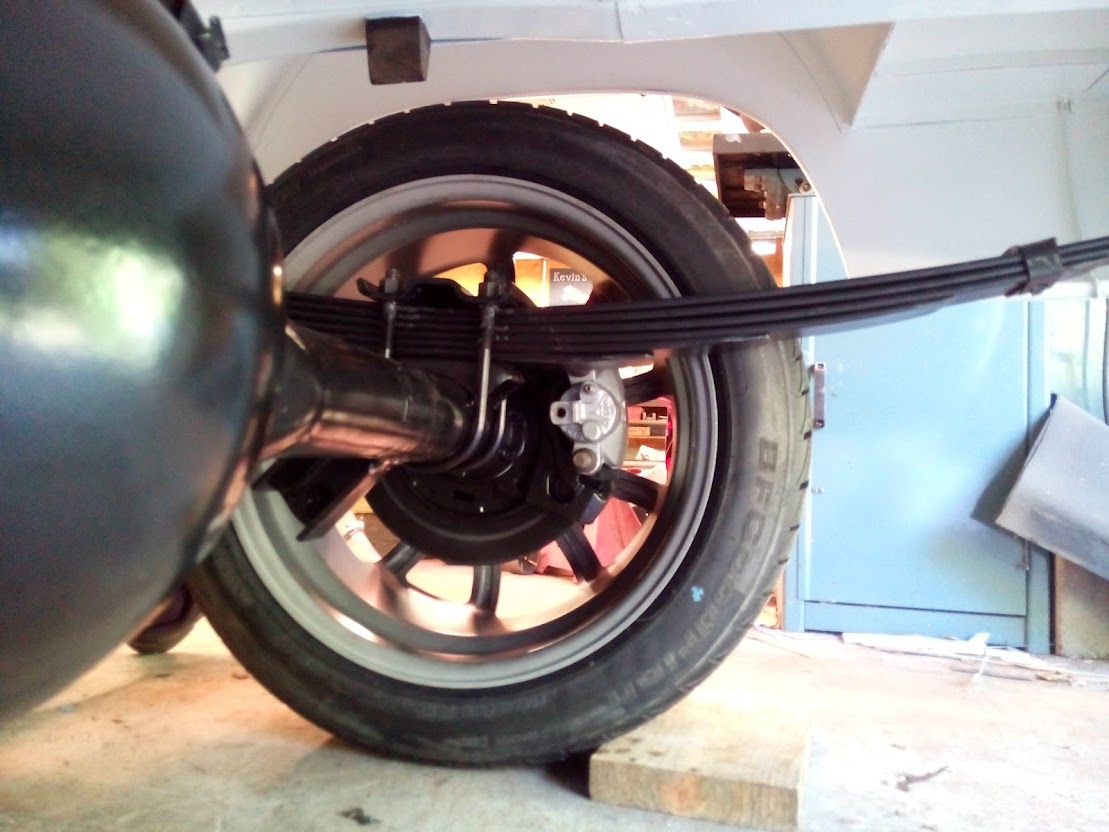
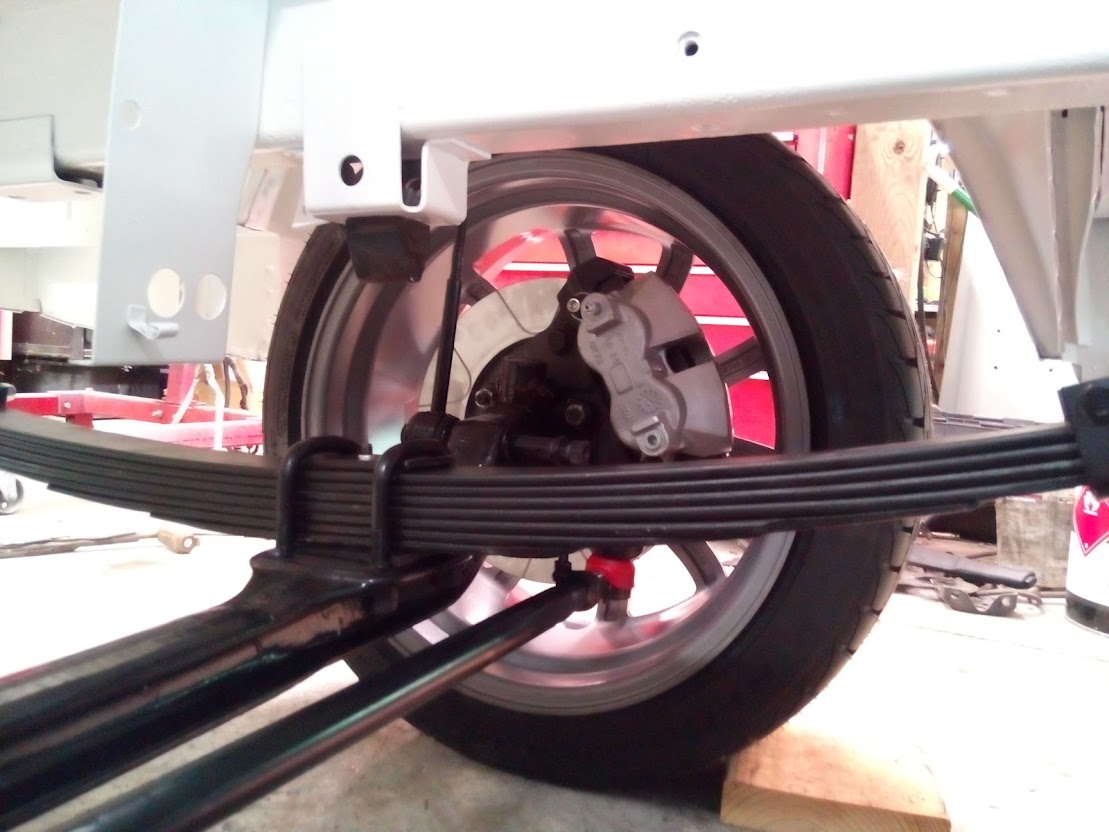
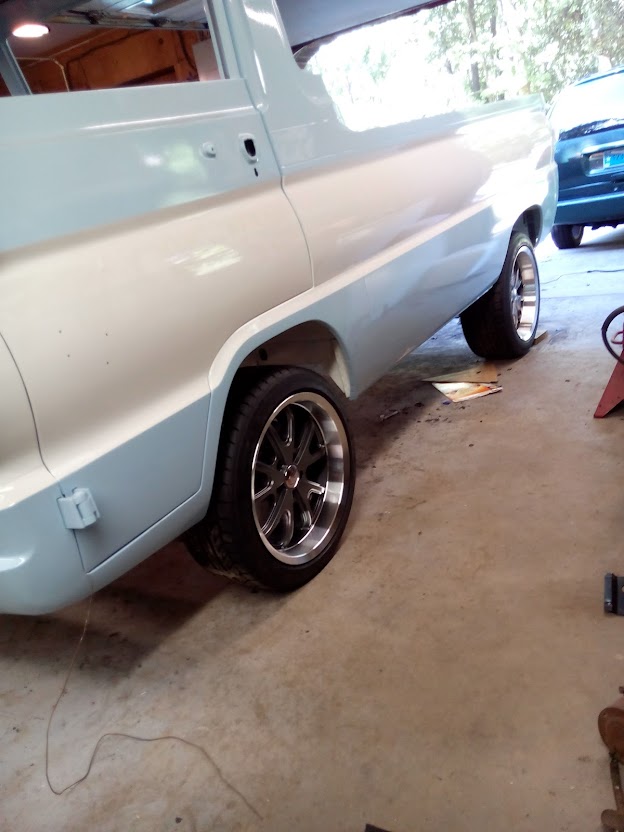
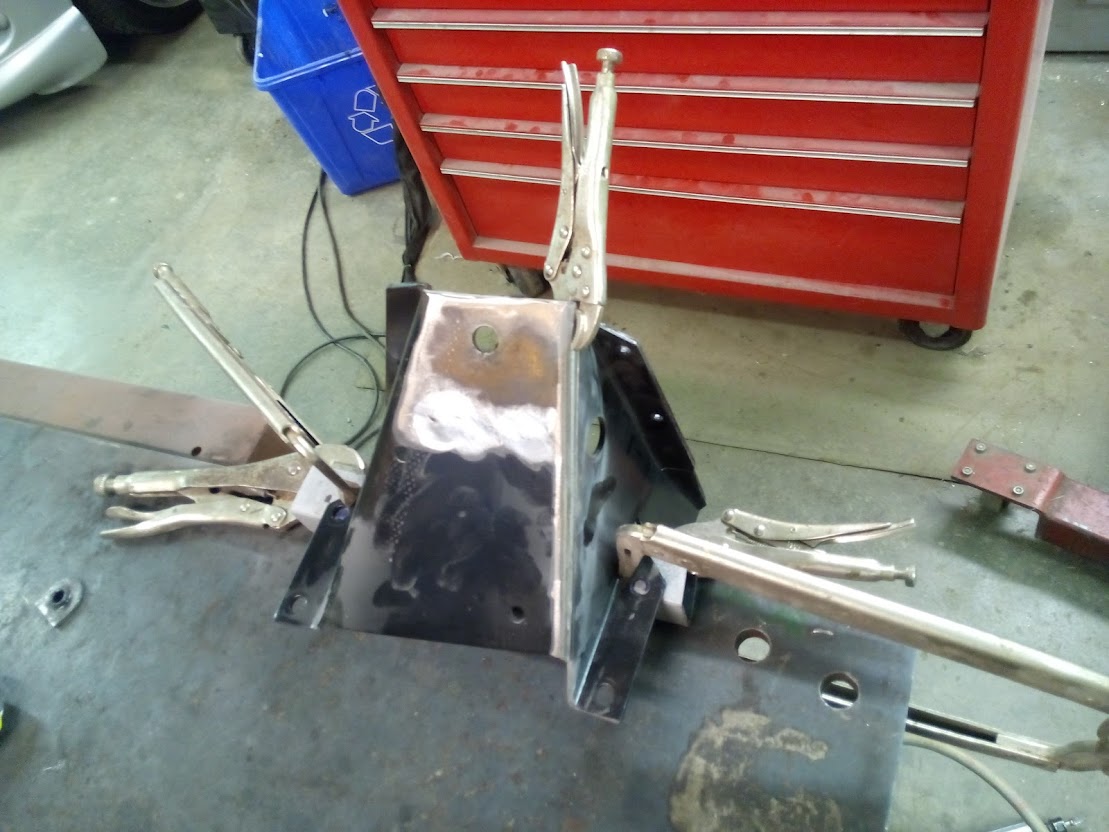
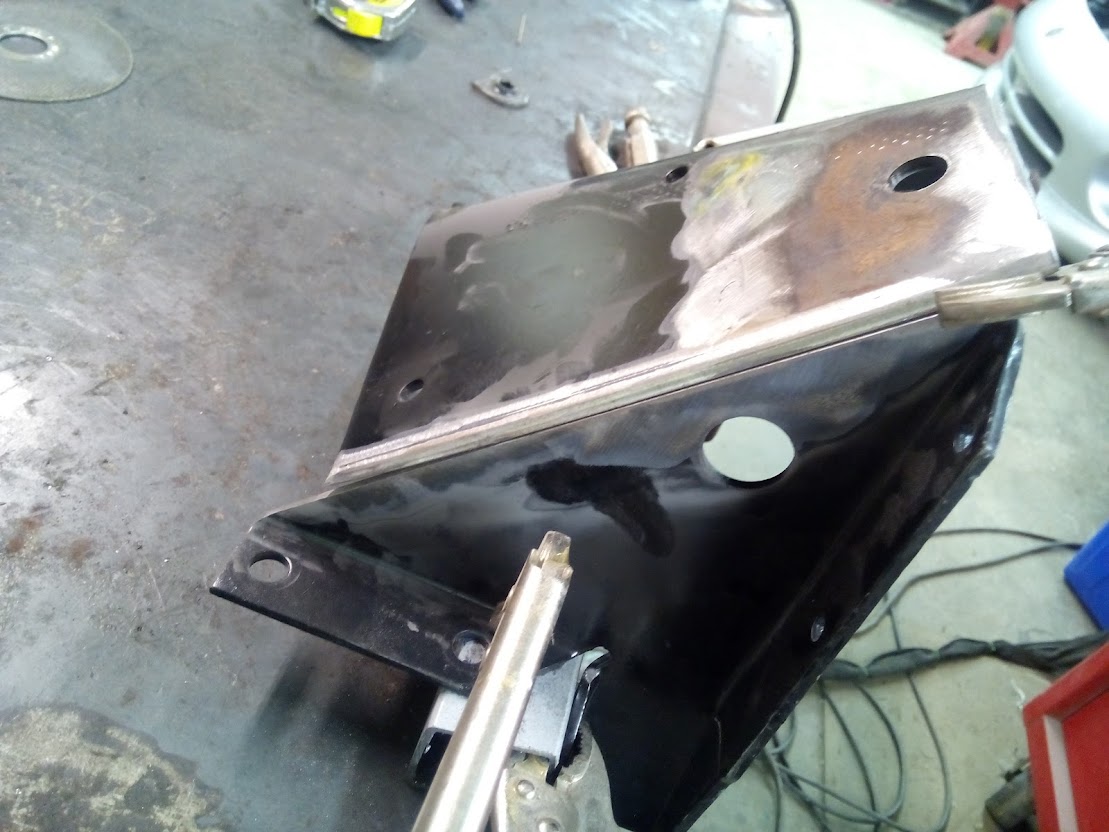
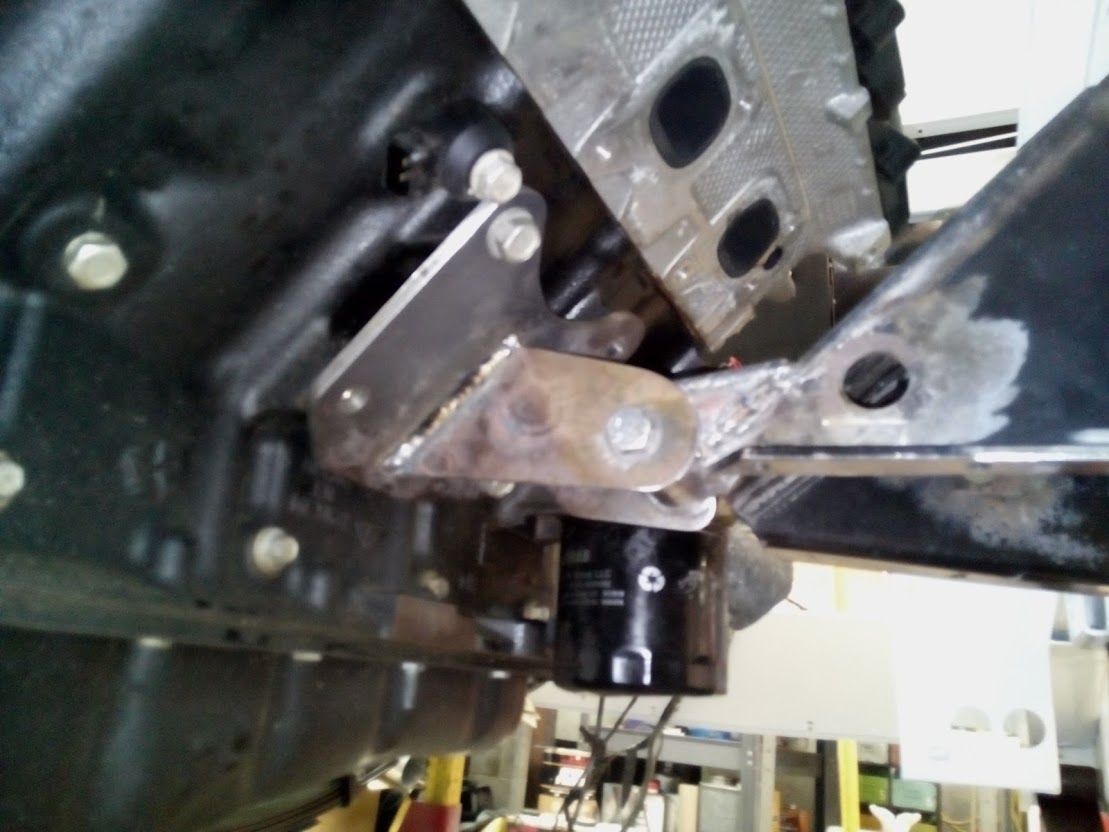
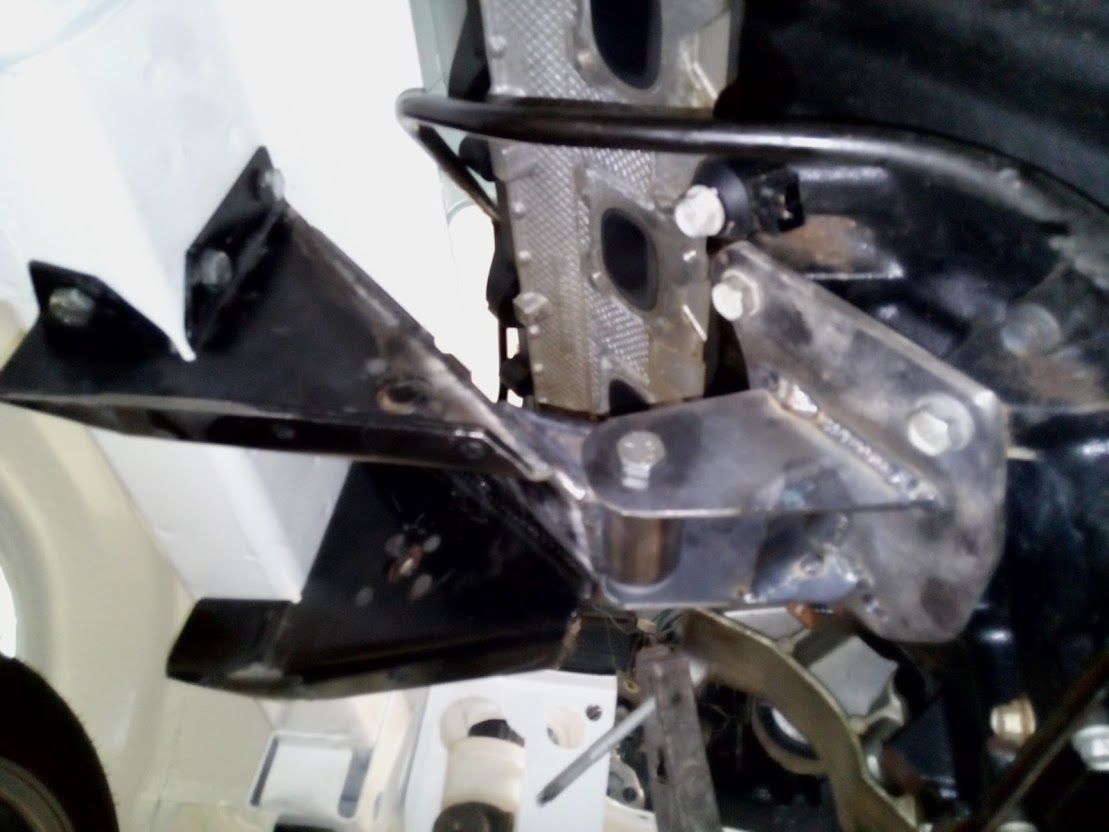
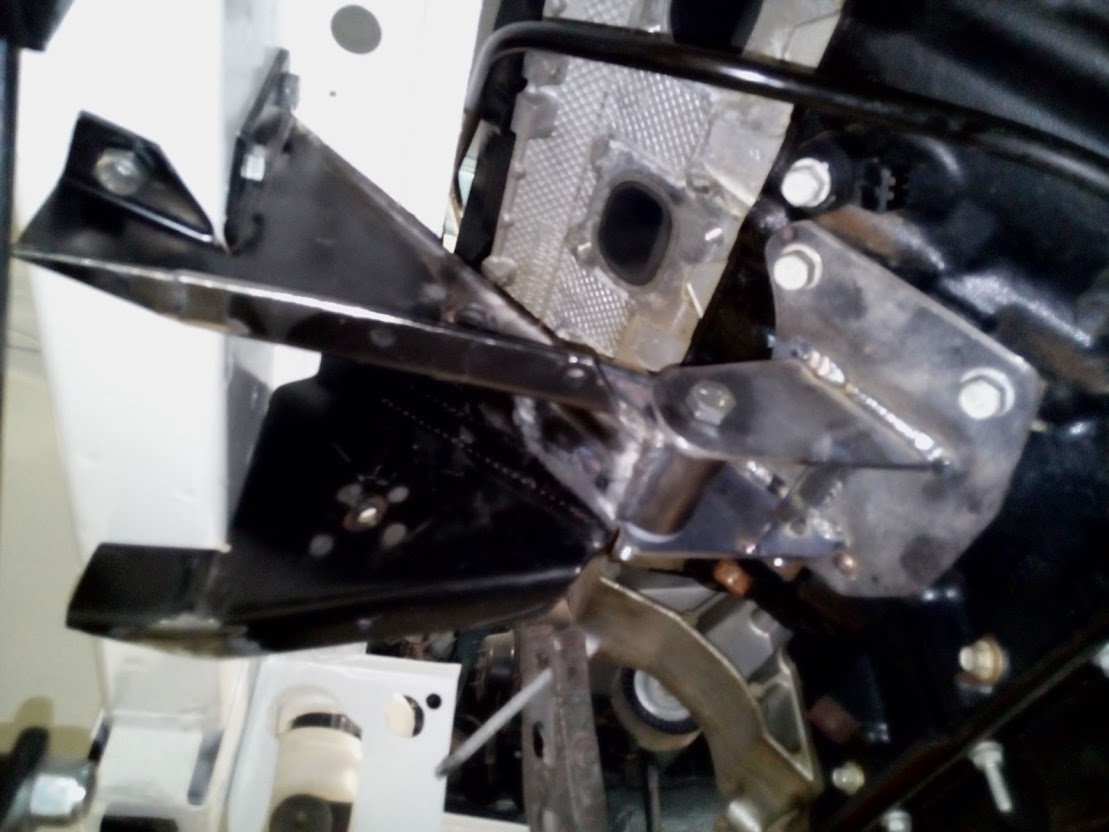
    But the exciting news for the day, Something went back on it instead of off!!! That's huge news indeed.

    My long suffering A100 Pickup project IMG_20150626_194159

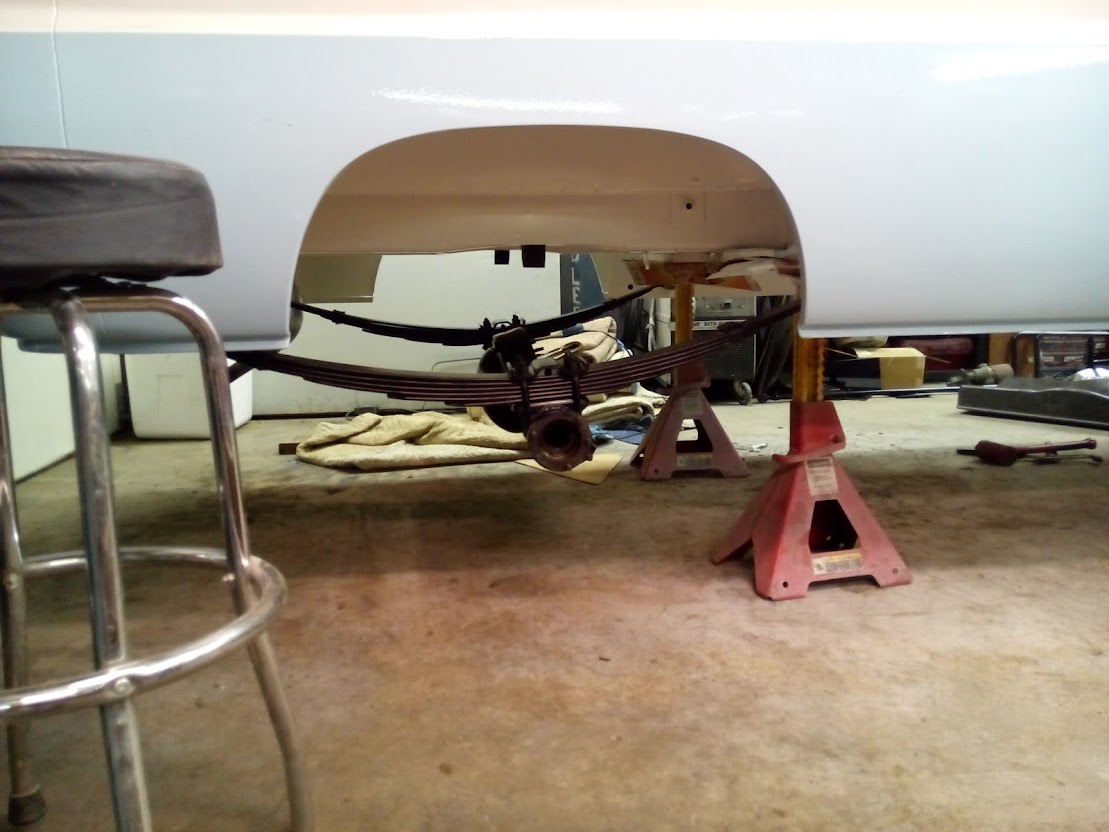
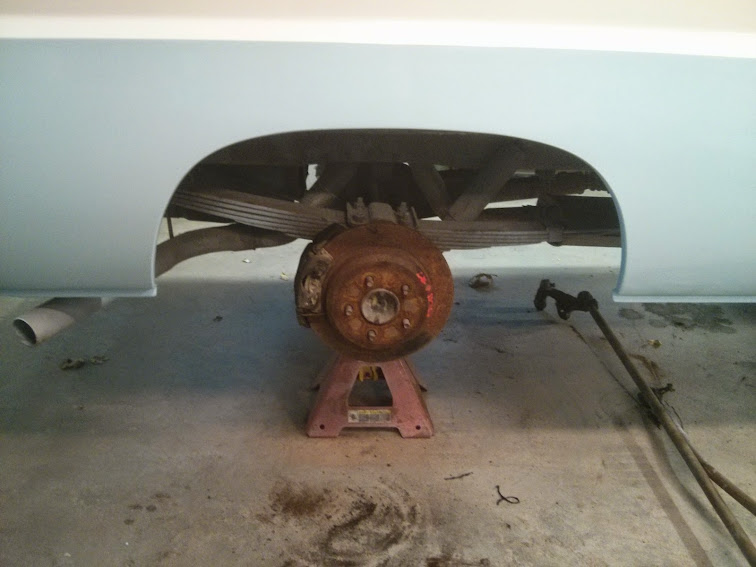
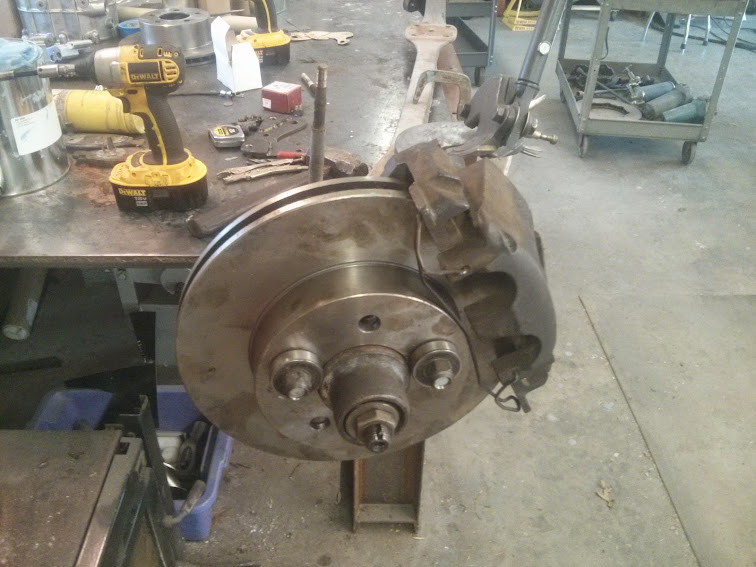
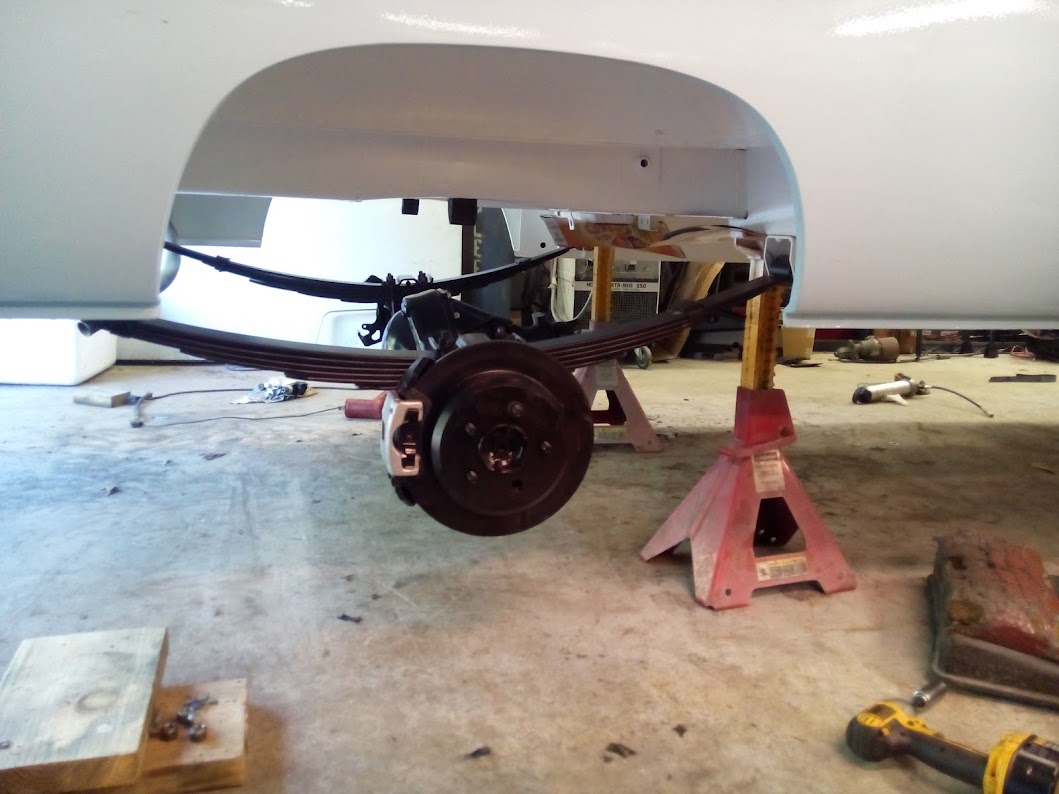
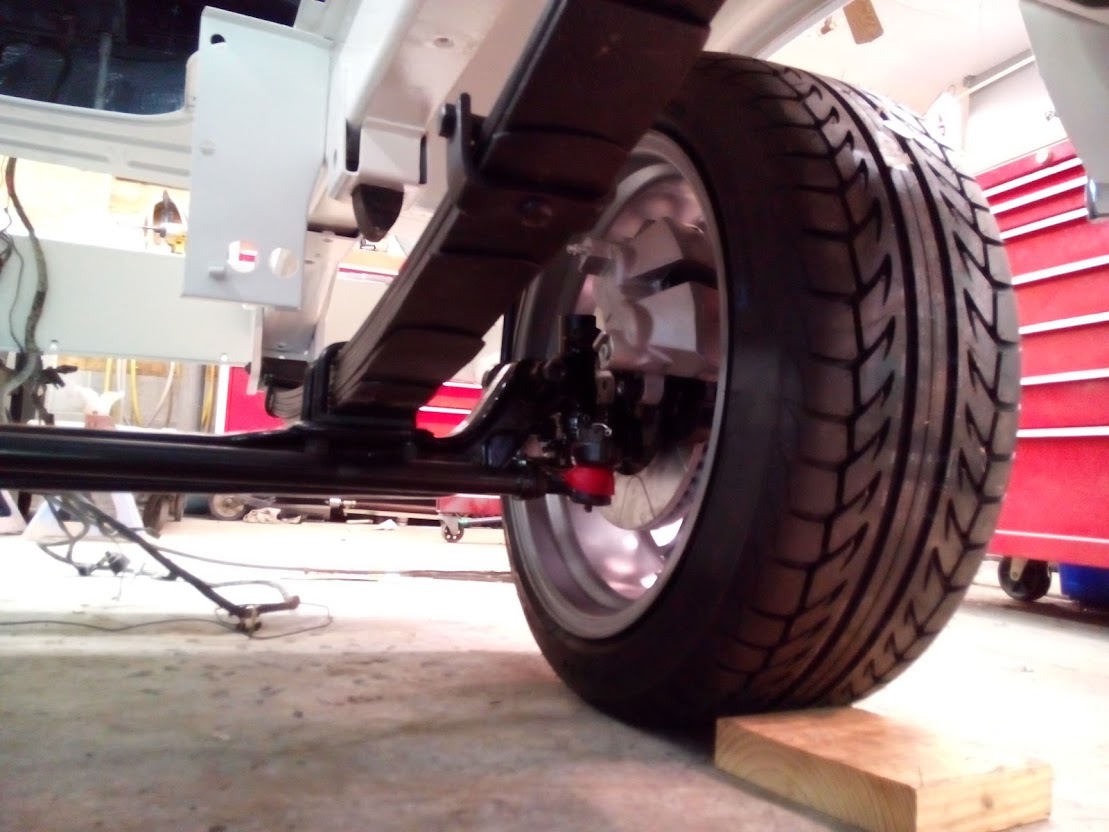
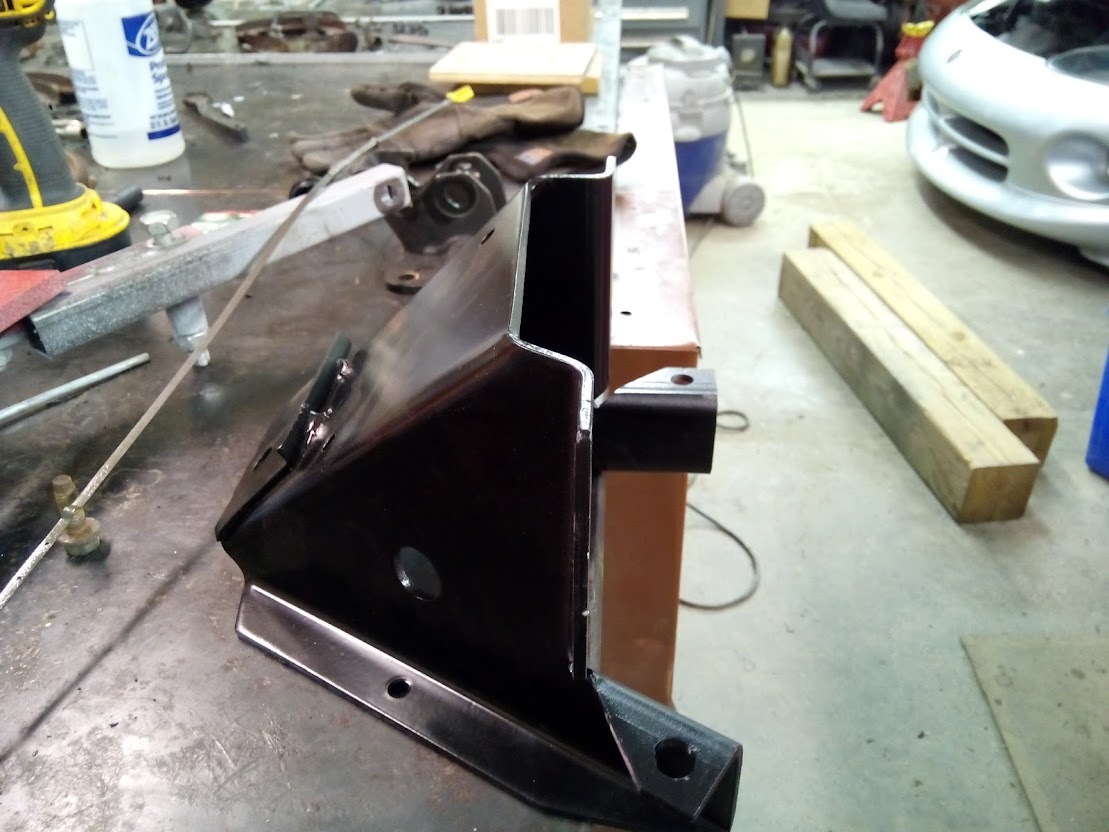
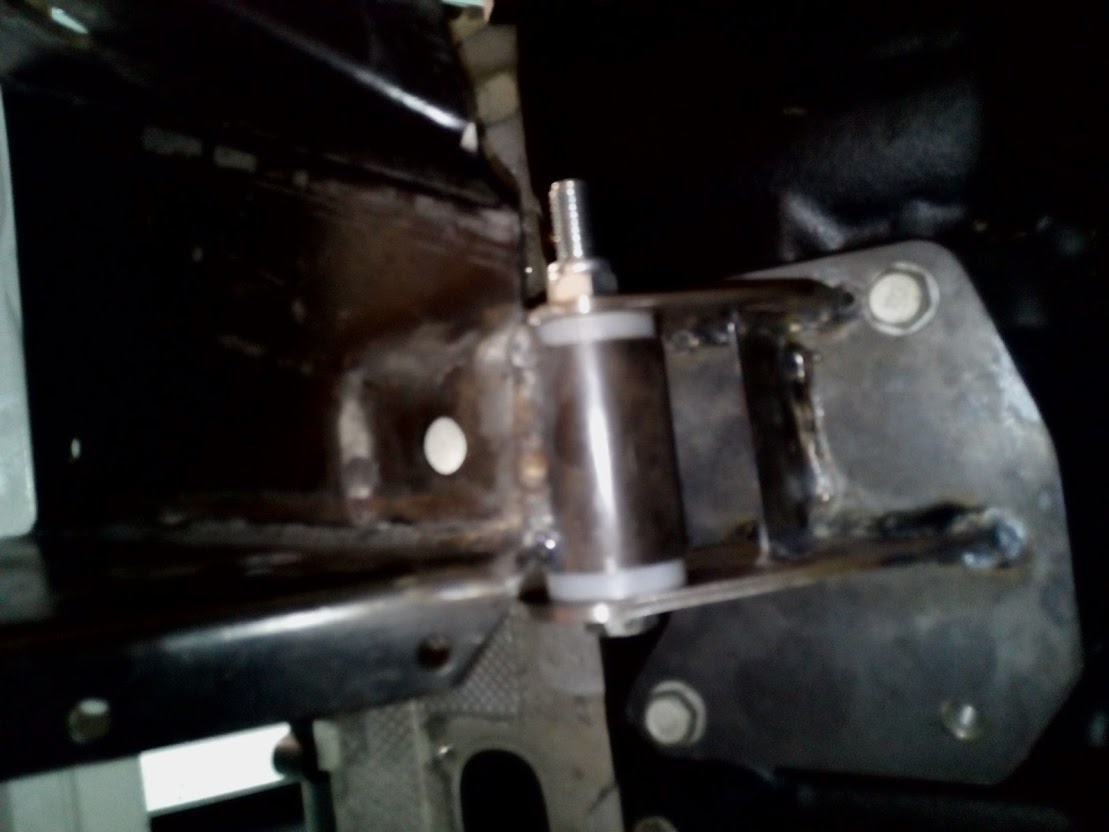
    New spring bushings I made using UHMW and new sleeves, I like this material for bushings and it should stiffen things nicely.

    My long suffering A100 Pickup project IMG_20150626_194214


    Last edited by Kma4444 on Sat Jul 30, 2016 6:48 am; edited 1 time in total
    Kma4444
    Kma4444


    Number of posts : 44
    Location : Anderson, SC
    Registration date : 2016-07-28

    My long suffering A100 Pickup project Empty Re: My long suffering A100 Pickup project

    Post by Kma4444 Sat Jul 30, 2016 6:30 am

    It sure is nice to be in actual assembly. If only I had cleaned the inside of the rear axle before now. Man that is some nasty stuff, I suppose 50 year old gear lube gets pretty stiff. There is a coating all over the inside of the housing that can only be described as something like the original Permatex gasket compound. Thick, in some places it came off in sheets, in others it was just super thick heavy gook. Terrible stuff. Oddly enough the bearings and gears look good, go figure. I'm guessing it will need regular changes for a while to get rid of what the new fluid will undoubtedly start dissolving. Good thing there's no pump or passages, just big ol' clunky gears and bearings.

    So quite a lot of assembly today, here's a couple highlights.

    All the steering and front brakes, new wheel bearings etc, all in, tight, lubed and cotter keyed!

    My long suffering A100 Pickup project IMG_20150627_132335

    My long suffering A100 Pickup project IMG_20150627_132355

    Went and got my tires mounted as I was reasonably confident in the package fitting under there. Hope I was right.

    My long suffering A100 Pickup project IMG_20150627_163242

    Here's a rather fuzzy pic of the caliper bracket. The calipers are from a 99-04 Grand Cherokee and the rotors are either 90 Dakota 4wd, not so easy to find, or Jeep Liberty, exact same rotor just different part number in the parts house computer system.

    My long suffering A100 Pickup project IMG_20150627_163740


    And with the rear just blocked up in there, I hope that's where it ends up. I should know tomorrow as I think I am about ready to bolt all that together.

    My long suffering A100 Pickup project IMG_20150627_171538

    Kma4444
    Kma4444


    Number of posts : 44
    Location : Anderson, SC
    Registration date : 2016-07-28

    My long suffering A100 Pickup project Empty Re: My long suffering A100 Pickup project

    Post by Kma4444 Sat Jul 30, 2016 6:36 am

    The rear brake setup. This was born on a 98 or earlier Grand Cherokee. Not too difficult of a fitment. Had to drill the lower hole for the axle retainer as the Jeep one only uses 4 studs. Had to enlarge the center hole a bit and then spacers between the retainers and the bearing as the brake mounts are thicker than the original drum backing plates.

    My long suffering A100 Pickup project IMG_20150628_095100


    And, it holds itself up!!! Way up actually,,,, that's gonna take some feddling once it is laden with drivetrain so I can figure out how far it needs to come down to look right.

    My long suffering A100 Pickup project IMG_20150628_103053


    Pretty funny, I have the 70's stance working pretty solidly right now.

    My long suffering A100 Pickup project IMG_20150628_103115

    My long suffering A100 Pickup project IMG_20150628_103128

    And a close up of the wheel and rear brakes. I really like these wheels also. I like that they tie in a vintage and modern theme which fits this build just right. I would have liked to used the American Racing Cobra wheels in an 18" but they were way pricey and I'm about spent out.

    My long suffering A100 Pickup project IMG_20150628_103257

    My long suffering A100 Pickup project IMG_20150628_103316

    My long suffering A100 Pickup project IMG_20150628_103322

    My long suffering A100 Pickup project IMG_20150628_103334

    My long suffering A100 Pickup project IMG_20150628_103351

    I had the front springs dearched by 2" and they may be alright once the weight gets in it. But the rears will almost certainly need some work as well. The springs are stiff indeed, they didn't give a hoot about ride quality obviously, just wanted it to have plenty of capacity I suppose. So I don't expect it to come down much and won't be surprised if I have to dearch all the springs to get it where I want it. It's not going to be low, just not tall.

    My long suffering A100 Pickup project IMG_20150628_103424

    My long suffering A100 Pickup project IMG_20150628_103509
    Kma4444
    Kma4444


    Number of posts : 44
    Location : Anderson, SC
    Registration date : 2016-07-28

    My long suffering A100 Pickup project Empty Re: My long suffering A100 Pickup project

    Post by Kma4444 Sat Jul 30, 2016 6:41 am

    I thought about flipping the axles but like you say, it would be too much. Right now there is 4.25" from the top of the tire to the fender opening. I'm thinking somewhere around 2" is probably right, we'll have to see. Don't want to have to guess too many times as the spring shop isn't super cheap to dearch them so hopefully I guess right.

    Here's some pics from today.

    Ugh, this exhaust manifold is used on a 390hp engine??????

    My long suffering A100 Pickup project IMG_20150629_111410

    Not lacking in port size though!

    My long suffering A100 Pickup project IMG_20150629_111556

    And say what you may about the diminutive A100, it certainly has a healthy appetite.

    My long suffering A100 Pickup project IMG_20150629_160246

    My long suffering A100 Pickup project IMG_20150629_160304

    My long suffering A100 Pickup project IMG_20150629_160323

    SO yep, it fits. I will need to move that dipstick you see in the last pic as the engine had to move a bit left. Not sure about the dog house yet it may be close on the driver's side. I raised the front up about an inch and a half after these pics.

    This is one of the stock engine mount brackets. I swapped them side to side as they are offset forward for the old LA engine and the hemi mounts are rearwards in comparison. That took a little fab work and may take a little more as the engine has some rake front to back to help with driveline alignment. That means the mounts are now angled the wrong way, shouldn't be a big deal and it gets me on the way for mounts.

    My long suffering A100 Pickup project IMG_20150629_165222

    Kma4444
    Kma4444


    Number of posts : 44
    Location : Anderson, SC
    Registration date : 2016-07-28

    My long suffering A100 Pickup project Empty Re: My long suffering A100 Pickup project

    Post by Kma4444 Sat Jul 30, 2016 6:44 am

    Alright, so a week away for work and I'm back at it. Here's a few pics of the motor mount work.

    My long suffering A100 Pickup project IMG_20150630_134106

    Clamped and ready to weld back together. This worked out fine.

    My long suffering A100 Pickup project IMG_20150630_134114

    My long suffering A100 Pickup project IMG_20150630_085322

    My long suffering A100 Pickup project IMG_20150708_125912

    My long suffering A100 Pickup project IMG_20150708_125920

    My long suffering A100 Pickup project IMG_20150708_125933

    My long suffering A100 Pickup project IMG_20150708_125947

    So the engine is mounted as is the transmission. I will need to shoot a couple of, hopefully in better focus, pics of that Rube Goldberg contraption. It had to reach from under and at the rear of the trans up to the top and forward to grab the stock hanger of a mount. It's interesting if not elegant.

    Sponsored content


    My long suffering A100 Pickup project Empty Re: My long suffering A100 Pickup project

    Post by Sponsored content


      Current date/time is Fri May 17, 2024 3:03 am