+7
sweetvan
busman78
Big W
whalemstr
OutofSight
vanny
Kma4444
11 posters
My long suffering A100 Pickup project
OutofSight- Number of posts : 1564
Location : Lake Oroville, Ca.
Registration date : 2015-11-19
Outstanding work!

vanny- Moderator
- Number of posts : 14778
Location : Ashburnham, MA
Age : 65
Registration date : 2012-09-22
Man, that is one Beautiful APup!!! I'm amazed at the quality of work on so many of these builds. Lots of talented people on this site for sure! Thanks for posting all these pics. Looks Fantastic! 


_________________
“The future will soon be a thing of the past."
http://public.fotki.com/Vintage-Vans/vintage-vans-es/ruff-diamond-1/?cmd=fs_slideshow
whalemstr- Number of posts : 248
Location : Corning, California
Registration date : 2012-06-27
I absolutely agree!!!
Makes me wish for a garage even more!!!
LOL
You guys with all that high tech concrete floors and stuff LOL
Nice work!!! Very nice work!!!
Makes me wish for a garage even more!!!
LOL
You guys with all that high tech concrete floors and stuff LOL
Nice work!!! Very nice work!!!

Kma4444- Number of posts : 44
Location : Anderson, SC
Registration date : 2016-07-28
Thanks all! I appreciate the kind words. Here's a little more....
The mounts all painted and looking proper.

The entire mount set here, including the "Reacharound" transmission mount. It has to reach from the rear lower of the trans and up to the hanging mount on the truck.


And here is a day's worth of lunacy on the parking brake of all things. I couldn't believe all I went through to just get that simple system squared away.
I needed to guide the cable around the exhaust and such so I made this little piece.


And the handle itself couldn't just bolt back on, it needed some extra support so to the mill and a little whittlin' later....

It's all stiffened up now. Not to mention that assembly was a big ol' stuck together rusty mess when I started. It's very nice now.
I also got the rear springs de-arched so now the ride height is much more proper.

The mounts all painted and looking proper.
The entire mount set here, including the "Reacharound" transmission mount. It has to reach from the rear lower of the trans and up to the hanging mount on the truck.
And here is a day's worth of lunacy on the parking brake of all things. I couldn't believe all I went through to just get that simple system squared away.
I needed to guide the cable around the exhaust and such so I made this little piece.
And the handle itself couldn't just bolt back on, it needed some extra support so to the mill and a little whittlin' later....
It's all stiffened up now. Not to mention that assembly was a big ol' stuck together rusty mess when I started. It's very nice now.
I also got the rear springs de-arched so now the ride height is much more proper.

Kma4444- Number of posts : 44
Location : Anderson, SC
Registration date : 2016-07-28
And, I finished the exhaust today, except for hanging it.


The exhaust is stainless, 2.5" into a 4" tailpipe. That's a hooker muffler, straight through, glass pack really so it may be too loud, just have to see.
I have the engine management and trans management systems in hand. I'm using EFI Source for the engine, it has a Mega Squirt ECU and they did the harness and pre-loaded a file to get it up and going. The ECU supports self tuning so that may not be too involved. Still have to add some O2 sensor bungs, just thought about that actually.
The trans will be managed with a Powertain Control Solutions TCU with support from Sound German Automotive. This is the best solution I could find for the NAG1 electronic controls. Since it is essentially a Mercedes trans it's pretty unusual as far as the programming. I have to use a stock shifter from a NAG1 equipped car for the gear position switches and that's the next hurdle of any amount, getting that to look at home in the old truck. I think I have a location figured out we'll see how that goes.
I also have the fuel system done except for one short fuel line, I was waiting for a fitting which has come in. I put an in tank pump which required an access panel in the tank so I could get it all in there. I made a shallow tray for the Holley Hydra-Mat to sit in and the pump mounted to the bracketry I made for the tray. Just realized I didn't take any pictures of that process, probably because it drove me crazy figuring out a nice looking and hopefully reliable way to get it in there. It then pumps out to a Corvette filter that has a built in regulator which I thought was very tidy. I will get a picture of that sometime.
So anyway, it's coming along nicely, if not quick enough. Another trip next week will slow me again, but it will put a little money back in the bank, WHEW have I been massacring my poor, poor bank account lately. And since I am painfully cheap, according to my wife, it's been killing me!!!!

Kma4444- Number of posts : 44
Location : Anderson, SC
Registration date : 2016-07-28
Thanks all again. SO here's a quick update, not sure how I have spent so much time and have so little in the way of photo evidence. Suppose I am at the stage of lots of effort, little looks much different. Goes back to that old saying that is terribly true, "You can build 90% of the car in 10% of the time" It's the little things that eat up so much time. Especially when it's inventing new things or like has been mentioned earlier, solving problems you created.
So here's a few pictures of the cooling system as I envisioned it. I wanted the radiator to live down low and have the air exit down low. I came up with this.


So here's a few pictures of the cooling system as I envisioned it. I wanted the radiator to live down low and have the air exit down low. I came up with this.

Kma4444- Number of posts : 44
Location : Anderson, SC
Registration date : 2016-07-28
Alright, so that covers the cooling package install mostly. Next was wet sanding the entire thing and the initial thought was to polish it, but as is fairly normal, that wouldn't do. I decided to go ahead and get it all slick and then clear coat it. More work and money but it will look like I want. So I sanded it all, fixed a few areas I didn't like, then reshot a coat of color on the whole thing, wetsanded it all again and then shot clear. Really a bit neurotic, all this spraying and sanding, I'm sure I need an intervention.


Kma4444- Number of posts : 44
Location : Anderson, SC
Registration date : 2016-07-28
These are just some random pics, mostly before I started the wetsanding of the first paint. Mostly because it looks so COOL!!! Not that I'm biased or anything. Thanks, I'm glad I can get something back up here.


Kma4444- Number of posts : 44
Location : Anderson, SC
Registration date : 2016-07-28
Alright so here it is wet sanded for the clear. I did it all in 400 grit, sounds pretty coarse but trust me, you cannot see any sand scratches through the 5 coats of SPI Universal Clear. That stuff builds like crazy, it's like a hi-build primer you can see through. Plenty there to sand back to really flat. I don't think there are any spots that will require any more clear, even the buzzards that haunted me during the all day spray event!!!


Next is to get it out in the daylight for a bit to finish the curing then some sanding and buffing, should come out like a peeled onion, if I did everything close to correctly.
It runs and moves though I haven't driven it beyond the yard yet. I need another windshield and then install the windows. Then recover the seats and it should be close enough to tool around a bit. Very close now.

Kma4444- Number of posts : 44
Location : Anderson, SC
Registration date : 2016-07-28
There's not been a lot of pics because things have looked much the same, you know, spray some stuff, sand some stuff. Repeat ad-nauseam. But here are some pics of something a bit different, I actually got to the part where I make it shiny, very nice to see it coming around.


This is compounded but not polished yet. The polishing won't make a huge difference with the light colors but it will be a little better. I have a great local glass shop making windshields for it and will drop it off there to have them and the rear 3 windows installed.
So after the windows then it's getting the wiring tidied up, the trans cooler lines finished, the doghouse insulated and installed, the dash put together and detailed some. Then seats, so it is pretty danged close to being drive-able. Still have to find an evaporator box so I can finish the AC stuff but that won't stop the driving obviously.
Cheers!!!

vanny- Moderator
- Number of posts : 14778
Location : Ashburnham, MA
Age : 65
Registration date : 2012-09-22
_________________
“The future will soon be a thing of the past."
http://public.fotki.com/Vintage-Vans/vintage-vans-es/ruff-diamond-1/?cmd=fs_slideshow

Big W- Number of posts : 3282
Location : Saskatoon,Sask,Canada
Age : 60
Registration date : 2011-01-13
Great Job!!!! That's an Awesome looking truck. 

Kma4444- Number of posts : 44
Location : Anderson, SC
Registration date : 2016-07-28
Thank you very much all!!!!!!!!
busman78- Number of posts : 483
Location : Oklahoma City, OK
Registration date : 2012-07-11
You are an excellent fabricator, outstanding work!

Kma4444- Number of posts : 44
Location : Anderson, SC
Registration date : 2016-07-28
Thanks again all! I may actually drive it down the road today. Been working on detail stuff and it's getting very close to being road worthy.

sweetvan- Number of posts : 251
Location : Ventura, CA, 93003
Registration date : 2013-12-16
Beautiful, fantastic. Thanks!

OutofSight- Number of posts : 1564
Location : Lake Oroville, Ca.
Registration date : 2015-11-19
Right on!

68bigblock- Number of posts : 44
Location : Alberta
Registration date : 2016-03-19
That is one incredible A100
gary h- Number of posts : 497
Location : tn.
Registration date : 2012-10-19
LOOKS GREAT!!!! 


Kma4444- Number of posts : 44
Location : Anderson, SC
Registration date : 2016-07-28
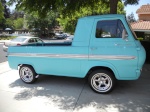
Thanks again everyone. I have driven it a bit now and all seems to be working well. No temperature problems, transmission shifts correctly and yeah, plenty of power. With the 3.91 gear and the really low first gear ratio of the NAG1 trans, it is hard to get going without looking like a wanker. It is peppy to be sure. Now on to the interior, such that it is. Going to do a headliner, redo the seats, carpet, a rear panel, stuff like that.
66e100pu- Number of posts : 199
Location : So-Cal
Registration date : 2011-04-02
Just a FANTASTIC job of bringing this back from the edge of death!!

Kma4444- Number of posts : 44
Location : Anderson, SC
Registration date : 2016-07-28

vanny- Moderator
- Number of posts : 14778
Location : Ashburnham, MA
Age : 65
Registration date : 2012-09-22
Kma you must be getting a ton of rubber neckers driving that Beauty around town!
_________________
“The future will soon be a thing of the past."
http://public.fotki.com/Vintage-Vans/vintage-vans-es/ruff-diamond-1/?cmd=fs_slideshow

Kma4444- Number of posts : 44
Location : Anderson, SC
Registration date : 2016-07-28
Hahaha, I can tell you for sure that there haven't been many quick stops anywhere, lots of people want to talk about it.

vanny- Moderator
- Number of posts : 14778
Location : Ashburnham, MA
Age : 65
Registration date : 2012-09-22
I guess I must have missed the shifter earlier. I've been trying to figure out where to mount an Auto -shifter in my van. I don't think I'be ever seen one mounted like that. Can I ask what vehicle that shifter came out of?
_________________
“The future will soon be a thing of the past."
http://public.fotki.com/Vintage-Vans/vintage-vans-es/ruff-diamond-1/?cmd=fs_slideshow


