
It's fairly simple to rekey your door locks to match your ignition key, or if you have an original door key and a replacement door. It only takes patience and the ability to work with really small parts.... This particular guide focuses on my '65 Econoline pickup, but most locks use a similar system.
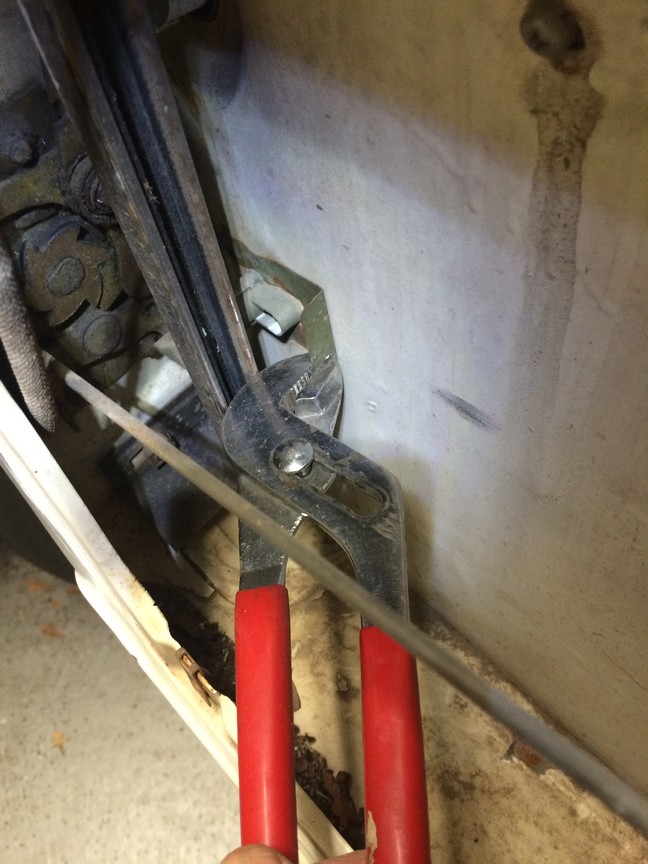
The first step for the Econoline is to remove the door panel and reach in and pull loose the clip that holds the door lock in place
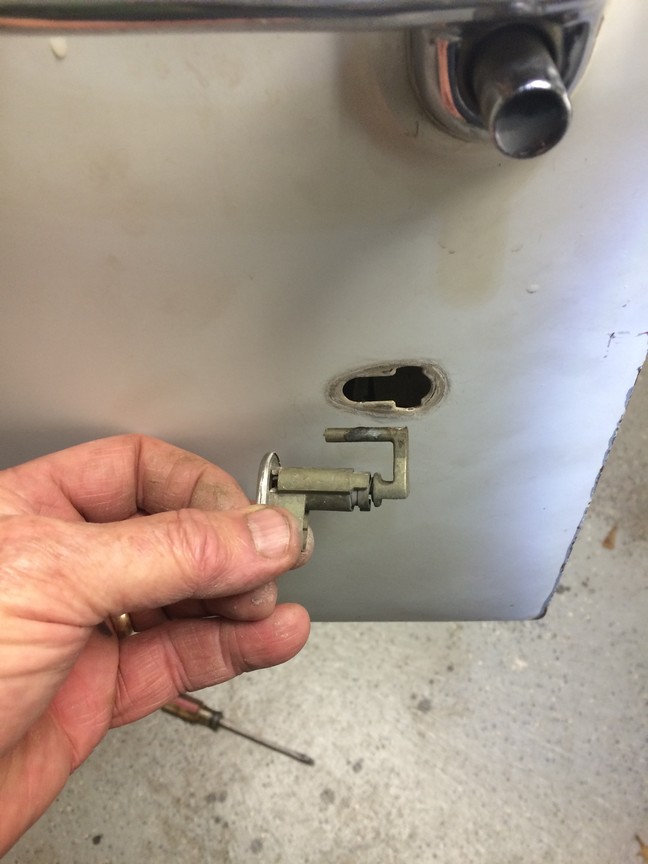
Once the clip is off, the lock slips out of the door with a little wiggling around, no tools required.
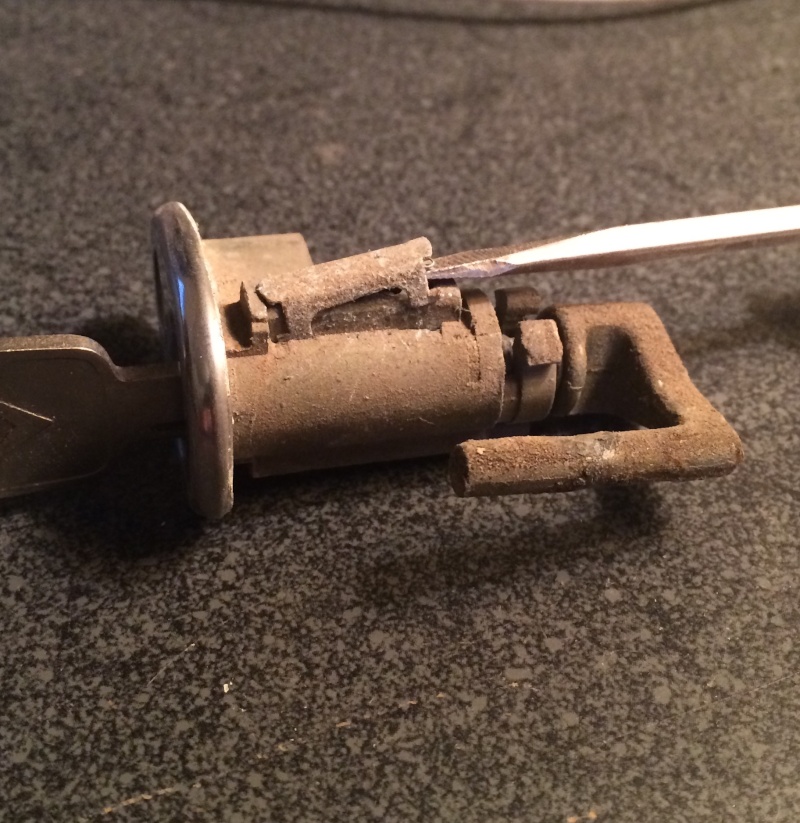
Pry the cover off the lock cylinder. Comes off pretty easy with a small screw driver
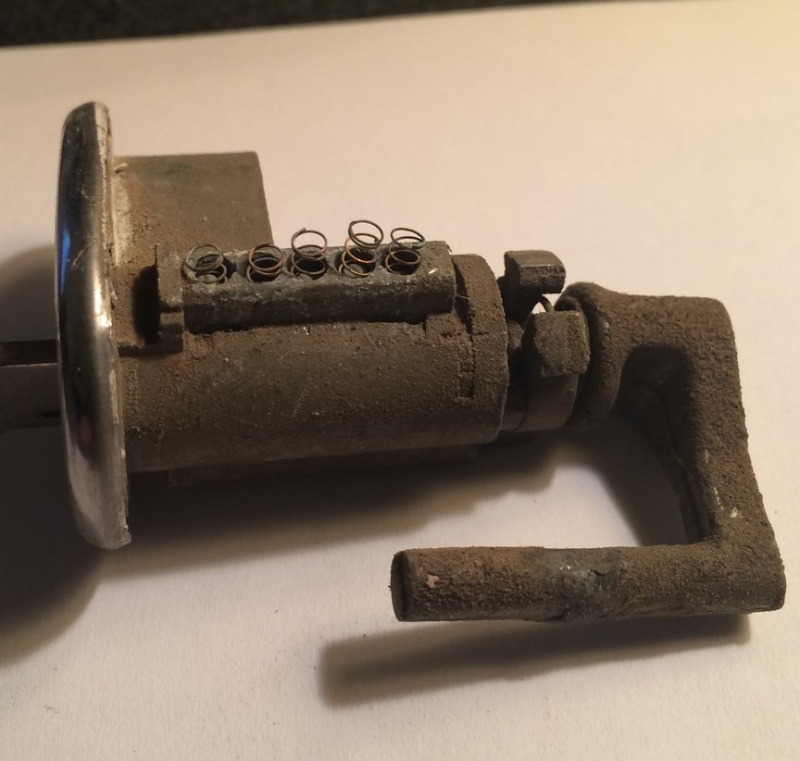
After the cover is off, the row of springs and key pins is revealed
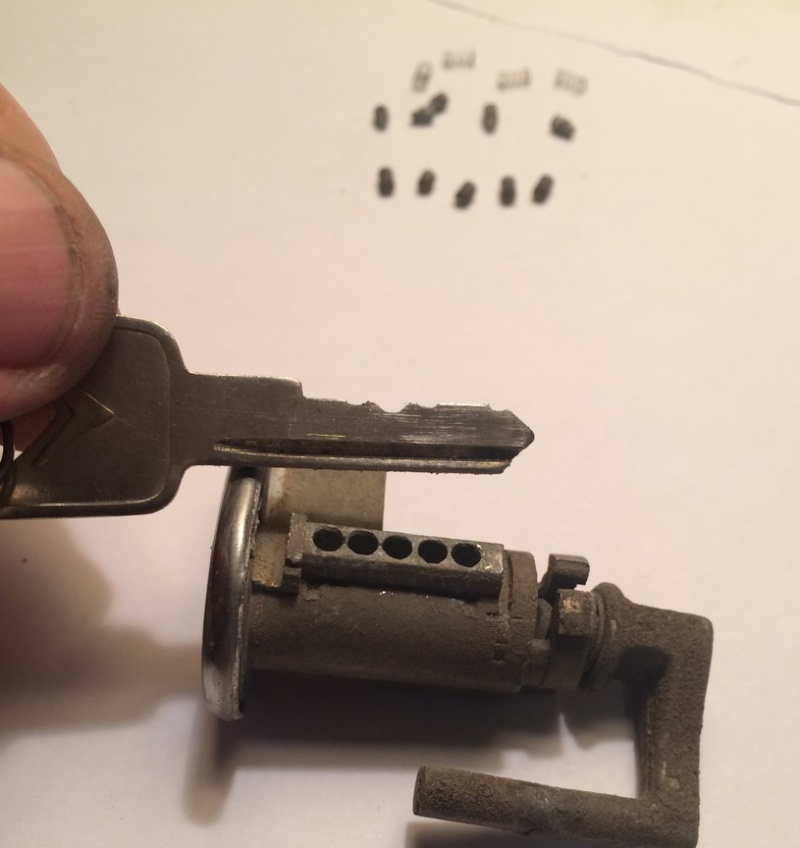
Carefully remove the springs and tiny pins in each hole. In this Econoline door lock, there are five holes, which correspond to the four notches and one flat on my ignition key.
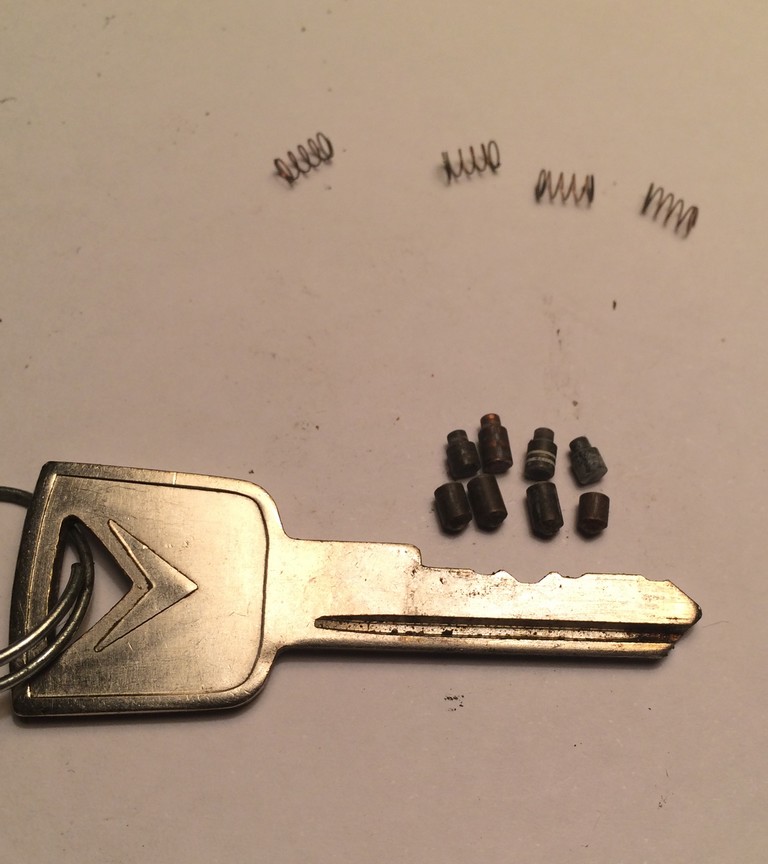
The pin sets each have two pins, one with a rounded end and the other with a seat for the spring. The rounded end goes in first and rides on the key. When the key turns the lock, the bottom pin turns with it. If that pin is too tall, the lock won't turn. (On the flip side, if the pin is too short for that notch, it may not lock)
Line up the pin sets to match the size of the notches in the key. In the pic below, the second notch is the deepest, and would have the tallest pin set, and the flat area near the tip the shortest.
Drop a pin set into the first hole and try to turn the key. If it doesn't, find a pin that allows the key to turn, and then move on to the second hole.
I got the first two pins right on the first try, but had to make several stabs to get the order right on the other three. I finally realized two of the pins were just too tall for my key notches. I shortened them by a cats whisker with a small file and eventually got all five to work with my key.
If you lose a pin or destroy a spring, don't worry. The lock will actually work with only one pin in place, or 2, 3 or 4. Of course, the more pins the stronger the lock.
Once you've got your pins in place and the key still turns, push on the tiny springs, snap on the pin cover and reinstall the lock!
The first step for the Econoline is to remove the door panel and reach in and pull loose the clip that holds the door lock in place
Once the clip is off, the lock slips out of the door with a little wiggling around, no tools required.
Pry the cover off the lock cylinder. Comes off pretty easy with a small screw driver
After the cover is off, the row of springs and key pins is revealed
Carefully remove the springs and tiny pins in each hole. In this Econoline door lock, there are five holes, which correspond to the four notches and one flat on my ignition key.
The pin sets each have two pins, one with a rounded end and the other with a seat for the spring. The rounded end goes in first and rides on the key. When the key turns the lock, the bottom pin turns with it. If that pin is too tall, the lock won't turn. (On the flip side, if the pin is too short for that notch, it may not lock)
Line up the pin sets to match the size of the notches in the key. In the pic below, the second notch is the deepest, and would have the tallest pin set, and the flat area near the tip the shortest.
Drop a pin set into the first hole and try to turn the key. If it doesn't, find a pin that allows the key to turn, and then move on to the second hole.
I got the first two pins right on the first try, but had to make several stabs to get the order right on the other three. I finally realized two of the pins were just too tall for my key notches. I shortened them by a cats whisker with a small file and eventually got all five to work with my key.
If you lose a pin or destroy a spring, don't worry. The lock will actually work with only one pin in place, or 2, 3 or 4. Of course, the more pins the stronger the lock.
Once you've got your pins in place and the key still turns, push on the tiny springs, snap on the pin cover and reinstall the lock!
Last edited by jdlaugh on Sun Nov 22, 2015 5:46 am; edited 7 times in total