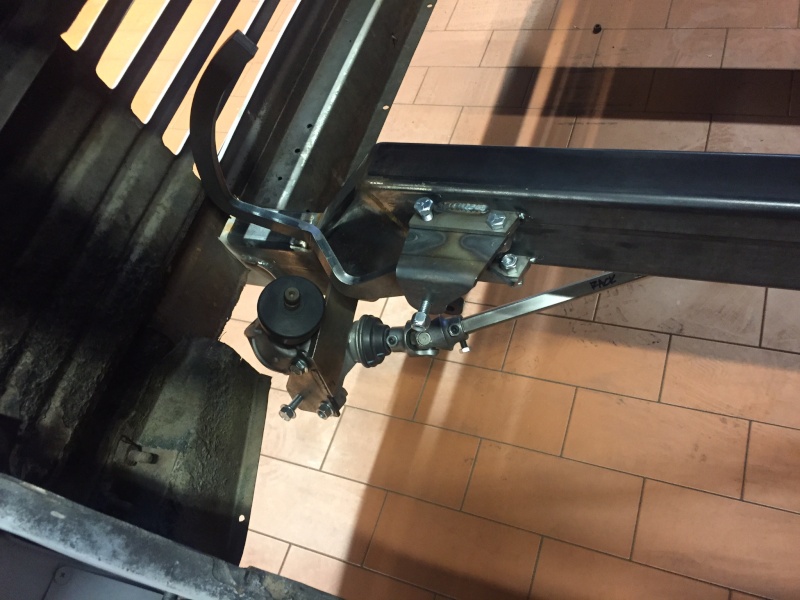
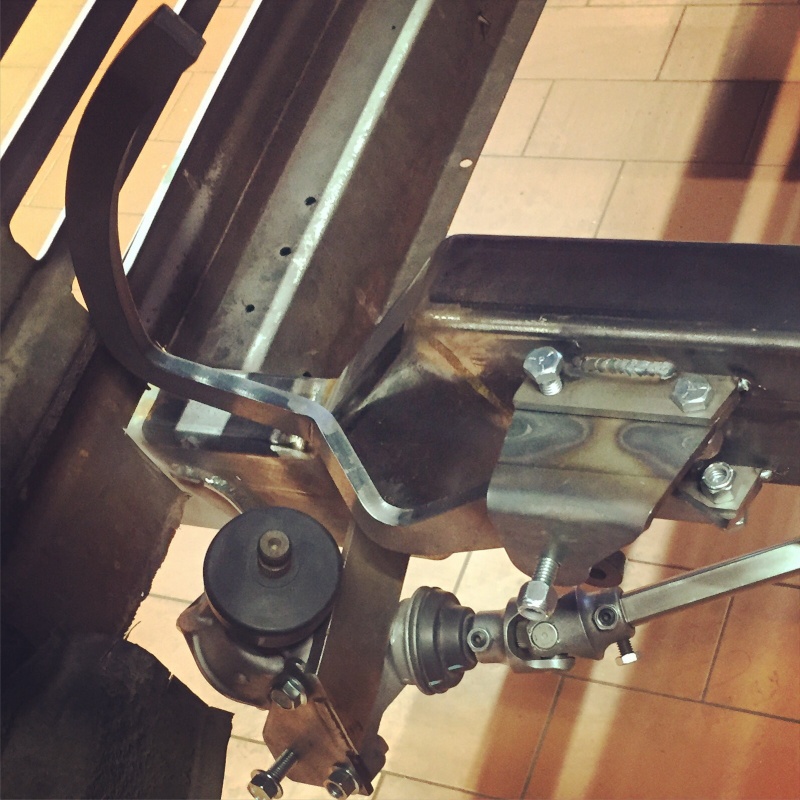
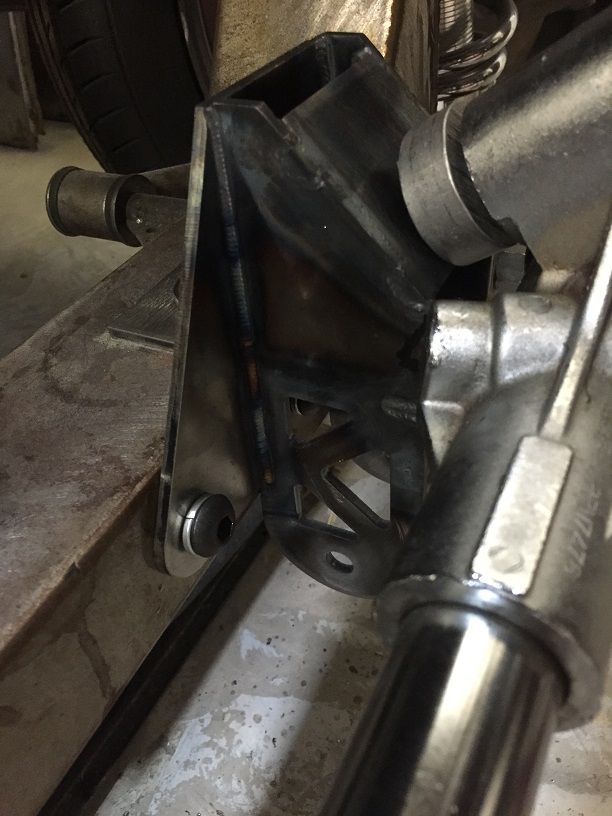
Broke out the TIG to weld up a crossmember for the rear linkage and exhaust. I had the steel water jetted and spaced the two pieces with some 3/16 steel.
+22
dhuglife
Skulptorchaz
xjamesx
Seth G
Vantasia
Big W
67VanHelsing
Deluxxx
wirepuller
Xelmon
Edoz
mothradeath
BvrWally
jimthefred
panelmanrd
vanny
G-Man
Digz
Joe Van
savage
Viking
suicideking
26 posters
IFS under a 65
suicideking- Number of posts : 75
Location : Mesa, AZ
Registration date : 2013-06-13
- Post n°26
Re: IFS under a 65
Broke out the TIG to weld up a crossmember for the rear linkage and exhaust. I had the steel water jetted and spaced the two pieces with some 3/16 steel.
suicideking- Number of posts : 75
Location : Mesa, AZ
Registration date : 2013-06-13
- Post n°27
Re: IFS under a 65
Finished the body mounts and took the last of the old floor out. Made some patterns for the trans member and the floor. Debating where to put the fuel cell. Left side, or rear?
suicideking- Number of posts : 75
Location : Mesa, AZ
Registration date : 2013-06-13
- Post n°28
Re: IFS under a 65
The rear four link needed custom brackets at the axle and fore. I have gotten really spoiled drawing up parts on the PC and emailing them to a waterjet/laser shop to be cut. I welded up the transaxle and brackets using a similar design element to tie the rear together.
BvrWally- Number of posts : 946
Location : Earlyville,Ohio
Registration date : 2008-05-19
- Post n°29
Re: IFS under a 65
Niceeeeeeee!
jimthefred- Number of posts : 326
Location : Parksley VA
Registration date : 2012-01-15
- Post n°30
Re: IFS under a 65
All I can say is wow! And then I start to drool......
mothradeath- Number of posts : 217
Location : youngstown ohio
Registration date : 2009-06-17
- Post n°31
Re: IFS under a 65
looking great! keep on plowing through....i know very well how big this project is. im putting the wraps on one myself. are you going to bag eventually or sticking with coils? are you doing the isuzu gearbox mod to the rack? heres where mines at currently.
suicideking- Number of posts : 75
Location : Mesa, AZ
Registration date : 2013-06-13
- Post n°32
Re: IFS under a 65
No bags static coils. That looks fantastic. Way cleaner body than mine
Edoz- Number of posts : 18
Location : Tulsa, OK
Registration date : 2012-09-30
- Post n°33
Re: IFS under a 65
Wow, that is dang cool. I wish I had the shop space and vehicle knowledge to put my metal fab skills to use on a project like that. I'll have to settle for seat brackets to start:)
suicideking- Number of posts : 75
Location : Mesa, AZ
Registration date : 2013-06-13
- Post n°34
Re: IFS under a 65
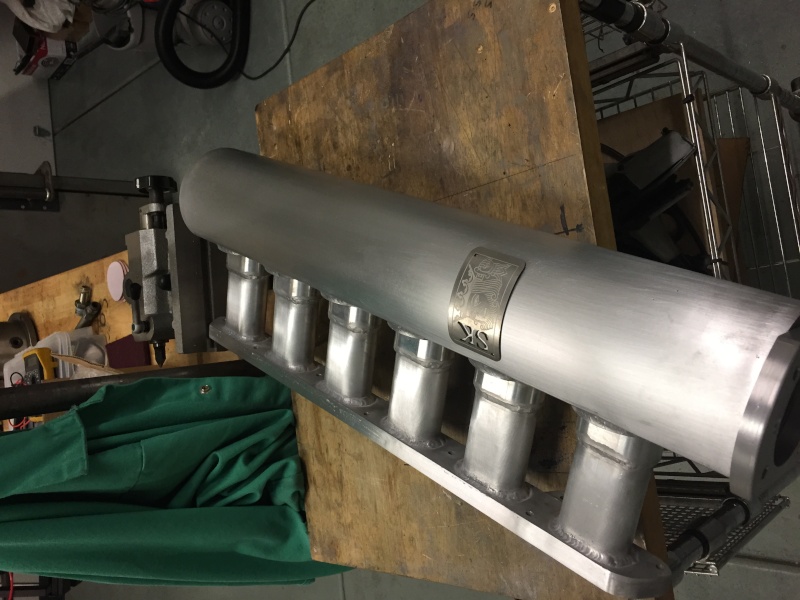
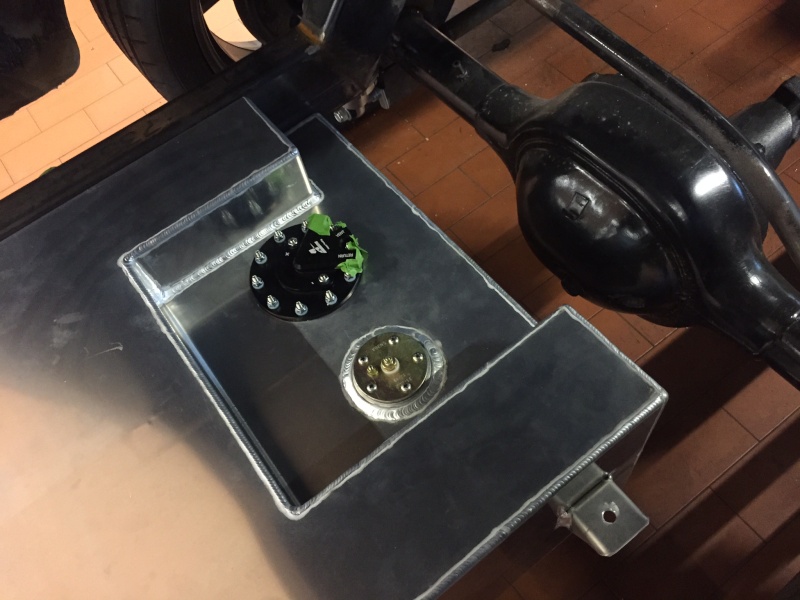
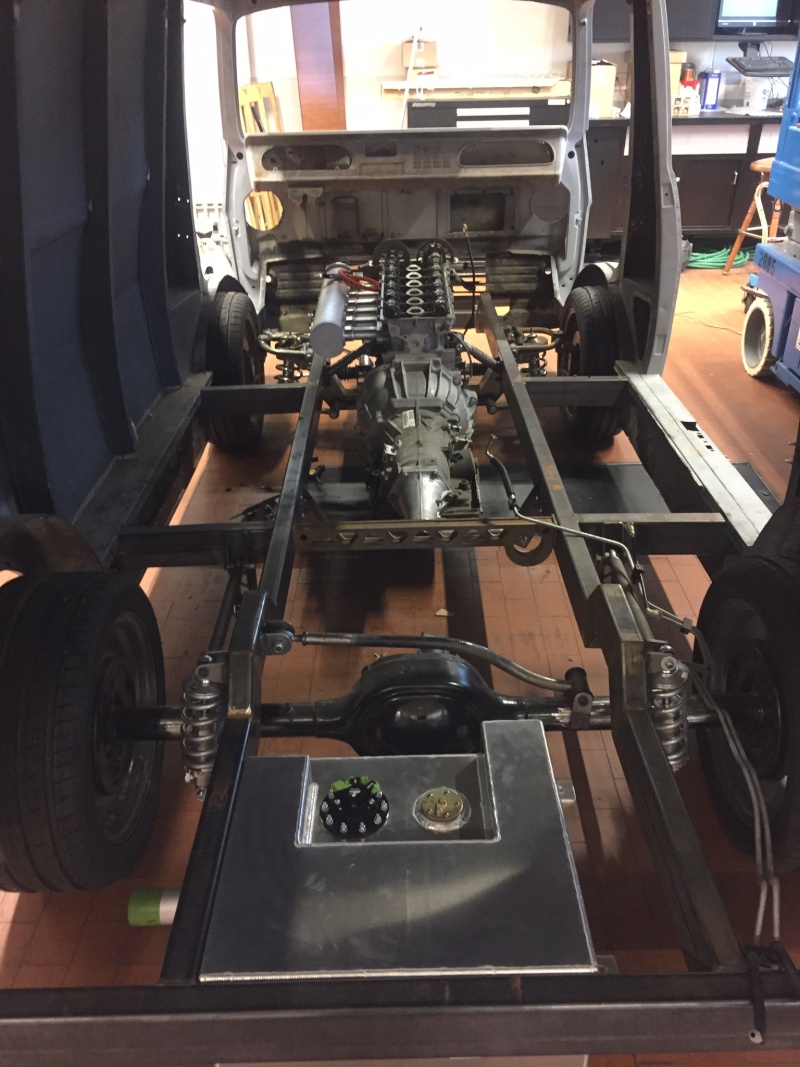
long time since last update. Life comes at you fast some times (years) i have put some time into the project in the last few months. took a welding cert class at the college and made an intake for my final project. got the new engine hung, worked out the steering box, made a fuel cell, and figured out how the brakes are going to fit.( a remote booster behind the drivers seat about 4' long actuating rod)
Xelmon- Number of posts : 361
Location : Smell-A, CA
Registration date : 2011-10-11
- Post n°35
Re: IFS under a 65
Suuuuper cool, love the IFS!
How are you going to adjust the camber? Am I not seeing some bits in there?
suicideking- Number of posts : 75
Location : Mesa, AZ
Registration date : 2013-06-13
- Post n°36
Re: IFS under a 65
The front camber is adjusted via slots on the shock cap that hold the cast "bone" to the upper control arm. This can also change front toe. The rear camber is not adjustable.
The adjustability has been limited due to the custom nature of the front suspension, I had to get pretty close on where the cap height ultimately ended up being welded in. the issue most of the projects I saw where people wanted a modern looking stance using the 65' suspension is the tire/wheel couldn't be tucked in far enough to sit inside the well. This is why i narrowed the rails by 5" and cut 3.75" off the caps. its a compact fully custom set up. go-kart like.
suicideking- Number of posts : 75
Location : Mesa, AZ
Registration date : 2013-06-13
- Post n°37
Re: IFS under a 65
This was the mock up.
Xelmon- Number of posts : 361
Location : Smell-A, CA
Registration date : 2011-10-11
- Post n°38
Re: IFS under a 65
I see.
My suspicion was right that at a glance there would have to be some pretty radical modifications to be able to fit an IFS into the van due to the engine placement.
panelmanrd- Number of posts : 801
Location : kcmo
Age : 63
Registration date : 2009-10-04
- Post n°39
Re: IFS under a 65
you are going to love the way this van will handle.
I have almost the same setup in my panel truck with
the exception of air bags, drives like a go cart.
by the way very nice work!!!!!!!!!!!!!!!
I have almost the same setup in my panel truck with
the exception of air bags, drives like a go cart.
by the way very nice work!!!!!!!!!!!!!!!
suicideking- Number of posts : 75
Location : Mesa, AZ
Registration date : 2013-06-13
- Post n°40
Re: IFS under a 65
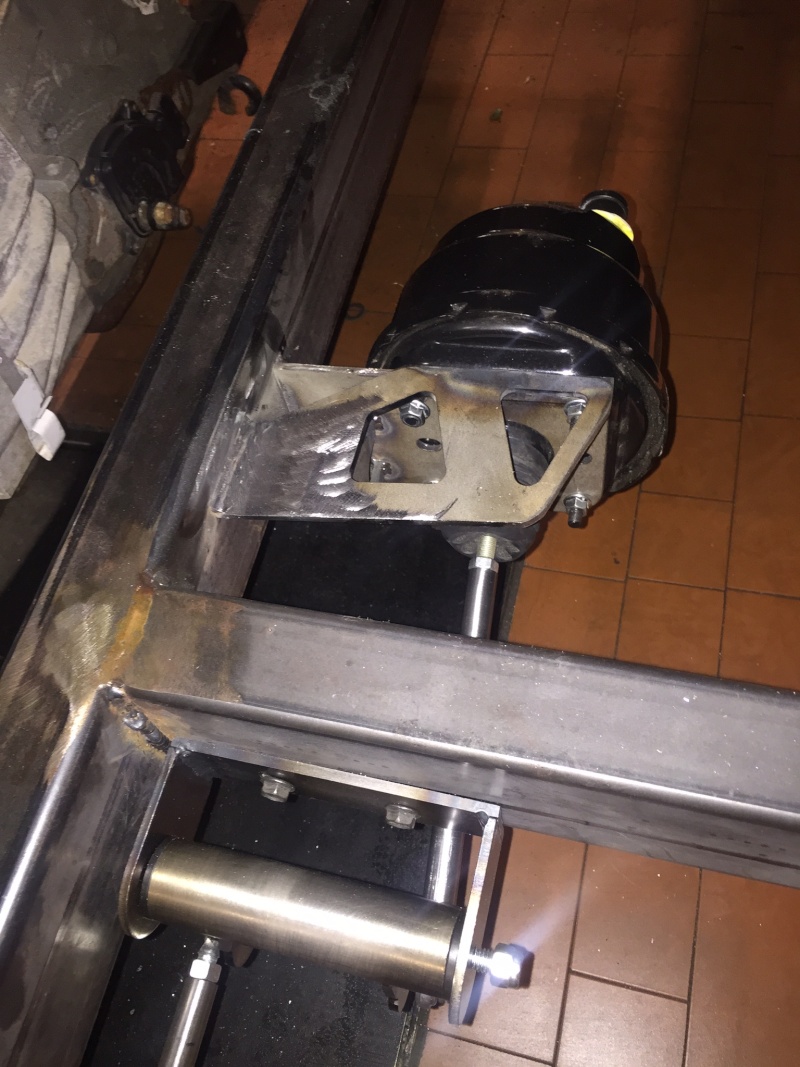
Finish welded and bolted the transfer station and brake booster bracket. had to gun drill the longer push rod (approx 48" long) and a second one at about 10" long, tapped to accommodate the heim joints. I am happy with the booster set up. The master will sit nearly midway in that side pocket opposite from the battery so i hope to have two separate access doors for symmetry. I am eager to get all the mechanical bits bolted and welded under the floor so i can start on the floor panels themselves. still need brake lines, fuel lines, steering mount, before i can start welding it closed. It has been so easy to access from the top so far.
it fits under the coil hat nicely with no modifications
finger tight joints so far, so there is alot of movement still
it fits under the coil hat nicely with no modifications
finger tight joints so far, so there is alot of movement still
suicideking- Number of posts : 75
Location : Mesa, AZ
Registration date : 2013-06-13
- Post n°41
Re: IFS under a 65
suicideking- Number of posts : 75
Location : Mesa, AZ
Registration date : 2013-06-13
- Post n°42
Re: IFS under a 65
suicideking- Number of posts : 75
Location : Mesa, AZ
Registration date : 2013-06-13
- Post n°43
Re: IFS under a 65
Digz- Number of posts : 3794
Location : United States Six Lakes MI
Registration date : 2008-05-17
- Post n°44
Re: IFS under a 65
That is some nice detail work.
suicideking- Number of posts : 75
Location : Mesa, AZ
Registration date : 2013-06-13
- Post n°45
Re: IFS under a 65
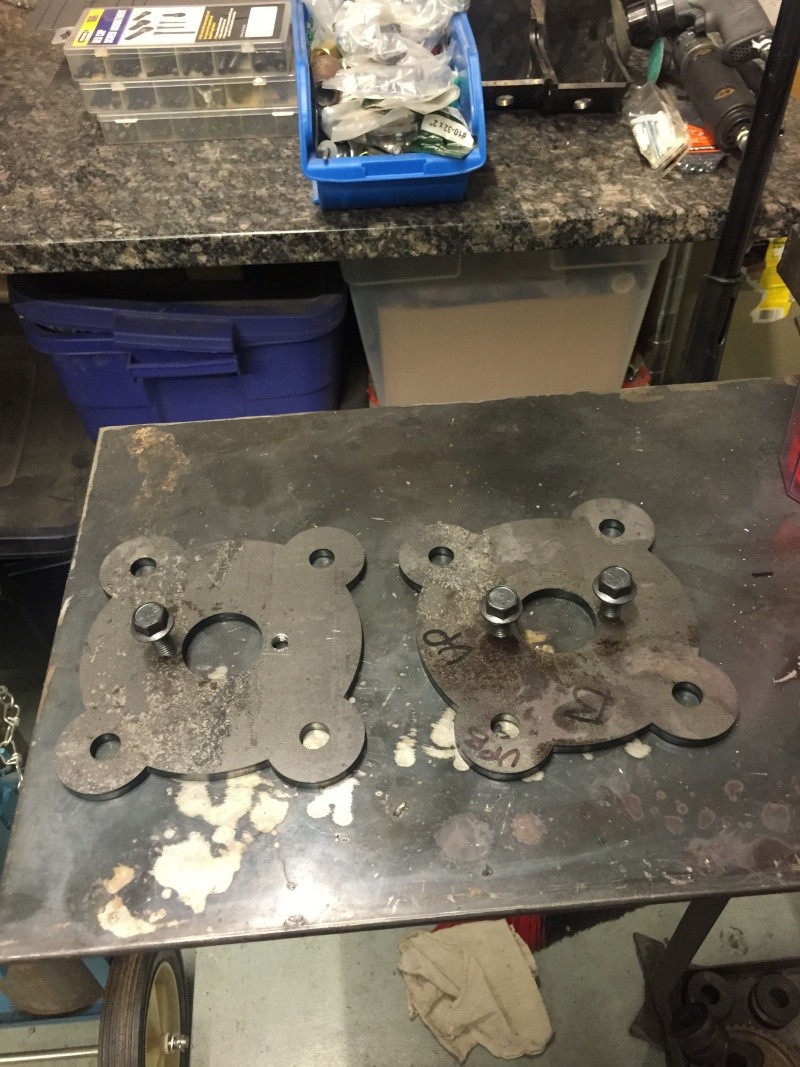
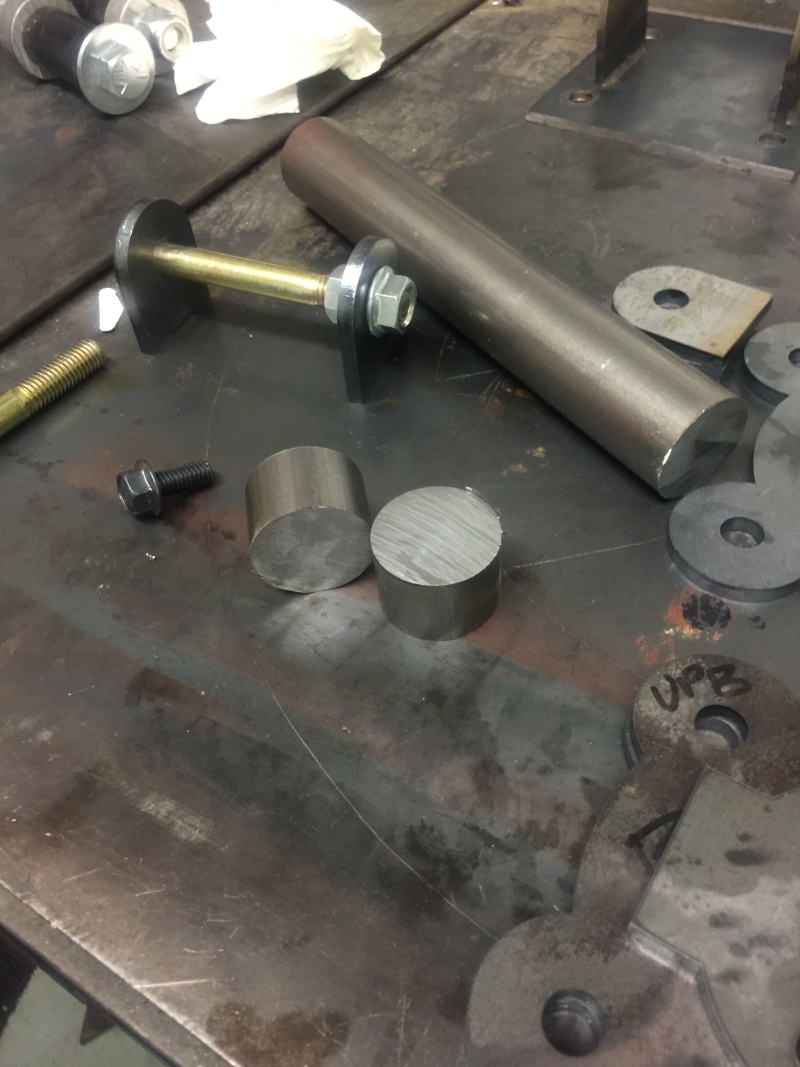
you can file this project under: "if you just left good enough alone this van would already be done" while my engine Is being rebuilt/refinished/overhauled. I decided to remake my engine mount mounts. the plate that bolts onto the block itself was constructed a bit rudimentary the first time around and didn't allow for any adjustment in the pinion angle. I drew up the pattern in my cad program and had my local waterjet cut the patterns out. the kerf on the water jet still needs a bit of clean up on the mill including tapping the hold downs. you can see the first setup in the back.
the main body pivots around a full piece of 1.5" tool steel stock. welded on both ends trapping the pivot inside. you can see how the adjustment slide allows about 15 degrees of pinion angle but the two bolts don't hold any real weight, that's all taken up by the 1/4" plate and tool steel pivot.
wirepuller- Number of posts : 176
Location : Edmonton, AB, Canada
Registration date : 2011-01-28
- Post n°46
Re: IFS under a 65
Kick @$$ work you got going on there!! Keep it up. The what-cha-ma-doodle-thingy for the brake booster is ingenious. Love it!
WP
WP
vanny- Moderator
- Number of posts : 14778
Location : Ashburnham, MA
Age : 65
Registration date : 2012-09-22
- Post n°47
Re: IFS under a 65
I don't know what the heck you're doing but it sure is fun to watch someone with you're knowledge and abilities!!! Amazing work. Keep the pics coming...Please!
_________________
“The future will soon be a thing of the past."
http://public.fotki.com/Vintage-Vans/vintage-vans-es/ruff-diamond-1/?cmd=fs_slideshow
Deluxxx- Number of posts : 131
Location : Fremont, CA, USA
Registration date : 2015-09-24
- Post n°48
Re: IFS under a 65
Just got here. Love what you're doing with your van. I'm doing something very similar on my '64 panel, but way less fancy. Talented guy, keep up the good work.
67VanHelsing- Number of posts : 118
Location : Los Angeles, CA
Registration date : 2014-03-04
- Post n°49
Re: IFS under a 65
Very impressive work! Man this thing should be sweet to drive!
suicideking- Number of posts : 75
Location : Mesa, AZ
Registration date : 2013-06-13
- Post n°50
Re: IFS under a 65
some updates in the last few months;
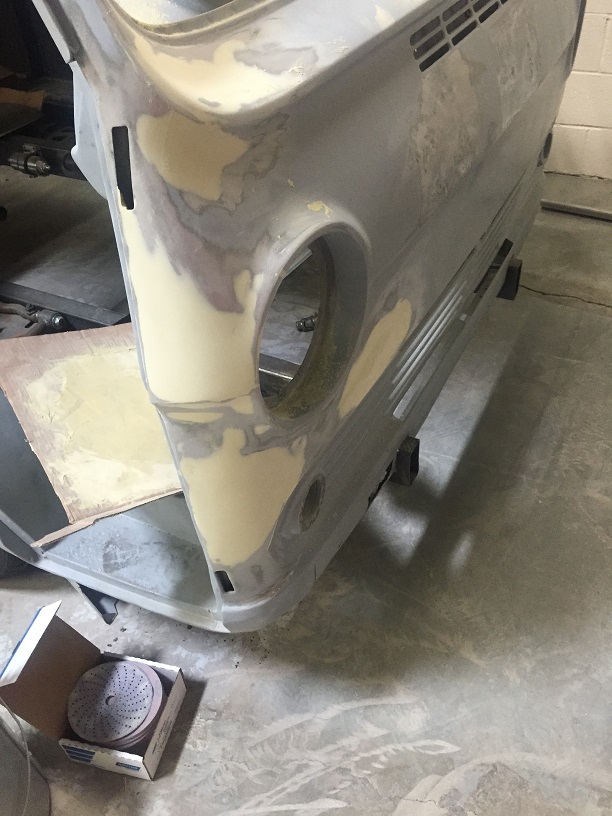
worked out some of the worst body panels. This is new to me and I needed a lot of direction and help
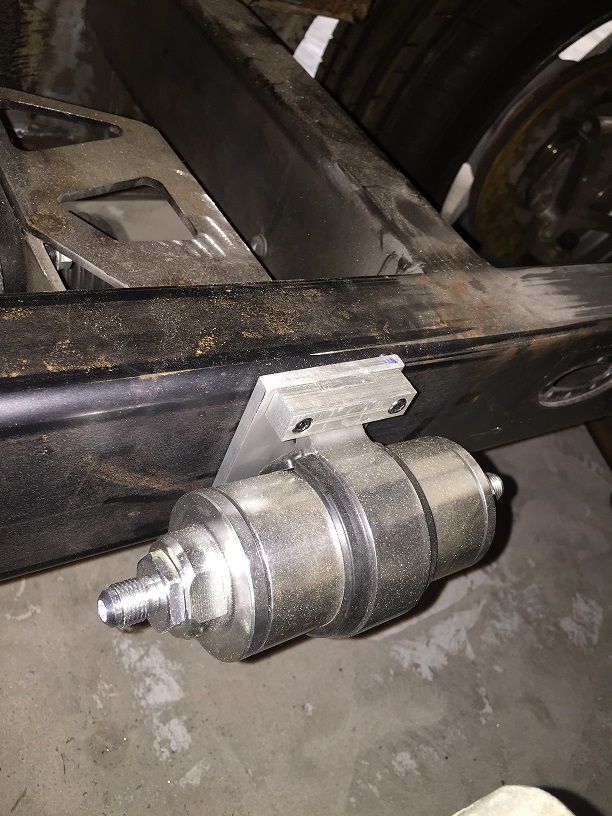
mounted the fuel filter on the inside of the intake side rail. serviceable from underneath
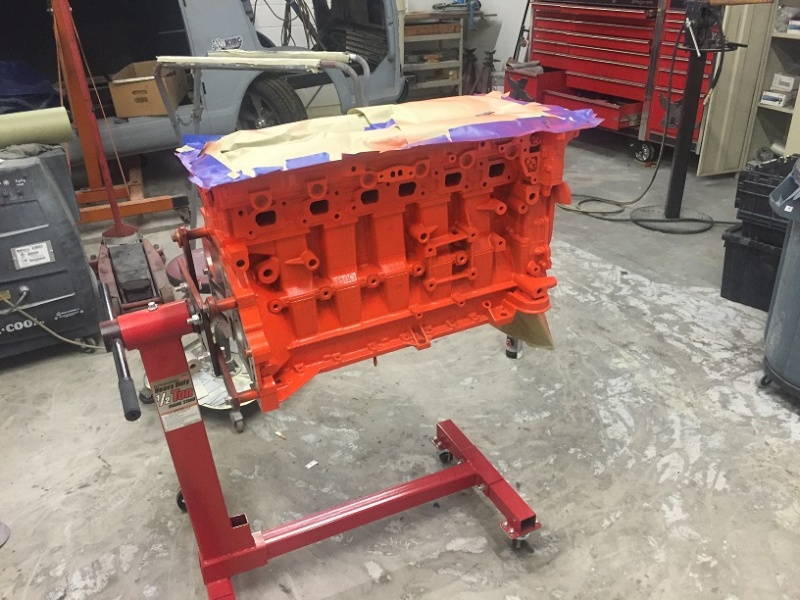
Had the engine completely rebuilt including some paint
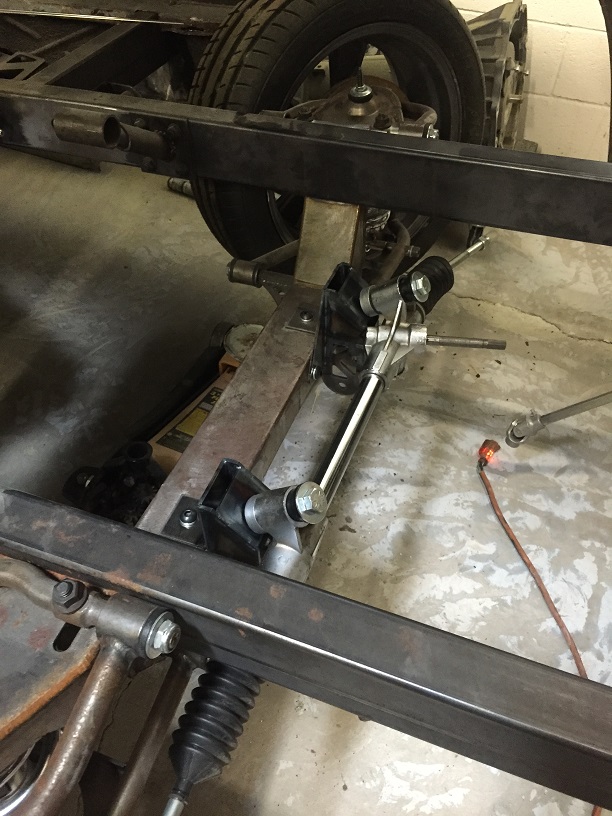
reworked the steering brackets and mount to a stiffer finished piece
the rack mounts on top upside down to accommodate the forward mounted steering box
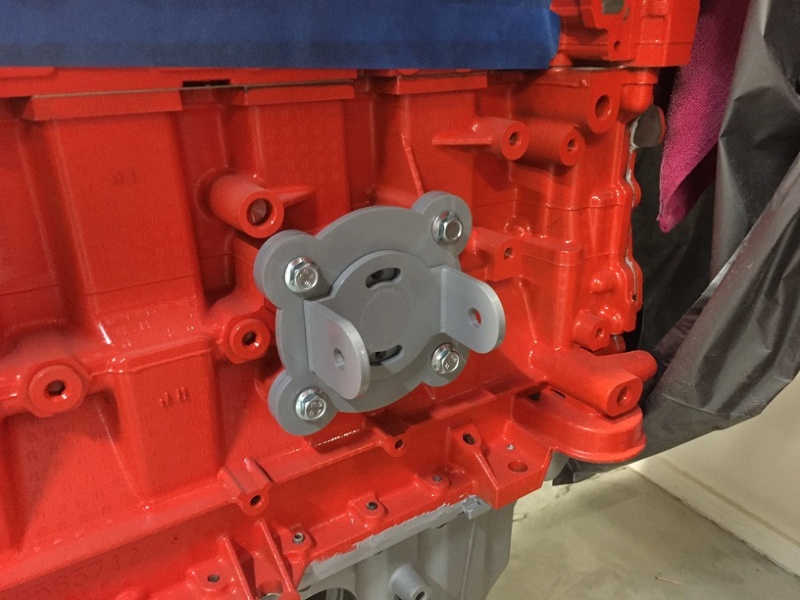
This is one of the finished motor mounts on the motor. I hope to adjust the pinion angle to an ideal spot and then "pin" the mount using the tapped inner holes.
all in all I didn't make a lot of progress in the last few months but it was "one of those years" for me. work, life, more work...you get the idea. I moved the van out of my work and rented a shop in Mesa. (plenty of room for a roomie if someone wanted to split the space and costs)
the van has transformed from something to keep me busy, to my lifes work.