VintAGE-Vans

Would you like to react to this message? Create an account in a few clicks or log in to continue.

BRINGING IT ALL TOGETHER.... A's, G's & E's


+38
Gothboy
austinmodhouse
kaz
vanny
dodge man
jimthefred
Van Halen
organ grinder
lws67
Scott
BILLS66
Roman
67a 100 pickup
BILL Carson
wylee
mrclean
jkr
HandiVanMan
dix
chester42
clinsenbarh
Zuffen
RodStRace
pan58head
kgdb
Big W
white-lightning
Twinpilot001
DanTheVanMan
Nightmoves
whopman
Bear
gotavan
jrinaman
savage
sasktrini
G-Man
Digz
42 posters

    Gettin' Stoopid 66G

    Digz
    Digz


    Number of posts : 3794
    Location : United States Six Lakes MI
    Registration date : 2008-05-17

    Gettin' Stoopid  66G - Page 4 Empty Re: Gettin' Stoopid 66G

    Post by Digz Tue Nov 29, 2011 4:34 pm

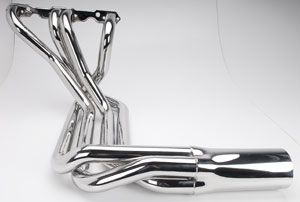
    If my wallet is deep enough when the time comes and Ican get some measurements Id like to try these.
    Gettin' Stoopid  66G - Page 4 Sidemo10
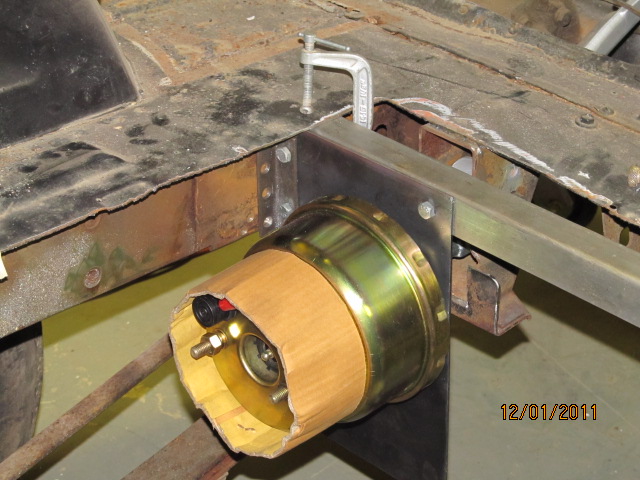
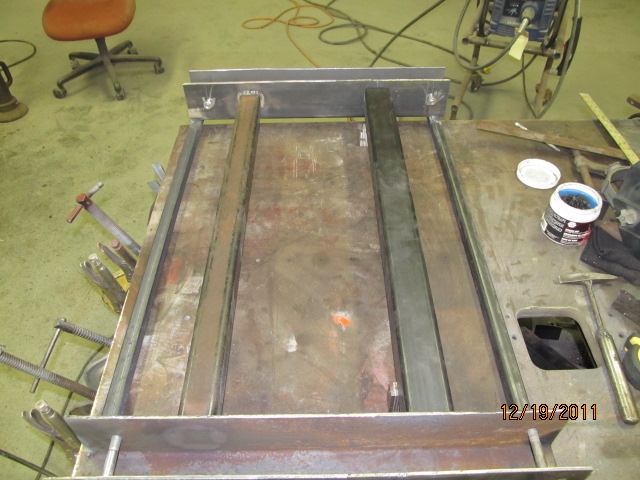
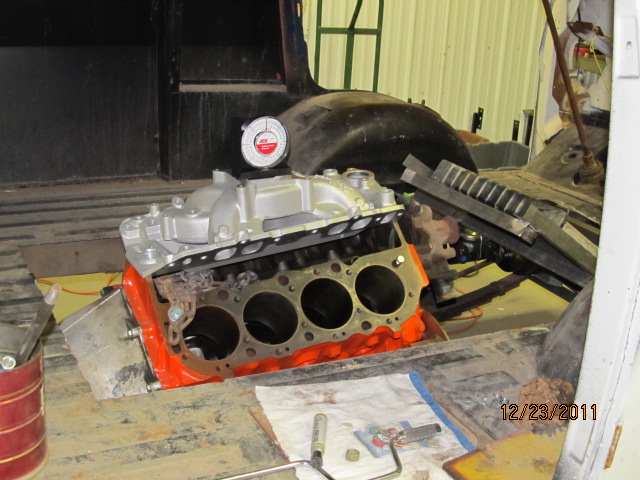
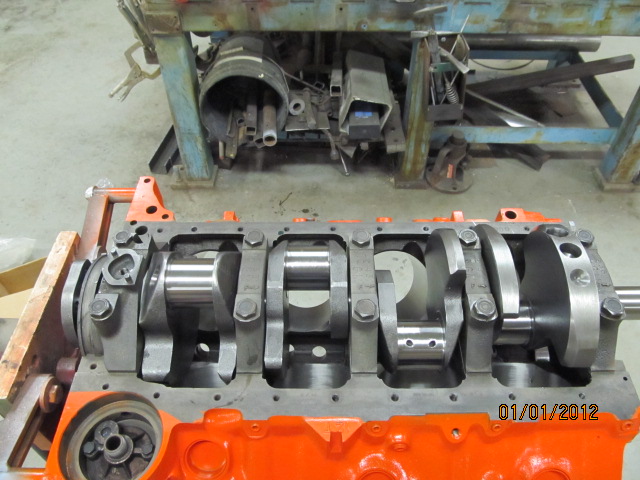
    Yep BigW it's all mock up at this point. get my holes where I need them and it all comes out! Shell gets rotisseried and I can get the engine put together finally and I have a tranny that will need work. not to mention narrowing the RA. For this winter I am going to try working with the stuff I already have on hand, so somethings will come to a stand still until work picks back up in the spring. $$$$$$$ lol
    pan58head
    pan58head


    Number of posts : 512
    Location : new hampshire
    Registration date : 2010-03-15

    Gettin' Stoopid  66G - Page 4 Empty Re: Gettin' Stoopid 66G

    Post by pan58head Tue Nov 29, 2011 9:41 pm

    Yeah digz I wondered about those corvette header into side pipes myself. I bought a set at a swap meet for $75(headers and side pipes) but my buddy needed them for his vette so Isold them to him. There over a grand now !!!!!!!!! Bob
    Digz
    Digz


    Number of posts : 3794
    Location : United States Six Lakes MI
    Registration date : 2008-05-17

    Gettin' Stoopid  66G - Page 4 Empty Re: Gettin' Stoopid 66G

    Post by Digz Thu Dec 01, 2011 1:57 pm

    Worked on roughing in the bracket for the MC/ Booster today in between Real shop stuff.
    Gettin' Stoopid  66G - Page 4 Img_1011

    Gettin' Stoopid  66G - Page 4 Img_1012

    Gettin' Stoopid  66G - Page 4 Img_1013
    I will not fasten this in permanent until I'm dang sure it's where I want it ! I also measured the area around the gas tank Xmember and found out I have more than enough room for my RA set up. Thanks again guys ! Spent some time on my suspension design but thats alot of sketches and numbers ,,LOL
    Digz
    Digz


    Number of posts : 3794
    Location : United States Six Lakes MI
    Registration date : 2008-05-17

    Gettin' Stoopid  66G - Page 4 Empty Re: Gettin' Stoopid 66G

    Post by Digz Wed Dec 07, 2011 4:34 pm

    I finished the MC bracket today, made it a bolt in.
    Gettin' Stoopid  66G - Page 4 Mc_bra10
    I should mention that my first attempt at this was a 1 piece bent up thing that was a total failure,LOL. I used some of that to finish this out. Got the vertical positioning for the RA figured out. Im a week out on the bushes I need for the frame X.
    Gettin' Stoopid  66G - Page 4 Ra_on_11
    my brain is stuck on the RA so figuring out what I can do while im waiting is kinda sucky. confused

    Got it wrapped up today
    Gettin' Stoopid  66G - Page 4 Mc_fro10
    Digz
    Digz


    Number of posts : 3794
    Location : United States Six Lakes MI
    Registration date : 2008-05-17

    Gettin' Stoopid  66G - Page 4 Empty Re: Gettin' Stoopid 66G

    Post by Digz Mon Dec 12, 2011 1:15 pm

    Messed around with a 3 core rad I had out of a Chevy 1 ton truck today, A little on the long side but might work if the rad shop could move some things for me.
    Gettin' Stoopid  66G - Page 4 Img_1014[img][/img]

    Gettin' Stoopid  66G - Page 4 Img_1015

    Gettin' Stoopid  66G - Page 4 Img_1016
    This is mostly so Im sure I have room to do what I may need and have to start thinking ahead on floor layout and seats. Still just a mock up.
    Digz
    Digz


    Number of posts : 3794
    Location : United States Six Lakes MI
    Registration date : 2008-05-17

    Gettin' Stoopid  66G - Page 4 Empty Re: Gettin' Stoopid 66G

    Post by Digz Thu Dec 15, 2011 2:48 pm

    Made the frame brackets for the RA today. They will wrap the frame and bolt in. Starting with 3x6 tubing.
    Gettin' Stoopid  66G - Page 4 Frame_11
    I drilled the cross holes before cutting because the tubing springs open a little bit.
    Gettin' Stoopid  66G - Page 4 Frame_12
    I have to clear off the E brake brackets and some other small hanging things to get these set up yet.
    Gettin' Stoopid  66G - Page 4 Cut_an10
    DanTheVanMan
    DanTheVanMan
    Commissioner
    Commissioner


    Number of posts : 7900
    Location : Escanaba, Michigan
    Age : 62
    Registration date : 2008-10-08

    Gettin' Stoopid  66G - Page 4 Empty Re: Gettin' Stoopid 66G

    Post by DanTheVanMan Thu Dec 15, 2011 3:35 pm

    Nice!!! You have lots of cool toys! Lookin good! Very Happy


    _________________
    DanTheVanMan    
    1965 Chevy G10 Sportvan Custom
    1984 Jeep CJ-7 Laredo, Restored
    2004 Kawasaki KLR650
    1997 Jeep TJ Sport

    My Mini Gallery

    Gettin' Stoopid  66G - Page 4 Qr_cod10

    <-<-<- Cruising is not a "Point A to Point B" thing, but an "Everything in between thing!  <-<-<-
    Digz
    Digz


    Number of posts : 3794
    Location : United States Six Lakes MI
    Registration date : 2008-05-17

    Gettin' Stoopid  66G - Page 4 Empty Re: Gettin' Stoopid 66G

    Post by Digz Fri Dec 16, 2011 12:36 pm

    This is where those go. I need to get some more iron next week to jig this up right...
    Gettin' Stoopid  66G - Page 4 Bracke10
    sasktrini
    sasktrini


    Number of posts : 2067
    Location : Saskatoon, SK, Canada
    Registration date : 2008-05-20

    Gettin' Stoopid  66G - Page 4 Empty Re: Gettin' Stoopid 66G

    Post by sasktrini Fri Dec 16, 2011 12:51 pm

    I know that's gonna work out for the rear! You can fab up the whole rack, assemble the rear, and slide it in!

    I'm a little concerned about airflow through that rad at that angle. Is that a temporary idea? I see the brakes won't allow you to go to a much wider rad. I guess it will be interesting to see how it works out.
    RodStRace
    RodStRace


    Number of posts : 3046
    Location : Chino Valley
    Registration date : 2010-01-21

    Gettin' Stoopid  66G - Page 4 Empty Re: Gettin' Stoopid 66G

    Post by RodStRace Fri Dec 16, 2011 2:22 pm

    2 points:
    1. Are you going to notch above the rear axle?
    2. Most all modern cars with a laydown radiator go the opposite direction (front high). Provided you can set it up for easy removal, that might be the smart way to go.
    It will force air up and through, meaning the doghouse will get flow from top front to back, down and out.
    Digz
    Digz


    Number of posts : 3794
    Location : United States Six Lakes MI
    Registration date : 2008-05-17

    Gettin' Stoopid  66G - Page 4 Empty Re: Gettin' Stoopid 66G

    Post by Digz Fri Dec 16, 2011 5:01 pm

    I shouldn't need to notch the rear frame for axle clearance. Yep I did think about it. If I was going to go for a low rider , yes I would. I have the pinion height set up the same as whats on my Orange van and the the Jag RA had a limited amount of travel to start with and I should have all of that and a smidge more. The top of the 3rd member will be below the bottom of the frame a little bit. There were some other considerations like tire size compared to actual wheel well size also.
    The radiator...I have my own plans/theories on air flow there. I have talked to guys with Panteras and that design also leads to air dams according to them. The rad will be directionally shrouded to the front. and I will leave space around it for flow to the engine while moving and figure in some kind of auxillary fan for "in-traffic" DH flow. That particular radiator may not be the end product but it gives me something to work with on other component design layouts. Its hard to see in the pics but underneath the rad as it is there, there is almost unlimited space for air bags or even an IFS set up possibly. Im having fun with it!
    sasktrini
    sasktrini


    Number of posts : 2067
    Location : Saskatoon, SK, Canada
    Registration date : 2008-05-20

    Gettin' Stoopid  66G - Page 4 Empty Re: Gettin' Stoopid 66G

    Post by sasktrini Sun Dec 18, 2011 10:51 am

    I knew you had theories and plans, I'm just trying to learn. I have faith in you Smile
    Zuffen
    Zuffen


    Number of posts : 165
    Location : Sydney Australia
    Registration date : 2011-07-28

    Gettin' Stoopid  66G - Page 4 Empty Re: Gettin' Stoopid 66G

    Post by Zuffen Sun Dec 18, 2011 11:21 pm

    My radiator sits just like yours and flows the air form above with twin electric fans underneath the radiator.

    Seems to work OK and it got me out of a spot as I couldn't fit my radiator front high so this was the best I could do.

    I use an alloy radiator for a 454 chev to cool my LS3.
    Digz
    Digz


    Number of posts : 3794
    Location : United States Six Lakes MI
    Registration date : 2008-05-17

    Gettin' Stoopid  66G - Page 4 Empty Re: Gettin' Stoopid 66G

    Post by Digz Mon Dec 19, 2011 4:34 am

    Thanks much for the info Zuffen ! While I have the overall placements of things almost nailed down. Im still lacking the details of course. It will be quite some time before any of this will be permanent. Do you have any pics of your van and set up posted on the site?
    Zuffen
    Zuffen


    Number of posts : 165
    Location : Sydney Australia
    Registration date : 2011-07-28

    Gettin' Stoopid  66G - Page 4 Empty Re: Gettin' Stoopid 66G

    Post by Zuffen Mon Dec 19, 2011 2:49 pm

    No photos of the car on the SIte yet.

    I may take the time today to do a write up on it.

    Basically it's a Mitsubishi L300 van cut down into a pick-up with an LS3 turned 180degrees sitting in the rear tray.

    I first drove it a couple of weeks ago after a 9 month build but it has a long way to go.

    One problem is it isn't an "early" as it's a 1982 model, looks much like an A100 right down to the 90" wheelbase.
    Digz
    Digz


    Number of posts : 3794
    Location : United States Six Lakes MI
    Registration date : 2008-05-17

    Gettin' Stoopid  66G - Page 4 Empty Re: Gettin' Stoopid 66G

    Post by Digz Mon Dec 19, 2011 4:21 pm

    Definately would like to see that !! We have that section in here for the Early Enoughs,, Post away! I like seeing any fab work.
    Nightmoves
    Nightmoves


    Number of posts : 2214
    Location : Old Hickory Tenn.
    Age : 64
    Registration date : 2008-11-17

    Gettin' Stoopid  66G - Page 4 Empty Re: Gettin' Stoopid 66G

    Post by Nightmoves Mon Dec 19, 2011 5:55 pm

    Hope you got you some van time,if ya wanted,for your B-day Joe.
    Yeah,some pics would be nice Zuffin.
    Digz
    Digz


    Number of posts : 3794
    Location : United States Six Lakes MI
    Registration date : 2008-05-17

    Gettin' Stoopid  66G - Page 4 Empty Re: Gettin' Stoopid 66G

    Post by Digz Mon Dec 19, 2011 6:51 pm

    Yeah I got some work time in on it today Moe, not much but every little bit is a gain. Hope to have more of the RA frame done by the end of the week. I ordered some bushings thru my NAPA guy,, probably would have been quicker if I had gotten them myself direct ,LOL,, but sometimes ya gotta put these guys thru thier paces. I can go quite aways tho while Im waiting.
    Digz
    Digz


    Number of posts : 3794
    Location : United States Six Lakes MI
    Registration date : 2008-05-17

    Gettin' Stoopid  66G - Page 4 Empty Re: Gettin' Stoopid 66G

    Post by Digz Tue Dec 20, 2011 2:02 pm

    Put the frame sleeves in today. As careful as I thought I was, I have a heck of a time making things line up exact. Larger drill bits have a tendacy to walk on me when I drill stuff close to sheet metal thicknesses and that was with a pilot hole! I really need to make some drill guides someday! But they were close. Cut the sleeves and the trick is to use a guide bolt to place them so they dont fall into the frame.
    Gettin' Stoopid  66G - Page 4 Guide_10
    Working through the wheel wells is easy enough but drilling it out to 3/4 UNDER the van was a PITA as usual.
    Gettin' Stoopid  66G - Page 4 Sleeve10
    The engine and tranny sleeves are gonna wait until I have this thing on the rotisserie! I got alittle ahead of myself and welded in the front X brace. Should have done the sleeves first! Would have been easier to work with.
    Gettin' Stoopid  66G - Page 4 Subfra10

    sasktrini
    sasktrini


    Number of posts : 2067
    Location : Saskatoon, SK, Canada
    Registration date : 2008-05-20

    Gettin' Stoopid  66G - Page 4 Empty Re: Gettin' Stoopid 66G

    Post by sasktrini Tue Dec 20, 2011 2:15 pm

    Looks great!
    Digz
    Digz


    Number of posts : 3794
    Location : United States Six Lakes MI
    Registration date : 2008-05-17

    Gettin' Stoopid  66G - Page 4 Empty Re: Gettin' Stoopid 66G

    Post by Digz Fri Dec 23, 2011 2:38 pm

    Was delivering a 6 pack of Christmas cheer to my Tranny Shop buddy today and wound up bringing this back to help in the mock up. 29.5x10.5 15 ET
    Gettin' Stoopid  66G - Page 4 Et_sli10
    If it works out well with the hub clearance I may have room for a wider tire yet.
    Gettin' Stoopid  66G - Page 4 Tub_ro10
    Ive got everything set within 1.5 degrees of where I need to be.(easy enough to tweak). Outside of U joint cap to cap the driveshaft will be 12" long. I can still raise the RA 1/2"
    Gettin' Stoopid  66G - Page 4 Img_1017
    Set The RPM Air gap on just to see it today,, basically spent the day goofing off!
    Gettin' Stoopid  66G - Page 4 Img_1018
    clinsenbarh
    clinsenbarh


    Number of posts : 14
    Location : Okla City, Oklahoma
    Registration date : 2011-12-14

    Gettin' Stoopid  66G - Page 4 Empty Re: Gettin' Stoopid 66G

    Post by clinsenbarh Sun Dec 25, 2011 1:18 pm

    Looking good, lot's of fun.
    Charley
    chester42
    chester42


    Number of posts : 1383
    Location : Homosassa,FLA
    Age : 81
    Registration date : 2009-04-06

    Gettin' Stoopid  66G - Page 4 Empty Re: Gettin' Stoopid 66G

    Post by chester42 Sun Dec 25, 2011 5:36 pm

    Digz if you have a Harbor Frieght near you, pick up a set of step drill bits. They work exelent in light metal and don't drift or make oblong holes. A set runs about $10.00 and are titianium coated so they do work well. Just use a good lube on them. You project sure looks interesting and a real step out of the box. Just keep it going!
    Hope your Christmas was good for you family!
    Digz
    Digz


    Number of posts : 3794
    Location : United States Six Lakes MI
    Registration date : 2008-05-17

    Gettin' Stoopid  66G - Page 4 Empty Re: Gettin' Stoopid 66G

    Post by Digz Sun Dec 25, 2011 6:02 pm

    Had a very good Christmas ,, Thanks! Yeah I have the step drill, just have an awful time with it on the thicker frame material, The position working under the van at that stage also hinders any decent leverage. Use it alot anywhere I can tho. The holes ended up being pretty close, the die grinder cured all issues.
    Digz
    Digz


    Number of posts : 3794
    Location : United States Six Lakes MI
    Registration date : 2008-05-17

    Gettin' Stoopid  66G - Page 4 Empty Re: Gettin' Stoopid 66G

    Post by Digz Tue Jan 03, 2012 4:19 pm

    I feel like a slacker !! got this far the other day.
    Gettin' Stoopid  66G - Page 4 Crank_10
    With temps dropping into the teens ,I'm giving the heat bill at the shop a break for a few days.

    Sponsored content


    Gettin' Stoopid  66G - Page 4 Empty Re: Gettin' Stoopid 66G

    Post by Sponsored content


      Current date/time is Mon May 20, 2024 5:01 am