VintAGE-Vans

Would you like to react to this message? Create an account in a few clicks or log in to continue.

BRINGING IT ALL TOGETHER.... A's, G's & E's


+2
Indian640
EconoUSAparts
6 posters

    My little project - restoring the automotic steering column

    avatar
    Guest
    Guest


    My little project - restoring the automotic steering column Empty My little project - restoring the automotic steering column

    Post by Guest Sun Nov 28, 2010 5:04 pm

    Today I set up my work table in my room to begin this project - to restore the automatic steering column for early Ford vans - or for my van! I found this column from a local PNP yard where there is a '64 van which I've already grabbed the front doors, some small interior pieces, the original chrome wiper arms and headlight hubs.

    So, I had begin disassembled the column to inspect what I may need to replace and I see I'll need the little plastic ring, the turn signal switch, and horn ring and the clear lens piece for "P RND12"

    My little project - restoring the automotic steering column 1964FordEconolinesteeringcolunm002

    My little project - restoring the automotic steering column 1964FordEconolinesteeringcolunm001

    Anyone here can help me in looking for good or NOS Ford parts to buy? If so please PM me if you do - thanks!

    My next stage is to take the metal pieces to be stripped of old paint to bare metal then apply etch-primer then final primer coat and I'll have to decide what final color to apply on the column.

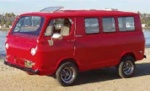
    Should I go with factory trim black or go with body color? My '63 Mercury had factory red color, but the original steering column is in black.

    Will post with updates as the project progress... Thanks
    EconoUSAparts
    EconoUSAparts


    Number of posts : 2198
    Location : Ft Thomas,Ky
    Registration date : 2008-05-17

    My little project - restoring the automotic steering column Empty Re: My little project - restoring the automotic steering column

    Post by EconoUSAparts Sun Nov 28, 2010 6:24 pm

    If the stock motor mount arms are still there and in good shape,grab them too. Also the transmission and driveshaft. That stuff is 1 year only and highly sought.
    avatar
    Guest
    Guest


    My little project - restoring the automotic steering column Empty Re: My little project - restoring the automotic steering column

    Post by Guest Sun Nov 28, 2010 8:33 pm

    EconoUSAparts wrote:If the stock motor mount arms are still there and in good shape,grab them too. Also the transmission and driveshaft. That stuff is 1 year only and highly sought.

    Here are a few photos of the van I was talking about - there's not much good stuff left in this van.

    My little project - restoring the automotic steering column Spottedoldvansinalleys001

    My little project - restoring the automotic steering column Walkingaroundtheyard045

    My little project - restoring the automotic steering column Walkingaroundtheyard043

    I tried to get the chrome grille but all the bolts are so rusty FROZEN - only way is to cut around it then take home and deal with the bolts in garage. Right now it's so damn cold outside Laughing . I had already grabbed nearly all the good stuff - the only good left in the van are the 2 blue doors (you can see them inside). The transmission and drive shaft aren't original because the van had been customized a lot - it had a early '70s 302 V8 with C4 automatic tranny. The steering column was actually manual in original but was rigged to work with auto tranny in there.

    As for the motor mounts ... even I can't be sure if they're original. You see where the 302 sit on the mounts? You tell me whatever if they are.

    Now... back to my steering column and yes, i also gabbed the steering box that was with it. the code on the steering box is C8UR-8550-A and on the box is a tag saying "H C C AB". I hope I get the good one!
    EconoUSAparts
    EconoUSAparts


    Number of posts : 2198
    Location : Ft Thomas,Ky
    Registration date : 2008-05-17

    My little project - restoring the automotic steering column Empty Re: My little project - restoring the automotic steering column

    Post by EconoUSAparts Mon Nov 29, 2010 3:25 am

    Are you sure thats not a C3 code instead of C8.
    avatar
    Guest
    Guest


    My little project - restoring the automotic steering column Empty Re: My little project - restoring the automotic steering column

    Post by Guest Mon Nov 29, 2010 4:42 am

    EconoUSAparts wrote:Are you sure thats not a C3 code instead of C8.

    You're right ... it's C3UR - 3550-A. I rubbed with scotch pad and can now see all the letters and numbers better. I found two more characters under that code - a square with "0" inside and one "7"
    Indian640
    Indian640


    Number of posts : 256
    Location : Boca Raton, Fla.
    Registration date : 2010-06-27

    My little project - restoring the automotic steering column Empty Re: My little project - restoring the automotic steering column

    Post by Indian640 Mon Nov 29, 2010 3:43 pm

    63Merc, When you go back to the yard, spray the bolts for the grille with Kroil and let it sit for awhile...... they will come apart. Art
    avatar
    Guest
    Guest


    My little project - restoring the automotic steering column Empty Re: My little project - restoring the automotic steering column

    Post by Guest Mon Nov 29, 2010 5:10 pm

    What is Kroil? Is that something like WD-40? I don't know if we get that up in Canada scratch
    Indian640
    Indian640


    Number of posts : 256
    Location : Boca Raton, Fla.
    Registration date : 2010-06-27

    My little project - restoring the automotic steering column Empty Re: My little project - restoring the automotic steering column

    Post by Indian640 Mon Nov 29, 2010 5:30 pm

    It`s sold at most refrigeration and plumbing shops..... penetrates to within one millionth of an inch.. has been around since the 1930`s.
    avatar
    Guest
    Guest


    My little project - restoring the automotic steering column Empty Re: My little project - restoring the automotic steering column

    Post by Guest Mon Nov 29, 2010 6:31 pm

    Guess I'll find a local plumping shop around me and check that one out. Thanks! Hmmm, wonder if Home Depot also carry this product - since this store also carry plumping stuff in there.
    avatar
    Old Skool
    Econoline Guru


    Number of posts : 1306
    Location : North Hills, CA
    Age : 72
    Registration date : 2009-06-13

    My little project - restoring the automotic steering column Empty Re: My little project - restoring the automotic steering column

    Post by Old Skool Tue Nov 30, 2010 8:34 am

    Well,,, I just happen to specialize in our steering columns, and can help. The plastic bushings are the same ones that are in the 68 to 74 GENII Econolines. Also, the tab on your shift handle arm is more than likely worn out also. I make the correct plastic shift indicator plates for the 67. There are three types of plates. The early GREEN dot, the 66/67 and the 68 to 74. ALL will interchange, however most people prefer to get rid of the 64 type "Green Dot" shift pattern and go with the 67 type. It is as easy as changing your early transmission shift body to a 67 to 74 shift body. I didn't catch what year tranny you have?? and whether or not it is the one year only rare bare donout mount small bell C4???? If so, I would definitely change the shift pattern. Back to your shifter.
    The column tube is a "welded seam" tube, and the seam is apparent unless you fill it as well as all the pits, plier and pipe wrench marks. LOL ~~ I sand blast it completely, and prime it with Epoxy primer, and then fill in all the rust pits, and blend in the seam just like doing body work, and then paint them with a HIGH end Urethane paint with a hardener. The paint I use costs me at shop price @ $95 a quart!!! but takes the abuse from legs and shoes.
    Yours will have what is left of a plastic bushing in the lower aluminum mounting bracket, which is usually gummed up and or worn out. I bore it out to continue the clearance from its other side, as I install a bronze bushing update I designed over twenty years ago to fix that problem. The lower support bracket, the "Z" shaped pc held in place from the underside with 5/15th bolt (inspect this also, as not uncommon for it to be stripped out and needing a helicoil) does NOT do any alignment like the upper plastic bushing, it only is designed to support the shift tube,, this is where I install a bronze bushing that I cut down and make to fit here. I also, cut the end of the shift tube itself on the lathe, re weld it in brass, and then re cut it back to .750 zero exactly,, this gets rid of the plastic bushing in the aluminum support (of which I bored out for more clearance). I made a jig fixture to re weld the shift arm back into its proper position so that the neutral adjustment hole in the aluminum bracket aligns correctly with the alignment hole in the shift arm itself. In my columns I also, update the upper bowl in order to use the 67 to 74 E flashers in the column, its a nice upgrade also. Also,, there are NO spring tension washers available anywhere from anybody!!! I set the clearance up using also, bronze bearing type washers to get them perfect.
    Let me know any problems you may have or what you would like to do.
    vic
    Casimier
    Casimier


    Number of posts : 864
    Location : Jackson,NJ
    Registration date : 2010-07-26

    My little project - restoring the automotic steering column Empty Re: My little project - restoring the automotic steering column

    Post by Casimier Tue Nov 30, 2010 11:04 am

    avatar
    Old Skool
    Econoline Guru


    Number of posts : 1306
    Location : North Hills, CA
    Age : 72
    Registration date : 2009-06-13

    My little project - restoring the automotic steering column Empty Re: My little project - restoring the automotic steering column

    Post by Old Skool Tue Nov 30, 2010 11:20 am

    That is actually a 67 type turn cam, as it has the wires in it,, the earlies (61--66) do not. I use the 68 to 74 complete turn assembly, and mill out a slot for the red button as well as adapt also the hole for the turn lever part, after that I convert the GENII wires over to ours using two prong trailer light ends, they are EXACTLY like ours and its then a simple plug into our harness. All you do then is provide one more flasher which is dedicated only for the flasher part, its super easy. You also need to install the 67 to 74 round horn contact onto the bottom of your steering wheel, (wheels are identical from 61 to 74 with the added contact ring starting in 67). I also, simply color code the trailer plug in to match our colors. The 67 is not sold anymore, however the 68 to 74 (same eight wire unit) is sold by SHE MAR for about $119, I pay usually about $10 bucks at the bone yrd for the used 68 to 74's. Also, if looking for a used 67 e flasher turn assembly, make sure you get the late 8 wire unit, and not the early 67 seven wire unit, as it needs the key in the ignition to operate.
    vic
    donivan65
    donivan65
    Governor
    Governor


    Number of posts : 12220
    Location : San Diego, California
    Registration date : 2008-05-12

    My little project - restoring the automotic steering column Empty Re: My little project - restoring the automotic steering column

    Post by donivan65 Tue Nov 30, 2010 11:59 am

    ,,,,,,the juice,,,,,,,,


    My little project - restoring the automotic steering column Kroil_10
    Indian640
    Indian640


    Number of posts : 256
    Location : Boca Raton, Fla.
    Registration date : 2010-06-27

    My little project - restoring the automotic steering column Empty Re: My little project - restoring the automotic steering column

    Post by Indian640 Tue Nov 30, 2010 2:04 pm

    donivan65 wrote:,,,,,,the juice,,,,,,,,


    My little project - restoring the automotic steering column Kroil_10

    HEY !!! that`s the stuff....... There`s also a product called Tascon in a yellow and black can, but it is extremely hard to find these days..... Art
    EconoCarl
    EconoCarl


    Number of posts : 1109
    Location : Beaumont, TX
    Registration date : 2008-05-19

    My little project - restoring the automotic steering column Empty Re: My little project - restoring the automotic steering column

    Post by EconoCarl Tue Nov 30, 2010 2:59 pm

    There's also Aero-Kroil, same stuff in a spray can.
    Nothing better for getting into those hard to reach places!
    donivan65
    donivan65
    Governor
    Governor


    Number of posts : 12220
    Location : San Diego, California
    Registration date : 2008-05-12

    My little project - restoring the automotic steering column Empty Re: My little project - restoring the automotic steering column

    Post by donivan65 Tue Nov 30, 2010 3:36 pm

    My little project - restoring the automotic steering column Repai193
    avatar
    Old Skool
    Econoline Guru


    Number of posts : 1306
    Location : North Hills, CA
    Age : 72
    Registration date : 2009-06-13

    My little project - restoring the automotic steering column Empty Re: My little project - restoring the automotic steering column

    Post by Old Skool Tue Nov 30, 2010 3:47 pm

    NEVER to old to learn a new trick,,, its hard to find one that will penetrate, rather than just look like its getting inside there,,, THNX will put that on my need yesterday list!!!!
    vic
    avatar
    Guest
    Guest


    My little project - restoring the automotic steering column Empty Re: My little project - restoring the automotic steering column

    Post by Guest Wed Dec 01, 2010 5:17 am

    Old Skool wrote: I make the correct plastic shift indicator plates for the 67. There are three types of plates. The early GREEN dot, the 66/67 and the 68 to 74. ALL will interchange, however most people prefer to get rid of the 64 type "Green Dot" shift pattern and go with the 67 type. It is as easy as changing your early transmission shift body to a 67 to 74 shift body. I didn't catch what year tranny you have?? and whether or not it is the one year only rare bare donout mount small bell C4????

    My auto column has the red arrow tab screwed in on the little metal piece on the plate - it's factory as it is what I see. All I need do is sand away this pieces and re-paint the red arrow and whatever color on the other pieces. As for my van - it doesn't have the engine and tranny, I brought it as is ... pretty much a rolling body with some parts LOL. I'm open to whatever engine I want to drop in - so I'm leaning to getting a Mustang 200 inline with auto transmission in year range 1965-74, but there are also 200 inline sixes going up to 1983. I just need to know which is the right match for the auto column to use. I have the complete NOS dash wiring harness in prefect condition.

    Old Skool wrote: The column tube is a "welded seam" tube, and the seam is apparent unless you fill it as well as all the pits, plier and pipe wrench marks. LOL ~~ I sand blast it completely, and prime it with Epoxy primer, and then fill in all the rust pits, and blend in the seam just like doing body work, and then paint them with a HIGH end Urethane paint with a hardener. The paint I use costs me at shop price @ $95 a quart!!! but takes the abuse from legs and shoes.

    Yes, that's what I'm doing the same like you did. I've already begin stripping away the old paint off few pieces now. I work as an autobody man and can paint colors like a painter ( did few cars before).


    Old Skool wrote: Yours will have what is left of a plastic bushing in the lower aluminum mounting bracket, which is usually gummed up and or worn out. I bore it out to continue the clearance from its other side, as I install a bronze bushing update I designed over twenty years ago to fix that problem. The lower support bracket, the "Z" shaped pc held in place from the underside with 5/15th bolt (inspect this also, as not uncommon for it to be stripped out and needing a helicoil) does NOT do any alignment like the upper plastic bushing, it only is designed to support the shift tube,, this is where I install a bronze bushing that I cut down and make to fit here. I also, cut the end of the shift tube itself on the lathe, re weld it in brass, and then re cut it back to .750 zero exactly,, this gets rid of the plastic bushing in the aluminum support (of which I bored out for more clearance). I made a jig fixture to re weld the shift arm back into its proper position so that the neutral adjustment hole in the aluminum bracket aligns correctly with the alignment hole in the shift arm itself. In my columns I also, update the upper bowl in order to use the 67 to 74 E flashers in the column, its a nice upgrade also. Also,, there are NO spring tension washers available anywhere from anybody!!! I set the clearance up using also, bronze bearing type washers to get them perfect.
    Let me know any problems you may have or what you would like to do.
    vic

    Your upgrades sounds like good - might be what I need to get the column function like new again. Maybe I should send the column tubes to you or shall I do the work while you send me the parts you use and follow your instructions? Yes, the plastic washer inside the top "cup" is 3/4 remaining surviving with 1/4 worn gone ( see the photo).

    Now, I'm having trouble getting the auto shift stick out of the neck tube on column. I got it coming out halfway but is stuck because of the slot in the neck - the auto shift stick's tongue is in the way. I got the cap and spring out of the column as the shift stick went out. The cap and spring appear to be in good shape - feel not weak but is tight, they still have grease on them! Now... how do i get the stick out?

    EnocoUSAparts and you are saying "64 one year only" thing... ok what does that mean? I'm told that my column may be this one. Didn't the early Enocolines have the auto shift option for 1961 to 1967?

    Thanks for any advice!
    Gregory
    avatar
    Old Skool
    Econoline Guru


    Number of posts : 1306
    Location : North Hills, CA
    Age : 72
    Registration date : 2009-06-13

    My little project - restoring the automotic steering column Empty Re: My little project - restoring the automotic steering column

    Post by Old Skool Wed Dec 01, 2010 11:05 am

    LOTS to answer there,, Firstly all 61 to 64's have the steering box itself, mounted at a DIFFERENT angle than the 65 to 67's. The according column mounting dash brackets for each year. Obviously, all the 65 to 67's would be of one kind only and all the same for these years. The 61 to 64's however break into two different styles, of which either will fit in any 61 to 64 as these all have the steering box mounted at the same angle (remember different though than the 65->67's).
    The 61 to 63's, use a small triangle shaped dash bracket and a matching small angled bracket to match it. The 64 uses the exact same bracket as a 65 to 67, HOWEVER it is welded on to the actual tube in a LOWER position in order to accommodate the 61 to 64 steering box mounting angle. In other words, the 64 is all by itself, even though the bracket LOOKS similar to the later 65 to 67's. Hoping that explains it well,and not MORE confusing???
    There are two styles of shifter retention methods, as well as different bends in the arms, also, different engagement tabs on the top of the shift arm itself. The first and early setup uses a simple tension type roll pin, and the laters use a spring and two pins that push outwards and keep the shifter in place. The autos are ALWAYS a pain to get to come out, and on old worn out ones I simply cut the rubber away enough to allow the upper tab to now come down and clear to let it come out, its a pain, some oil or grease helps.
    The shift handle knobs and the turn knobs are available from Dennis Carpenters, or Mac's, as well as the replacement rubber SHIFT INSULATORS, they are all about $6 bucks each. So far not impressed with Carpenters knobs, as they need some epoxy inside to keep them in place, and the 67 to 74 type knobs are not only available from California Mustang or something?? would have to look it up again. However, I simply use the 61 to 66 knobs on all of them.
    In my opinion, the column would come out a lot better if I did it here, as I have taken the time to make all of the jigs setups. For example, like cutting the welds and removing the shift arm so I can bore out the aluminum mounting bracket for more clearance, cutting the tube end, re welding it, cutting it back to original size to fix it, and then, re welding the shift arm in its correct position. I also, have all the setups to easily mill out a slot for the e flasher upgrade as well as mill out the turn handle hole in the bowl,,(LOL),,,
    I had the picture thing working,now its not again for me??? I make auto columns out of a stick core, for $275 complete, includes new plastic shift indicator plate, hood, additional horn contact if using the 67 e flasher turn assembly. Also includes as standard a later model shift handle replacement.
    vic
    avatar
    Guest
    Guest


    My little project - restoring the automotic steering column Empty Re: My little project - restoring the automotic steering column

    Post by Guest Thu Dec 02, 2010 5:17 am

    Old Skool wrote:LOTS to answer there,, Firstly all 61 to 64's have the steering box itself, mounted at a DIFFERENT angle than the 65 to 67's. The according column mounting dash brackets for each year. Obviously, all the 65 to 67's would be of one kind only and all the same for these years. The 61 to 64's however break into two different styles, of which either will fit in any 61 to 64 as these all have the steering box mounted at the same angle (remember different though than the 65->67's).

    If you go back to where I posted about my steering box - I typed all the codes I read off the steering box. This steering box was with the auto column at the time I was at the junk van. I'm hoping someone might be able to tell me something about the codes?


    Old Skool wrote:The 61 to 63's, use a small triangle shaped dash bracket and a matching small angled bracket to match it. The 64 uses the exact same bracket as a 65 to 67, HOWEVER it is welded on to the actual tube in a LOWER position in order to accommodate the 61 to 64 steering box mounting angle. In other words, the 64 is all by itself, even though the bracket LOOKS similar to the later 65 to 67's. Hoping that explains it well,and not MORE confusing???
    There are two styles of shifter retention methods, as well as different bends in the arms, also, different engagement tabs on the top of the shift arm itself. The first and early setup uses a simple tension type roll pin, and the laters use a spring and two pins that push outwards and keep the shifter in place. The autos are ALWAYS a pain to get to come out, and on old worn out ones I simply cut the rubber away enough to allow the upper tab to now come down and clear to let it come out, its a pain, some oil or grease helps.

    The 64 uses the exact same bracket as a 65 to 67, HOWEVER it is welded on to the actual tube in a LOWER position

    The little bracket was indeed welded to the shift column on top of the shift tube and is under the larger dash bracket on the other tube. See the photo to show all the little parts I removed in a line. I only have one pin but the shift tube do have 2 holes for 2 pins - one pin must had got lost before i got the column?

    My little project - restoring the automotic steering column 1964FordEconolinesteeringcolunm003


    Old Skool wrote:The shift handle knobs and the turn knobs are available from Dennis Carpenters, or Mac's, as well as the replacement rubber SHIFT INSULATORS, they are all about $6 bucks each. So far not impressed with Carpenters knobs, as they need some epoxy inside to keep them in place, and the 67 to 74 type knobs are not only available from California Mustang or something?? would have to look it up again. However, I simply use the 61 to 66 knobs on all of them.

    The black knobs on the column ... I'd like to keep the same style (for the sake of factory style look LOL). If you think the new knobs is the same type - are they? Yes, the 61 to 66 knobs.


    Old Skool wrote: In my opinion, the column would come out a lot better if I did it here, as I have taken the time to make all of the jigs setups. For example, like cutting the welds and removing the shift arm so I can bore out the aluminum mounting bracket for more clearance, cutting the tube end, re welding it, cutting it back to original size to fix it, and then, re welding the shift arm in its correct position. I also, have all the setups to easily mill out a slot for the e flasher upgrade as well as mill out the turn handle hole in the bowl,,(LOL),,,

    I suppose I should hand it to your hands - at least you may do a better job than me and you have all the parts and setups LOL! The thing is, I still want to sandblast all the metal pieces and sand for a smooth job. Then ship them to you to do the installation with new parts ... hey you have a clean column to work on! - right?


    Old Skool wrote:I had the picture thing working,now its not again for me??? I make auto columns out of a stick core, for $275 complete, includes new plastic shift indicator plate, hood, additional horn contact if using the 67 e flasher turn assembly. Also includes as standard a later model shift handle replacement.
    vic

    Pm'd to you to send me photos. Since I do have the auto column - how much would it cost me? That will have to be after Christmas to talk about what work you can do for me ok? Here is couple of photos - one showing the broken horn ring and the shift flasher bracket - I'll need a complete new one to replace this. The other photo shows the original column in my van - the black manual shift.

    My little project - restoring the automotic steering column 1964FordEconolinesteeringcolunm002-1

    My little project - restoring the automotic steering column IMG_0029
    avatar
    Old Skool
    Econoline Guru


    Number of posts : 1306
    Location : North Hills, CA
    Age : 72
    Registration date : 2009-06-13

    My little project - restoring the automotic steering column Empty Re: My little project - restoring the automotic steering column

    Post by Old Skool Thu Dec 02, 2010 9:13 am

    Like I said, I have all the jigs setup to properly weld any and all parts of these column parts where they belong. This includes a jig to weld the needle holder pc in the proper position on the shift tube itself. I run into these either broken, missing and or loose like yours is.
    Also, I mentioned in having to bore out the aluminum mounting bracket in order to give it a little more clearance, that I had to make a jig to re weld the shift arm back in its correct position. So,, its all handled here.
    I would prefer you to do the blasting and all the metal work repair, like plier marks, blending in the weld seam on the tube, rust pits, etc. However, in order to do it correctly, you will need a good primer before hand, I use Epoxy primer, and then fill and blend to perfect, then I top coat. So,,, if you at least blast if and prime it for me that will be just fine, and then you can complete the painting part. I actually loose money on it, as the paint alone, without the reducer or hardener is $95 a quart. (shop price) reducer is $58 a gallon, etc, etc,,,, hours and hours filling and blending, etc, etc,
    In order to properly paint the shift tube it takes a minimum of one week to paint it by itself. Not including the welding and re cutting of the end to bring it back to new. The paint needing a minimum of two days for EACH of the two painting stages, in order for the paint to fully cure. If you mask the one side in order to paint the other side, BEFORE the paint has fully cured, it leaves marks in the side you just painted,, its a pain to do it nicely. I leave the parting line for these two, underneath the aluminum support pc so that no one can see it.
    If you want the E flasher upgrade also, again, I have the jigs setup to do it easily and correctly,,, however you will need an eight wire turn assembly. I can sell you a used one for $45. You need to repair yours anyways, so you would get an update at the same time!!! If not I may have an early turn assembly, will look depending on what you would like????
    In regards to the knobs,,, like I said before,,,, Carpenters, Mac's, etc, etc, all sell the same knobs, and I have a source for the 67 type knob also. So that is/was covered also.
    Bending up the automatic shift arm that is welded onto the shift tube, is a real pain, like I said, so you can save both of us a lot of extra work if you send me your automatic, blasted and primed for me to repair for you. I can do all the repairs which would ALSO include my NEW replacement plastic shift indicator plate and a late model replacement shifting handle for $125. If you want the E flasher in the column, I will include that for free also. If you would like the used turn assembly please add that price to the total. If you would like a painted and completed, however converted over manual column, that is quite a bit more involved, and that would be the standard price of $275. Of course all of this does not include shipping. Would be happy to help you, so let me know???
    vic
    EconoUSAparts
    EconoUSAparts


    Number of posts : 2198
    Location : Ft Thomas,Ky
    Registration date : 2008-05-17

    My little project - restoring the automotic steering column Empty Re: My little project - restoring the automotic steering column

    Post by EconoUSAparts Thu Dec 02, 2010 8:07 pm

    Vic,words dont do your work justice. Post some pics of your masterpieces.
    avatar
    Guest
    Guest


    My little project - restoring the automotic steering column Empty Re: My little project - restoring the automotic steering column

    Post by Guest Thu Dec 02, 2010 9:04 pm

    Old Skool wrote:
    I would prefer you to do the blasting and all the metal work repair, like plier marks, blending in the weld seam on the tube, rust pits, etc. However, in order to do it correctly, you will need a good primer before hand, I use Epoxy primer, and then fill and blend to perfect, then I top coat. So,,, if you at least blast if and prime it for me that will be just fine, and then you can complete the painting part. I actually loose money on it, as the paint alone, without the reducer or hardener is $95 a quart. (shop price) reducer is $58 a gallon, etc, etc,,,, hours and hours filling and blending, etc, etc,
    In order to properly paint the shift tube it takes a minimum of one week to paint it by itself. Not including the welding and re cutting of the end to bring it back to new. The paint needing a minimum of two days for EACH of the two painting stages, in order for the paint to fully cure. If you mask the one side in order to paint the other side, BEFORE the paint has fully cured, it leaves marks in the side you just painted,, its a pain to do it nicely. I leave the parting line for these two, underneath the aluminum support pc so that no one can see it.

    Vic, leave the metal work, sandblast and primer to me - I'm an autobody man and I do that for a living. I will get all the metal pieces up to primer stage and then hand them to you for the upgrade with new parts add on it. I have access to a paint booth and have my own paint spray gun - so the paint materials is cheap to me, I already have some harder, reducer and primer in cans in the garage. That way - you don't make a loss in your costs.


    Old Skool wrote: If you want the E flasher upgrade also, again, I have the jigs setup to do it easily and correctly,,, however you will need an eight wire turn assembly. I can sell you a used one for $45. You need to repair yours anyways, so you would get an update at the same time!!! If not I may have an early turn assembly, will look depending on what you would like????
    In regards to the knobs,,, like I said before,,,, Carpenters, Mac's, etc, etc, all sell the same knobs, and I have a source for the 67 type knob also. So that is/was covered also.

    I'd like the E flasher upgrade - as long it looks belong to the era period for the van. I'll send the broken horn/turn signal wiring assembly with the metal tubes and you can find some use for the wire somehow.


    Old Skool wrote: Bending up the automatic shift arm that is welded onto the shift tube, is a real pain, like I said, so you can save both of us a lot of extra work if you send me your automatic, blasted and primed for me to repair for you. I can do all the repairs which would ALSO include my NEW replacement plastic shift indicator plate and a late model replacement shifting handle for $125. If you want the E flasher in the column, I will include that for free also. If you would like the used turn assembly please add that price to the total. If you would like a painted and completed, however converted over manual column, that is quite a bit more involved, and that would be the standard price of $275. Of course all of this does not include shipping. Would be happy to help you, so let me know???
    vic

    Ok, I have a question for you: Should I remove the neck tube where the auto shift arm goes in - off the shift tube? Since the shift tube already have the pin holes - the neck tube have the marks to match the pin holes there. Shouldn't be a problem in re-jig that neck back on the tube after you bore them for new bronze rings or washers in there? I'll sandblast the auto shift arm to primer then you can do your part in re-install it back in. All clear?

    Of course, after your work done and I get the column back in mail - I'll do the final primer touch-up then get them all ready for the paint color in the end. Your price quotes look good to me - around up to $200 in costs plus shipping both ways should be enough. I'll see about that after the holidays.

    Yeh - I'd like to see the pictures of your masterpieces LOL!
    avatar
    Old Skool
    Econoline Guru


    Number of posts : 1306
    Location : North Hills, CA
    Age : 72
    Registration date : 2009-06-13

    My little project - restoring the automotic steering column Empty Re: My little project - restoring the automotic steering column

    Post by Old Skool Thu Dec 02, 2010 11:45 pm

    There is no reason for you to TRY and remove the tube that the shift arm itself goes into??????????? I don't understand why anyone would want to do that, it is factory FURNACE brazed into position and never comes off or wears out. The upper pc that you showed in the pic, periodically comes loose because of bad welding from the factory, but no big deal for me with the jigs.
    I keep trying the pictures and I guess I am just lame at this setup,, it will take days and tons of work to setup the photo bucket routine,,, dratzzzz If you PM me its way too easy. When ever you're ready to send it let me know,,

    vic
    avatar
    Guest
    Guest


    My little project - restoring the automotic steering column Empty Re: My little project - restoring the automotic steering column

    Post by Guest Fri Dec 03, 2010 5:34 am

    I already PM to you 2 days ago - didn't you get the message?

    Sponsored content


    My little project - restoring the automotic steering column Empty Re: My little project - restoring the automotic steering column

    Post by Sponsored content


      Current date/time is Tue May 07, 2024 11:41 am