


Electrical problems are scary to most people. The fear of the unknown and mostly unseen. The fear of getting zapped. The lack of knowing how to properly diagnose a problem and being certain it is fixed.
Most people want the easy answer or fix. The easy answer allows you to move on and not spend the time to understand and diagnose the problem. However, when you understand the system, you can fix it anywhere and gain a bit of karmic awareness of your surroundings. This does feel good! You are more confident and self-reliant. Maybe you don’t want to grow and can your own produce or raise or hunt your own meat. But if you want to own an older vehicle, you will need a trusted mechanic on call and a triple A card, or you will need to be able to do some things yourself.
Since our older vans are so electrically simple, they are fairly easy to work on. There are no computers or multiplex circuits, only a couple resistors and a harness that can be held in one hand.
Electrical problems fall into 2 basic categories: constant and intermittent. Constant are easy to find, they are always there to trace down. Intermittent problems are tougher. They must be failing when you are testing. System knowledge and experience can narrow your search and allow you to make educated guesses, but unless you are able to catch the problem when it’s happening, it is still a guess.
I found this series of four videos showing how to test a circuit using the voltage drop method. I've reviewed them and they are great.
https://www.youtube.com/watch?v=6Sqk_Gai59I
There are other ways to perform a voltage drop test. However, the type shown in the videos is more than enough to diagnose any vintage van electrical issue. Always check the whole circuit.
So now that we have seen how to do a voltage drop test, let’s look at how this applies to your van. You want a voltmeter, a wiring diagram, an understanding of what is failing and the conditions when it’s failing.
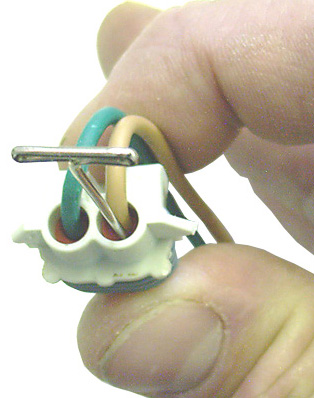
Any voltmeter that can handle ~15 volts DC or direct current will work. These can be found at yard sales, stores, tool trucks, etc. Prices can range from under 10 bucks to over a hundred dollars. A power probe as shown is much quicker and easier to use when crawling around a vehicle. When you are laying half in and half out, reaching up under the dash and having dirt fall into your face, it is much more certain. They cost more, but if you have the money, I’d seriously suggest one.
A wiring diagram is a major help in understanding the circuit. If the entire van had each circuit laid out as it is in the video, tracing each circuit would be easy. However, the van has harnesses wrapped in tape and tucked away from view. Think of it like a street drainage system. You know the water flows downhill, and that there are manhole covers for access, but you can’t see the entire system. You can check along the system and narrow down where the problem is located.
What is failing and the conditions involved are a major factor in narrowing what you need to check.
First are the conditions. Did it work before? Was any work performed just before it failed? What was happening when it failed? These are especially important when dealing with an intermittent so you can reproduce the same conditions so it will fail.
Next, what failed? A dead light bulb is simple to narrow down. An engine stumble when hot at low speed going around a corner is tougher. If two problems are happening at the same time, look for shared components.
Always start with a good, fully charged battery with clean connections. DO NOT start testing if you see this!

Next, do a visual inspection of the parts of the circuit you can see. Check for a bad fuse, bulb and bare, corroded or broken wires. If the circuit is currently not working, try NOT to wiggle parts or clean the connections. This can often make a poor connection work again just long enough so you can’t test it, only to fail again down the road. Just note any poor connections. If a fuse or bulb is bad, go ahead and replace it while cleaning those connections. Then test the circuit to ensure there isn’t a separate issue that caused the failure.
Now do a voltage drop test. There are only a couple of places to note that there are resistors on our vans. These are noted on the wiring diagram, but I’ll mention them here too. The ignition coil feed circuit will have a resistor to drop the voltage. Many will also have a resistor feeding some of the gauges. There may also be a resistor in the charging system trigger circuit. Also note that sending units operate by varying resistance to change the gauge reading. If your gauge light dimmer is working, this is a great opportunity to see how a resistance circuit works by doing a voltage drop test on this circuit.
You will find that some areas are very hard to reach for testing without disturbing the harness or removing components. Try to minimize disruption and test in place if possible. Try to only probe at connectors. Avoid stripping off insulation from the wire for testing. I’ve found that if you are careful, a pin can be used to backprobe most connectors. Do not allow the pin to touch anything else! As a general rule, always clean and tighten ground connections after you diagnose the problem. They are usually oversize and will work even when poor, but are often missed and neglected. Clean those grounds!
Electrical problems fall into 3 main categories.
Corrosion in the circuit, causing an increased resistance. This will cause increased flow through the circuit, causing dim lights, blown fuses and in bad cases, feedback. If you have followed behind a car that had dim taillights and when they hit the brakes some lights got brighter and some went out, that’s a poor connection/corrosion. This is common on older vehicles, especially with unsealed connectors.
Open circuit means that the power will not flow, causing it not to work. This can be a blown fuse or bulb, a broken wire or a badly corroded or disconnected connector. This is common on older vehicles with brittle old wiring. Again, be careful moving stuff around!
Short circuit is when a feed circuit contacts another circuit or the body. The most common cause is a wire that has been exposed when the insulation is worn or broken away. This will blow a fuse or can cause fires. This is common on older vehicles with brittle old wiring. Again, be careful moving stuff around!
Once the problem is located, repair as best as you can. This does not mean masking tape or wire nuts unless that is all you have to get off the freeway! Always try to make a repair that will not come apart, will last a long time, will not corrode and is insulated to prevent shorts. Bonus points for neatness and visually clean repairs. Crimp connectors with heat shrink, new wire in proper size and color, using harness tape instead of electrical tape, etc.
Once the problem is found and fixed, check operation and recheck the circuit if needed. Clean all poor connections. If it was intermittent or it failed under specific conditions, check operation under the conditions to make sure the problem will not return. Simply replacing a fuse will not fix the short from the bare wire that caused it.
A final note on safety and the fear of getting zapped. The system is 12 volts. Provided you are not soaked in salt water, you can touch both terminals of the battery with your hands and your body’s resistance is so high there will be no flow. The ignition coil can produce enough voltage (30-50,000 volts) to give you a nasty jolt. It will not cause permanent damage unless you have a medical condition and/or an aftermarket HEI ignition. The ignition condenser and radio noise suppression both store voltage and can also zap you. This is unlikely, and also will cause no long term damage. Always be careful when probing so you do not touch the circuit to anything else. Corrosion can burn your skin, damage your eyes and eat away paint and cloth. Always rinse the junk off.
Most people want the easy answer or fix. The easy answer allows you to move on and not spend the time to understand and diagnose the problem. However, when you understand the system, you can fix it anywhere and gain a bit of karmic awareness of your surroundings. This does feel good! You are more confident and self-reliant. Maybe you don’t want to grow and can your own produce or raise or hunt your own meat. But if you want to own an older vehicle, you will need a trusted mechanic on call and a triple A card, or you will need to be able to do some things yourself.
Since our older vans are so electrically simple, they are fairly easy to work on. There are no computers or multiplex circuits, only a couple resistors and a harness that can be held in one hand.
Electrical problems fall into 2 basic categories: constant and intermittent. Constant are easy to find, they are always there to trace down. Intermittent problems are tougher. They must be failing when you are testing. System knowledge and experience can narrow your search and allow you to make educated guesses, but unless you are able to catch the problem when it’s happening, it is still a guess.
I found this series of four videos showing how to test a circuit using the voltage drop method. I've reviewed them and they are great.
https://www.youtube.com/watch?v=6Sqk_Gai59I
There are other ways to perform a voltage drop test. However, the type shown in the videos is more than enough to diagnose any vintage van electrical issue. Always check the whole circuit.
So now that we have seen how to do a voltage drop test, let’s look at how this applies to your van. You want a voltmeter, a wiring diagram, an understanding of what is failing and the conditions when it’s failing.
Any voltmeter that can handle ~15 volts DC or direct current will work. These can be found at yard sales, stores, tool trucks, etc. Prices can range from under 10 bucks to over a hundred dollars. A power probe as shown is much quicker and easier to use when crawling around a vehicle. When you are laying half in and half out, reaching up under the dash and having dirt fall into your face, it is much more certain. They cost more, but if you have the money, I’d seriously suggest one.
A wiring diagram is a major help in understanding the circuit. If the entire van had each circuit laid out as it is in the video, tracing each circuit would be easy. However, the van has harnesses wrapped in tape and tucked away from view. Think of it like a street drainage system. You know the water flows downhill, and that there are manhole covers for access, but you can’t see the entire system. You can check along the system and narrow down where the problem is located.
What is failing and the conditions involved are a major factor in narrowing what you need to check.
First are the conditions. Did it work before? Was any work performed just before it failed? What was happening when it failed? These are especially important when dealing with an intermittent so you can reproduce the same conditions so it will fail.
Next, what failed? A dead light bulb is simple to narrow down. An engine stumble when hot at low speed going around a corner is tougher. If two problems are happening at the same time, look for shared components.
Always start with a good, fully charged battery with clean connections. DO NOT start testing if you see this!
Next, do a visual inspection of the parts of the circuit you can see. Check for a bad fuse, bulb and bare, corroded or broken wires. If the circuit is currently not working, try NOT to wiggle parts or clean the connections. This can often make a poor connection work again just long enough so you can’t test it, only to fail again down the road. Just note any poor connections. If a fuse or bulb is bad, go ahead and replace it while cleaning those connections. Then test the circuit to ensure there isn’t a separate issue that caused the failure.
Now do a voltage drop test. There are only a couple of places to note that there are resistors on our vans. These are noted on the wiring diagram, but I’ll mention them here too. The ignition coil feed circuit will have a resistor to drop the voltage. Many will also have a resistor feeding some of the gauges. There may also be a resistor in the charging system trigger circuit. Also note that sending units operate by varying resistance to change the gauge reading. If your gauge light dimmer is working, this is a great opportunity to see how a resistance circuit works by doing a voltage drop test on this circuit.
You will find that some areas are very hard to reach for testing without disturbing the harness or removing components. Try to minimize disruption and test in place if possible. Try to only probe at connectors. Avoid stripping off insulation from the wire for testing. I’ve found that if you are careful, a pin can be used to backprobe most connectors. Do not allow the pin to touch anything else! As a general rule, always clean and tighten ground connections after you diagnose the problem. They are usually oversize and will work even when poor, but are often missed and neglected. Clean those grounds!
Electrical problems fall into 3 main categories.
Corrosion in the circuit, causing an increased resistance. This will cause increased flow through the circuit, causing dim lights, blown fuses and in bad cases, feedback. If you have followed behind a car that had dim taillights and when they hit the brakes some lights got brighter and some went out, that’s a poor connection/corrosion. This is common on older vehicles, especially with unsealed connectors.
Open circuit means that the power will not flow, causing it not to work. This can be a blown fuse or bulb, a broken wire or a badly corroded or disconnected connector. This is common on older vehicles with brittle old wiring. Again, be careful moving stuff around!
Short circuit is when a feed circuit contacts another circuit or the body. The most common cause is a wire that has been exposed when the insulation is worn or broken away. This will blow a fuse or can cause fires. This is common on older vehicles with brittle old wiring. Again, be careful moving stuff around!
Once the problem is located, repair as best as you can. This does not mean masking tape or wire nuts unless that is all you have to get off the freeway! Always try to make a repair that will not come apart, will last a long time, will not corrode and is insulated to prevent shorts. Bonus points for neatness and visually clean repairs. Crimp connectors with heat shrink, new wire in proper size and color, using harness tape instead of electrical tape, etc.
Once the problem is found and fixed, check operation and recheck the circuit if needed. Clean all poor connections. If it was intermittent or it failed under specific conditions, check operation under the conditions to make sure the problem will not return. Simply replacing a fuse will not fix the short from the bare wire that caused it.
A final note on safety and the fear of getting zapped. The system is 12 volts. Provided you are not soaked in salt water, you can touch both terminals of the battery with your hands and your body’s resistance is so high there will be no flow. The ignition coil can produce enough voltage (30-50,000 volts) to give you a nasty jolt. It will not cause permanent damage unless you have a medical condition and/or an aftermarket HEI ignition. The ignition condenser and radio noise suppression both store voltage and can also zap you. This is unlikely, and also will cause no long term damage. Always be careful when probing so you do not touch the circuit to anything else. Corrosion can burn your skin, damage your eyes and eat away paint and cloth. Always rinse the junk off.

