VintAGE-Vans

Would you like to react to this message? Create an account in a few clicks or log in to continue.

BRINGING IT ALL TOGETHER.... A's, G's & E's


+8
dodge man
dix
Wheelie
Digz
G-Man
Big W
BILL Carson
Scotts_A100
12 posters

    My '69 A100 Sportsman Revival Project

    avatar
    Scotts_A100


    Number of posts : 160
    Location : Metro Detroit
    Registration date : 2010-06-02

    My '69 A100 Sportsman Revival Project Empty My '69 A100 Sportsman Revival Project

    Post by Scotts_A100 Fri Mar 29, 2013 6:20 pm

    I've been a member of this site for several years and check in here most every day to see what's new. I've also posted before that I had a thread of my project on the AACA (Antique Automobile Club of America) and have included a link to it for those that may be interested in following along. I thought though that I would take a few minutes to post a few photos of my '69 A100 project just to give those that have'nt viewed that thread an idea of what I started with and where things are currently at.

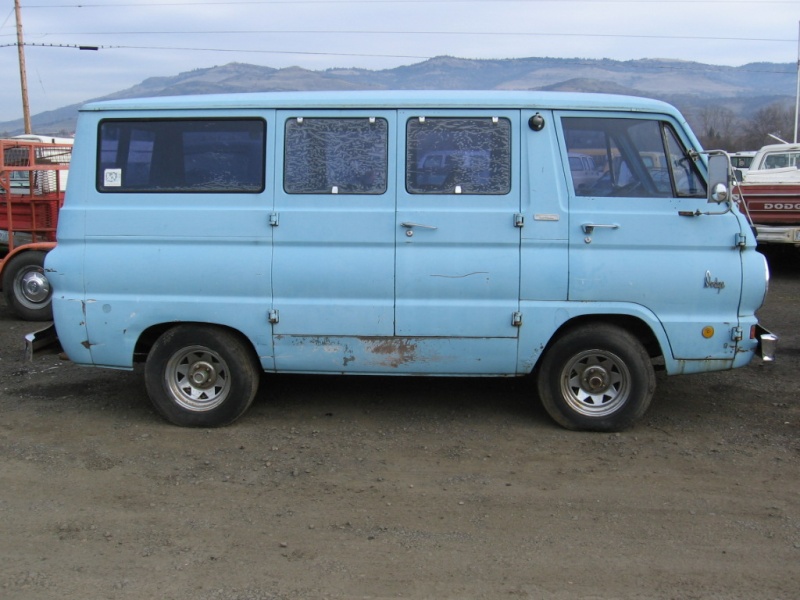
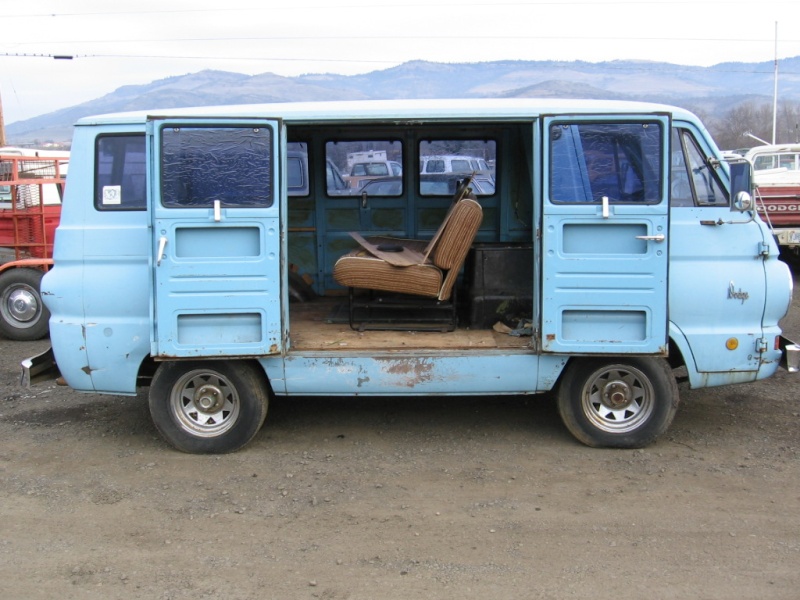
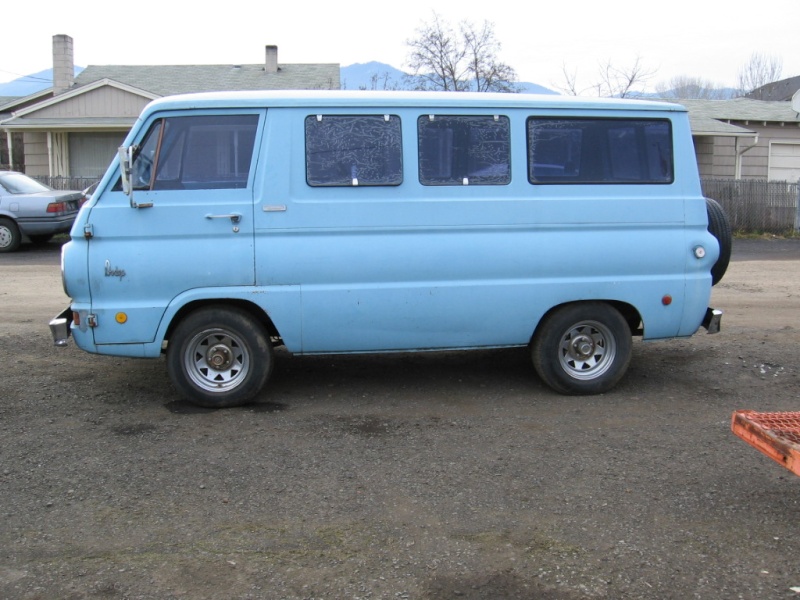
    With that we'll start a few pictures of how it looked when it was purchased.

    My '69 A100 Sportsman Revival Project 69_a1010

    My '69 A100 Sportsman Revival Project 69_a1011

    My '69 A100 Sportsman Revival Project 69_a1012

    My '69 A100 Sportsman Revival Project 69_a1013

    My '69 A100 Sportsman Revival Project 69_a1014

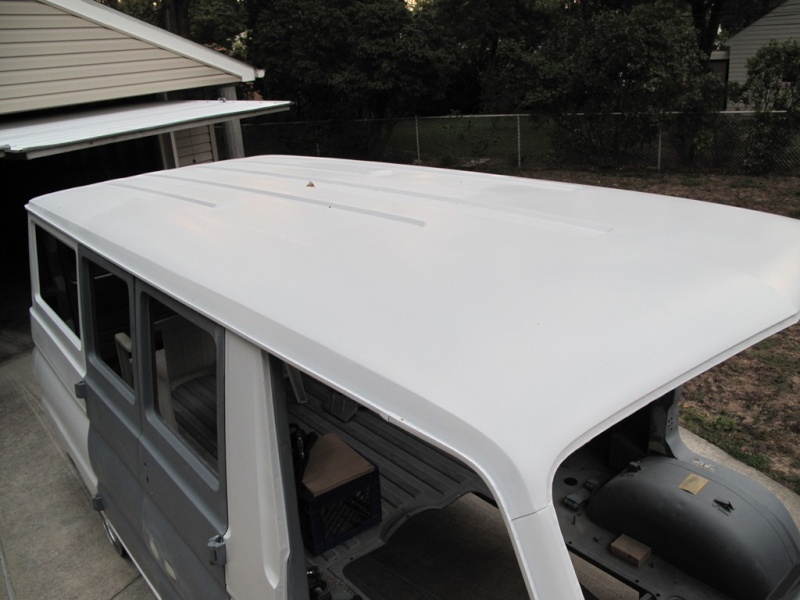
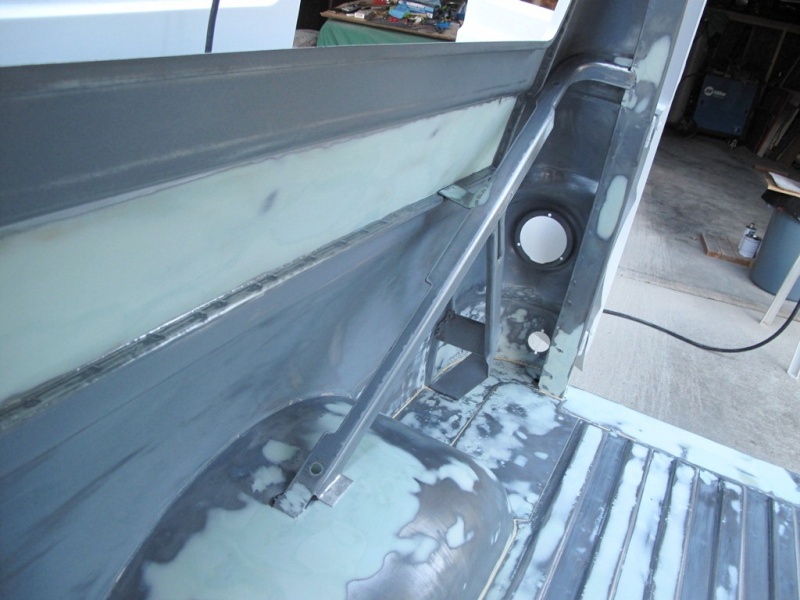
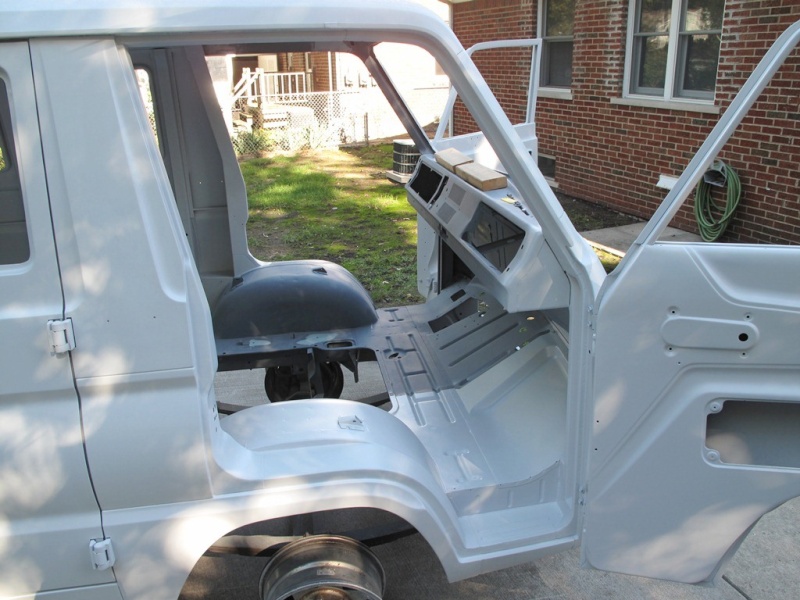
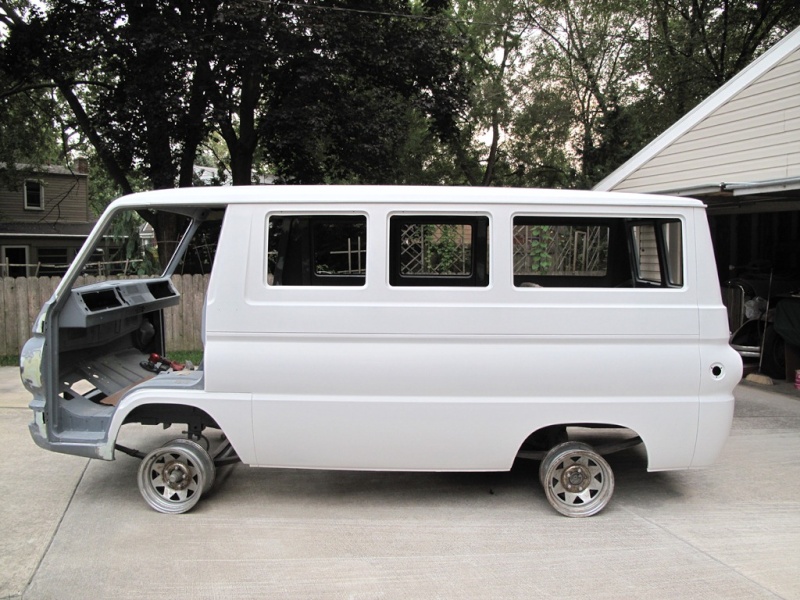
    And now a few current pictures where I had left off last fall before the start of this winter. Both the gray and the white is an epoxy primer from PPG. The gray primer was done at the same time that I had the body media blasted. There is a ton of body work that went into it before I could spray the white. I'll skuff the white and spray a high build for finish sanding before another sealer then paint.

    My '69 A100 Sportsman Revival Project A100_s10

    My '69 A100 Sportsman Revival Project A100_s11

    My '69 A100 Sportsman Revival Project A100_s12

    My '69 A100 Sportsman Revival Project A100_s13

    My '69 A100 Sportsman Revival Project A100_s14

    And finally a few pictures of the extent of fab work that I've been doing.

    The side doors were pretty bad and I picked up a set of back doors that from an earlier year that were pretty straight. The problem was that they were not set up for the pop out windows. One of the tasks was to transplant the latch area from the original to the replacement door. This was done on both side doors. This door also had to have the holes for the DODGE letters welded up.

    This is the original door that is now the doner for the pop out latch area.
    My '69 A100 Sportsman Revival Project A100_o10

    This is the replacement door that needed to be able to support the pop out.
    My '69 A100 Sportsman Revival Project A100_o11

    The doner part is fitted into the replacement door prior to welding.
    My '69 A100 Sportsman Revival Project A100_o12

    After welding and in the process of cleaning up weld.
    My '69 A100 Sportsman Revival Project A100_o13

    As there were no real flaw or reason to use filler this work just got a glaze coat. You'll note the inside of the bottom of the door also has glaze, this is where the holes for the DODGE letters were filled and ground smooth. The doors will all be sprayed with the white epoxy when all the body work has been finished on them.
    My '69 A100 Sportsman Revival Project A100_o14

    So now you all have an idea of my project. I hope that you've enjoyed the brief tour of where things stand. Like I mentioned at the start of this thread there is a lot more pictures and text on what it took to get to this point with the van within the thread I have on the AACA site. BTW, if/when I am looking for parts this is the van that they would be headed for. Scott...
    avatar
    Scotts_A100


    Number of posts : 160
    Location : Metro Detroit
    Registration date : 2010-06-02

    My '69 A100 Sportsman Revival Project Empty Re: My '69 A100 Sportsman Revival Project

    Post by Scotts_A100 Fri Mar 29, 2013 7:00 pm

    I realized that I didn't include the link to the AACA thread for those that might be interested in reading (looking at more pictures) of what I have been doing since begining this project back in 2010.

    The link to my thread/post on the AACA site:
    http://forums.aaca.org/f190/reviving-69-dodge-sportsman-van-281698.html

    Scott...
    BILL Carson
    BILL Carson


    Number of posts : 171
    Location : harrison mi
    Age : 68
    Registration date : 2011-05-02

    My '69 A100 Sportsman Revival Project Empty Re: My '69 A100 Sportsman Revival Project

    Post by BILL Carson Fri Mar 29, 2013 7:20 pm

    scott your van is looking great.
    Big W
    Big W


    Number of posts : 3282
    Location : Saskatoon,Sask,Canada
    Age : 60
    Registration date : 2011-01-13

    My '69 A100 Sportsman Revival Project Empty Re: My '69 A100 Sportsman Revival Project

    Post by Big W Fri Mar 29, 2013 7:32 pm

    That's looking nice Scott. I will have to check out that link you posted to see all that's been done. Have you decided on a paint color?
    G-Man
    G-Man
    Mayor
    Mayor


    Number of posts : 30743
    Location : Fowlerville, MI
    Age : 63
    Registration date : 2008-05-06

    My '69 A100 Sportsman Revival Project Empty Re: My '69 A100 Sportsman Revival Project

    Post by G-Man Fri Mar 29, 2013 7:59 pm

    Hope to see it at Baker's this year
    avatar
    Scotts_A100


    Number of posts : 160
    Location : Metro Detroit
    Registration date : 2010-06-02

    My '69 A100 Sportsman Revival Project Empty Re: My '69 A100 Sportsman Revival Project

    Post by Scotts_A100 Sat Mar 30, 2013 5:25 am

    Thanks for the comments.

    Bill: My "new" side doors are the back doors from your parts van you picked up, they look like they will work out just fine. I still haven't followed up on the front doors to see if they still might be available, still hoping.

    Big W: I've got two, maybe three, colors that I've narrowed it down to and will get some test pints to spray before making my final decision. It will have a white stripe though.

    G-Man: I've got my work cut out to make it with the van to Bakers, we'll have to see how things go.

    I general I was spoiled last year thinking that it might already be warm enough to be outside working on it. The problam is that I don't have a heated garage, but not many do, and the temps this spring are taking their time getting to the mid 50's at a minimum which I can work in. Scott...
    Digz
    Digz


    Number of posts : 3794
    Location : United States Six Lakes MI
    Registration date : 2008-05-17

    My '69 A100 Sportsman Revival Project Empty Re: My '69 A100 Sportsman Revival Project

    Post by Digz Sat Mar 30, 2013 5:56 am

    That is looking good Scott ! I like those Dodge lines more everytime I see them.
    Wheelie
    Wheelie


    Number of posts : 322
    Location : Plano, TX
    Registration date : 2013-02-22

    My '69 A100 Sportsman Revival Project Empty Re: My '69 A100 Sportsman Revival Project

    Post by Wheelie Sat Mar 30, 2013 1:47 pm

    Van looks great! Epoxy is hard stuff, I hate sanding that stuff but its durable.
    dix
    dix
    Moderator 1st Class
    Moderator 1st Class


    Number of posts : 8763
    Location : pittsburgh pa
    Age : 67
    Registration date : 2008-05-29

    My '69 A100 Sportsman Revival Project Empty Re: My '69 A100 Sportsman Revival Project

    Post by dix Sat Mar 30, 2013 2:07 pm

    your work is looking great. can't waite to see her painted,you said you have a parts van, do you have extra parts ?? members are always looking for some,


    _________________
    still vannin since 1974
    dodge man
    dodge man


    Number of posts : 2036
    Location : ohio
    Registration date : 2012-08-08

    My '69 A100 Sportsman Revival Project Empty Re: My '69 A100 Sportsman Revival Project

    Post by dodge man Sat Mar 30, 2013 2:41 pm

    AN AWESOME JOB THERE SCOTT, I WISH THE GUY WHO I BOUGHT MINE FROM HAD DONE AS NICE OF WORK,,
    avatar
    Scotts_A100


    Number of posts : 160
    Location : Metro Detroit
    Registration date : 2010-06-02

    My '69 A100 Sportsman Revival Project Empty Re: My '69 A100 Sportsman Revival Project

    Post by Scotts_A100 Sat Mar 30, 2013 5:11 pm

    Again thanks for the nice comments.

    Digz (Joe): I grew up with Dodge (Chrysler) products and we used a company car, actually it was an A100 Sportsman Van one vacation. My dad had worked for Chrysler at the time. I've always had a thing for these A100 vans.

    Wheelie: The epoxy is hard I'll give you that but not all that bad to work with. I was lucky and ended with no runs spraying the white epoxy but I wish I could say the same with the gray epoxy they sprayed after media blasting it.

    Dix: I must have mis-stated something earlier that gave the impression that I have a parts van. I did pick up some part for my van from both Bill Carson when he parted out the parts van he bought to redo his roof and also some parts from Digz (Joe) but I myself do not have a parts van. I could have used one though.

    Dodge Man: I been trying to keep this project real because it's realy only going to be a driver. One of my brothers who stops by to check it out while I'm working on it keeps telling me I thought it wasn't a show car, me reply is that it's not. My problem though is that I when I'm working on things it just has to be right, not just good enough, and that can really push the amount of time I end up in this. I could have just replaced the engine and called it good after getting it home but I just couldn't.

    That's it for me for now, again thanks for the comments. Scott...
    avatar
    Scotts_A100


    Number of posts : 160
    Location : Metro Detroit
    Registration date : 2010-06-02

    My '69 A100 Sportsman Revival Project Empty Re: My '69 A100 Sportsman Revival Project

    Post by Scotts_A100 Mon Oct 28, 2013 6:17 pm

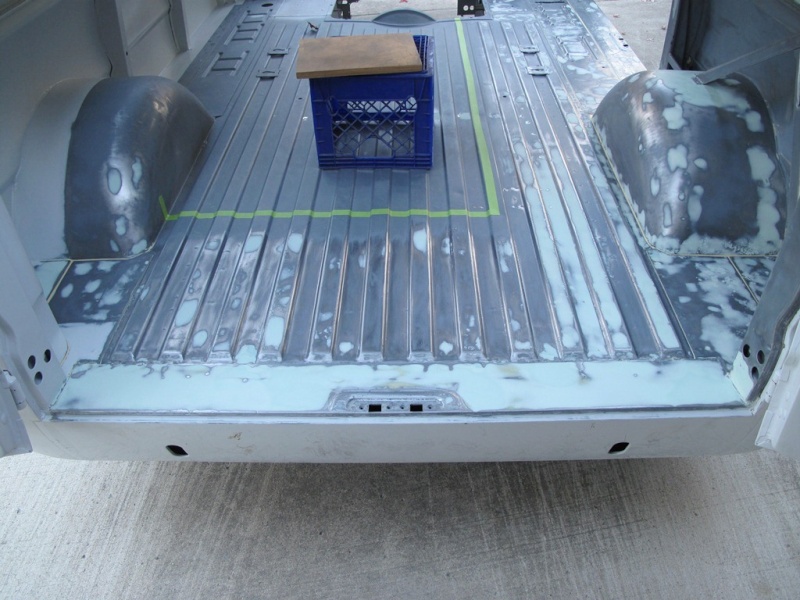
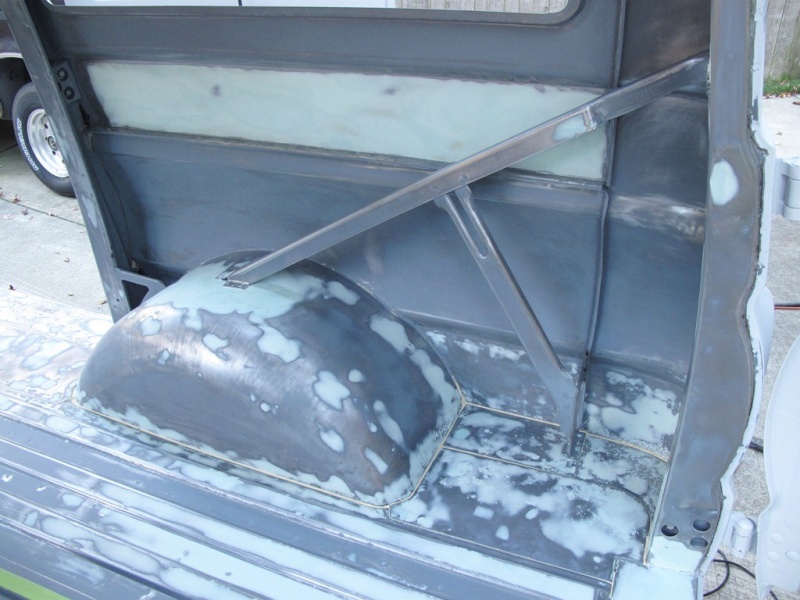
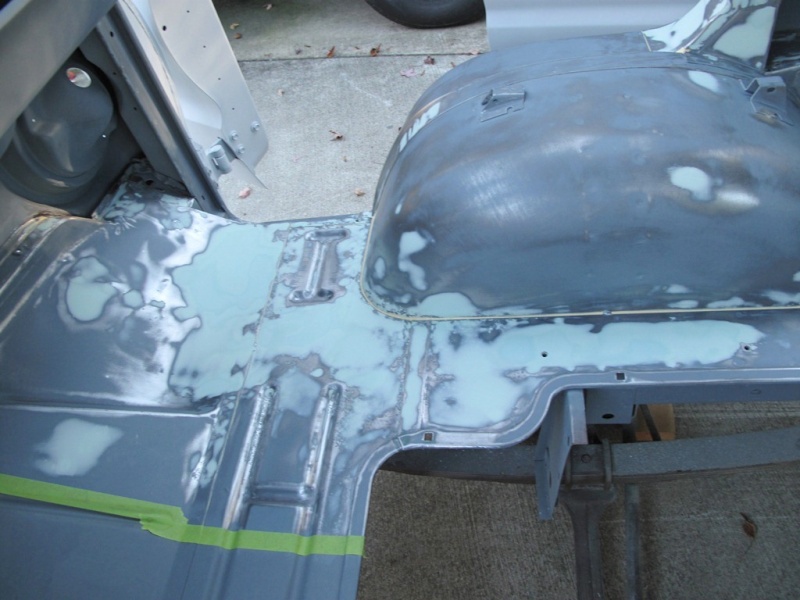
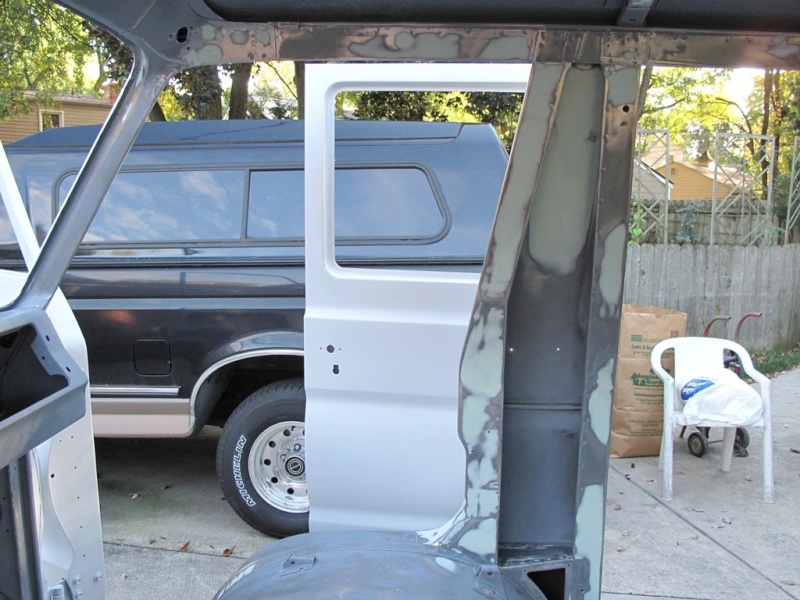
    Just thought I'd share an update as to how far I actually got this year since my last update. In total not actually appear to be all that much further, but it was a lot of work and the weather  and other sideline events played heck with me this summer.

    My '69 A100 Sportsman Revival Project A100_210

    My '69 A100 Sportsman Revival Project A100_211

    My '69 A100 Sportsman Revival Project A100_212

    My '69 A100 Sportsman Revival Project A100_213

    My '69 A100 Sportsman Revival Project A100_214

    My '69 A100 Sportsman Revival Project A100_215

    My '69 A100 Sportsman Revival Project A100_216

    My '69 A100 Sportsman Revival Project A100_217

    My '69 A100 Sportsman Revival Project A100_218

    My '69 A100 Sportsman Revival Project A100_219

    My '69 A100 Sportsman Revival Project A100_220

    My '69 A100 Sportsman Revival Project A100_221

    That completes the body work, although some work that I'd completed were not shown here in detail as it had by this time been covered up by the epoxy primer. All work (and comments) on my project though have been documented on my thread on the AACA site. The next set shows nothing more that how far the epoxy primer got this year.

    My '69 A100 Sportsman Revival Project A100_222

    My '69 A100 Sportsman Revival Project A100_223

    My '69 A100 Sportsman Revival Project A100_224

    My '69 A100 Sportsman Revival Project A100_225

    My '69 A100 Sportsman Revival Project A100_226

    My '69 A100 Sportsman Revival Project A100_227

    My '69 A100 Sportsman Revival Project A100_228

    My '69 A100 Sportsman Revival Project A100_229

    My '69 A100 Sportsman Revival Project A100_230

    My '69 A100 Sportsman Revival Project A100_231

    My '69 A100 Sportsman Revival Project A100_232

    My '69 A100 Sportsman Revival Project A100_233

    So that pretty much captures where it stands. I was so close to finishing the inside it bothered me alot that Fall was closing in. Just after this the temps dumped into the upper 50's and although I could have done some more body work I would not have been able to have gotten it covered (protected) with the epoxy primer. Probably not realistic but I'm hoping for a short winter and looking forward to next spring already. Scott...
    Magic Bus
    Magic Bus


    Number of posts : 1422
    Location : -Gateway to the West - St Louis Missouri
    Registration date : 2009-12-02

    My '69 A100 Sportsman Revival Project Empty Re: My '69 A100 Sportsman Revival Project

    Post by Magic Bus Mon Oct 28, 2013 7:21 pm

    Thats looking fantastic and I and am sure many others here can feel your pain!
    avatar
    Scotts_A100


    Number of posts : 160
    Location : Metro Detroit
    Registration date : 2010-06-02

    My '69 A100 Sportsman Revival Project Empty Re: My '69 A100 Sportsman Revival Project

    Post by Scotts_A100 Mon Oct 28, 2013 7:50 pm

    No doubt that others have been where I've been traveling trying to make some headway. Thank's for the nice comment but there is still has a long way to go and I can only hope that it turns out as nice as yours did. Scott...
    avatar
    Guest
    Guest


    My '69 A100 Sportsman Revival Project Empty Re: My '69 A100 Sportsman Revival Project

    Post by Guest Mon Oct 28, 2013 9:20 pm

    I just went through your whole thread on the other site and hot damn man your detail and patience is incredible!! Nice work.
    Digz
    Digz


    Number of posts : 3794
    Location : United States Six Lakes MI
    Registration date : 2008-05-17

    My '69 A100 Sportsman Revival Project Empty Re: My '69 A100 Sportsman Revival Project

    Post by Digz Tue Oct 29, 2013 2:36 am

    Sure is looking nice Scott. I noticed that slot for the step lever is a little ragged looking. Is that how they were done? I never paid attention to the one on my 66.
    Vannin Ken
    Vannin Ken


    Number of posts : 292
    Location : Brighton,MI
    Registration date : 2012-12-29

    My '69 A100 Sportsman Revival Project Empty Re: My '69 A100 Sportsman Revival Project

    Post by Vannin Ken Tue Oct 29, 2013 3:37 am

    Nice work Scott.. I love doing bodywork. What color are you goin with? Ken
    G-Man
    G-Man
    Mayor
    Mayor


    Number of posts : 30743
    Location : Fowlerville, MI
    Age : 63
    Registration date : 2008-05-06

    My '69 A100 Sportsman Revival Project Empty Re: My '69 A100 Sportsman Revival Project

    Post by G-Man Tue Oct 29, 2013 3:56 am

    Looks bettter than factory
    avatar
    Scotts_A100


    Number of posts : 160
    Location : Metro Detroit
    Registration date : 2010-06-02

    My '69 A100 Sportsman Revival Project Empty Re: My '69 A100 Sportsman Revival Project

    Post by Scotts_A100 Tue Oct 29, 2013 6:36 am

    Again, thanks for all the nice comments.

    Blackyck; I hope that you enjoyed the thread on the AACA site as some times I can ramble on. As far as having patiences and getting into the details the way I tend to, it sure slows down the pace and progress at times. I really just wanted a nice looking original driver and would not have guessed it was going to take as long as it has so far.

    Digz (Joe); The slot looks like it was cut with a cutting tourch and I was thinking that it may have been done at a dealer as the original colors under the blue was the copper metallic with the white stripe/belt line. As to the completeness of the blue paint job I'd come to think that the dealer had a customer that wanted a blue van with the step and the customer ended up getting what he wanted. Other than that I've no clue.

    Vannin Ken; Not certain on the color yet but my one brother thinks I should go back to the copper metallic with white stripe/belt line, I've also considered the med green matallic with the white stripe/belt line. Whatever color it gets it will be what was available from the factory when it was built.

    G-Man; It's probably better than factory in some areas and that is because I look at a given area that I am working and wonder why the fit/finish is so poor and if I can clean it up I do as I work it. The down side is it takes time and there are other areas of the van where the fit was just bad and because it's welded together from the factory that way that's the way it's going to stay. It's been hard at times to not attempt to change/clean something up because of it. Digz comment about the ragged slot is an example, I really did consider cutting the ragged area out and weld clean lines in but got smart and decided that would be stupid as no one would see it.

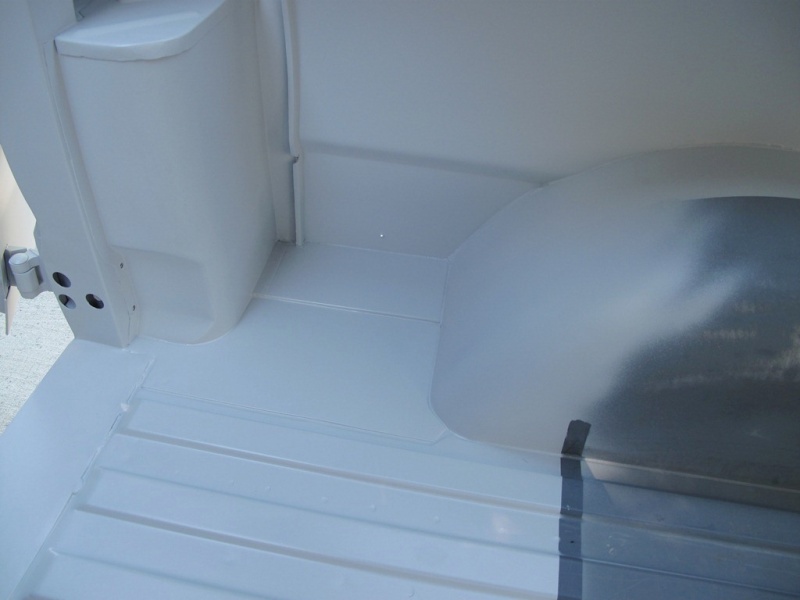
    All the filler work you all saw in the pictures inside the van is actually a body glaze as there was no real depth to fill. I was covering up small surface rust pits in the metal and dings or the grind marks from the hundered screw holes that I welded up in the floor, wall and roof ribs. The model is the Basic Sportsman so there was no carpet or rubber mat in the back so the floor was exposed. The walls were also exposed from the factory as there were no trim panels so I'd spent more time trying to get them straight which is a challenge as anthing to correct outside body issues would transfer the problem inside, so far it turned out looking nice. Again, thanks eveyone for the nice comments. It helps to offset the amount of effort that I've put into it. Scott...
    facechicken
    facechicken


    Number of posts : 21
    Location : Hiawatha, KS
    Registration date : 2013-04-12

    My '69 A100 Sportsman Revival Project Empty Re: My '69 A100 Sportsman Revival Project

    Post by facechicken Tue Jan 14, 2014 5:42 am

    I am back to working on my 69 Sportsman A108, hows your progress coming along? Anything new and exciting?
    avatar
    Scotts_A100


    Number of posts : 160
    Location : Metro Detroit
    Registration date : 2010-06-02

    My '69 A100 Sportsman Revival Project Empty Re: My '69 A100 Sportsman Revival Project

    Post by Scotts_A100 Tue Jan 14, 2014 6:25 am

    Thanks for asking but there has been no work on the van since my last update. My garage is full and cold this time of year and it doesn't help that we are having one of our old fashion winters here this year, there has been lots of snow and very cold. I thought about getting something done on the shop side of the garage but the space is pretty much taken up in the winter for storage too and besides the snow blower has been pulled out and is parked at the ready.

    Although I pretty much shift my attention to inside projects during the winter months I still make time though planning out my to do list while I wait for the spring thaw to get here. It always is a contest of what I plan to accomplish and what actually gets acomplished.

    Looking back thru the photos of where I had left off in the fall I am reminded how close I am to completing the body work and also how much work went into getting the work already done completed. With some luck this year with the weather and no projects/issues that sideline me I'm going to do my best to get this painted and back together this year. I am so looking forward to taking that first ride around the block in it. Scott...
    sweetvan
    sweetvan


    Number of posts : 251
    Location : Ventura, CA, 93003
    Registration date : 2013-12-16

    My '69 A100 Sportsman Revival Project Empty Re: My '69 A100 Sportsman Revival Project

    Post by sweetvan Sat May 17, 2014 9:15 am

    Very nice work, keep it up, one spot at a time.
    Sweetvan, also in progress.
    avatar
    Scotts_A100


    Number of posts : 160
    Location : Metro Detroit
    Registration date : 2010-06-02

    My '69 A100 Sportsman Revival Project Empty Re: My '69 A100 Sportsman Revival Project

    Post by Scotts_A100 Sat May 17, 2014 5:19 pm

    Thanks for the compliment. I've yet to be able to work on it this year which has been bugging me a bit. It's either been too cold, or warm enough but raining, or cold and raining, or warm and other things that had to be done.

    My objective is to be able to start work on it within the next week or two as the other outside work will be caught up, we'll see. Scott...

    Sponsored content


    My '69 A100 Sportsman Revival Project Empty Re: My '69 A100 Sportsman Revival Project

    Post by Sponsored content


      Current date/time is Sun Oct 06, 2024 6:21 pm