VintAGE-Vans

Would you like to react to this message? Create an account in a few clicks or log in to continue.

BRINGING IT ALL TOGETHER.... A's, G's & E's


+3
vanny
savage
bluesprint260
7 posters

    Travelwagon Build

    bluesprint260
    bluesprint260


    Number of posts : 41
    Location : Victoria BC
    Registration date : 2018-06-22

    Travelwagon Build  Empty Travelwagon Build

    Post by bluesprint260 Fri May 01, 2020 11:58 pm

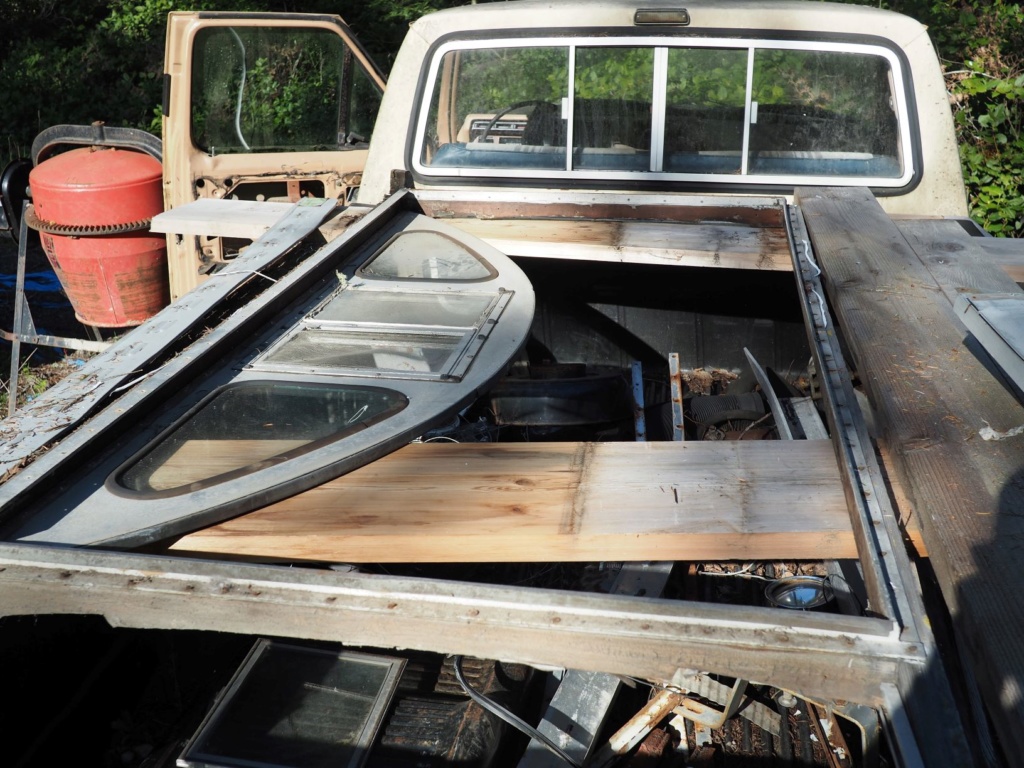
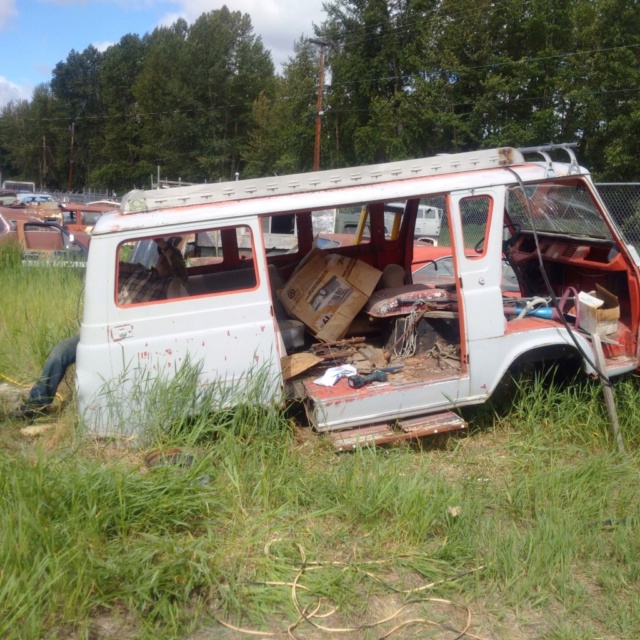
    I am going to start posting some images and documenting my Travelwagon build. I am a year and a half into the project so some of the images will be in the past. I live an Vancouver Island in British Columbia and I looked at several vintage vans, but all were really rusty. I posted a wanted add on craigslist for a Travelwagon. Some who had them contacted me, some who had seen them told me about them in peoples yards. I followed the few leads that I got but most wanted more than I wanted to pay or they were not for sale. A guy told me about one in an auto wrecker in Princeton BC. I called the owner of the yard up and inquired about the condition. The van was picked over but the top was intact... to maybe a good template. I kept it in mind and broadened my search to vans. They seemed to be more prevalent south of the border so began to keep my eye open for a van that was from the dryer part of the province or the Spokane area in an attempt to find a van that wasn't so rusty. I bought one that I made an agreement to purchase sight unseen. I will speak more about that later. I made the arrangements to bring it across the border and made a trip from Vancouver island to Coeur d'Alene, ID with my dad and his truck on a weekend. We swung by Princeton on the way back and collected the top.Travelwagon Build  Img_2010
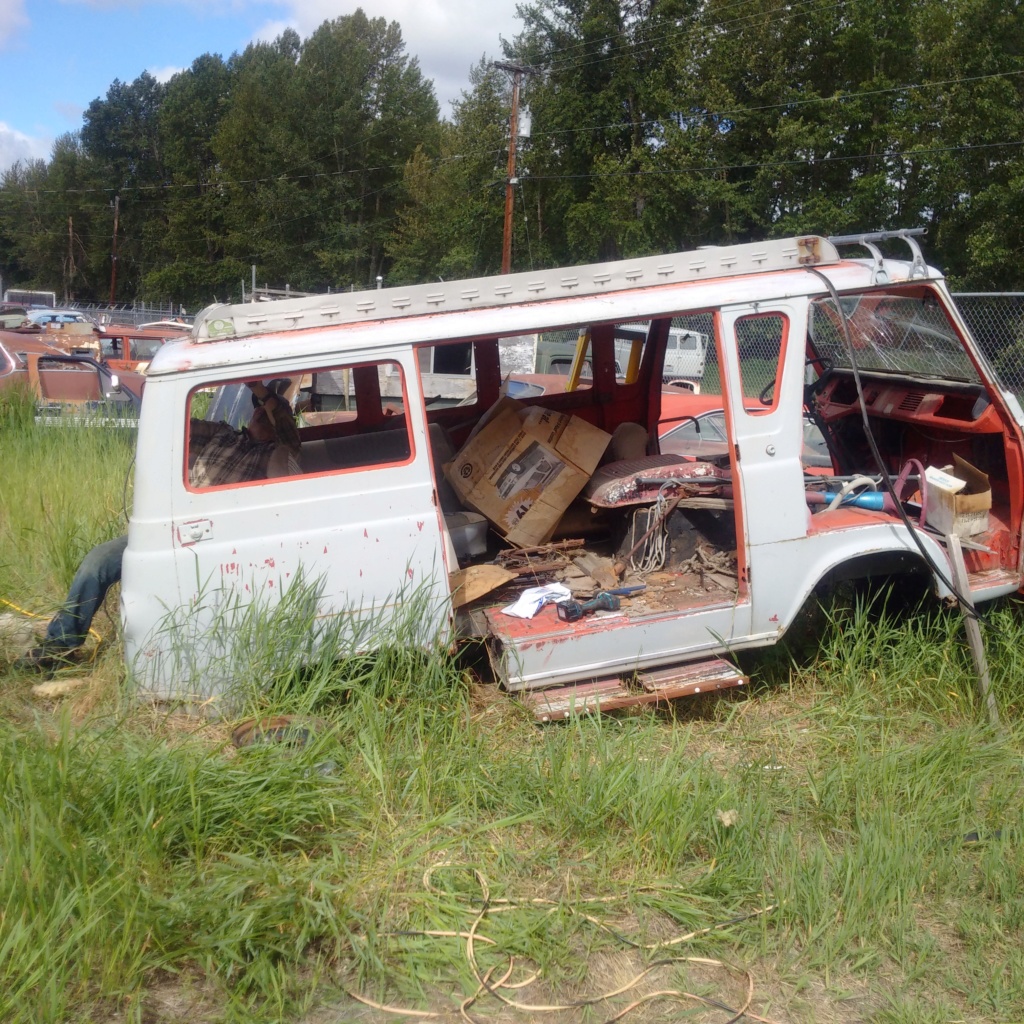
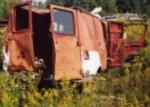
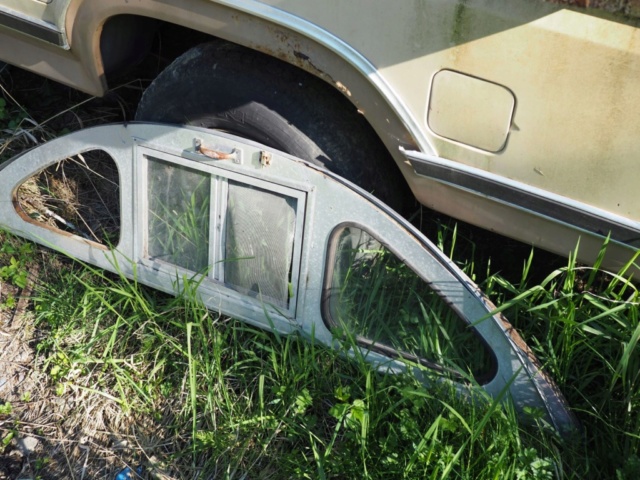
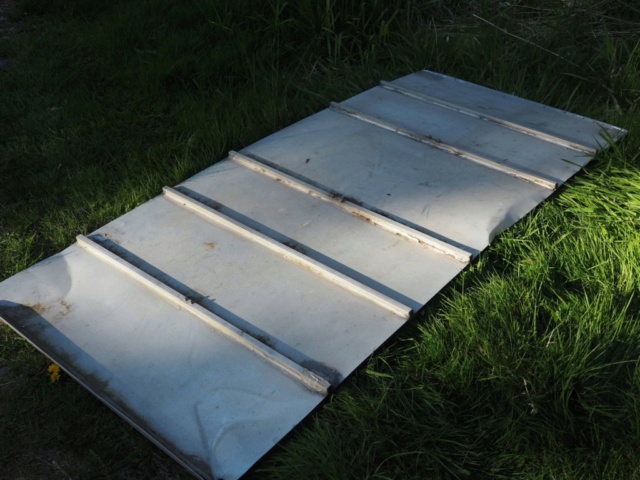
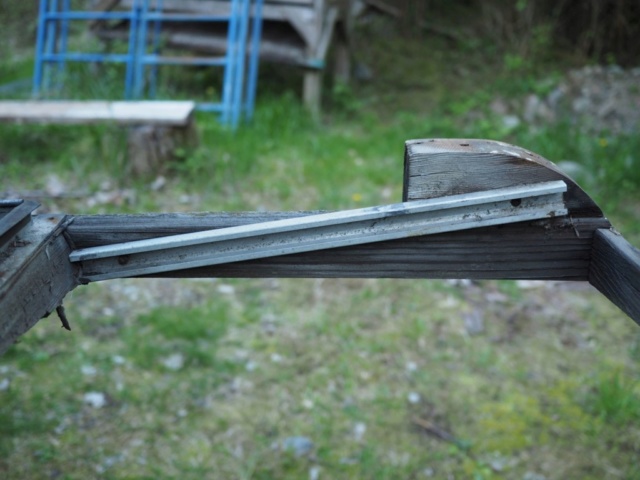
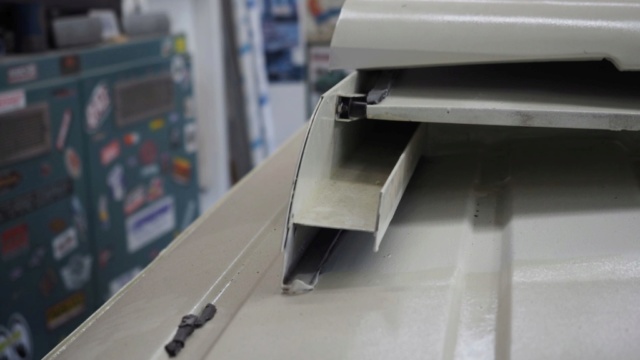
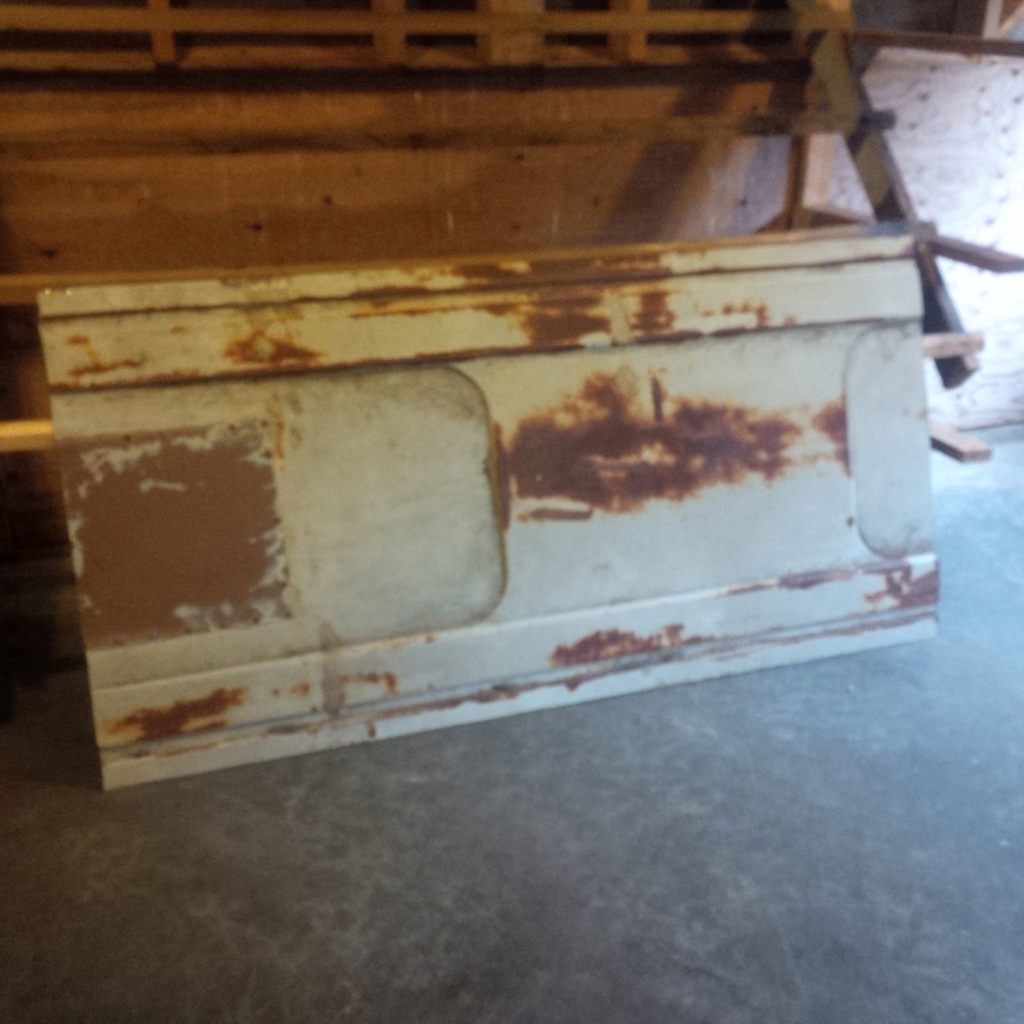
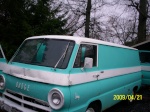
    This is the Van in the Princeton Yard. I took the top and the step... which was pretty rusty but the mechanism was intact.
    Travelwagon Build  01111_10
    Travelwagon Build  00a0a_10
    Travelwagon Build  00j0j_10
    Travelwagon Build  00606_10
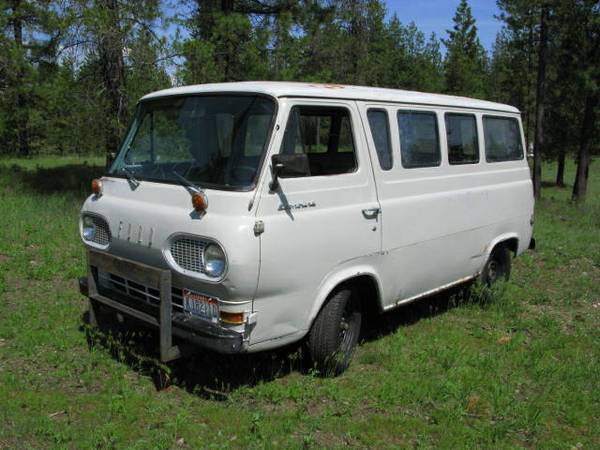
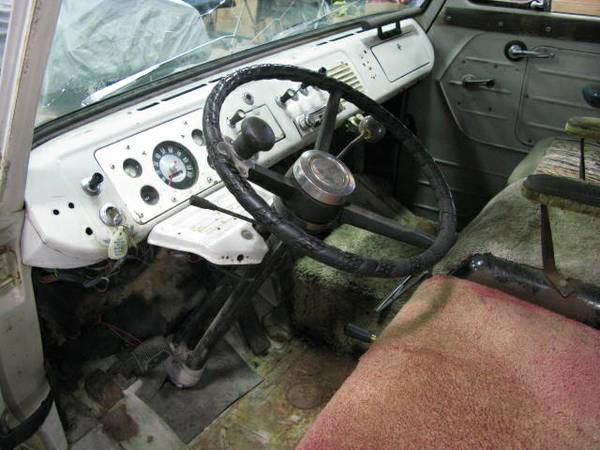
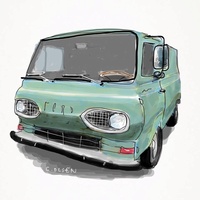
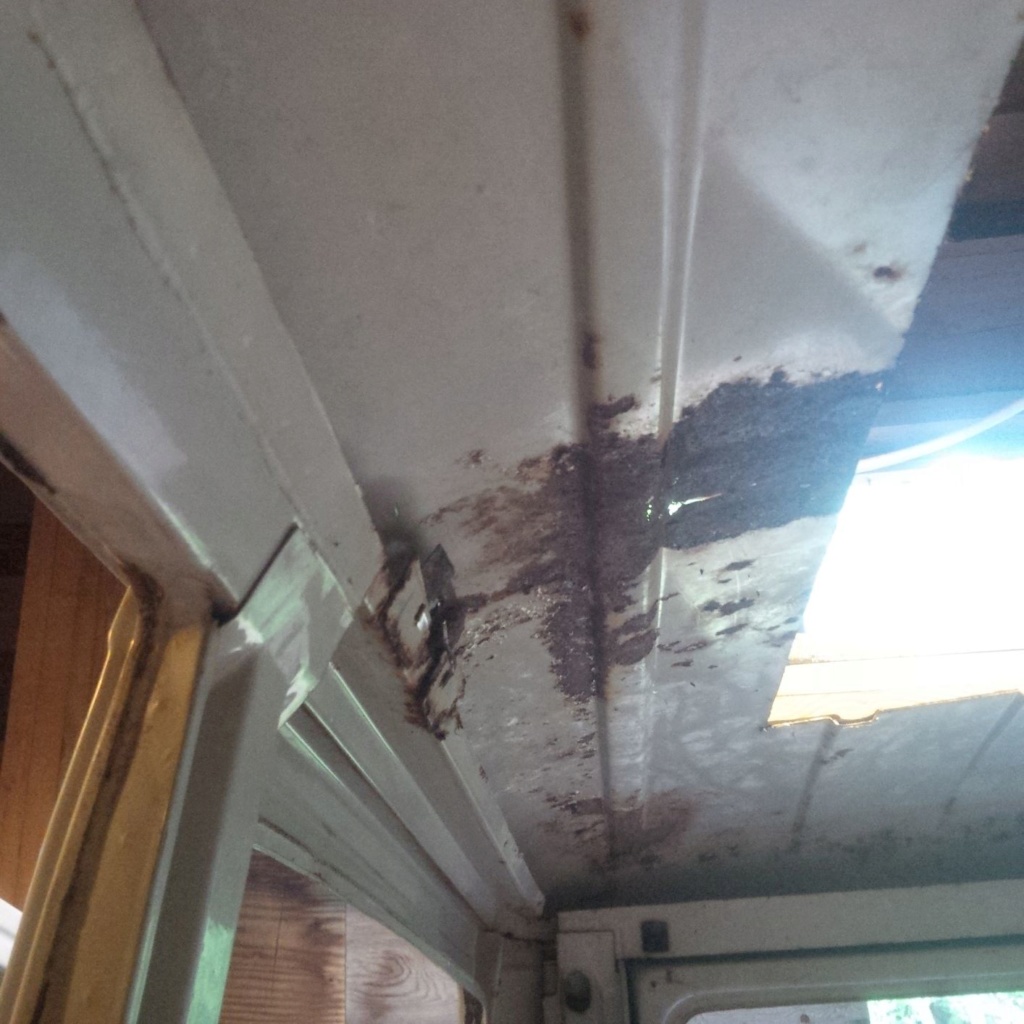
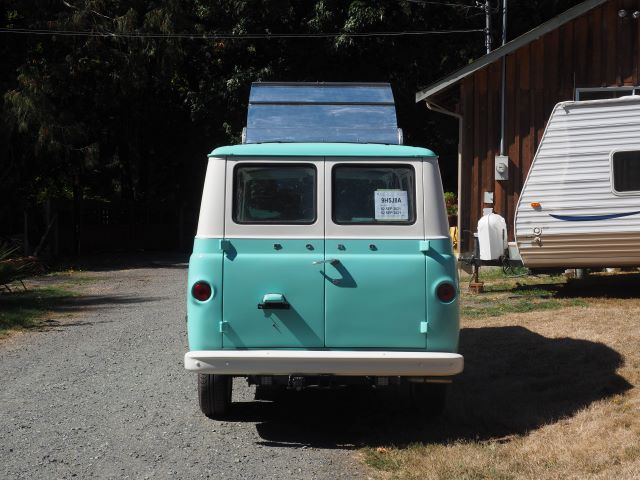
    The van from Idaho looked pretty good in the exterior images. the worst part was the roof, which I thought I wouldn't have to deal with too much because I was going to cut alot of it off for the travelwagon top. There was also visibly a rocker panel on the driver side that was rusty, and the rear driver side door post had the hinge loose because of some sort of rust. i had pretty much already rented a trailer, filed the paperwork at the border, and committed a weekend so didn't look to hard and loaded it up.


    Travelwagon Build  P6100010
    Travelwagon Build  P2050210

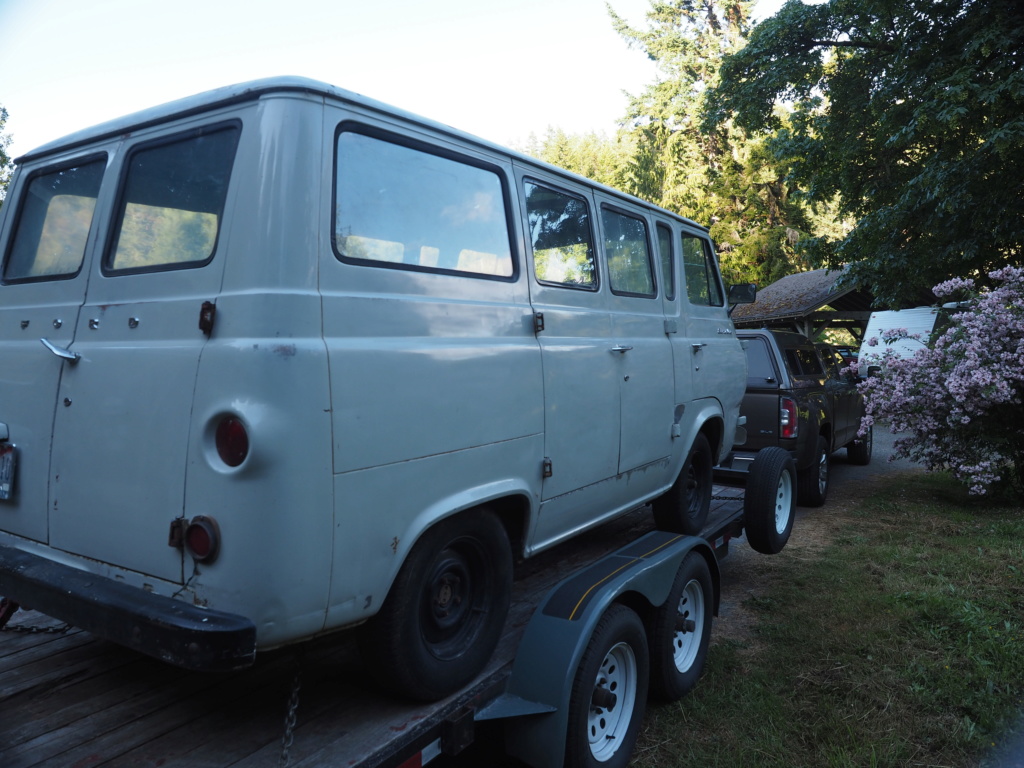
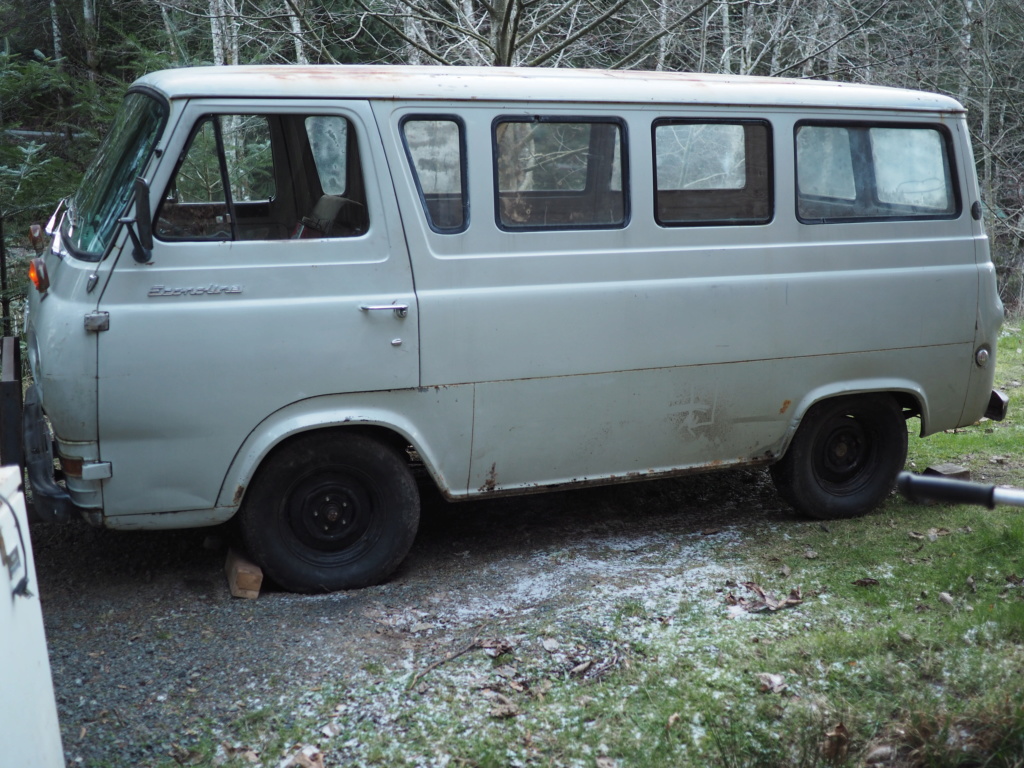
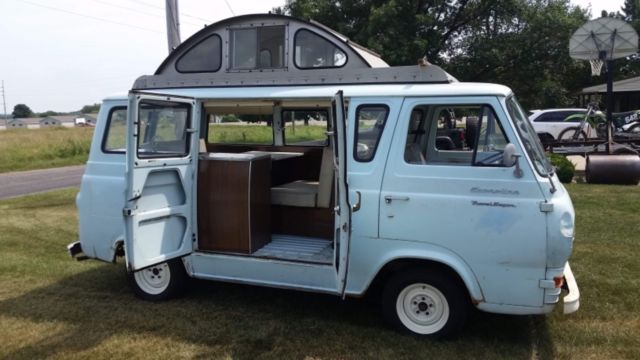
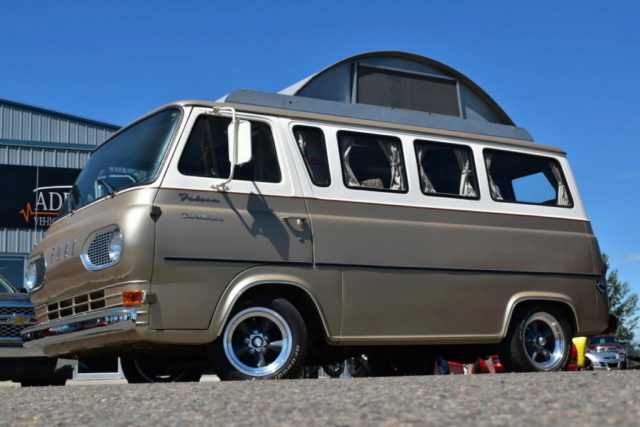
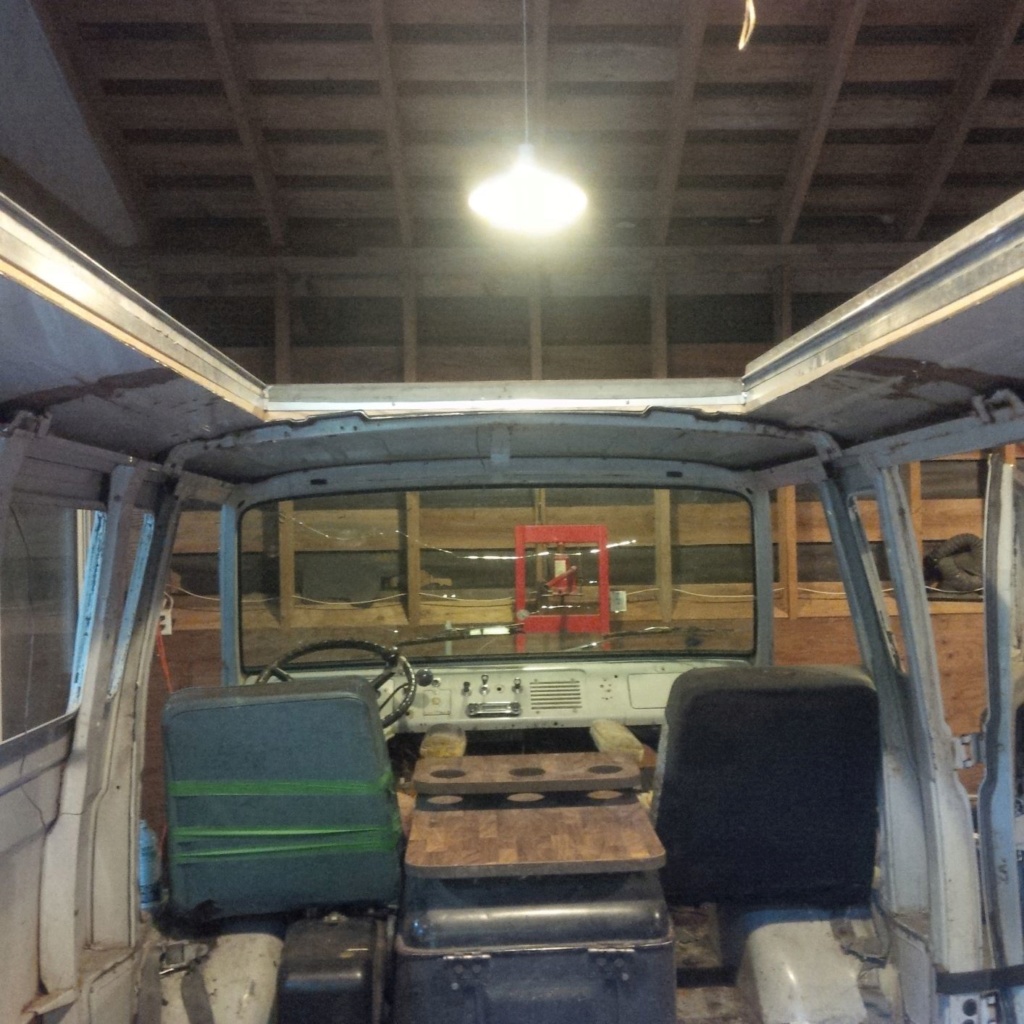
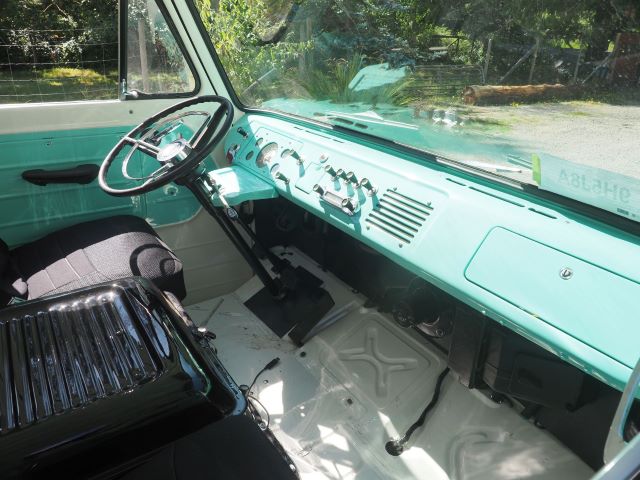
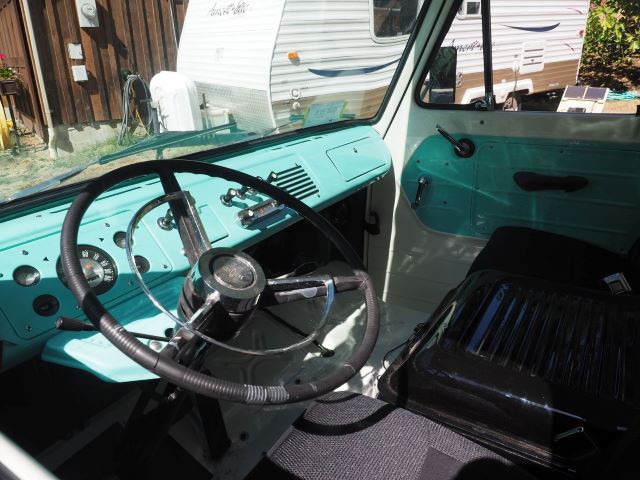
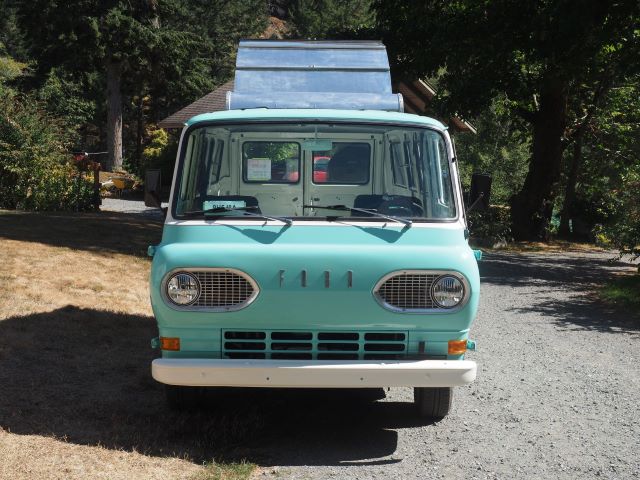
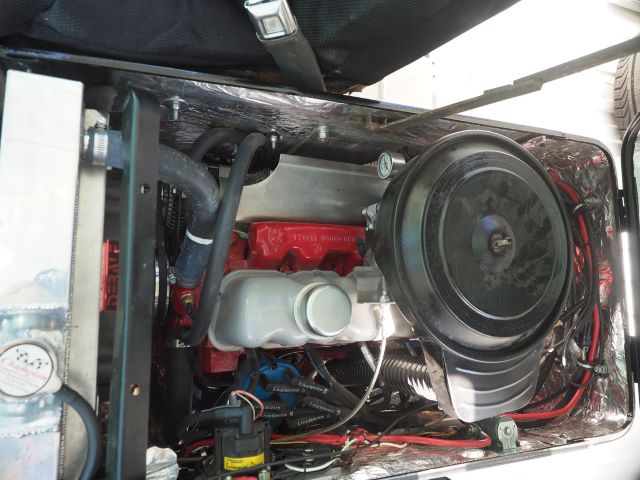
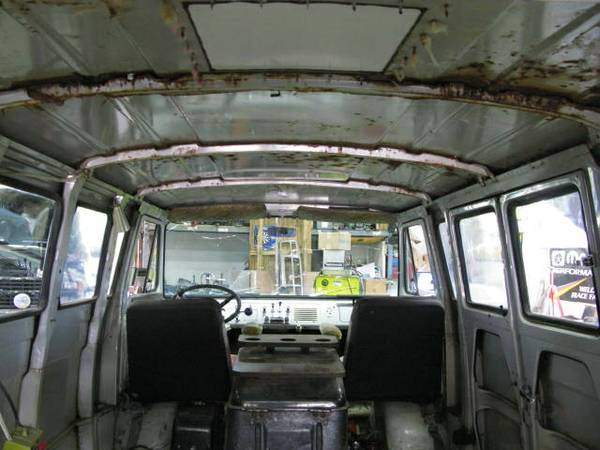
    Here are some more pics of it back on Vancouver Island. It had a 200 that the previous owner had put in it with a 3:03 (?) 3 speed and the small rear end. it ran and drove, had marginal brakes but was mostly all there. The previous owner was the second owner. The previous owner being the US Government. It was an interagency vehicle that was loaned to whatever branch of the gov't needed vehicles. I have the date he bought it somewhere but I think it was sometime in the early 70's. He had used it to camp with his family in it. It had close to 400,000 miles on the chassis as his records showed and if memory serves.
    Travelwagon Build  Img_2011
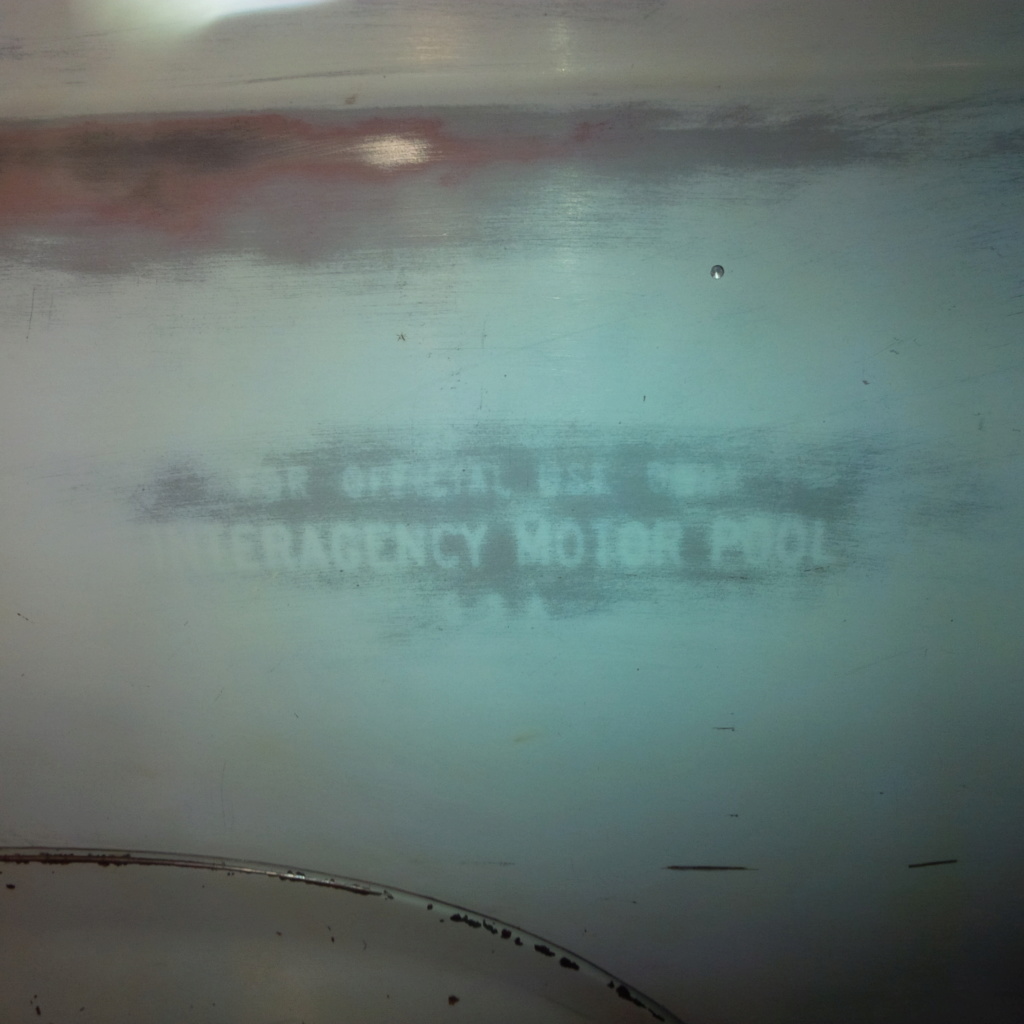
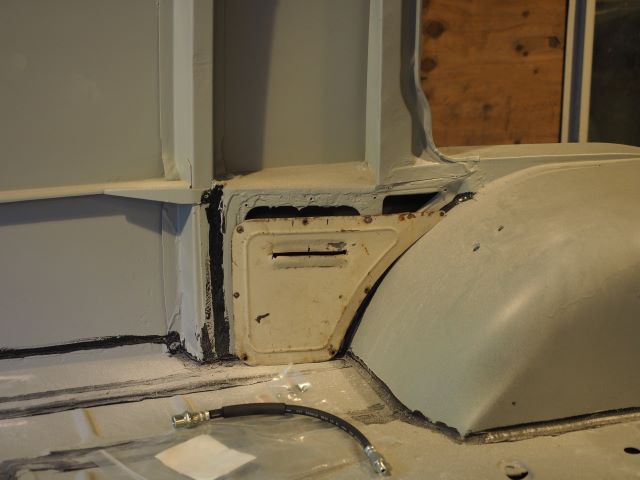
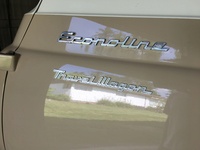
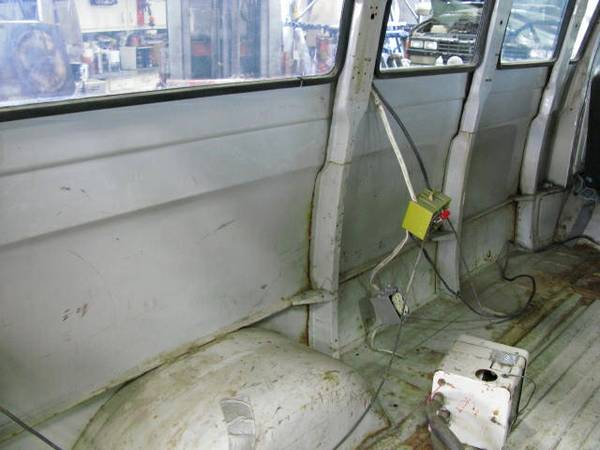
    "For Official use Only - Interagency Motor pool", The hazard lights on the front of the van and the hole on the driver side back corner look to be part of the original govt configuration. it also had rivets in the roof where racks once were. I have seen other racks that looked to be original to the vans.

    I used it as a yard truck for a few months, and as storage as all vans seem to do before I began working on it... more to come
    savage
    savage


    Number of posts : 2626
    Location : Where Rust Never Sleeps in Ft Wayne IN
    Registration date : 2008-05-15

    Travelwagon Build  Empty Re: Travelwagon Build

    Post by savage Sat May 02, 2020 5:22 am

    Look's like a good van to start your project.
    Does it have a seat on the doghouse, or just arm rest???
    My 1st van was a 64 Econo, panel. Always had people riding on doghouse lid
    bluesprint260
    bluesprint260


    Number of posts : 41
    Location : Victoria BC
    Registration date : 2018-06-22

    Travelwagon Build  Empty Re: Travelwagon Build

    Post by bluesprint260 Sat May 02, 2020 10:02 am

    The previous owner had built a box at the front of the doghouse for a kids feet to sit on and had a cushion that fit between the armrests. It wasn't an ford official product seat. Oh how things have changed.
    bluesprint260
    bluesprint260


    Number of posts : 41
    Location : Victoria BC
    Registration date : 2018-06-22

    Travelwagon Build  Empty Re: Travelwagon Build

    Post by bluesprint260 Sat May 02, 2020 10:51 am

    Here are some details of the top, A project that I worked on in the winter. I actually didn't know that there were two versions of this top when I went to Princeton to pick it up. The early top was made of wood and aluminum. I think I have seen them on vans up till 1964, but that was on a craigslist add so it may have been added later. My van is a 1965. I do have ford publications that show this one ( with the two portals and a small window in the centre ) as opposed to the galvanized steel top that is more common ( with the single large window in the centre).

    Travelwagon Build  P4280410

    Travelwagon Build  Travel17

    Travelwagon Build  Travel16

    Travelwagon Build  Travel15

    These are some of the Images of the template old type aluminum and wood top.

    Travelwagon Build  Travel14

    Travelwagon Build  Travel13

    Travelwagon Build  Travel12

    Travelwagon Build  Travel11

    Here is the Frame that I have made so far. It is kind of a hybrid between the two designs. In my opinion the galv top is a better and more leak proof design. I decided that I wanted to do something to make the top more weather proof so it would shed water better. I made two gutters out of aluminum and made welded aluminum ends and uprights. I also want to put my canoe on the van and so the welded uprights will fit racks into the round ends of the top. The top will go up with the canoe off but the racks can stay on. The wood had to be fitted so that it would fit the contour of the van. I'm hoping it will be stiffer and keep the wood portions a little more maintenance friendly as it will be not so exposed.

    Travelwagon Build  Travel10

    Here is an image of a galvanized later top. You can see how there is no wood and it has a gutter built into the design. There is also no wood that is sealed to the roof of the van. A place it could likely rot and leak. The aluminum maybe has a little more space age 60's look.

    Travelwagon Build  1963-f10
    Travelwagon Build  Falcon10

    Here the two tops shown on vans. The louvres on the sides of the aluminum top drain the water off the wood frame. The later ones lost the louvres and have the integrated gutters instead.

    I hope you don't mind but I reimported your pics at the 640 Pixels setting so they wouldn't get cut off...Vanny Fantastic shop setup to do that work!!!
    savage
    savage


    Number of posts : 2626
    Location : Where Rust Never Sleeps in Ft Wayne IN
    Registration date : 2008-05-15

    Travelwagon Build  Empty Re: Travelwagon Build

    Post by savage Sun May 03, 2020 5:21 am

    Nice job doing some Major fab work for a Moe Better frame.
    Must of been fun getting the original one off without destroying it
    Travelwagon Build  Img_2011
    vanny
    vanny
    Moderator


    Number of posts : 14775
    Location : Ashburnham, MA
    Age : 65
    Registration date : 2012-09-22

    Travelwagon Build  Empty Re: Travelwagon Build

    Post by vanny Sun May 03, 2020 5:27 am

    Love this build! I like your improvements and am very jealous of that workshop! Great setup for getting things done...and the skills to follow through with your modifications! Keep up the Fantastic work! cheers cheers cheers


    _________________
    “The future will soon be a thing of the past."

    http://public.fotki.com/Vintage-Vans/vintage-vans-es/ruff-diamond-1/?cmd=fs_slideshow
    Seth G
    Seth G
    Vintage-Vans Listings Manager
    Vintage-Vans Listings Manager


    Number of posts : 2086
    Location : Anacortes, WA
    Age : 50
    Registration date : 2013-04-24

    Travelwagon Build  Empty Re: Travelwagon Build

    Post by Seth G Thu May 14, 2020 12:39 am

    Wow. It looks like you're doing a heck of job with that frame.
    bluesprint260
    bluesprint260


    Number of posts : 41
    Location : Victoria BC
    Registration date : 2018-06-22

    Travelwagon Build  Empty Re: Travelwagon Build

    Post by bluesprint260 Sat May 16, 2020 11:30 pm

    Thanks for all the positive comments... The next part of the project started off the big job of removing all of the rust. The van had some good parts to it.... none of the frame was rotten and all of the spring mounts were good. The body looked pretty ok at first glance but when you got closer there were pinholes in many places where steel backed the sheet metal. The worst part was the roof. Since I was cutting alot of it out I thought it was a good place to start.

    Travelwagon Build  Roof_210

    Travelwagon Build  Roof_110

    I made measurements when we removed the camper top and so I used it as a template and cut it out with a zip wheel. I drilled out the spot welds where the mostly rotten brackets were and had a look at what was left.

    Travelwagon Build  Roof_310

    Travelwagon Build  Roof_210

    Travelwagon Build  Roof_r10

    Travelwagon Build  Roof_310

    It looked way worse than I expected. I took the short roof brackets out of the donor van and so I had those to weld back in. I was hoping that the camper top would have removed all of the bad stuff but the pinholes went further to the edges than expected. I cut pieces out of the removed roof section and welded them in where the roof/ roof supports had met. I had to source a new front roof support. Another Econoline collector in Victoria let me remove one from his parts van. It was rough but repairable.

    Travelwagon Build  Roof_410

    Travelwagon Build  Roof_410

    You can see one of the 6 rectangular patches right where the roof support should be in the photo above. It has been primed so it is difficult to see.

    Travelwagon Build  510

    Travelwagon Build  Roof_510

    Travelwagon Build  610

    Travelwagon Build  Roof_610

    After needle gunning and sandblasting the rusty sections I sprayed epoxy primer, then undercoating. Not sure if it will be a good idea as I know there are many who don't like it. I thought that maybe the rubberish texture would inhibit some of the condensation that caused this rust in the first place. I think it does have an effect as the temperature of the coating feels warmer than the painted steel. After the undercoating I welded the braces back in. Sometime during this phase I also ordered and installed 3 Pt seatbelts into the van (from Wesco... they had ones designed for vans). I had to weld a location for the shoulder mount. I will add some photos of that later as I can't find them right now.

    The welding shrunk the roof quite a bit. I had to use hydraulic jacks to lift the roof enough to get the supports back in. There will be some bondo that will have to go on the roof to fair out the work but all in all it looks much improved.
    Seth G
    Seth G
    Vintage-Vans Listings Manager
    Vintage-Vans Listings Manager


    Number of posts : 2086
    Location : Anacortes, WA
    Age : 50
    Registration date : 2013-04-24

    Travelwagon Build  Empty Re: Travelwagon Build

    Post by Seth G Sun May 17, 2020 12:19 am

    Nice work. I've got some rust on my roof interior that I need to deal with at some point. I'll be interested in your seatbelt install. I'm getting ready to do that myself, but I just got cheapo ones on ebay.
    vanny
    vanny
    Moderator


    Number of posts : 14775
    Location : Ashburnham, MA
    Age : 65
    Registration date : 2012-09-22

    Travelwagon Build  Empty Re: Travelwagon Build

    Post by vanny Sun May 17, 2020 4:37 am

    It looks like you've got a good system of attack going...roof brackets look nice and solid in there! Thanks for the pics of this process as I've never seen the setup of a travelwagon roof system up close...I'm sure this build will be helpful to others who decide to take on this challenge in the future.


    _________________
    “The future will soon be a thing of the past."

    http://public.fotki.com/Vintage-Vans/vintage-vans-es/ruff-diamond-1/?cmd=fs_slideshow
    Tuck646
    Tuck646


    Number of posts : 1
    Location : Philadelphia PA
    Registration date : 2019-10-12

    Travelwagon Build  Empty Re: Travelwagon Build

    Post by Tuck646 Sun May 17, 2020 9:51 am

    bluesprint260 wrote:Here are some details of the top, A project that I worked on in the winter. I actually didn't know that there were two versions of this top when I went to Princeton to pick it up. The early top was made of wood and aluminum. I think I have seen them on vans up till 1964, but that was on a craigslist add so it may have been added later. My van is a 1965. I do have ford publications that show this one ( with the two portals and a small window in the centre ) as opposed to the galvanized steel top that is more common ( with the single large window in the centre).

    Travelwagon Build  P4280410

    Travelwagon Build  Travel17

    Travelwagon Build  Travel16


    Look @ that shop mang, dis guy don mezz a round mang .
    Travelwagon Build  Travel15

    These are some of the Images of the template old type aluminum and wood top.

    Travelwagon Build  Travel14

    Travelwagon Build  Travel13

    Travelwagon Build  Travel12

    Travelwagon Build  Travel11

    Here is the Frame that I have made so far. It is kind of a hybrid between the two designs. In my opinion the galv top is a better and more leak proof design. I decided that I wanted to do something to make the top more weather proof so it would shed water better. I made two gutters out of aluminum and made welded aluminum ends and uprights. I also want to put my canoe on the van and so the welded uprights will fit racks into the round ends of the top. The top will go up with the canoe off but the racks can stay on. The wood had to be fitted so that it would fit the contour of the van. I'm hoping it will be stiffer and keep the wood portions a little more maintenance friendly as it will be not so exposed.

    Travelwagon Build  Travel10

    Here is an image of a galvanized later top. You can see how there is no wood and it has a gutter built into the design. There is also no wood that is sealed to the roof of the van. A place it could likely rot and leak. The aluminum maybe has a little more space age 60's look.

    Travelwagon Build  1963-f10
    Travelwagon Build  Falcon10

    Here the two tops shown on vans. The louvres on the sides of the aluminum top drain the water off the wood frame. The later ones lost the louvres and have the integrated gutters instead.

    I hope you don't mind but I reimported your pics at the 640 Pixels setting so they wouldn't get cut off...Vanny   Fantastic shop setup to do that work!!!
    bluesprint260
    bluesprint260


    Number of posts : 41
    Location : Victoria BC
    Registration date : 2018-06-22

    Travelwagon Build  Empty Re: Travelwagon Build

    Post by bluesprint260 Sun May 17, 2020 10:14 pm

    I will post them at 640 pixels wide from now on. I think I have it figured out.
    bluesprint260
    bluesprint260


    Number of posts : 41
    Location : Victoria BC
    Registration date : 2018-06-22

    Travelwagon Build  Empty Re: Travelwagon Build

    Post by bluesprint260 Thu May 21, 2020 12:18 pm

    I did a 3 point seatbelt install when I had the roof apart. I didn't take any images at the time but will take some as I assemble it later.

    I saw some who mounted the shoulder attachment to the post. I thought that it was too far forward as the seatbelt lifted off my shoulder. I wanted to get the seatbelt about in the middle of the window but didn't want to weld a bar across the window. Above the window seemed too high. I found other users on VV that used the Wesco conversion van seat belts. They allow the attachment point to be higher up as it has a short segment of belt that connects higher up. https://www.wescoperformance.com/conversion-van-seat-belt.html . If you get these belts get the upper bolt to bolt the shoulder point to the van as well... I did not but realized I needed it later.

    There wasn't really a very strong connection point there with much sheet metal. I took some 3/16 angle and cut two short segments and welded them in on each side of the roof support connection. The angle iron fit relatively easily in the gutter just below the roofline. I welded it in along the top of the existing pinch weld in a few spots. Then i took a piece of 1/4" angle and fitted it below the roofline gutter. It kind of looks like ford left something out there anyhow as the sheet metal is confused at that point. I drilled three 3/8 holes through the lower 1/4" angle, through the sheet metal gutter, and up into the 3/16" upper angle. I put three grade 8 bolts in to sandwich it altogether.

    Travelwagon Build  Seat_b10

    You can see the top of the 3/16 angle and the tacks holding them in place. The lower 1/4" angle fitted in and a hole drilled for the seatbelt. i wanted 4 bolts but I couldn't quite fit them. The hard part is getting the wrench on the bolts to tighten it all up. It really just has to happen once however.

    For the receiver end of the seatbelt I got the belts that have a hard plastic support on them. With a seat in the van I marked and drilled a hole into the side of the doghouse so the receiver button was pressable above the doghouse. The stock seatbelt mounting used the doghouse on one of the two sides. I  welded up that hole and just moved it up. I will make a large reinforcement washer on the back when I do the final install.

    Travelwagon Build  Seat_b11

    For the retractor I saw another poster on VV who fit them into the access cover space behind the driver and passenger. The rollers fit in there tightly but low enough that I could get a bolt through the inner rocker panel behind the rear wheel. I will fabricate a heavy washer for that point too. Then I reshaped the cover to let the belt come out properly. This process was definitely better outlined elsewhere on VV. If you can find it again please post the name so credit can be given.

    Travelwagon Build  Lower_10


    I read that it is important for some retractors to have the unit in a  horizontal fashion. The location of the retractor and the location of the shoulder mount makes that work out. I can't remember if the Wesco retractor type makes that important or not. I might be confusing that with the belts in my other car.

    All in all I think that my solution worked very well and the belt is comfortable and easy to use. it also doesn't look too obtrusive or look like it is an aftermarket add on to the untrained eye. it is definitely better than fishing the belts from under the seat each time you want to use them... and will keep my head (a little more) out of the crumple zone in the event of that much feared crash in a vintage vehicle. I will take some photos of the belts installed as it goes together later.
    Seth G
    Seth G
    Vintage-Vans Listings Manager
    Vintage-Vans Listings Manager


    Number of posts : 2086
    Location : Anacortes, WA
    Age : 50
    Registration date : 2013-04-24

    Travelwagon Build  Empty Re: Travelwagon Build

    Post by Seth G Fri May 22, 2020 12:33 pm

    I don't have the window so I'm putting it in the middle of that area welding in some 1/8" plate across there. What I'm curious about is where you're anchoring the outboard part of the lap belt? As far as I can tell I'll have to bolt it through the wheel well. I like the idea of putting the retractor in that compartment, I'll have to look into that. I was going to weld in 1/8" plate across just above that.
    bluesprint260
    bluesprint260


    Number of posts : 41
    Location : Victoria BC
    Registration date : 2018-06-22

    Travelwagon Build  Empty Re: Travelwagon Build

    Post by bluesprint260 Sun May 24, 2020 9:32 pm

    You can see on the fender well in the above photo there are two holes. the forward hole is for the seat to mount and the rear/lower hole is for the seatbelt to attach. My van came with stock lapbelts... that hole was already there and has a doubler on the inside of the fender well.
    bluesprint260
    bluesprint260


    Number of posts : 41
    Location : Victoria BC
    Registration date : 2018-06-22

    Travelwagon Build  Empty More Current Images

    Post by bluesprint260 Mon Mar 14, 2022 11:15 pm

    Here are some more current photos of the van that I have been working on. Although I had intention of posting more often, turns out I did not. Next step is the camper interior. I am going to install a Webasto heater under the floor, and put a small fridge and furniture. I have an original gas stove from the travelwagon setup that needs to be modded for a more current gas cylinder.

    **If anyone out there has some fiberglass interior trim panels I would love to hear from you**


    The Van:
    - 200 six with a 4 on the tree
    -The trans is a Rug 3 speed overdrive "toploader imposter"
    -3.50 traction lock 9"
    - Home brew disc brakes and master cylinder
    - Champion aluminum rad
    - Derale Electric fan (cut down to 1/3 thickness) with custom shroud, surge tank
    - Large log head, ported and polished with larger valves fitted, welded in port divider, Head machined to accommodate 2 barrel adapter
    - Sneider camshaft
    - Holley sniper 2300 - controls 2 speed fan, and daytime running lights
    - 20 gallon mustang tank modified for econoline, fitted with slosh tray and 2000 ford econoline fuel pump assembly
    - Duraspark 2 distributor - modified springs
    - Ebay header
    - Ford 4G alternator with 2 V belt setup
    - Delay wipers from newer ford pickup
    - Led headlights
    - 3 point seatbelts
    - heated seats - pending - controls where choke control used to be on doghouse
    - Fabricated van top- has custom racks to put canoe or other on top- not shown


    Working on the seats next. Stock seats are going to be modified to have headrests and a little taller back. Just started driving it and am finding a bunch of minor details that still need attention. Holley sniper is kind of good but at the same time I'm not so sure. Not as easy as I thought it would be. I have come to see it's potential but it is not quite dialed in yet.

    Travelwagon Build  Interi10
    Travelwagon Build  Interi11
    Travelwagon Build  Exteri10

    Travelwagon Build  Exteri11
    Travelwagon Build  Exteri12
    Travelwagon Build  Cargo_10

    Travelwagon Build  Cargo_11
    Travelwagon Build  Engine10

    savage, Seth G and jrdunn96 like this post

    vanny
    vanny
    Moderator


    Number of posts : 14775
    Location : Ashburnham, MA
    Age : 65
    Registration date : 2012-09-22

    Travelwagon Build  Empty Re: Travelwagon Build

    Post by vanny Tue Mar 15, 2022 2:07 am

    Wow that’s really coming along nicely! Sounds like a ton of work but just keep pecking at it. Can’t wait to see you getting it dialed in!!! cheers cheers cheers


    _________________
    “The future will soon be a thing of the past."

    http://public.fotki.com/Vintage-Vans/vintage-vans-es/ruff-diamond-1/?cmd=fs_slideshow

    savage likes this post

    Otto
    Otto


    Number of posts : 125
    Location : Portland, Oregon
    Registration date : 2020-09-02

    Travelwagon Build  Empty Re: Travelwagon Build

    Post by Otto Sun Feb 26, 2023 9:06 pm

    Curious about the transmission you installed. Is this a three speed where third gear is overdriven, or does it have four speeds where fourth is overdriven? What did you do for the shift column?
    bluesprint260
    bluesprint260


    Number of posts : 41
    Location : Victoria BC
    Registration date : 2018-06-22

    Travelwagon Build  Empty Re: Travelwagon Build

    Post by bluesprint260 Fri Mar 17, 2023 2:16 pm

    Otto, I installed a three speed plus overdrive, but it has the same relative case dimension as a toploader 4 speed. I found a four on the tree shifter from a 1964 econoline that came with the supposedly weak dagenham transmission. I have the daganham still if anyone needs one. I had to make new shift linkages but overall it works quite good. I also had to make a rear trans mount and get a custom driveshaft made. It does make it quieter on the highway.

    wylee
    wylee


    Number of posts : 917
    Location : middletown,ny
    Registration date : 2009-04-03

    Travelwagon Build  Empty Re: Travelwagon Build

    Post by wylee Sat Mar 18, 2023 5:38 am

    freakin outstanding work sir

    Sponsored content


    Travelwagon Build  Empty Re: Travelwagon Build

    Post by Sponsored content


      Current date/time is Sun Apr 28, 2024 2:17 am