VintAGE-Vans

Would you like to react to this message? Create an account in a few clicks or log in to continue.

BRINGING IT ALL TOGETHER.... A's, G's & E's


2 posters

    Vics OLD SKOOL Shop

    donivan65
    donivan65
    Governor
    Governor


    Number of posts : 12220
    Location : San Diego, California
    Registration date : 2008-05-12

    Vics OLD SKOOL Shop Empty Vics OLD SKOOL Shop

    Post by donivan65 Fri Oct 30, 2015 10:31 am

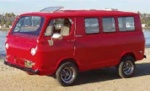
    ,,,,a look at whats in Old Skool Vics Shop,,,,,,,,


    ,,,,,,Just starting to get this section organized ,,,,,


    Last edited by donivan65 on Fri Oct 30, 2015 11:13 am; edited 1 time in total
    donivan65
    donivan65
    Governor
    Governor


    Number of posts : 12220
    Location : San Diego, California
    Registration date : 2008-05-12

    Vics OLD SKOOL Shop Empty Re: Vics OLD SKOOL Shop

    Post by donivan65 Fri Oct 30, 2015 10:53 am

    1..............


    Vics OLD SKOOL Shop Shift_11


    Vics OLD SKOOL Shop 100_1011


    Last edited by donivan65 on Fri Oct 30, 2015 11:00 pm; edited 1 time in total
    donivan65
    donivan65
    Governor
    Governor


    Number of posts : 12220
    Location : San Diego, California
    Registration date : 2008-05-12

    Vics OLD SKOOL Shop Empty Re: Vics OLD SKOOL Shop

    Post by donivan65 Fri Oct 30, 2015 10:28 pm

    2....................Hub Removal


    Vics OLD SKOOL Shop 100_1010


    Vics OLD SKOOL Shop Expand10


    Vics OLD SKOOL Shop Swedgi10
    donivan65
    donivan65
    Governor
    Governor


    Number of posts : 12220
    Location : San Diego, California
    Registration date : 2008-05-12

    Vics OLD SKOOL Shop Empty Re: Vics OLD SKOOL Shop

    Post by donivan65 Fri Oct 30, 2015 10:41 pm

    3.............Shift rod adjustment


    Been rebuilding our columns for years now and surprised no one has re posted the procedure and why??? The 4 spd unit above looking like one of my rebuilds with my bronze bushing update.
     ALL Econoline steering column shifters have alignment holes in them for neutral, regardless of an automatic, a 3 spd or a 4 spd. Several inherent issues causing shifting problems.
    IF the shift pin is slightly out of position it will interfere and can lock up the transmission requiring a person to knock the shifter back to neutral because of the interlock system in the transmission. Typically the hole in the shift tube itself is worn out as it is soft iron and the pin and the shifter gates are hardened and if the pin is not exactly in the middle it wont go in the other neutral gate of the opposite shifter.
    I have been cutting and re welding the lower part of the shift tube for years and now recently have come up with a new repair by replacing the whole lower part of it using cold rolled steel silver soldered in place. This piece replacing the worn out shift pin hole as well as the worn out shifter surface.
    The correct way to adjust the shifter is to align all the holes using any round 1/4" piece of round rod. I have been using a simple 1/4" Phillips screw driver for years and it works well.
     On the mounting clamp on the bottom of the steering column there is a round 1/4" hole on the passengers side of it and its there to align all the shifters for neutral!!  
     LOOSEN ONLY the large hex nut on the transmission shifters themselves so that the shift rods can slide easily through them without changing gears and then using the round rod slide it down through the aluminum mounting clamp at the bottom of the column and down through EACH HOLE IN EACH SHIFTER ARM.  This aligns the neutral gates with each other on the steering column. Then go back under the truck and make sure each shifter is in NEUTRAL and then re tighten the large hex nuts so that the rods no longer slide.
     This will align the neutral shift gates on the steering column shifter arms for neutral and also set the transmission for neutral at the same time.
    IF the shift tube hole for the pin is worn too badly you will have to play with it a little as it can get finicky and if any part of that pin is hanging up on the other side it wont allow the pin to engage the other shifter arm.
    Recently I came up with a new system to repair the shift tube shift pin hole and its standard on all  rebuilds now.  
     As mentioned above, the shift tube is soft metal and the shift pin AND the gates on the shift arms are hardened and so very difficult to re machine for a larger hardened pin and at that very few thousands of an inch left to make it over size. I have used slightly larger hardened pins but usually not enough to compensate for the worn out hole in the shift tube and so now replace the whole lower piece using COLD ROLLED steel as its much stronger for this application.
     Also, the support z bar bracket is NOT INTENDED for lateral support and guiding but only to support upwards and when I came up with the bronze busing idea I had to also re weld and re machine the end to get rid of the slop there.  
     Combined with the end being worn out, the shift pin hole being worn out and the sliding surface for the shifters themselves being worn out I now silver solder a complete new end on it.
     Have been meaning to post it anyways and so now a perfect time to show it off. The new piece is set up in a fixture to make sure the hole is in the correct position when assembling it


    Vics OLD SKOOL Shop 100_0810
    donivan65
    donivan65
    Governor
    Governor


    Number of posts : 12220
    Location : San Diego, California
    Registration date : 2008-05-12

    Vics OLD SKOOL Shop Empty Re: Vics OLD SKOOL Shop

    Post by donivan65 Fri Oct 30, 2015 10:51 pm

    4.............1 wire Alternator


     A SINGLE WIRE ALTERNATOR:  simply ties the signal wire from the regulator directly to the load circuit and was designed TO BYPASS THE ENTIRE wire loom and get a BETTER LOAD reading directly to the load sending source,,,, IE:  the large black wire in an Econoline from the battery side of the starter solenoid to the dash board.  The single wire load shifted about 24"'s,,,,,,  and not the other side of the wire loom,,,, LOL  
     To make a single wire alternator out of any alternator you simply tie the signal wire on the alternator directly to the wire that goes to the battery side of the solenoid so that it can read the load requirement without being dragged down by going through the wire loom.  On ours it reads it by the black wire in the 1st place,,,, LOL
      Our trucks were NEVER INTENDED to deal with the power requirements that we now put on them let alone all of the late model things that we add.  Our trucks with a heat generator inside an oven!!!!  and then we insulate it to keep the heat inside of for a longer time,,,  NOVEL THINKING???
      Think about it,,, NO FAN SHROUD to force the air to come through a radiator,,,  an alternator that has to run at over 1,000 rpm to put out is FULL output of 40 amps!!!!!!!  add insulation to the doghouse to help KEEP the heat in there so that it can boil the fuel in the carb,,,  add to that a belly pan to TRY and force additional air through the radiator but it only works when going down the highway,,,,,and use your heater (additional alternator load, LOL) to try and keep the heat down and so now you have to keep the RPM up and it still wont keep up,,,,  NOVEL THINKING,,,,,,
      Years ago I came up with an alternator that put out more juice at an idle than the stock one puts out at 1500 rpm!!!!!!!!!!!!!!  can u imagine that,,,  LOL..... 90 amps at 600 rpm and up to 200 amps at full tilt boogey. hmpmmmmmmmmm,,,,,,
    The FORD 3G alternator!!!!!  its a bolt on, has a piggy back voltage regulator (meaning you can dump the POJ stock one), comes in 135 amp, 150 amp and 200 amps.
     So,, as a Ford guy,, (lol)   why would anyone bother going through all of that work when you can simply bolt on an alternator that puts out 90 amps at idle while the Chevy guys with the 100 amp single wire alternator are calling AAA,,,,,NOVEL THINKING,,,,, lol

    In the following picture the yellow wire is changed from going to the battery side of the starter solenoid and now connecting to the output wire that goes to the  same place,, LOL,, now a SINGLE WIRE alternator,,


    Vics OLD SKOOL Shop 100_1110
    Seth G
    Seth G
    Vintage-Vans Listings Manager
    Vintage-Vans Listings Manager


    Number of posts : 2086
    Location : Anacortes, WA
    Age : 50
    Registration date : 2013-04-24

    Vics OLD SKOOL Shop Empty Re: Vics OLD SKOOL Shop

    Post by Seth G Wed Sep 07, 2016 7:41 pm

    Vics OLD SKOOL Shop 100_1124

    greggk likes this post

    Seth G
    Seth G
    Vintage-Vans Listings Manager
    Vintage-Vans Listings Manager


    Number of posts : 2086
    Location : Anacortes, WA
    Age : 50
    Registration date : 2013-04-24

    Vics OLD SKOOL Shop Empty Re: Vics OLD SKOOL Shop

    Post by Seth G Mon Sep 12, 2016 7:52 pm

    Wipers

    albadanie@gmail.com wrote:Anybody do a coversions of some sort?

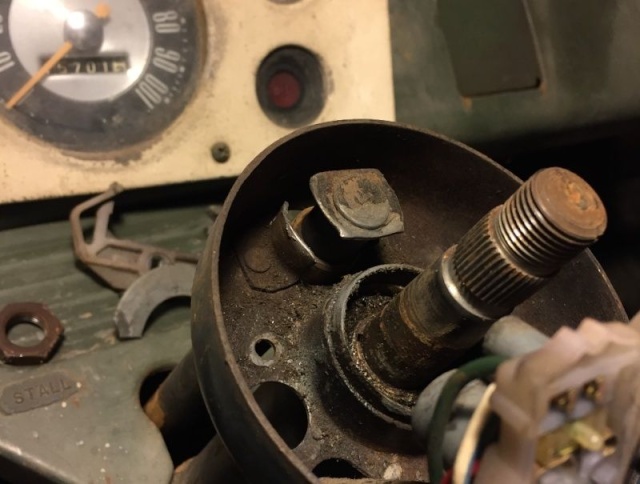
    Old Skool wrote:I use the ones from Broncos and F series pickups. Easy to identify. They make two models that I have found, the CORRECT one using a RED plug in. Pull the dash back and peek inside, if its red, its the one. On the F series, there is a small plastic box, directly over the e brake lever, take the mounting screws out as one is used for the relay box. In the Bronco's, the relay box is hiddend further up inside, wrapped in foam to protect it. Careful with them as they have a warining on them that says do not drop, and they mean it..  There is a ground wire on the switch, and our 67 wiper motor has the matching correct plug on it to go into this switch.  Test the units if you can,, I have a box of at least two dozen that don't act quite correctly??? sometimes the switch and sometimes the relay box.
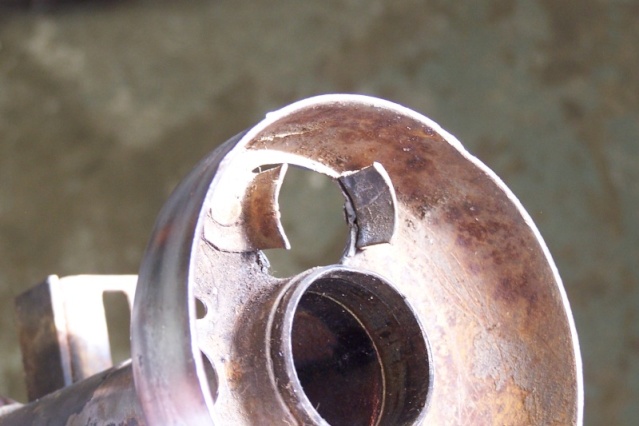
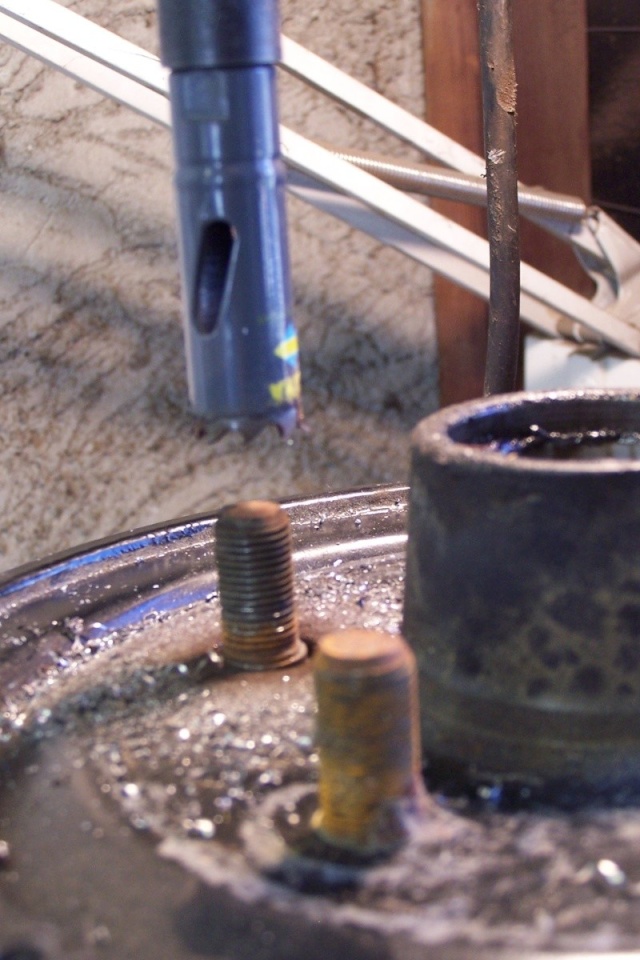
    The conversion on the switch stem is not too hard to do, it needs to be cut in length (note: careful on length, as our switch pulls out, this one pushes in, and if you cut it too close, it won't work as I recall (old age setting in,ha,ha)  anyways, use a washer to shim the assembly out a little, and continue cutting the flat spot down, and cut a NEW little slash with a dremel motor for our knob to click into like the stock switch has,, Mine works great, use it all the time, and you can't tell its not stock at all.
    vic

    Vics OLD SKOOL Shop 100_0714

    Vics OLD SKOOL Shop 100_0716


    Sponsored content


    Vics OLD SKOOL Shop Empty Re: Vics OLD SKOOL Shop

    Post by Sponsored content


      Current date/time is Sun May 19, 2024 8:27 am