


When I can't work on the van, I try to keep busy. Here is a little something I put together.
DIY Parts Tumbler.
I needed something with a strong motor with plenty of torque. After much searching, I found that a traditional ice cream maker would do the trick.

You can find these at any thrift store for under 10 bucks.
Next, you will need to modify the tub that would have normally held the liquid for the ice cream.

You can discard the paddle assembly that goes inside, it is not needed.
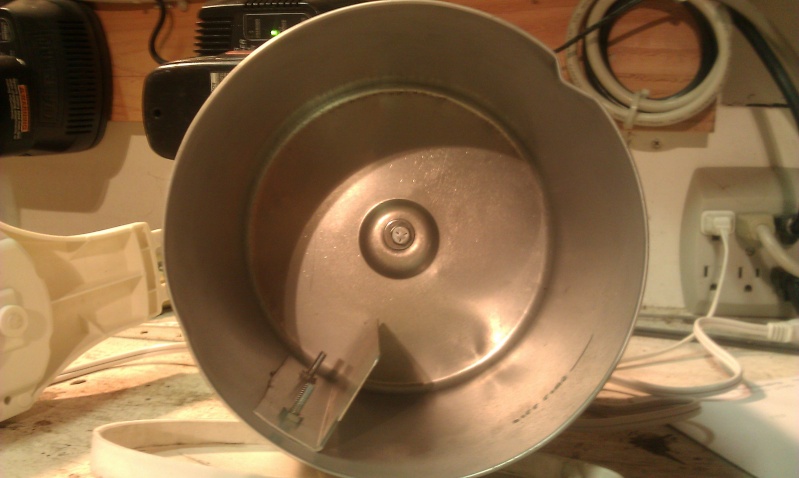
The inside of the cylinder is smooth, and will not be effective for turning parts. You will need to add something to churn it up. I added a piece of "L" aluminium that I had around. I used a few nuts and bolts to hold it in place. You don't need to worry about it being water tight. The piece I added in mine keeps things moving during a tumble. If you look closely at the bottom of my cylinder, you'll see a bold head. I don't have a picture, but I added a bolt and nut at the bottom so that the bolt extended about an inch past the bottom of the tumbler cylinder. I then drilled the bottom of the TUB so the bolt would fit in there. More on this later.
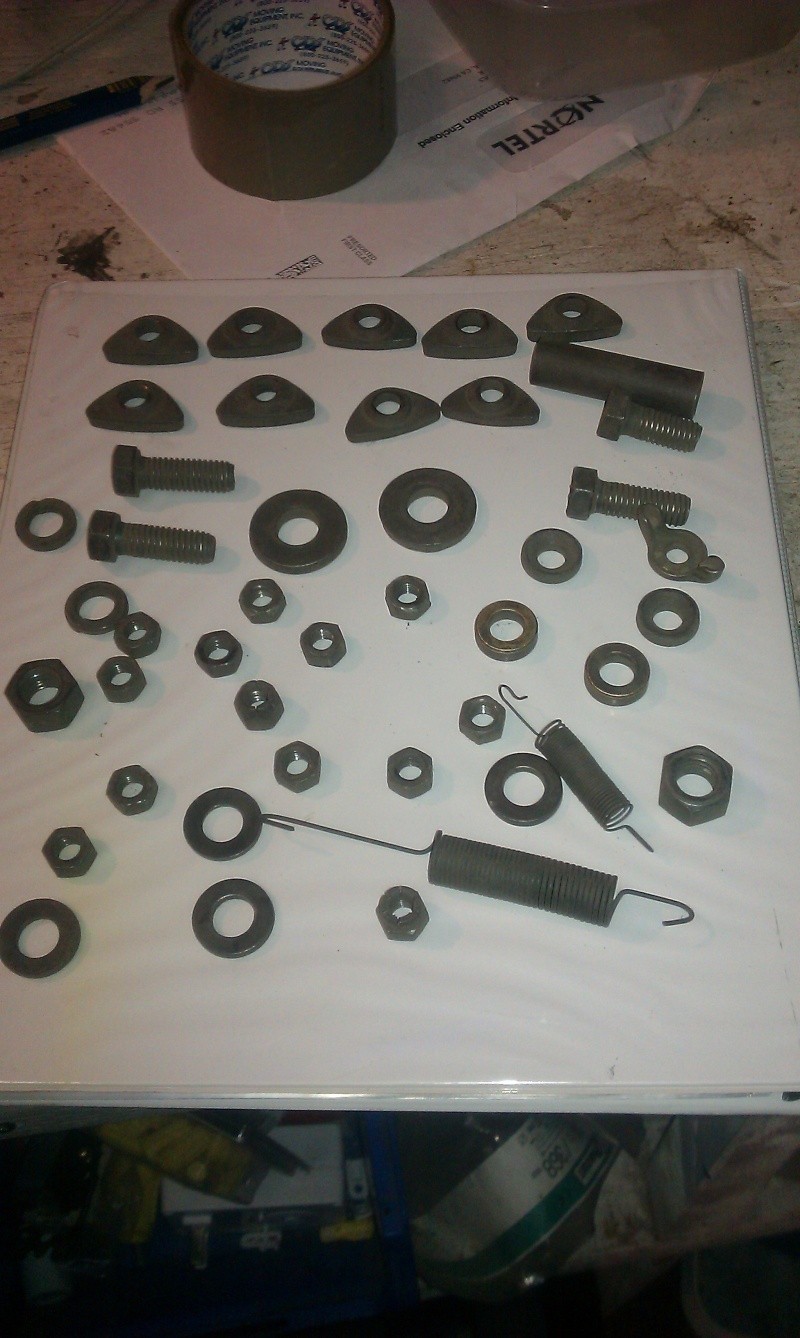
And now for the parts to be tumbled. These are various nuts and bolts and you'll recognize the triangle shapes used for the slant 6 manifolds.

Tumbling Media:
I have used crushed corn cobs and crushed walnut shells. Both of these are available at most any pet store. In a pinch, I have also used dry rice.
Fill the cylinder about half way with the media and drop your parts in there.
Don't go crazy and over load it. Attach the cover on the cylinder. you will need to tape the seams otherwise the media may seep out.

Now for the tumbling. You will need to set the entire unit at an angle or on it's side. This is where the bolt on the bottom comes into play by keeping the cylinder centered during a tumble. Here is mine that I set in a trash can for support.

I usually tumble my parts for about 10-12 hours. Be warned: Ice cream maker motors are not quiet! I either have to run mine during the day or away from the house. A few times, I have run an extension cord about 50 feet and placed the unit in my A100 and closed the doors and let it run all night. I'm out in the country so I have no neighbors to bother.
After a tumble, separate the parts from the media. You can re-use the media a few times if you like, or use fresh.
And now some pictures of the results:


I hope you enjoyed my show. It's not fancy, but if you shop around and don't mind fiddling, it's a fun project.
DIY Parts Tumbler.
I needed something with a strong motor with plenty of torque. After much searching, I found that a traditional ice cream maker would do the trick.
You can find these at any thrift store for under 10 bucks.
Next, you will need to modify the tub that would have normally held the liquid for the ice cream.
You can discard the paddle assembly that goes inside, it is not needed.
The inside of the cylinder is smooth, and will not be effective for turning parts. You will need to add something to churn it up. I added a piece of "L" aluminium that I had around. I used a few nuts and bolts to hold it in place. You don't need to worry about it being water tight. The piece I added in mine keeps things moving during a tumble. If you look closely at the bottom of my cylinder, you'll see a bold head. I don't have a picture, but I added a bolt and nut at the bottom so that the bolt extended about an inch past the bottom of the tumbler cylinder. I then drilled the bottom of the TUB so the bolt would fit in there. More on this later.
And now for the parts to be tumbled. These are various nuts and bolts and you'll recognize the triangle shapes used for the slant 6 manifolds.
Tumbling Media:
I have used crushed corn cobs and crushed walnut shells. Both of these are available at most any pet store. In a pinch, I have also used dry rice.
Fill the cylinder about half way with the media and drop your parts in there.
Don't go crazy and over load it. Attach the cover on the cylinder. you will need to tape the seams otherwise the media may seep out.
Now for the tumbling. You will need to set the entire unit at an angle or on it's side. This is where the bolt on the bottom comes into play by keeping the cylinder centered during a tumble. Here is mine that I set in a trash can for support.
I usually tumble my parts for about 10-12 hours. Be warned: Ice cream maker motors are not quiet! I either have to run mine during the day or away from the house. A few times, I have run an extension cord about 50 feet and placed the unit in my A100 and closed the doors and let it run all night. I'm out in the country so I have no neighbors to bother.
After a tumble, separate the parts from the media. You can re-use the media a few times if you like, or use fresh.
And now some pictures of the results:
I hope you enjoyed my show. It's not fancy, but if you shop around and don't mind fiddling, it's a fun project.


