VintAGE-Vans

Would you like to react to this message? Create an account in a few clicks or log in to continue.

BRINGING IT ALL TOGETHER.... A's, G's & E's


+27
austinmodhouse
slowflapper
Twinpilot001
EconoCarl
richie61
texasjohn
61econoline
Limey Steve
wideload
wdaguy
crazee
BvrWally
BILLS66
wylee
gotavan
Nightmoves
back2thewoods
Vanish
DanTheVanMan
Scott
donivan65
sasktrini
mo_1040
savage
VANagain
G-Man
Digz
31 posters

    Digz's 65 panel

    Digz
    Digz


    Number of posts : 3794
    Location : United States Six Lakes MI
    Registration date : 2008-05-17

    Digz's 65 panel - Page 13 Empty Re: Digz's 65 panel

    Post by Digz Fri Mar 12, 2010 3:14 am

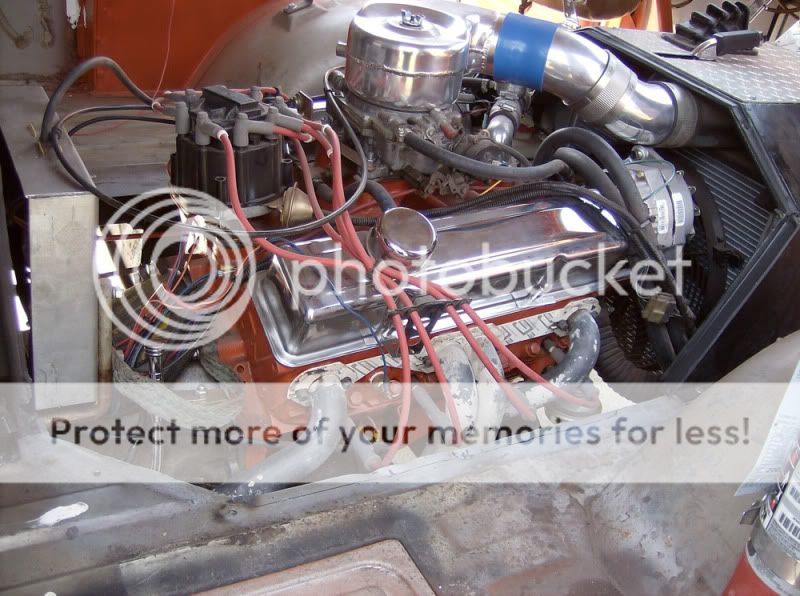
    I dont think I gained squat on the passengerside, it is tight to the door pillar. I was thinking in "hindsight" the other day, that a do-over would be to get the seats I wanted, center them where I wanted, and then set the engine and radiator hieght to fit them. You guys probably already know how our stock driver seat sets 2-1/2" left of center, If I knew this I had forgotten it, the engine also sets right of center crowding the pass.side, These Dodge seats are about 21"wide at the bottom, so similar to what most are using. The batwing racing seats would fit if I could center them on the steering wheel or the glove box. But that isnt happening for know. On the brightside, everything is bolted in and can be changed if I want to . My wife sat in the pass seat yesturday and said it was okay for her, the friend who helped me get the TVC set was in it and I could tell he was kinda scrunched against the pillar.
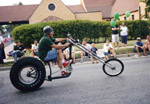
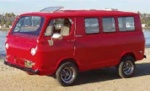
    On a side note: My brother got all the big pieces put together on his project and took it home,
    Digz's 65 panel - Page 13 Mater_10
    I kinda get the idea he thinks this was the hard part,, Exclamation
    G-Man
    G-Man
    Mayor
    Mayor


    Number of posts : 30743
    Location : Fowlerville, MI
    Age : 62
    Registration date : 2008-05-06

    Digz's 65 panel - Page 13 Empty Re: Digz's 65 panel

    Post by G-Man Fri Mar 12, 2010 4:42 am

    Joe on my 69 its tight on he Pass side also, seen I drive i alone most of the time I don't worry about it
    VANagain
    VANagain


    Number of posts : 1046
    Location : San Diego, CA
    Age : 62
    Registration date : 2008-05-16

    Digz's 65 panel - Page 13 Empty Re: Digz's 65 panel

    Post by VANagain Fri Mar 12, 2010 8:53 am

    I guess the rule for the passenger side is skinny chicks only!

    Joe, where did you get the nice chrome bumpers? Mine came with them but they are shot. I would like a perfectly straight pair. There is a company that shows up at our big car swap meet here with a semi trailer full of chrome bumpers and I think they were selling ours for $300 each. Plus I know that all rechroming is not the same. I'd hate to shell out top dollar and have them start rusting.
    Digz
    Digz


    Number of posts : 3794
    Location : United States Six Lakes MI
    Registration date : 2008-05-17

    Digz's 65 panel - Page 13 Empty Re: Digz's 65 panel

    Post by Digz Fri Mar 12, 2010 2:12 pm

    The bumpers,,, a little chrome polish and a picture can hide a thousand sins. These were on it when I got it, they were bent up some and still bear some scars, we have a work bench thats abot 3 ft x 6ft made of 1" plate, it works well as an anvil and a brake, what doesnt show is a lot of micro cracks in the chrome, it took some elbow grease to get it to look this good and it could use another treatment before i get around to waxing it. I almost swapped them out for the plain steel ones on the hippy van, but spent alittle time and stuck with them. If I had went with the plain ones I would have painted them aluminum and clear coated them, i did that to the mirrors and headlight rings and it looks pretty good.
    Digz's 65 panel - Page 13 Produc10
    gotavan
    gotavan


    Number of posts : 242
    Location : Greenville Michigan
    Registration date : 2008-05-17

    Digz's 65 panel - Page 13 Empty Re: Digz's 65 panel

    Post by gotavan Sat Apr 10, 2010 6:26 pm

    I got a close up look and a ride, very nice.
    Digz's 65 panel - Page 13 Joe8
    Digz's 65 panel - Page 13 Joe7
    Digz's 65 panel - Page 13 Joe2
    I went out and started a couple vans, I sold my old ragtop so i got to get it out of the barn.
    Digz's 65 panel - Page 13 Rag1
    Digz
    Digz


    Number of posts : 3794
    Location : United States Six Lakes MI
    Registration date : 2008-05-17

    Digz's 65 panel - Page 13 Empty Re: Digz's 65 panel

    Post by Digz Thu Apr 15, 2010 7:06 pm

    Thanks to Dan , I got those holes in my rear door filled in.
    Digz's 65 panel - Page 13 Chevro10
    Got the engine cover closed in, need to do/tweak a couple things on it , but its good to go for now.
    Digz's 65 panel - Page 13 Eng_co10
    brought it home today. The atmosphere at the pit is getting harsh, it needs a bath real bad.
    Digz's 65 panel - Page 13 Home_w10
    Had the rear carrier and pinion out after the trip to Dans, the pinion was loose or had loosened up, got rid of the growl but still have a whine and the clutch packs in the posi unit seem a bit to grabby after things warm up and you make a sharp turn, nature of the beast with wide tires??, anyway gonna put a few miles on it see how it works out ,, would like to put a new set of 3:73's in I think before next season.
    Digz's 65 panel - Page 13 Chekin10

    Digz's 65 panel - Page 13 Home_012
    richie61
    richie61


    Number of posts : 445
    Location : Van Nuys, CA
    Age : 63
    Registration date : 2010-01-04

    Digz's 65 panel - Page 13 Empty Re: Digz's 65 panel

    Post by richie61 Thu Apr 15, 2010 8:51 pm

    I got a good looking Impala/Caprice/Olds??? rear you can have soon???? Looks great...someday for me I hope??
    Digz
    Digz


    Number of posts : 3794
    Location : United States Six Lakes MI
    Registration date : 2008-05-17

    Digz's 65 panel - Page 13 Empty Re: Digz's 65 panel

    Post by Digz Fri Apr 16, 2010 4:01 am

    If it wasn't for the "extra" age and possible parts issues, that front loader and wheel bearing set up might not be to bad to work with. Rich , if you pick up another rear axle ass. and it needs some work , look into a kit, I piece mealed mine and it was a bit more $ for the individual parts and mind set me to poorboy the thing a little. Its alot easier to work on them out of the van than in. Also I think if I'm reading things right you would have more gear ratios to work with going with a 10 bolt, the 12 I have is in a family that supports only the 3:73 and 4:11 ? On another note , all my carpenter stuff is here at home, hoping to start messin' with interior stuff soon, gotta tame down that tin can amplified gear whine ,,LOL,, We will get'em right eventually !
    Joe
    richie61
    richie61


    Number of posts : 445
    Location : Van Nuys, CA
    Age : 63
    Registration date : 2010-01-04

    Digz's 65 panel - Page 13 Empty Re: Digz's 65 panel

    Post by richie61 Fri Apr 16, 2010 7:06 am

    Like the Springsteen song says...one step up and 2 steps back.. Making it safe is my concern as it is for all of us. Can't beleive I never noticed the rear since I was working on the engine mostly. We'll get it right and thanks for the advice...I will look into a kit if I go that route. Don't want my wheels falling off!!
    Digz
    Digz


    Number of posts : 3794
    Location : United States Six Lakes MI
    Registration date : 2008-05-17

    Digz's 65 panel - Page 13 Empty Re: Digz's 65 panel

    Post by Digz Sat Jun 05, 2010 7:25 pm

    Once more into the breech ,, so to say.
    Digz's 65 panel - Page 13 Rear_o10

    Digz's 65 panel - Page 13 All_ap10
    Used a piece of pipe longer than than the width of the housing to drive the axle bearings and seal out.
    Digz's 65 panel - Page 13 Pipe_f10
    hose clampeda scotchbrite pad to some conduit for a swab, ,, after running it some it had loosened up more debris from the first tear down.
    Digz's 65 panel - Page 13 Swab10
    pulling the larger pinion bearing from the shaft, gear splitter and puller.
    Digz's 65 panel - Page 13 Puller10
    It takes alot to get the crush sleeve to compress. I stopped before it was to tight for today, I need to either find my Inch/lb torque or borrow one to finish setting the preload on the pinion. I did get the speedo gear swap done,, now have to get it back together to see if it works right!
    Digz's 65 panel - Page 13 Pinion10
    Also replacing the axle bearings with the repair bearings, Parts store had 1 in stock ,, get the other monday.
    G-Man
    G-Man
    Mayor
    Mayor


    Number of posts : 30743
    Location : Fowlerville, MI
    Age : 62
    Registration date : 2008-05-06

    Digz's 65 panel - Page 13 Empty Re: Digz's 65 panel

    Post by G-Man Sat Jun 05, 2010 7:50 pm

    Joe get her together quick my friend only 22 days to Bakers
    Digz
    Digz


    Number of posts : 3794
    Location : United States Six Lakes MI
    Registration date : 2008-05-17

    Digz's 65 panel - Page 13 Empty Re: Digz's 65 panel

    Post by Digz Sat Jun 05, 2010 8:01 pm

    Yes quick !! Just need the axle bearing ,have the rest !
    Sunday: got the pre load and back lash set, 1 axle installed with the new repair bearing. The repair bearings are not a quickie, like Vanagain and Don ran into , I had to grind the ridge off towards the axle flange and even then gently use a clamp to get enough play to drop in the C-clip. I think the seal survived, time will tell. the repairs are pre lubed and if the inner seal stays intact do not lubricate from the main housing.
    Digz
    Digz


    Number of posts : 3794
    Location : United States Six Lakes MI
    Registration date : 2008-05-17

    Digz's 65 panel - Page 13 Empty Re: Digz's 65 panel

    Post by Digz Tue Jun 08, 2010 7:17 pm

    Thought I would post this to give a better idea of the repair bearings.
    There are instructions but they are simple, a little silicone sealant on the outside and don't mess up the seals when putting the axle in.
    Digz's 65 panel - Page 13 Repair11
    This is the housing side.
    Digz's 65 panel - Page 13 Bearin10
    I used a large 3/4 drive socket to drive in the bearing, it goes fairly easy, but it protrudes about 3/16" from the end of the tube.
    Digz's 65 panel - Page 13 Bearin11
    It doesnt interfere with the axle after its installed but you have to grind the flange back (smooth it out) to get the C-clips to go in without messing up the seal. This is on a stock 12 bolt rear maybe it would be different with 10 bolt axles?
    Digz's 65 panel - Page 13 Ground10
    All said and done I'm ready to bleed the brakes again, everything else is hooked up.
    Another thing, if you order a kit do not order the one for a truck 12 bolt, the axles are larger, this didnt bother me because I used the repairs, the 12 bolt axles in our 1/2 ton vans are 1.4 or maybe 1.3999 in diameter. but the rest of the bearings are the same.
    richie61
    richie61


    Number of posts : 445
    Location : Van Nuys, CA
    Age : 63
    Registration date : 2010-01-04

    Digz's 65 panel - Page 13 Empty Re: Digz's 65 panel

    Post by richie61 Wed Jun 09, 2010 1:42 pm

    Getting ready to do the same thing on mine. Thanks for the pictures. I see what I might have to do if the axles are scored. I'm hoping the lock nut comes out easily so I can get the shaft out....keep you posted?? By the way that's a hefty breaker bar you got there...it's nice to have the right tools, restocking my collection as I go along with this project!!!!
    mo_1040
    mo_1040


    Number of posts : 645
    Location : Hibbing, Minnesota...The land of 10,000 rednecks
    Age : 52
    Registration date : 2008-07-04

    Digz's 65 panel - Page 13 Empty Re: Digz's 65 panel

    Post by mo_1040 Wed Jun 09, 2010 1:49 pm

    I want to take the diff cover off of mine but I'm afraid to look Wink Might find more work to do pale
    richie61
    richie61


    Number of posts : 445
    Location : Van Nuys, CA
    Age : 63
    Registration date : 2010-01-04

    Digz's 65 panel - Page 13 Empty Re: Digz's 65 panel

    Post by richie61 Wed Jun 09, 2010 2:01 pm

    There is always more to do, I just cross it off the list as I go. Thankfully the rear I'm working on is not on the van so it might be a little easier. The worst fear is going through all the work, installing it and find out it wines down he road like Digz did. Keeping my old car rear and will figure out what to do from there.
    Digz
    Digz


    Number of posts : 3794
    Location : United States Six Lakes MI
    Registration date : 2008-05-17

    Digz's 65 panel - Page 13 Empty Re: Digz's 65 panel

    Post by Digz Fri Jun 11, 2010 7:17 pm

    The rear end re-do seems to be a success, I can hear the tires hummmm now! And some other squeaks and rattles that were previously camoflaged. Neutral
    The speedo gear repair didnt fare so well, I installed the drive gear clip in the wrong hole and chewed them to pieces. Re-ordered those, will document the CORRECT way when I get the new parts. Big step forward a hiccup back,,,,
    G-Man
    G-Man
    Mayor
    Mayor


    Number of posts : 30743
    Location : Fowlerville, MI
    Age : 62
    Registration date : 2008-05-06

    Digz's 65 panel - Page 13 Empty Re: Digz's 65 panel

    Post by G-Man Fri Jun 11, 2010 7:25 pm

    glad to here it's back together and working right
    VANagain
    VANagain


    Number of posts : 1046
    Location : San Diego, CA
    Age : 62
    Registration date : 2008-05-16

    Digz's 65 panel - Page 13 Empty Re: Digz's 65 panel

    Post by VANagain Fri Jun 11, 2010 10:47 pm

    Way to go Digz! I give you a lot of credit for taking on the whole differential rebuild. Not too long ago I was afraid of opening up the rear end and pulling the axles to replace the wheel bearings and seals. I hope your seals don't leak. (Mine too!)
    Digz
    Digz


    Number of posts : 3794
    Location : United States Six Lakes MI
    Registration date : 2008-05-17

    Digz's 65 panel - Page 13 Empty Re: Digz's 65 panel

    Post by Digz Thu Jun 17, 2010 4:42 pm

    Okay , I got a few things done today. Got the speedo gears in, put a vent on the left rocker, changed the oil/filter, got the high beam indicater light in the right hole. even put in a cigarette lighter. and Hail mary'd the pan/timing cover with some silicone. heres the deal on the speedo for you 700R4 guys.
    First this is what happens if you hit the wrong hole.
    Digz's 65 panel - Page 13 Bad_ge10
    After calculating the needed gears, check your housing to see if it supports the right gears, the numbers are what gears fit that particular housing. I needed a 45 so I got a new housing.
    Digz's 65 panel - Page 13 Family10
    This just a pic of the speedo housing removed, you do not need to take this out first to take the tail shaft off, mine was just used to coming out !
    Digz's 65 panel - Page 13 Speedo10
    what will be staring at you after you remove the tail housing. The drive gear can be slid off by depressing the end of the retainer clip with a screwdriver or a dental pick, it may need some coaxing. I just bump tapped it from behind with a small hammer.
    Digz's 65 panel - Page 13 Clip_t10
    When installing the new drive gear and clip make sure the tang on the clip sits in the hole closest to the main trans housing.
    Digz's 65 panel - Page 13 Correc10
    Putting a new gear on goes a bit tight and you have to have the groove in the gear lined up with the clip as you slide/drive it on. I again gently tapped with a small hammer but the correct size tube would be way better.
    Digz's 65 panel - Page 13 Positi10
    These are the new parts I got from Bowtie Overdrive.
    Digz's 65 panel - Page 13 New_pa10
    This is the driven gear installed in the housing.
    Digz's 65 panel - Page 13 Speedo11
    This is the old external clip I had to use for now because they didnt ship the new one I thought I ordered. The new billet housing uses a different anti spin clip than the original , but it works for now, you just cannot over tighten your speedo cable without it turning a bit.
    Digz's 65 panel - Page 13 Extern10
    Anyway my speedometer reads pretty damn close now if my tach calculations are right ! On a side note you will lose some tranny fluid when you pop the tailshaft housing so have a catch pan ready. This actually is a pretty easy DIY, drop the drive shaft . the tail bolts are 15 mm and the external retainer is 10mm, and a pair of pliers and small hammer. I did use a slight coating of silicone on the tailshaft housing O ring and the speedo drive O ring when I re assembled.
    richie61
    richie61


    Number of posts : 445
    Location : Van Nuys, CA
    Age : 63
    Registration date : 2010-01-04

    Digz's 65 panel - Page 13 Empty Re: Digz's 65 panel

    Post by richie61 Thu Jun 17, 2010 10:42 pm

    I think I have to do that on my 3 speed tranny. I put a new speedo cable in as well as a new gear for a 66 but the tranny might be newer than that and it still doesn't work. It was missing altogether when I got it..
    VANagain
    VANagain


    Number of posts : 1046
    Location : San Diego, CA
    Age : 62
    Registration date : 2008-05-16

    Digz's 65 panel - Page 13 Empty Re: Digz's 65 panel

    Post by VANagain Fri Jun 18, 2010 12:15 am

    Good info and photos, Digz! I didn't know about those numbers on the speedo housing. I'll have to check mine. And did Bowtie want you to put that white lithium grease on the speedo gears?

    What is a "vent on the left rocker"?
    Digz
    Digz


    Number of posts : 3794
    Location : United States Six Lakes MI
    Registration date : 2008-05-17

    Digz's 65 panel - Page 13 Empty Re: Digz's 65 panel

    Post by Digz Fri Jun 18, 2010 3:40 am

    My local tranny guy recommended the litho on the driven gear shaft, I just figured it couldnt hurt on the gear, that stuff dissolves in fluids easy, looks like more than it is. I put a rocker cover vent to carb hat on the engine, The thread on the pcv made me realize I didnt have an open system going on in the block, have no idea if it makes much difference just seems right.
    donivan65
    donivan65
    Governor
    Governor


    Number of posts : 12218
    Location : San Diego, California
    Registration date : 2008-05-12

    Digz's 65 panel - Page 13 Empty Re: Digz's 65 panel

    Post by donivan65 Fri Jun 18, 2010 8:08 am

    For the PCV to work, you need a crossflow of air. But most of all, that fresh air hose or cap, is a relief valve for all the pressure that builds in the engine when it is running. It vents it back to the carb, otherwise the pressure forces oil out ALL the gaskets and seals,,,,,,,
    VANagain
    VANagain


    Number of posts : 1046
    Location : San Diego, CA
    Age : 62
    Registration date : 2008-05-16

    Digz's 65 panel - Page 13 Empty Re: Digz's 65 panel

    Post by VANagain Fri Jun 18, 2010 9:05 am

    Ha! I thought you had add vent to your left rocker panel! Some clever way to get more air into the van or engine compartment! Razz

    I too recently hooked up a hose from the valve cover to the air cleaner. We've got too many fumes in the dog house as it is, we don't need a breather oil cap adding any more to it!

    Sponsored content


    Digz's 65 panel - Page 13 Empty Re: Digz's 65 panel

    Post by Sponsored content


      Current date/time is Fri Apr 19, 2024 7:34 am